
Related Manuals for Mingda MD-600D


Summary of Contents for Mingda MD-600D
- Page 1 User Manual [MD-600D & MD-1000D 3D Printer] *Please read this guide carefully before using this printer Shenzhen MINGDA Technology Co.,Ltd V1.1...
- Page 2 Thank you for choosing MINGDA Technology's products! For the best experience, please read this user manual carefully and follow the instructions to operate the printer. If you encounter any issues with the printer, please contact us using the contact information provided at the end of this user manual.
-
Page 3: Table Of Contents
Contents 1 Overview …………………………………………………………………………………………………………………..2 Device Introduction ………………………………………………………………………………......Device Parameters ……………………………………………………………………………………………...….......... Packing List ……………………………………………………………………………………………………………........... Precautions for the Use of High Temperature Filament ……..……..……..……....…..……....3 Operational Steps ……………………………………………………………………………………......Unboxing Inspection ……………………………………………………………………………………………..…........Device Installation ……………………………………………………………………………………………..........1. Install the indicator light ………………………………………………………………………………..........2. Install the antenna ………………………………………………………………………………..…….......... 3. -
Page 4: Overview
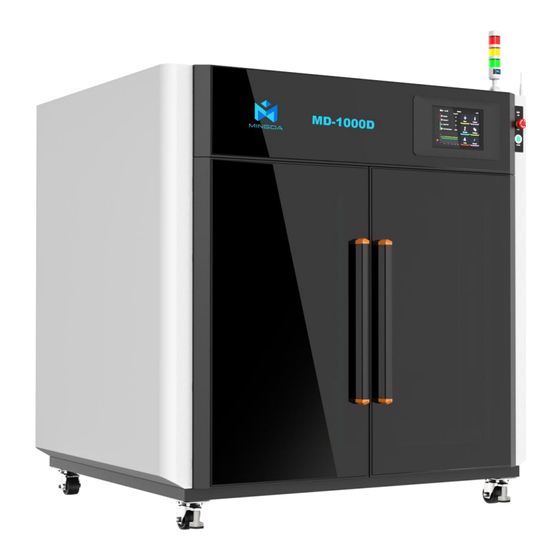
Thank you for choosing our product, and we wish you a pleasant experience! 2. Device Introduction Device Parameters Basic Parameters Product Model MD-600D | MD-1000D Machine Dimensions 1300*965*1255mm | 1680*1365*1665 mm Max. Build Dimensions 600*600*600mm | 1000*1000*1000mm Print Technology... -
Page 5: Packing List
Packing List Below we will take MD-1000D as an example to introduce the function and use of the printer: Tool List Indicator light & screw U-disk Nozzle*2 Diagonal pliers 7mm Sleeve If you choose high temperature filament, we will provide a drying box. Allen wrench Antenna Note:... -
Page 6: Precautions For The Use Of High Temperature Filament
Precautions for the Use of High Temperature Filament Note: Please put the high-temperature filaments in a dry box for printing, otherwise humidity will affect the print quality. If the high-temperature filament is not used up, put it in an aluminum foil bag in time. If the filament is wet or the surface of the print has obvious drawing, it means that the filament is damp, and it needs to be dried in an industrial oven before use. -
Page 7: Operational Steps
3. Operational Steps Unboxing Inspection Unpack and inspect the device for any damage. If there is any abnormality, please contact the manufacturer or dealer. Device Installation 1. Install the indicator light. 2. Install the antenna. -
Page 8: Power On
2. Power on Please ensure that the print platform is clear before connecting the power and check if the device is connected properly. In a good ventilation and dry environment Insert a power socket Press the power button to turn on the printer 3. -
Page 9: Startup Configuration
Startup Configuration (For the first startup, it will enter the configuration wizard.) 1. Select Language and Time Zone Start by selecting your continent on the left, Click the right arrow to choose then click the right arrow to choose your the language, and click the upper specific region. - Page 10 Once the connection is successful, click Upon successful connection, click the checkmark in the upper right corner to enter the Close button. the main interface of the machine. If you do not need to connect to the network, you can also click the checkmark to skip this step.
-
Page 11: Introduction To Machine Operation Page
Introduction to machine operation page Primary interface Explain Temperature Temperature display area. Time Time display. Move Adjust the value of the XYZ axis. Preheat Pre-set nozzle & hotbed’s temperature. Extrude To unload or load filament. Settings Printer’s printing value adjustment. General More printer setting. - Page 12 Settings: Secondry interface Explain Leveling Auto-leveling Z Calibrate Calibrate Z offset Cooling fan adjustment Leds Turn on/off Light Save config To save your configuration Includes some basic settings such as time, language, screen KlipperScreen timeout, notification sound toggle, and automatic shutdown after printing completion.
- Page 13 General: Secondry interface Explain Manual Manual Troubleshooting Troubleshooting Cautions Cautions Maintenance Maintenance Contains some basic test models, which can be selected to Calibration test the corresponding functions. XY Offset Calibrate XY axis Z Offset Calibrate Z axis System Check next page...
- Page 14 System: Secondry interface Explain Full update Update all content available for update on the current page Reset Reset to Factory Defaults Refresh the current page to check for updates, in Refresh conjunction with the use of 'Full update'. Restart Restart the printer Shutdown Turn off the printer, click Shutdown-Printer...
-
Page 15: Extruder Offset Calibration
Extruder Offset Calibration XY Axis Offset Calibration Tips: Wipe the nozzle clean before calibration to avoid any interference during the process. Click the "General" button. Click the "XY Offset" button. Fine-tune the XY axis to align the nozzle Click the "Start" button, and the left center of the left extruder with the origin of extruder will move to the calibration the XY axis. -
Page 16: Z Axis Offset Calibration
Z Axis Offset Calibration Tips: Wipe the nozzle clean before calibration to avoid any interference during the process. Click the "Start" button to begin the Click the "Z Offset" button. automatic calibration. Initially, the left extruder will move to the top of the Z axis calibration sensor and slowly descend to trigger the switch. -
Page 17: Install The Filament
Install the filament (Take PLA filament as an example ) 1. Hang two volumes of PLA Filament on the scraping pole in the left and right Filament box, and insert the Filament from the inlet port until the Filament are exposed to the printed head along the guide pipe. - Page 18 3. Load Filament for the Left and Right Extruders Click the "Extrude" button Select the first extruder “T0”, Click Sequentially load filament for the left and '100mm', click on the feed speed right extruders. If the temperature is too '5mm/s', then click 'load' to inport the low, a prompt will appear indicating the filament.
- Page 19 Resume printing after power failure When the printer is in the midst of the printing process, power outages may occur at times. This printer is equipped with a resume printing function to assist you in resuming the print from the point of interruption. After power is restored, the printer will After clicking 'Confirm,' the printer will begin prompt whether to resume printing.
-
Page 20: Slicing Software Installation And Usage
Choose your preferred language and follow the on-screen prompts during the installation process. Wait for the installation to complete. Configuration: Upon the first run of Mingda OrcaSlicer, you will enter the configuration wizard. Select the desired filament type. Choose the MD-600D &MD-1000D model and click "Confirm."... -
Page 21: Usage
Usage Click the "Prepare" button. we will take MD-600D as an example Choose the printer model and select the print material settings. Load the STL model, adjust the print parameters. Once you confirm everything is correct, click the "Slice plate" button to slice the model. -
Page 22: Printing
Click "Network" to enter the Check the printer's IP address. settings page. network page. In Mingda OrcaSlicer, click the WiFi icon, select Host type as Octo/Klipper, enter the printer's IP address, and press Enter. Click the "Test" button to verify the successful connection. - Page 23 File Transfer: Click the dropdown icon in the top right corner , select "Print." Click "Print" and choose "Upload and Print."...
- Page 24 Device Connection After successful connection, click on "Device" Enter the control interface below the diagram 1.Task List 2.Temperature Control 3.Camera 5.Printer Limits 6.Console 4.Movement Control 1. Task List: Drag G-code files to this task list for printing. 2. Temperature Control: Displays machine temperature changes and allows pre-setting nozzle and bed temperatures.
-
Page 25: Print Mode
Print Mode we will take MD-600D as an example Print Two Colors Printing size: 600 * 600 * 600mm MingDa 600D 0.4 nozzle (Dual) Selecting the 1. In the filaments column on the left side of the interface, click "+" to add another filament. - Page 26 Double extrusion: Start the Prime tower Because there is always one printer in standby mode during the printing process, it is easy to cause defects such as wire drawing and material leakage. Prime tower can solve this problem, the extruder will print a prime tower before each layer printing. Any material leakage will be printed on the tower, effectively avoiding the phenomenon of material leakage when replacing the extruder.
-
Page 27: Printing Support
MD-600D as an example Printing Support Printing size: 600 * 600 * 600mm Selecting the MingDa 600D 0.4 nozzle (Dual) 1. On the left side of the interface, in the filaments column, click "+" to add another filament. -
Page 28: Printing
Printing Open the settings interface in the Printer tab, and check 'Auxiliary Part Cooling Fan' under "Basic Information-Accessory". Due to the different feature of filament, if you do not need an auxiliary fan or need to adjust the fan speed, please go to the Filament tab, open the settings interface, and choose Cooling-Auxiliary Part Cooling Fan. -
Page 29: Maintenance And Care
4. Maintenance and Care Cleaning the Nozzle: After printing is complete, promptly clean the residue on the nozzle using a tool and taking advantage of the nozzle's residual heat. Avoid touching the nozzle directly with your hands to prevent burns. Replacing Filaments: Timely replace filaments based on the type and actual usage. -
Page 30: Common Issues And Solution
0.2mm during the first layer printing, it will significantly reduce adhesion to the platform, and re-leveling is needed. 2.In MingDa Orcaslicer, set the platform adhesion by choosing the adhesion type as "Brim." This helps enhance adhesion and prevent warping issues. -
Page 31: After Sales Service And Support
128 MB graphics card memory MINGDA Limited Warranty Statement Besides limited warranty, within the maximum range allowed by law. MINGDA or any authorized dealer have not made any other statements or implied guarantee, including marketability and special-purpose applicability of implied warranties. MINGDA has not... - Page 32 Shenzhen MINGDA Technology Co., Ltd Tel: 0086-13530306290 Email: support@3dmingda.com www.3dmingda.com Address: No. 20, Dahe Industrial Zone, Longhua District, Shenzhen, 518110, Guangdong Province, China.
Need help?
Do you have a question about the MD-600D and is the answer not in the manual?
Questions and answers