
Related Manuals for Honeywell PC45 Series


Summary of Contents for Honeywell PC45 Series
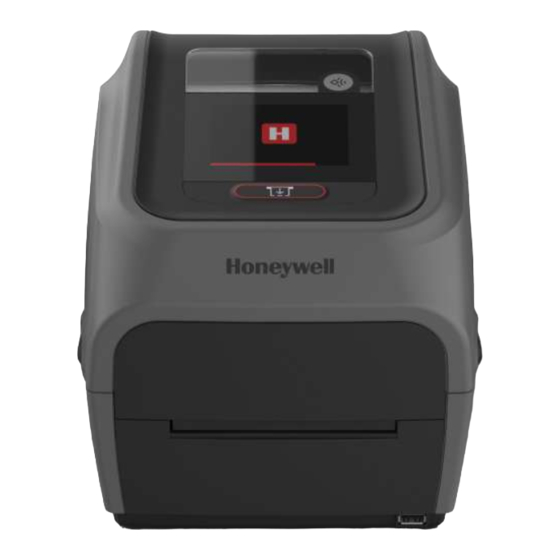
- Page 1 PC45 Series Printer Desktop Printer PC45d, PC45t* User Guide * Additional model names may exist for specific countries.
- Page 2 Disclaimer Honeywell International Inc. (“HII”) reserves the right to make changes in specifications and other information contained in this document without prior notice, and the reader should in all cases consult HII to determine whether any such changes have been made. HII makes no representation or warranties regarding the information provided in this publication.
-
Page 3: Table Of Contents
Navigate the Main Menu ...................... 6 Wizards ............................... 6 Printing Wizard ......................... 7 Communications Wizard ...................... 7 Calibration Wizard........................7 Printer Command Languages and Simulator Support Options ......... 8 Direct Protocol .......................... 8 ESim.............................. 8 Fingerprint..........................8 PC45 Series Printer User Guide... - Page 4 Chapter 3 - Connect the Printer ..............35 Connect the Printer to Your PC ....................35 Connect the Printer Using a Serial Cable ..............35 Connect the Printer Using a USB Cable...............35 Connect the Printer using Bluetooth Communication ..........36 PC45 Series Printer User Guide...
- Page 5 Load a Printer Profile from the Web Page ..............49 Save a Printer Profile from the Main Menu..............49 Load a Printer Profile from the Main Menu ..............49 Load a Printer Profile Using Programming Commands........50 Install a Configuration File from a USB Storage Device ........50 PC45 Series Printer User Guide...
- Page 6 About Software Updates ......................62 Software Downloads ......................62 Upgrade the Printer Firmware ....................62 Upgrade Firmware from the Printer Web Page ............63 Upgrade Firmware from a USB Storage Device ............63 Chapter 6 - Maintenance ................65 Clean the Printer ..........................65 PC45 Series Printer User Guide...
- Page 7 Printed Barcode Symbologies ..................78 1D Barcode Symbologies.....................78 2D Barcode Symbologies.....................79 Graphic File Types .........................80 Appendix A - Default Settings ..............81 Communications..........................81 Serial Port ..........................81 Ethernet.............................82 Wireless 802.11........................83 Bluetooth ..........................85 Printing.............................86 Media............................86 Print Quality..........................89 Cutter............................89 RFID ............................90 PC45 Series Printer User Guide...
- Page 8 Appendix B - Print Labels with INPrint............103 The INPrint Page ........................103 Create and Save a Web Form..................103 Sample Code ........................104 Print INPrint Labels......................105 Appendix C - Accessories and Options.............107 Printer Accessories and Options ..................107 viii PC45 Series Printer User Guide...
-
Page 9: Customer Support
To search our knowledge base for a solution or to log into the Technical Support portal and report a problem, go to honeywell.com/PSSTechnicalsupport. Product Service and Repair Honeywell International Inc. provides service for all of its products through service centers throughout the world. Go to www.sps.honeywell.com... -
Page 10: Safety Warnings
1. Power off the printer and remove all cables. 2. Remove media and ribbon (if installed) from the printer. 3. Pack the printer in the original package. Note: Honeywell is not responsible for any damage caused during shipment/transit. PC45 Series Printer User Guide... -
Page 11: Chapter 1 - Get Started
CHAPTER GET STARTED The PC45 series printers are compact, easy-to-use barcode label printers built on Honeywell’s Printer Edge™ platform that fit easily on a desktop. The printers include integrated USB, Ethernet, and optional such as Bluetooth, RS232, and Wi- fi interfaces. You can connect the printers to a single PC, a wired network, or a wire- less (optional) network. -
Page 12: Pc45 Printer Front View
Power switch Latch USB host port Back View (Ports and Power) External media feed slot Ethernet port Power switch Optional Serial port Power port USB device port USB host port Note: NFC Tag is model dependent. PC45 Series Printer User Guide... -
Page 13: About The Display
Refer to System Settings for more information. Caution: Honeywell recommends keeping the Sleep Timer setting enabled and not changing the default setting. Changing this setting to either disable screen timeout or extend the time before screen timeout may reduce the lifespan of the LCD display and is considered improper use of the device. -
Page 14: Print/Feed Button
Press the icon to view communications information for your printer. Printer Information Press the icon to view specific printer information. Wireless 802.11 Press the icon to view Wi-Fi connectivity information. Bluetooth Press the icon to view Bluetooth/Bluetooth LE information for your printer. PC45 Series Printer User Guide... -
Page 15: Main Menu
• Select Print Settings to view and change print settings. Note: The printer cannot print while the Main Menu is showing. Exit the Main Menu and return to the Ready screen to begin printing. PC45 Series Printer User Guide... -
Page 16: Navigate The Main Menu
You can start all of the wizards from the Main Menu except for the startup wizard. The startup wizard appears the first time you turn on the printer and after the printer has been reset to the factory default state. PC45 Series Printer User Guide... -
Page 17: Printing Wizard
Calibrates the optimal label adjustment and output power setting for the RFID media loaded in the printer. Available when the RFID module is installed. Date and Time Configures the date and time. Screen Calibrates the touch screen. PC45 Series Printer User Guide... -
Page 18: Printer Command Languages And Simulator Support Options
Fingerprint is a BASIC-inspired general purpose printer language. Use Fingerprint to design custom label formats and write printer application software. If you plan to run Smart Printing applications directly on the printer without connecting to a PC, select Fingerprint as your printer command language. PC45 Series Printer User Guide... -
Page 19: Ipl
ZSim, to create and print labels. For more information, see the command reference manual for your desired language. For details on how to use Smart Printing directly on the printer, see the Fingerprint Command Reference Manual. PC45 Series Printer User Guide... -
Page 20: Access The Printer Web Page
Click System Settings > General. Select the printer command language you want to used from the Command Language list, and then click Save. A restart button will appear at the top of the page. Click Restart. PC45 Series Printer User Guide... -
Page 21: Set The Command Language From The Main Menu
From the Main Menu, press Settings > System Settings > General. Scroll down until you reach Command Language, and make your selection. Restart the printer: the printer starts up in the command language that you selected. PC45 Series Printer User Guide... - Page 22 PC45 Series Printer User Guide...
-
Page 23: Chapter 2 - Set Up The Printer
Warning: Installing the printer requires a power cord connected to a socket-outlet with an earthing connection. Press the power switch to turn on the printer. As the printer starts up, a progress bar appears, then the startup wizard appears. PC45 Series Printer User Guide... -
Page 24: Calibrate The Touchscreen
Once calibration is complete, your touch screen will automatically return to the Ready screen. Note: Typical screen calibration consists of five touches (one in each corner and one in the middle of the screen). PC45 Series Printer User Guide... -
Page 25: About The Media
Tickets with gaps, with or without perforations. • Tickets with black marks, with or without perforations. To load media for tear-off printing: Pull one or both of the printer latches toward the front of the printer and lift the printer lid. PC45 Series Printer User Guide... - Page 26 Pull the locking tab up. Slide the media holders to adjust the distance between them, and place the media roll between the holders. PC45 Series Printer User Guide...
- Page 27 Note: Pull the media forward to make sure the media rotates and is not resting at the base. If you are using notched or black mark stock, slide the label stop sensor so the notches or marks pass over the sensor. PC45 Series Printer User Guide...
- Page 28 To adjust the width of the media guides, slide the guides as needed to fit your media. Close the printer lid until it snaps shut. Turn the printer on and configure the feed adjust settings. PC45 Series Printer User Guide...
-
Page 29: Cut-Off Printing
Load Media for Cut-off Printing Cut-off printing is supported by PC45 series printers with the cutter installed. Pull one or both of the printer latches toward the front of the printer and lift the printer lid. - Page 30 Slide the media holders to adjust the distance between them, and place the media roll between the holders. Make sure the media holders are snug against the sides of the media roll, and press the tab down to lock the holders in place. PC45 Series Printer User Guide...
- Page 31 For the PC45d, thread the media under the tip guides on the media holders. For the PC45t printer, thread the media through the media guides. To adjust the width of the media guides, slide the guides as needed to fit your media. PC45 Series Printer User Guide...
-
Page 32: Load Media From An External Supply
13. Configure the Label top Adjust and Label Rest Adjust settings. Load Media from an External Supply To use large rolls of media or tag stock (up to 8in diameter), you can load the media from outside the printer. PC45 Series Printer User Guide... -
Page 33: About The Ribbon
If you see a mark on the paper, your ribbon is wound ink out. = Ink in = Ink out PC45 Series Printer User Guide... -
Page 34: Load Ribbon
Load Ribbon Press the printer latches toward the front of the printer and open the printer lid. Place ribbon roll between the rear ribbon holders. The ribbon should come off the roll. Ink-in Ink-out PC45 Series Printer User Guide... - Page 35 Place the takeup core between the front takeup core holders. Attach the end of the ribbon to the takeup core. PC45 Series Printer User Guide...
- Page 36 Turn the slack-wheel to take up slack in the ribbon. Set the ribbon selector switch to Ink-in or Ink-out. PC45 Series Printer User Guide...
- Page 37 Close the printer lid until it snaps shut. To configure for thermal transfer printing, from the printer Main Menu select Settings > Printing > Media > Print Method > Ribbon (TTR). Save your changes. PC45 Series Printer User Guide...
-
Page 38: Notchless Ribbon Core Adapter
The ribbon core adapter is sold separately. For detailed instructions on installing the .5-inch ribbon core adapter, refer to the PC45 Accessories User Guide available for download at sps.honeywell.com. Note: For information on purchasing this accessory, contact your local sales representative. - Page 39 (default), the ribbon should come off the back of the roll. For “ink-in” operation, the ribbon should come off the front of the roll. Ink-out Ink-in Place the takeup core and adapter between the front media holders. 1 inch PC45 Series Printer User Guide...
- Page 40 Route the ribbon under the print mechanism and up to the takeup core. Attach the ribbon to the takeup core. Turn the slack-wheel to take up slack in the ribbon. PC45 Series Printer User Guide...
-
Page 41: About Test Label
RFID tags is slightly thicker where the RFID tag is located. The slight thickness of this part of label may affect the print quality. For thermal transfer labels, Honeywell recommends using high-quality ink ribbon. To achieve the best possible print quality, follow these guidelines: •... -
Page 42: Run The Rfid Calibration Wizard
The yAntDist for the printers are: a. 244 dots, 30.5mm, 1.20in for PC45d. b. 542 dots, 31.5mm, 1.24in for PC45t. Use this formula to calculate the estimated Tag Position: Rear antenna: TagPosition=yChip - yAntDist PC45 Series Printer User Guide... -
Page 43: Configure Rfid Settings Using Web Page
Username is itadmin and the default value for Password is pass. Click Configure > Printing > RFID. The RFID settings page appears. Change RFID settings as needed. You can also click Default Settings to restore all default RFID settings. Click Save. PC45 Series Printer User Guide... - Page 44 PC45 Series Printer User Guide...
-
Page 45: Chapter 3 - Connect The Printer
Connect one end of the USB Type A cable to the back of the printer and connect the other end to your PC. Your PC will recognize the printer driver and connect to the printer. PC45 Series Printer User Guide... -
Page 46: Connect The Printer Using Bluetooth Communication
IP address from the network (DHCP) when you turn on the printer. You can use the network connection with Honeywell Windows Print Drivers. You can also use it to send commands directly to the printer through a ter- minal connection (Telnet) or through FTP/SFTP. -
Page 47: Configure Bluetooth Communication
Click Configure. The Configuration Summary page appears. Click Communications > Bluetooth. The Bluetooth settings page appears. Change Bluetooth settings as needed. You can also click Default Settings to restore all default Bluetooth settings. Click Save. PC45 Series Printer User Guide... -
Page 48: Configure Bluetooth Communication From The Main Menu
Note: If you are not using a DHCP network, Wi-Fi settings must be configured by using Honeywell PrintSet 5 through a USB connection to the printer. Send commands through a serial connection, or use the wizards and settings menus on the printer. -
Page 49: Configure Wi-Fi Communications From The Main Menu
.pem file and another soft link to the same file: ls -la. Note: Use the printer web page, from the Main Menu or Honeywell PrintSet 5 to specify the certificate .pem file to use for security. -
Page 50: Printer Drivers
Access the Honeywell Technical Support Downloads portal at honeywell.com/ PSSsoftware-downloads. Download Honeywell Software Download Manager by clicking here in the web page. Install the Download Manager. Click on the (+) to expand the list. Then go to Software > Printers > Printer Drivers >... -
Page 51: Usb Host Port
If you are connecting a USB storage device, make sure the device has a single partition and is formatted as FAT16 or FAT32. Connect the device to one of the USB host ports. Select Tools > USB Menu for more options. PC45 Series Printer User Guide... - Page 52 PC45 Series Printer User Guide...
-
Page 53: Chapter 4 - Configure The Printer
General, Security, and Network Printing Media and Print Quality System Settings General, Display, Audio, Manage I/O, Manage Services, and Maintenance Alerts Alerts Error, Warning, and Information Network Services Network services related configurations Languages Printer command language specific settings PC45 Series Printer User Guide... -
Page 54: Printer Configuration
Open a browser window on your PC. In the location or address bar, type https:// followed by the printer IP address and press Enter. The printer web page appears. Click Login. The login page appears. PC45 Series Printer User Guide... -
Page 55: Printer Web Page User Name And Password
To change printer command language specific print settings, click Languages. Make any changes to the settings you want to configure. To save your changes, click Save. 10. To reset all parameters on the page to the default settings, click Default Settings. PC45 Series Printer User Guide... -
Page 56: Configure The Printer With Printset 5 Or Print Set Mc
Android devices. For PrintSet 5, you may download from honeywell.com/ PSSsoftware-downloads. You can download Honeywell applications to extend the capabilities of the printer. You may need to purchase a license to run some applications. To learn more about, licenses and other Honeywell software solutions, go to www.sps.honeywell.com... -
Page 57: Uploading From A Usb Storage Device
Select the file you want to install and wait until the item turns gray and a checkmark appears next to it. The file is now successfully installed in the printer. d. Continue to another file if you have more files to install. PC45 Series Printer User Guide... -
Page 58: Change Background Image For The Ready Screen
In the printer web page (see Access the Printer Web Page), click Configure. Click System Settings > General. Click Save As Profile. The Save As Profile screen appears. Enter a name in the Profile field, and then click Save. PC45 Series Printer User Guide... -
Page 59: Load A Printer Profile From The Web Page
Select Load. The Load Profile menu appears. Select the profile you want to automatically load on the printer. Load Complete appears on the screen once the loading is successful. Press to return to the Main Menu. PC45 Series Printer User Guide... -
Page 60: Load A Printer Profile Using Programming Commands
Make sure the USB storage device has a single partition and is formatted as FAT16 or FAT32. Insert the storage device into the printer USB host port. From the Ready screen, press the Main Menu button. The Main Menu appears. PC45 Series Printer User Guide... -
Page 61: Remote Control
You can create shortcuts to access frequently used menus or items, such as profiles, applications, test labels, and wizards to the full touch printer. These shortcuts are added to a Quick Choices menu, which replaces the Main Menu. PC45 Series Printer User Guide... -
Page 62: Create Menu Shortcuts
Select the check mark icon at the bottom of the screen. The next time you press the Main Menu icon from the Ready screen, the Quick Choice menu (containing the Main Menu and your menu shortcuts) appears. PC45 Series Printer User Guide... -
Page 63: Customize The Printer Web Page
2. Modify the wcss.css style sheet with your desired font, color, etc, and save the file as style.css in your local directory. Example: home_title{ font-family:HoneywellSans-Bold; font-size:16px; color:#0090e8; letter-spacing:-0.01px; text-align:left; height:40px; margin-top: 10px 3. Upload the style.css to the printer via /home/user/webpage/ PC45 Series Printer User Guide... -
Page 64: Replace Standard Web Page
2. Modify the files with your desired changes and save the files in your local directory. 3. Upload the saved file to the printer via /home/user/webpage/. You can refresh your printer web page to see the changes. PC45 Series Printer User Guide... -
Page 65: Chapter 5 - Troubleshooting
Name of paired devices, connected devices, and device address information Font Information Name, type, location, and size of installed fonts Barcode Information Name and type of installed barcode fonts Image Information Name, type, location, and size of installed images PC45 Series Printer User Guide... -
Page 66: Maintenance Alerts
Click Configure. The Configuration Summary page appears. Click System Settings > Maintenance Alerts. The Maintenance Alerts settings page appears. Type the values you want to set for each maintenance alert. Click Save when you are finished. PC45 Series Printer User Guide... -
Page 67: Alert Notifications
Faulty Dot The printhead has reached the number of faulty dots set in the Faulty Dots setting in Maintenance Alerts. You may need to replace the printhead. PC45 Series Printer User Guide... -
Page 68: Troubleshoot Printer Problems And Find Solutions
The printhead may be dirty. Clean the printhead. • There may be missing dots on the printhead. Replace the printhead. Part of a dotted line is missing The printhead may be failing. Replace the printhead. PC45 Series Printer User Guide... -
Page 69: Networking Problems
• Make sure your PC is correctly configured for and connected to your network. • Make sure your printer is correctly configured for your network. PC45 Series Printer User Guide... -
Page 70: Rfid Problems
Click Login in the upper right corner of the screen. The Login page appears. Type your Username and Password in the text fields and click Login. Select Services > Restore Defaults. The Restore Defaults menu appears with none of the check boxes selected. PC45 Series Printer User Guide... -
Page 71: Restore Defaults From The Main Menu
Turn the printer off and open the media cover. Turn the printer on while pressing and holding the Feed button. Release the Feed button when the status bar is nearly full. All the settings are restored on the printer. PC45 Series Printer User Guide... -
Page 72: About Software Updates
1. Go to honeywell.com/PSSsoftware-downloads. 2. Create a login account if you have not already created one. 3. Install the Honeywell Download Manager tool. See “Note” on the portal page. This tool is required for downloads. 4. Locate the app or upgrade you want to download in the Software directory. -
Page 73: Upgrade Firmware From The Printer Web Page
• The printer web page, a USB storage device, PrintSet 5, or by using Honeywell Operational Intelligence. Note: After you upgrade the printer firmware, restore the default settings and calibrate the media sensors. Note: To learn more about OpIntel, see the Honeywell Cloud Connect User Guide available for download from the Operational Intelligence Software product page at sps.honeywell.com. - Page 74 PC45 Series Printer User Guide...
-
Page 75: Chapter 6 - Maintenance
Caution: To avoid possible personal injury or damage to the printer, never insert any pointed or sharp objects into the printer. Caution: Use only the cleaning agents specified in this section. Honeywell is not responsible for damage caused by any other cleaning materials used on this printer. -
Page 76: Clean The Printhead
Cleaning the printhead on a regular basis is important for the life of the printhead and for the print quality. Note: Honeywell recommends cleaning the printhead each time you replace the media. Follow this procedure to clean the printhead using the cleaning card. If you need to clean additional residue from the platen roller or tear bar, use a cotton swab moistened with isopropyl alcohol. -
Page 77: Clean The Media Path
Keep the cutter clean free of dust, stuck labels, and adhesive residue. Use this cleaning procedure for both standard cutter and Linerless cutter. Turn the printer off and disconnect the printer from power. Remove the cutter from the printer. PC45 Series Printer User Guide... - Page 78 To access the lower blade, open the rear-door of the cutter. Standard Cutter Linerless Cutter Clean the blades using a soft cloth soaked in isopropyl alcohol. Once the blades are dry, close the cutter door and install it back on the printer. PC45 Series Printer User Guide...
-
Page 79: About Disinfectant Ready Models
About Disinfectant Ready Models Some configurations of the PC45 series printers are available with external plastic housings that are designed to resist the effects of harsh chemicals. These specialty printer configurations are equipped with disinfectant-ready housings (DRH) for healthcare and/or general-purpose markets. - Page 80 Carefully slide the printhead out of the mechanism. The printhead is still attached to the mechanism by ribbon cable. Disconnect the cable from the printhead and remove the printhead from the printer. Connect the ribbon cable to the new printhead. PC45 Series Printer User Guide...
- Page 81 Slide the printhead into the holders in the print mechanism. Press the printhead onto the locator pins. 10. Tilt the printhead up and make sure it is aligned with the printer lid and press into place. PC45 Series Printer User Guide...
- Page 82 11. Close the printer lid until it snaps shut. PC45 Series Printer User Guide...
-
Page 83: Replace The Platen Roller
3. Press the roller latches apart and tilt them up. Pull the latches up to remove the platen roller from the printer. 5. Insert the new platen roller and press the latches into the printer until they snap shut. PC45 Series Printer User Guide... - Page 84 PC45 Series Printer User Guide...
-
Page 85: Chapter 7 - Specifications And Additional Resources
300dpi: 4.12 in (106mm) Label Roll Diameter (max.) 5in (127mm) Label Length (min.) Printer only: 0.25in (6.35mm) With Cutter Module: 1in (25.4mm) With Self-Strip Module: 0.5in (12.7mm) Media Thickness 2.5mil to 8mil (0.06mm to 0.2mm) PC45 Series Printer User Guide... -
Page 86: Command Languages And Simulator Support Features
• • ZSim • • Smart Printing C# • Direct PDF Printing Print Sensors • Dual label gap/tag notch • Black mark • Printhead lift • Ribbon present/end • Ribbon low • Label taken (optional) PC45 Series Printer User Guide... -
Page 87: Network Services
• CG Triumvirate Condensed Bold • Century Schoolbook Roman • Dutch 801 Roman • HeiseiKakuGothW5 • Honeywell Sans TT Bold • Letter Gothic • MHeiGB18030C-Medium • Monospace 821 • Monospace 821 Bold • OCR A PC45 Series Printer User Guide... -
Page 88: Downloadable Fonts
WorldType Collection J • WorldType Collection K • WorldType Collection S • WorldType Collection T Supported Font Types • TrueType • OpenType • Bitmap Printed Barcode Symbologies 1D Barcode Symbologies • Codabar • Code 11 PC45 Series Printer User Guide... -
Page 89: Barcode Symbologies
• • UPC-5 digits Add-On Code • UPC-D1 • UPC-D2 • UPC-D3 • UPC-D4 • UPC-D5 • UPC Shipping Container Code 2D Barcode Symbologies • Aztec • Code 16K • Code 49 • Data Matrix PC45 Series Printer User Guide... -
Page 90: Graphic File Types
• MaxiCode • MicroPDF417 • MSI (modified Plessey) • PDF417 • Planet Code • Plessey Code • Postnet • QR Code • RSS-14 • USPS 4-State Customer barcode Graphic File Types • • • • PC45 Series Printer User Guide... -
Page 91: Appendix A - Default Settings
Specifies if software flow control (XON/XOFF) is used to Disable manage the rate of data transmission from the host. New Line Character Defines the characters that the printer echoes to the host to CR/LF indicate that it has moved to a new line. PC45 Series Printer User Guide... -
Page 92: Ethernet
128 characters. Private Key Sets the full path to the private key file the printer uses for EAP-TLS. Maximum length is 128 characters. If using pfx file here, the Client Certificate should not be specified. PC45 Series Printer User Guide... -
Page 93: Wireless 802.11
Sets the password that the printer uses when logging in to the network. Range is 1 to 96 characters. Anonymous Name Sets the outer EAP user name that the printer uses for logging in to the network. Maximum length is 96 characters. PC45 Series Printer User Guide... - Page 94 Validate Certificate Determines if the identity of the authentication server is verified using its certificate when using EAP-TTLS, PEAP, or EAP-TLS. Honeywell recommends that you set Validate Certificate to Yes. Sets the name of the PAC (Protected Access Credential) eap-fast.pc file that is used for EAP-FAST authentication.
-
Page 95: Bluetooth
Discover Determines if other Bluetooth devices can detect Enable the printer. Passkey Sets the passkey that is used when pairing Bluetooth devices to the printer. Range is 1 to 16 characters (case-sensitive). Reserve Disable PC45 Series Printer User Guide... -
Page 96: Printing
Media margin (X) Media Width Sets the width of the printable area measured from the 812 dots media margin (X) across the printhead. Unit of measurement is defined in the Unit of Measure parameter. Media width (X) PC45 Series Printer User Guide... - Page 97 Test feed: The printer prints two configuration labels as it calibrates the media sensors. Smart Calibration: Detects media type (gap, black mark, or continuous, detects printing method (ribbon or no- ribbon), and calibrates media length. PC45 Series Printer User Guide...
- Page 98 Note: If no action is selected for Head Down Action, then you need to align the media gap, black mark, hole, and notch with the tear bar before you close the printhead at Thermal Transfer printing mode. Otherwise, the first label may be printed by the used ribbon. PC45 Series Printer User Guide...
-
Page 99: Print Quality
Cut Interval Sets the interval (number of labels) after which cut operation has to be performed, enabled only in automatic cutter control mode. Cut After Feed Enables the cutter to cut after feeding the media. Disable PC45 Series Printer User Guide... -
Page 100: Rfid
Keyboard Input Selects the language of the external keyboard U.S./U.K. that is connected to the printer. Time Sets the current time. System time Date Sets the current date. System date PC45 Series Printer User Guide... -
Page 101: Display Settings
Sleep Timer or extend the time before screen timeout may reduce the lifespan of the LCD display and is considered improper use of the device. Honeywell will not cover any resulting damages under warranty or otherwise. Command Language Sets the printer command language. -
Page 102: Audio Settings
Changing this setting to either disable screen timeout or extend the time before screen timeout may reduce the lifespan of the LCD display and is considered improper use of the device. Honeywell will not cover any resulting damages under warranty or otherwise. Feed Key Access... -
Page 103: Manage Services
Address is ntp0.cornell.edu, and the default Port Number is 123. Device Determines if the printer can use 9300 TCP/IP port to Enable Management communicate with HCD. Connectivity Determines if the printer can communicate with Honeywell Cloud Disable Agent on port 10000. PC45 Series Printer User Guide... -
Page 104: Maintenance Alerts
Sets how often the alert is sent out for a specific printer event. Range is 1 to 65535. Delay Unit Selects the unit of measure that determines how often the alert is sent out. Message Sets the message that is sent out with alert for a specific printer event. PC45 Series Printer User Guide... -
Page 105: Error
From the printer web page, click Configure > Alerts > Warning. Default Values Warning Alerts Status Delay Repeat Delay Unit Message Upgrading Firmware Disable Occurrences Warning-Upgrading firmware Odometer (User Disable Occurrences Warning-Odometer (User Resettable) Resettable) has reached a preset value. PC45 Series Printer User Guide... -
Page 106: Information
TCP/IP network. Secondary DNS Server Sets the IP address of the secondary server to which the printer sends DNS requests. The DNS server retains IP address and routing information for the TCP/IP network. PC45 Series Printer User Guide... -
Page 107: Net1
Sets the email address of the person who will receive the alert messages. To Address Sets the email address that appears as the sender of the alert messages. Email Password Sets the password the printer uses to communicate with SMTP SSL service. PC45 Series Printer User Guide... -
Page 108: Snmp
Selects the algorithm that the printer uses to determine that Authentication the messages are from valid source. Protocol SNMPv3 Encryption Selects the type of encryption that the printer uses to prevent Protocol messages from being seen by an unauthorized user. PC45 Series Printer User Guide... -
Page 109: Wins
From the printer web page, click Configure > Network Services > Time Server. Time Server Description Default Server Address Sets the address the printer uses to communicate with ntp0.cornell. time server. Port Number Sets the port number the printer uses to communicate with the time server. PC45 Series Printer User Guide... -
Page 110: Connectivity Agent
Time Server Description Default Port Number Sets the port number that defines the TCP port of XML 9200 printing. Range is 1024 to 65535. Secure Determines if TLS encryption is used for data Disable Communication communication. PC45 Series Printer User Guide... -
Page 111: Device Management
From the printer Main Menu, select Settings> Network Services > Device Management. • From the printer web page, click Configure > Network Services > Device Management. Time Server Description Default Secure Determines if TLS encryption is used for data Disable Communication communication. PC45 Series Printer User Guide... - Page 112 PC45 Series Printer User Guide...
-
Page 113: Appendix B - Print Labels With Inprint
2. Save the file as .lbx 3. Create a Webforms folder in the USB thumbdrive and save the .lbx file in the folder. 4. Upload the Web Form to the printer. (See Uploading from a USB Storage Device). PC45 Series Printer User Guide... -
Page 114: Sample Code
AN 1 PP 20,20 PX 160,360,4 AN 5 PP 100,100 BT "DATAMATRIX" BM qMag% PB "@"+qVendor$+"@"+qModel$+"@"+qSerial$ AN 5 FONT "Univers Bold", 14 PP 260,110 PT qVendor$ AN 5 FONT "Univers", 14 PP 260,70 PT qModel$ PC45 Series Printer User Guide... -
Page 115: Print Inprint Labels
If you created the web form yourself, click Customer Downloaded and then select the web form in the list. • To use one of the Honeywell resident web forms, click Resident and then select the web form in the list. 5. Type information in the web form as needed. - Page 116 PC45 Series Printer User Guide...
-
Page 117: Appendix C - Accessories And Options
Use this accessory to hold larger rolls of media outside the printer. Heavier Spring Use the heavier spring for thick media types. Note: To view the Accessory User Guide, visit the PC45 product page at www.sps.honeywell.com. PC45 Series Printer User Guide... - Page 118 PC45 Series Printer User Guide...
- Page 120 Honeywell 855 S. Mint Street Charlotte, NC 28202 www.sps.honeywell.com ™ PC45-EN-UG-01 Rev B 07/23...
Need help?
Do you have a question about the PC45 Series and is the answer not in the manual?
Questions and answers