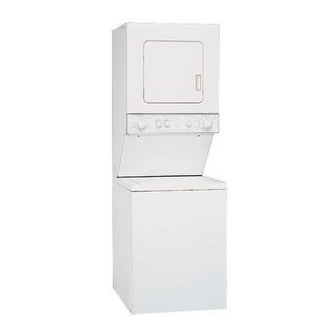
Whirlpool THIN TWIN LTE5243D Use & Care Manual
Automatic gas and electric washer/dryer
Hide thumbs
Also See for THIN TWIN LTE5243D:
- Product dimensions (1 page) ,
- Dimensions and installation information (1 page)
Table of Contents
Advertisement
Advertisement
Table of Contents
Troubleshooting

Related Manuals for Whirlpool THIN TWIN LTE5243D


Summary of Contents for Whirlpool THIN TWIN LTE5243D
- Page 1 ® THIN TWIN AUTOMATIC GAS AND ELECTRIC WASHER/DRYER Use & Care Guide For questions about features, operation/performance, parts, accessories or service call: 1-800-253-1301 or visit our website at www.whirlpool.com/canada Table of Contents... 2 3406877...
-
Page 2: Table Of Contents
TABLE OF CONTENTS WASHER/DRYER SAFETY... 3 PARTS AND FEATURES ... 5 CHECKING YOUR VENT... 6 WASHER USE ... 7 Understanding Washer Cycles ...7 Loading...7 Normal Washer Sounds ...7 Starting Your Washer ...8 Selecting a Cycle and Time ...9 Rinse and Spin ...9 Drain and Spin...9... -
Page 3: Washer/Dryer Safety
WASHER/DRYER SAFETY Your safety and the safety of others are very important. We have provided many important safety messages in this manual and on your appliance. Always read and obey all safety messages. This is the safety alert symbol. This symbol alerts you to potential hazards that can kill or hurt you and others. -
Page 4: Important Safety Instructions
IMPORTANT SAFETY INSTRUCTIONS WARNING: To reduce the risk of fire, electric shock, or injury to persons when using the washer/dryer, follow basic precautions, including the following: Read all instructions before using the washer/dryer. Do not place items exposed to cooking oils in your dryer. -
Page 5: Parts And Features
1. Washer controls 2. Lid instructions 3. Optional exhaust outlet 4. Agitator 5. Basket 6. Model and serial number plate 7. Dryer drum Control panel PARTS AND FEATURES 8. Lint screen 9. Dryer Controls 10. Lid latch - Push to release 11. -
Page 6: Checking Your Vent
CHECKING YOUR VENT Your dryer must be properly installed and vented to achieve maximum drying efficiency and shorten drying times. Use the minimum recommended installation clearances (found in your Installation Instructions) to avoid blocking the flow of combustion and ventilation air. Refer to your Installation Instructions for more information. -
Page 7: Washer Use
These sounds are normal. 3. Drain No agitation During washing When you select a small load size setting, your washer has a lower water level. This can cause a clicking sound from the upper part of the agitator. 4. Spin-Spray... -
Page 8: Starting Your Washer
Do not use an extension cord. Failure to follow these instructions can result in death, fire, or electrical shock. 1. Measure detergent and pour it into the washer. If desired, add powdered or liquid color safe bleach. Add extra detergent for the Extra Wash cycle. -
Page 9: Selecting A Cycle And Time
1. Push in the Cycle Control knob and turn it clockwise to any of the Rinse settings. 2. Pull out the Cycle Control knob. The washer fills to the selected load size, agitates, drains, and spins. Drain and Spin A drain and spin may help shorten drying times for some heavy fabrics or special-care items by removing excess water. -
Page 10: Dryer Use
Failure to follow these instructions can result in death, explosion, or fire. Fire Hazard No washer can completely remove oil. Do not dry anything that has ever had any type of oil on it (including cooking oils). Items containing foam, rubber, or plastic must be dried on a clothesline or by using an Air Cycle. -
Page 11: Drying, Cycle And Temperature Tips
Drying, Cycle and Temperature Tips Select the correct cycle and temperature for your load. Cool Down tumbles the load without heat during the last few minutes of all cycles to make the load easier to handle. Drying tips Follow care label directions when they are available. If you use fabric softener sheets, use only those labeled as dryer safe. -
Page 12: Washer/Dryer Care
Cleaning the interior Clean your washer interior by mixing 1 cup (250 mL) of chlorine bleach and 2 scoops or caps full of detergent. Pour this into your washer and run it through a complete cycle using hot water. -
Page 13: Removing Accumulated Lint
2. Disconnect and drain water inlet hoses. 3. Put 1 quart (1 L) of R.V.-type antifreeze in the basket. 4. Run washer on a drain and spin setting for about 30 seconds to mix the antifreeze and water. 5. Unplug washer/dryer or disconnect power. -
Page 14: Troubleshooting Washer
Are both the hot and cold water faucets turned on? Is the water inlet hose kinked? Does the water level seem too low, or does the washer appear to not fill completely? The top of the agitator is much higher than the highest water level. - Page 15 Did you properly sort the load? Sort dark clothes from whites and lights. Did you unload the washer promptly? To avoid dye transfer, unload the washer as soon as it stops. Load is wrinkled Did you use the right cycle for the load being washed? Use a cycle with a low spin speed to reduce wrinkling.
-
Page 16: Troubleshooting Dryer
TROUBLESHOOTING DRYER First try the solutions suggested here and possibly avoid the cost of a service call... Clothes are not drying satisfactorily Check the following: Is the lint screen clogged with lint? Is the exhaust vent or outside exhaust hood clogged with lint, restricting air movement? Run the dryer for 5-10 minutes. -
Page 17: Assistance Or Service
Whirlpool designated service technicians are trained to fulfill the product warranty and provide after-warranty service anywhere in the United States. To locate the Whirlpool designated service company in your area, you can also look in your telephone directory Yellow Pages. For further assistance... - Page 18 Whirlpool Corporation will not pay for: 1. Service calls to correct the installation of your washer/dryer, to instruct you how to use your washer/dryer, or to replace house fuses, reset circuit breakers, correct house wiring, plumbing or venting or to replace owner accessible light bulbs. Heavy 4 in. (10.2 cm) metal exhaust vent must be used.
Need help?
Do you have a question about the THIN TWIN LTE5243D and is the answer not in the manual?
Questions and answers
No heat in the dryer
The Whirlpool THIN TWIN LTE5243D dryer may have no heat due to the following possible reasons:
- Improper electrical supply
- Clogged lint screen
- Dryer improperly exhausted
Checking these factors and ensuring proper maintenance can help restore heating functionality.
This answer is automatically generated