Eureka NER E10s Instruction Manual
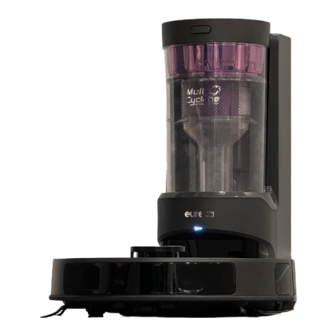
Robot vacuum cleaner
Hide thumbs
Also See for NER E10s:
- Owner's manual (24 pages) ,
- Instruction manual (105 pages) ,
- User manual
Advertisement
Table of Contents
- 1 Table of Contents
- 2 Safety Instructions
- 3 Technical Data
- 4 What Comes in the Box
- 5 How to Identify Parts of Your Robot
- 6 How to Use Your Robot
- 7 How to Maintain Your Robot
- 8 How to Maintain Brushroll
- 9 Other Routine Maintenance
- 10 Troubleshooting
- 11 Trademarks, Copyrights and Legal Statement
- Download this manual
Advertisement
Table of Contents

Related Manuals for Eureka NER E10s


Summary of Contents for Eureka NER E10s
- Page 1 NER E10s ROBOT VACUUM CLEANER INSTRUCTION MANUAL Please read the manual before use...
-
Page 2: Table Of Contents
CONTENTS Safety instructions How to set up app, connect the device and use app Technical data How to maintain your robot What comes in the box How to maintain brushroll How to identify parts of Other routine maintenance 17-18 your robot Assembling and charging Troubleshooting robot... -
Page 3: Safety Instructions
SAFETY INSTRUCTIONS Warning for the machine This appliance is not intended for use by persons (including children) with reduced physical, sensory or mental capabilities, or lack of experience and knowledge, unless they have been given supervision or instruction concerning use of the appliance by a person responsible for their safety. Children should be supervised to ensure that they do not play with the appliance. - Page 4 SAFETY INSTRUCTIONS Correct Disposal of this product. This marking indicates that this product should not be disposed of with other household wastes throughout the EU. To prevent possible harm to the environment or human health from uncontrolled waste disposal, recycle it responsibly to promote the sustainable reuse of material resources.
- Page 5 If the supply cord is damaged, it must be replaced by the manufacturer, its service agent or similarly qualified persons in order to avoid a hazard. Docking base is only Applicable to the product NER E10s. (Battery pack type : Li-ion, DC 14.4 V, 5200 mAh) The Docking base will automatically start charging after Robot Vacuum Cleaner returned to the base.
- Page 6 SAFETY INSTRUCTIONS Warning for battery before removing the battery. Please note that do not disassemble the battery by yourself. If you need to replace it, please contact the after-sales service center. Please dispose of used battery according to local laws and regulations Do not dismantle, open or shred the battery.
- Page 7 SAFETY INSTRUCTIONS [symbol IEC 60417-5957 for indoor use only ( 2004-12 )] [symbol ISO 7000-0790 read operator's manual ( 2004-01 )] [symbol IEC 60417-5031 direct current ( 2002-10 )] time-lag miniature fuse-link where X is the symbol for the time/current characteristic as given in IEC 60127 [symbol IEC 60417-5032 alternating current ( 2002-10 )]...
-
Page 8: Technical Data
TECHNICAL DATA Product Model: NER E10s Host Charging Voltage: 16.7V Host Rated Voltage: 14.4V Host Rated Power: 55W Docking Station Model: BS2302 Docking Station Input: 220-240V~, 50-60Hz, 850W Docking Station Output: 16.7V , 1A Battery Model: BP14452C Battery Rated Voltage: 14.4V Battery Capacity: 5200mAh 74.88Wh... -
Page 9: What Comes In The Box
Parts and Components What comes in the box Robot Vacuum Self-Emptying Base 445mm 97mm Side Brush x2 Cleaning Brush Instruction Manual Instruction Manual... -
Page 10: How To Identify Parts Of Your Robot
How to identify parts of your robot Network / Spot Cleaning Button Bumper LiDAR Sensor Power Button Recharging Button Edge Sensor Dustbin Release Reset Button Button Dustbin / Release Button of Water Tank Auto-lifting Mop Omni-directional Wheel Carpet Detection Sensor Side Brush Main Brush Auto-lifting Mop... - Page 11 Remove excess clutter and cables on the floor before cleaning. Quick Assembly Installation of side brushes Turn the main unit over. Attach the side brush to its color-matched post and press down until they fit into place. Filter installation Robot comes with filter installed. Before use, ensure the filter is securely in place.
- Page 12 Charging NOTES 1. Avoid placing the robot and the base under direct sunlight. 2. Be sure to keep the charging area dry. Press and hold " " for 3 seconds to power on the robot vacuum. After the power indicator turns on, press the recharging button or manually put the robot back into the self-emptying base for charging, as shown.
-
Page 13: How To Use Your Robot
How to use your robot Button Operation Start/pause/resume Return to the base Start spot cleaning Short Press Press and Shut down Enter the network pairing state hold for 3s Start / Pause / Resume Briefly Press " " to start/pause/resume cleaning or use your App to control. SPOT Cleaning When the robot vacuum is in standby/pause mode, press "... - Page 14 Using Eureka Robot App NOTE: If the wireless network in your home is unstable, it may cause issues with the operation of the Eureka Robot App. The content of the Eureka Robot App may change when the version is updated. Please refer to the Eureka Robotic Vacuum interface for details.
-
Page 15: How To Maintain Your Robot
How to maintain your robot Never operate robot without all filters, filter screen and dustbin in proper position. Moving parts! Recharge robot vacuum cleaner after each use. Dustbin/Water tank maintenance (clean as needed) Take out the dustbin: Remove debris by tApping the Press the dustbin release button filter against your garbage bin. -
Page 16: How To Maintain Brushroll
How to maintain brushroll Washable brushroll – clean frequently Do not attempt to remove belt. Cleaning tools How to use the cleaning brush: ① Cut the hair entangled on the main brush with the blade. Blade ② Brush Main brush maintenance (weekly cleaning recommended) Turn the main unit over. -
Page 17: Other Routine Maintenance
Maintenance of Self-Emptying Base How to empty the dust cup Empty as soon as dirt reaches the MAX Close the tab, and place the dust cup straight mark. Remove the dust cup by moving it down back into the self-emptying base. vertically upwards. - Page 18 Maintenance of Self-Emptying Base How to clean the filter Press the release tab of the cover of the filter on the back of the base to remove the cover. Release Button Rinse the filter with clean water until it is clean.
-
Page 19: Troubleshooting
Troubleshooting Actions Faults Possible Causes The robot vacuum The robot vacuum is not in Place the robot vacuum 1m in contact with the charging front of the self-emptying base cannot be recharged contacts. and press the recharging button. The robot vacuum Place the self-emptying base on The self-emptying base is a level surface that is free of... - Page 20 Troubleshooting To preserve natural resources, please recycle or dispose of expired battery Actions Faults Possible Causes pack properly. The robot vacuum has · The sound is muted. · Turn up the volume. · The robot vacuum is in Do Not no sound Disturb Mode.
-
Page 21: Trademarks, Copyrights And Legal Statement
TRADEMARKS, COPYRIGHTS AND LEGAL STATEMENT logo, word marks, trade name, trade dress and all versions thereof are valuable assets of intellectual property rights, and all goodwill derived from using any part of an Midea trademark. Use of Midea trademark for commercial purposes without the prior written consent of Midea may constitute trademark infringement or unfair competition in violation of relevant laws.
Need help?
Do you have a question about the NER E10s and is the answer not in the manual?
Questions and answers
need new side brushes
need tp order side brushes