
Subscribe to Our Youtube Channel
Related Manuals for AlphaTheta OMNIS-DUO

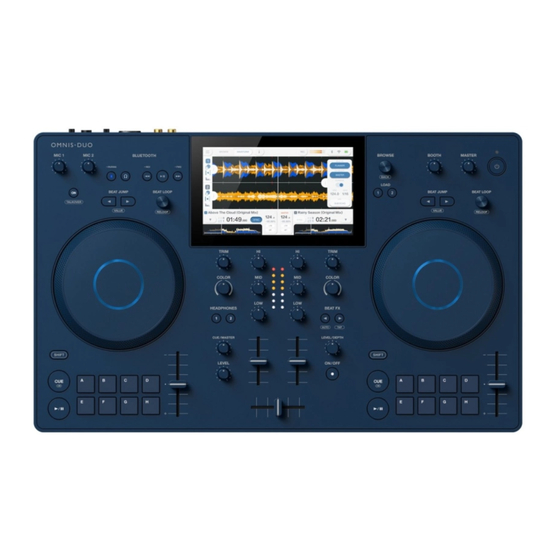
Summary of Contents for AlphaTheta OMNIS-DUO
- Page 1 Instruction Manual All-In-One DJ System alphatheta.com/support/ rekordbox.com For FAQ and other support information for this product, visit the websites above.
-
Page 2: Table Of Contents
Contents Before you start ................... 7 How to read this manual .................7 What’s in the box..................7 User guides .....................8 Safety precautions ..................8 Disposal of the unit..................9 Product overview................10 Charging the battery................10 System requirements ................12 rekordbox for Mac/Windows..............15 rekordbox for iOS/Android..............17 PRO DJ LINK ..................18 rekordbox CloudDirectPlay ..............18 PC/Mac setup .................. - Page 3 Track selection................... 42 Browse section..................42 Selecting a source.................42 Selecting a track..................43 Searching for a track ................43 Monitoring sound before loading a track (Touch Preview) ....46 Loading a track to a deck ..............47 Using History ..................48 Using the Tag List .................49 Displaying the playlist screen..............52 Playback .....................
- Page 4 Deleting a saved cue point..............65 Setting Auto Cue ...................66 Looping....................67 Setting a loop ..................67 Adjusting the length of a loop..............67 Using Active Loop .................68 Canceling loop playback ...............68 Emergency Loop ...................68 Saving a loop ..................69 Calling up a saved loop.................69 Deleting a saved loop................70 Hot Cues .....................
- Page 5 Outputting sound...................87 Adjusting the sound................88 Setting the faders ..................88 Monitoring sound ................90 Headphones section ................90 Monitoring with headphones ..............91 Booth section ..................92 Using a booth monitor ................92 Microphone ..................93 MIC section ...................93 Using a microphone ................94 Sound Color FX.................. 95 Sound Color FX section ................95 Using Sound Color FX ................96 Sound Color FX types and settings............97...
- Page 6 DJing with the sound from a mobile device, etc........118 Connecting to a mobile speaker, etc. (Bluetooth output) ....119 Wireless LAN (Wi-Fi ) connection..........121 ® Checking the internet connection............122 Using DJ software ................123 Controlling DJ software ...............123 Specifications .................. 125 Additional information ..............
-
Page 7: Before You Start
Before you start How to read this manual • Thank you for choosing this AlphaTheta product. Be sure to read this manual, the Quick Start Guide and the Precautions for Use which are also included with this product. These documents include important information that you should understand before using the unit. -
Page 8: User Guides
Before you start User guides rekordbox Introduction, Instruction Manual Refer to the rekordbox Introduction to find out how to set up rekordbox, and see the Instruction Manual to find out how to use rekordbox. Visit the URL below to find these user guides. rekordbox.com/manual Safety precautions Failure to observe the following precautions... -
Page 9: Disposal Of The Unit
Before you start If battery fluid leaks, do not touch it with bare hands. The leaked battery fluid may remain inside the unit. Consult an authorized service company or your dealer. If the battery fluid gets into your eyes, it may lead to blindness. Do not rub your eyes. -
Page 10: Product Overview
Product overview You can use this unit with the supplied AC adapter (power cord) connected to a power outlet, or the built-in lithium-ion battery. When you use the unit for the first time, connect the supplied AC adapter (power cord) to a power outlet and charge the battery at least partially (or the unit won’t turn on). - Page 11 Product overview 2 Connect the power cord to a power outlet. The battery charge indicator lights up in orange. Top panel of the unit Battery charge indicator • The battery charge indicator lights up in orange while charging and turns off when charging completes.
-
Page 12: System Requirements
Product overview System requirements Supported audio sources This unit supports the following sources. – SD memory card* – USB storage device – PC/Mac (rekordbox for Mac/Windows) – Mobile device (rekordbox for iOS/Android) * SD memory cards, and miniSD memory cards and microSD memory cards (use them with an SD memory card adapter) are collectively referred to as “SD memory card”... - Page 13 Product overview – Optical disc devices such as external DVD/CD drives – USB hubs • If excessive current passes through the USB port on the unit, the unit stops the power supply to the USB storage device and stops communication. To restore the unit to a normal condition, disconnect the USB storage device from the unit.
- Page 14 Product overview Tag information This unit can read tag information from ID3 tags (v1, v1.1, v2.2.0, v2.3.0, v2.4.0) and meta tags set in audio files. Artwork of audio files You can add an artwork image in JPEG format (extensions: “jpg”, “jpeg”) to each audio file. Images larger than 800 x 800 pixels can’t be displayed on this unit.
-
Page 15: Rekordbox For Mac/Windows
Product overview rekordbox for Mac/Windows rekordbox for Mac/Windows is a complete DJ application you can use to manage your music and perform. • If you export audio files managed in Export mode of rekordbox for Mac/Windows to a storage device (SD, USB) and connect the storage device to this unit, you can DJ with the audio files in the storage device. - Page 16 Product overview Device Library Plus This unit only supports the Device Library Plus format. Perform the following procedure before you use a storage device (SD, USB) which has the library exported from rekordbox for Mac/Windows with this unit. Once you have performed the following procedure, you can use the storage device (SD, USB) as usual.
-
Page 17: Rekordbox For Ios/Android
Product overview rekordbox for iOS/Android rekordbox for iOS/Android is a complete DJ application you can use to manage your music and perform. If you connect a mobile device running rekordbox for iOS/Android to the unit, you can play audio files managed in the app. •... -
Page 18: Pro Dj Link
Product overview PRO DJ LINK PRO DJ LINK supports USB Export, which utilizes a storage device (SD, USB), as well as rekordbox LINK EXPORT, which utilizes a PC/Mac running rekordbox. Read more: PRO DJ LINK (page 37) rekordbox CloudDirectPlay If you connect the unit to the internet via a wireless LAN (Wi-Fi) and use rekordbox CloudDirectPlay, you can load audio files from your cloud storage to the unit and play them. -
Page 19: Pc/Mac Setup
• For information on the latest system requirements, compatibility, and supported operating systems, visit the URL below. alphatheta.com/support/ • Operation isn’t guaranteed on all PC models, even if the system requirements are met. • Operation isn’t guaranteed when multiple units are connected to a PC/Mac. - Page 20 1 Visit the URL below. alphatheta.com/support/ 2 Click [Software & firmware updates]. 3 Click [OMNIS-DUO] under [All-in-one DJ systems]. 4 Click [Drivers]. 5 Click [Download link] and save the file. • Download the audio driver software dedicated to your PC.
-
Page 21: Setting Utility
– Checking the software version (page 23) Launching Setting Utility For Windows 11 1 Open the Start menu and click [All Apps] [AlphaTheta] [OMNIS-DUO Setting Utility]. For Windows 10 1 Open the Start menu and click [AlphaTheta] [OMNIS-DUO... - Page 22 PC/Mac setup Adjusting the buffer size (for Windows ASIO) • Close any running applications (DJ applications, etc.) which use the unit as the default audio device before adjusting the buffer size. 1 Click the [ASIO] tab. 2 Adjust the buffer size with the slider. •...
- Page 23 PC/Mac setup Checking the software version 1 Click the [About] tab.
-
Page 24: Part Names
Part names Top panel button Press and hold to turn the unit on or press to turn it off. • The confirmation message appears on the display before the unit turns off. • When you use the unit for the first time or after not using it for a long time, connect the AC adapter (power cord) to a power outlet and charge the battery at least partially. - Page 25 Part names CAUTION • When using the unit on battery power without using the AC adapter (power cord), pay attention to the battery level. If the battery runs out, the contents in the memory are cleared. Connect the AC adapter (power cord) and charge the battery before it runs out.
-
Page 26: Front Panel
Part names Front panel PHONES terminals (page 91) Connect headphones to one of the terminals (1/4″ stereo jack or 3.5 mm stereo mini- jack). If you use both terminals at the same time, the sound quality may be deteriorated or the volume may be low. Rear panel 9 10 9 USB port (for power supply) (page 10) - Page 27 Part names USB port (for PC/Mac) (page 39) Connect a PC/Mac. Use a 2 m or shorter standard USB cable. Kensington security slot Connect a cable lock. MASTER 1 terminals (balanced XLR) Connect to analog input terminals on a power amplifier, etc. •...
-
Page 28: Touch Screen
Part names Touch screen Title/status bar The title/status bar is displayed at the top of the screen. 4 5 6 (Launcher) Displays the launcher screen. Closes the display when is displayed. (BACK) Returns to the previous screen. Screen title Displays the title of the current screen. •... - Page 29 Part names Launcher screen The launcher screen appears when you touch on the title/status bar at the top of the screen. You can open various screens from the launcher screen. SOURCE Displays the [SOURCE] screen (select a source to play a track from) (page 30). Browse buttons Displays the browse screen when you touch [BROWSE], [TAGLIST], or [PLAYLISTS] (page 31), or the Search screen when you touch [SEARCH] (page 43).
- Page 30 Part names Source screen The [SOURCE] screen appears when you touch [SOURCE] on the launcher screen. Source icons Displays the icon of the connected source. Source name/status Displays the source name and status. Source information Displays the information of the selected source. •...
- Page 31 Part names Browse screen Touch [BROWSE], [TAG LIST], [PLAYLIST] on the launcher screen to display the browse screen (track list). You can browse the rekordbox library on a storage device (SD, USB), rekordbox CloudDirectPlay, a connected PC/Mac (rekordbox for Mac/Windows), or a mobile device (rekordbox for iOS/Android).
- Page 32 Part names • Touch an artwork to register of unregister the track to/from the Tag List (page 49). • Touch the title row to sort the list. • Touch on the title row to display the sub-column selection screen and select a sub-column to be displayed.
- Page 33 Part names • You can change the number of beats for Quantize in [Quantize Beat Value] on the [SETTINGS] screen (page 106). SLIP MODE Displayed in blue when Slip is turned on and in gray when it’s turned off. Source icon Displays the icon for the source of the track.
- Page 34 Part names 12. QUANTIZE (for Beat FX) Displayed in blue when Quantize for Beat FX is turned on and active or in gray when Quantize isn’t active when it’s turned on or off (). 13. BEAT Displays the number of beats set for the effect. 14.
- Page 35 Part names 25. Overall waveform Displays the overall waveform, cue points, loop points, and Hot Cue points, etc. that have been analyzed by rekordbox. You can start playback from a point you touch on the waveform (page 55). • The indicators on the overall waveform indicate the following. –...
- Page 36 Part names Basic operations on the screen Use the rotary selector or touch the screen to operate it. Using the rotary selector The following functions are available. Operation Description Rotate Moves the cursor and highlights an item. Press Selects the highlighted item. Press while pressing the Displays the next level up (previous screen).
-
Page 37: Connections (Basic Styles)
Connections (basic styles) Turn the unit off and disconnect the power cord before connecting other units. Connect the power cord after all the connections are complete. • Use the supplied power cord and AC adapter. • Read the instruction manuals for the devices you are going to connect with the unit. PRO DJ LINK USB Export You can transfer audio files and management data of rekordbox for use on this unit using a... - Page 38 Connections (basic styles) rekordbox LINK EXPORT You can directly select and play tracks in rekordbox with this unit when the unit is connected via wireless LAN (Wi-Fi) to a PC/Mac running rekordbox for Mac/Windows or a mobile device running rekordbox for iOS/Android. You can play playlists or tracks with cues, loops, and Hot Cues previously set in rekordbox.
-
Page 39: Rekordbox Clouddirectplay
Connections (basic styles) rekordbox CloudDirectPlay To use rekordbox CloudDirectPlay, connect your wireless LAN router to the internet (page 121). Wireless LAN router PC/Mac (access point) Mobile device with rekordbox for iOS/Android installed rekordbox Rear panel of the unit Rear panel AC adapter Power cord To power outlet... -
Page 40: Storage Device Connection (Sd, Usb)
Storage device connection (SD, USB) SD memory card • Do not remove an SD memory card from the unit without using [SD STOP]. The unit’s management data may be deleted or the SD memory card may become unreadable. • Be careful not to press or pull the SD memory card with excessive force, or it may be damaged. -
Page 41: Usb Storage Device
Storage device connection (SD, USB) 5 Pull the SD memory card out at a straight angle. USB storage device • Do not disconnect a USB storage device from the unit without using [USB STOP]. The unit’s management data may be deleted or the USB storage device may become unreadable. -
Page 42: Track Selection
Track selection Browse section Rotary selector (page 36) Moves the cursor or confirm the selection. • Press while pressing the [SHIFT] button use it as the BACK button. LOAD 1, LOAD 2 buttons Loads a track to the deck (1 or 2) and starts playback. Selecting a source 1 Touch [SOURCE] on the launcher screen. -
Page 43: Selecting A Track
Track selection Selecting a track Selecting a track on the browse screen 1 Open the browse screen. A track list is displayed. Read more: Browse screen (page 31) 2 Select a track. Read more: Loading a track to a deck (page 47) Searching for a track Using the Search feature This feature is only available when browsing the rekordbox library. - Page 44 Track selection • You can display the Search screen by touching [BROWSE] on the launcher screen then on the BROWSE screen. 2 Enter a keyword using the keyboard. Tracks including the keyword are displayed in the list. • You can specify multiple keywords by separating them with a space. Using the Jump feature The unit supports 2 jump modes.
- Page 45 Track selection Using Track Filter You can narrow down tracks by BPM, key, or the tag information, etc. added by rekordbox. This feature is only available when browsing the rekordbox library. Narrowing down tracks 1 Display the browse screen. A track list is displayed.
-
Page 46: Monitoring Sound Before Loading A Track (Touch Preview)
Track selection Monitoring sound before loading a track (Touch Preview) You can monitor the sound of a track before loading the track. 1 Connect headphones to the unit. Read more: Front panel (page 26) 2 Touch the waveform displayed in the track list. Monitor the sound from the touched point with your headphones. -
Page 47: Loading A Track To A Deck
Track selection Loading a track to a deck 1 Select a track in the track list. Read more: Selecting a track (page 43) 2 Press the [LOAD 1] or [LOAD 2] button. The track is loaded to the corresponding deck. •... -
Page 48: Using History
Track selection Using History Tracks played for approximately 1 minute are recorded in the History (playback list) (up to 999 tracks). • A new History is automatically created on a storage device (SD, USB) when it’s connected to the unit. •... -
Page 49: Using The Tag List
Track selection Using the Tag List You can tag a track you want to play next or tracks you think will work well in your performance and review them via the Tag List. • One Tag List is created for each storage device (SD, USB) or each rekordbox CloudDirectPlay. - Page 50 Track selection Registering a track to the Tag List 1 Touch an artwork of a track in the track list. A check mark is displayed for the tracks registered to the Tag List. Deleting a track from the Tag List ...
- Page 51 Track selection Converting the Tag List to a playlist A playlist converted from the Tag List is displayed in the [PLAYLIST] category. • You can’t convert the Tag List to a playlist if the rekordbox library isn’t saved on the storage device (SD,USB) or in rekordbox CloudDirectPlay.
-
Page 52: Displaying The Playlist Screen
Track selection Displaying the playlist screen Playlist screen Touch [PLAYLIST] on the launcher screen to display the [PLAYLIST] screen. You can also display the [PLAYLIST] screen from the browse screen (page 31). Playlist Bank Displays the playlist when a playlist is registered to a Playlist Bank (page 53). With Playlist Banks, you can find a playlist without browsing the folder hierarchy. - Page 53 Track selection • Touch on the title row to display the sub-column selection screen and select a sub-column to be displayed. (To set sub-columns you want to display in the selection list, go to [Preferences] in rekordbox.) Deleting a playlist 1 Touch and hold a track list on the [PLAYLIST] screen.
-
Page 54: Playback
Playback Deck section SHIFT button CUE button (page 63) button Plays or pauses a track. Hot Cue (A to H) buttons (page 71) TEMPO slider (page 56) -
Page 55: Play/Pause
Playback Play/pause 1 Press the [ ] button. — During pause: Starts playing the loaded track. — During playback: Pauses the track. • Playback of the next track doesn’t automatically start when [Play Mode] is set to [Single] in the Utility settings (page 109). •... -
Page 56: Slip Mode
Playback Slip mode 1 Touch [SLIP MODE] on the [WAVEFORM] screen to turn Slip If you turn Slip mode on, normal playback continues in the background (but you can’t hear it) when you perform the following operations. When you end the operation, Slip is canceled and normal playback starts from the exact point the track would have reached by then. -
Page 57: Adjusting The Playback Speed Without Changing The Pitch (Master Tempo)
Playback The adjustable range of [WIDE] is ±100%. The track stops when it’s set to -100%. * The value in parentheses indicates the adjustment unit. Adjusting the playback speed without changing the pitch (Master Tempo) If you turn Master Tempo on, you can change the playback speed of a track using the TEMPO slider without changing the pitch. -
Page 58: Recording
Recording You can record the same audio as the output from the [MASTER 1] and [BOOTH/MASTER 2] terminals into a WAV file on a USB storage device. • The recorded file name will be “REC***.WAV” (*** is a 3-digit number). •... -
Page 59: Splitting A Track During Recording
Recording Splitting a track during recording 1 Touch [REC] on the title/status bar during recording. The [REC] panel appears. 2 Touch [ (Track Marks)]. The file is split at the point where [ (Track Marks)] is touched, and the recording continues as a new file from the split point. -
Page 60: Using The Jog Wheel
Using the jog wheel Setting the jog wheel mode 1 Touch [JOG MODE] on the [WAVEFORM] screen to switch the modes. Vinyl mode turns on when the button is turned on. — Vinyl mode : Stops playback with a press on the top of the jog wheel and scratches a track by turning the jog wheel while pressing the top. -
Page 61: Jog Wheel Operations
Using the jog wheel Jog wheel operations You can use the following features in combination with the jog wheel. Function Description Turn the outer section of the jog wheel clockwise during playback to increase the playback speed, and counterclockwise to decrease it. Stop turning it to resume the Pitch Bend normal playback speed. -
Page 62: Adjusting The Playback Starting And Stopping Speeds (For Vinyl Mode)
Using the jog wheel Adjusting the playback starting and stopping speeds (for Vinyl mode) You can adjust the following speeds. – The speed at which playback slows down and stops after the top of the jog wheel is pressed or the [ ] button is pressed –... -
Page 63: Cueing
Cueing You can quickly call up a cue point you have set previously. Setting a cue point 1 Press the [CUE] button during pause. A cue point is set. • Turn the jog wheel during pause to fine-adjust (0.5 frame unit) the pause position. •... -
Page 64: Checking A Cue Point (Cue Point Sampler)
Cueing Checking a cue point (Cue Point Sampler) 1 Jump to a cue point. Read more: Jumping to a cue point (page 63) 2 Press and hold the [CUE] button. Playback continues while pressing the [CUE] button. • Press the [ ] button to continue playback even if you release the [CUE] button. -
Page 65: Calling Up A Saved Cue Point
Cueing Calling up a saved cue point 1 Load a track you have previously saved a cue point for. 2 Touch [ ] on the [WAVEFORM] screen. The [MEMORY CUE] panel appears. 3 Touch [ ] or [ ]. • If a comment has been set to the called up point in rekordbox, the comment is displayed in the track name display. -
Page 66: Setting Auto Cue
Cueing Setting Auto Cue When loading a track or performing Track Search, a cue point can be automatically set to the position immediately before the first sound in the track (skipping any silence at the beginning). 1 Touch [ ] on the [WAVEFORM] screen. The [MEMORY CUE] panel appears. -
Page 67: Looping
Looping You can choose a section of a track to play repeatedly. Setting a loop 1 Turn the [BEAT LOOP] knob to select the number of beats for the length of a loop. 2 Press the [BEAT LOOP] knob. Loop playback starts according to the BPM of the track and the specified number of beats. -
Page 68: Using Active Loop
Looping Using Active Loop Set a saved loop as an Active Loop using rekordbox beforehand. 1 Load a track that has an Active Loop set. After the playback point passes the set point, loop playback automatically starts. Canceling loop playback 1 Press the [BEAT LOOP] knob during loop playback. -
Page 69: Saving A Loop
Looping Saving a loop 1 Set loop points. Read more: Setting a loop (page 67) 2 Touch [ ] on the [WAVEFORM] screen. The [MEMORY CUE] panel appears. 3 Touch [MEM/DEL]. Calling up a saved loop 1 Load a track you have previously saved a loop for. 2 Touch [ ] on the [WAVEFORM] screen. -
Page 70: Deleting A Saved Loop
Looping Deleting a saved loop 1 Call up a saved loop. Read more: Calling up a saved loop (page 69) 2 Touch [ ] on the [WAVEFORM] screen. The [MEMORY CUE] panel appears. 3 Touch [MEM/DEL]. • If you delete a loop set as an Active Loop, the Active Loop is also deleted. -
Page 71: Hot Cues
Hot Cues You can quickly call up a Hot Cue point by pressing the Hot Cue (A to H) buttons and start playback from that point in the track. Hot Cues saved on a storage device (SD, USB) will automatically called up when tracks are loaded. -
Page 72: Starting Playback From A Hot Cue Point
Hot Cues Starting playback from a Hot Cue point 1 Press one of the Hot Cue (A to H) buttons that have a Hot Cue set. Playback stars from the Hot Cue point. • When [On] is set for [Overwrite Current Cue with Hot Cue] in the Utility settings, the point is set as a cue point (page 108). -
Page 73: Beat Jump/Loop Move
Beat Jump/Loop Move You can instantly move the playback point without changing the rhythm of a track that’s playing. Beat section BEAT JUMP buttons The playback point jumps forward or backward by the set number of beats from the point where you press the button. -
Page 74: Quantize (For Deck)
Quantize (for deck) Cue points, loop-in points, loop-out points, and Hot Cue points are automatically set to the closest beat position even if your timing is off the beat when you set them. You can use Hot Cues, loop, reverse playback, and Slip Reverse without breaking the rhythm of the track you are playing. -
Page 75: Beat Sync
Beat Sync If you turn Beat Sync on, tempo (BPM) and beat position of tracks on the unit automatically synchronize. • Beat Sync can’t be used with tracks that haven’t been analyzed by rekordbox. • You can set rekordbox for Mac/Windows as the sync master. For details, see the rekordbox Instruction Manual (page 8). -
Page 76: Using Instant Doubles
Beat Sync Using Instant Doubles You can duplicate a track loaded on DECK 1 or DECK 2 so it plays on the other deck from exactly the same point. 1 Press the [LOAD] button ([LOAD 1] or [LOAD 2]) twice on the deck where you want the duplicate track to start playing. -
Page 77: Beatgrid
Beatgrid You can adjust the beatgrid. • You can’t adjust the beatgrid for tracks that haven’t been analyzed by rekordbox. Adjusting the beatgrid 1 Press and hold the rotary selector on the [WAVEFORM] screen. The Grid Adjust panel appears. • You can also display the Grid Adjust tab by touching the waveform to display the [WAVEFORM] panel then [GRID ADJUST]. -
Page 78: Cloud
Cloud You can use rekordbox CloudDirectPlay if you connect the unit to the internet via wireless LAN (Wi-Fi). Read more: Wireless LAN (Wi-Fi®) connection (page 121) rekordbox CloudDirectPlay With rekordbox CloudDirectPlay, you can load and play audio files you’ve previously uploaded to your cloud storage onto the unit. - Page 79 Cloud Cloud storage service rekordbox CloudDirectPlay uses the cloud storage service (Dropbox) used by Cloud Library Sync. • Cloud Library Sync and rekordbox CloudDirectPlay support Dropbox and Google Drive. This unit only supports Dropbox. If you are using Google Drive, log in to Dropbox from rekordbox and upload audio files to Dropbox to use.
- Page 80 Cloud 4 Turn on [Use rekordbox CloudDirectPlay]. The conversion of the library starts on the cloud server. After the conversion completes, [ Auth] (authentication button) is displayed on the right of the device name in the tree view. • Depending on the number of audio files in the library, it may take some time to convert the library.
- Page 81 Cloud Authentication device for rekordbox CloudDirectPlay To play audio files with the unit via rekordbox CloudDirectPlay, prepare a storage device (SD, USB) to use for authentication. Connect the storage device (SD, USB) to your PC/Mac and perform the authentication procedure below. ...
- Page 82 Cloud Logging in to CloudDirectPlay 1 Connect the authentication storage device (SD, USB) for rekordbox CloudDirectPlay to the unit. If the connected device is valid, the device name is displayed on the [SOURCE] screen. 2 Touch [LOG IN] on the information display for the authentication storage device (SD, USB).
- Page 83 Cloud Playing audio files via rekordbox CloudDirectPlay When rekordbox CloudDirectPlay is selected on the [SOURCE] screen, you can play audio files uploaded to the cloud storage from the browse screen of the unit. • The time it takes to load audio files depends on the speed of your internet connection. You can view the loading progress in the overall waveform on the [WAVEFORM] screen.
- Page 84 Cloud Logging out of rekordbox CloudDirectPlay 1 On the [SOURCE] screen, touch [LOG OUT] on the information display for the authentication storage device (SD, USB). Deauthenticating the storage device (SD, USB) 1 Click (authenticated icon) on the right of the device name in the tree view.
- Page 85 Cloud The website is displayed in the browser. 4 Follow the instructions on the website to deauthenticate the device. • You can’t deauthenticate devices authenticated with other accounts. You’ll always need to perform the procedure with the account which authenticated the device.
-
Page 86: Audio Output
Audio output Follow the procedures below to output and adjust sound. – Outputting sound (page 87) – Adjusting the sound (page 88) – Setting the faders (page 88) Channel section/master section Channel section Channel level indicator Displays the volume level before the sound passes through the channel fader. TRIM knob Adjusts the volume for the channel input sound. -
Page 87: Outputting Sound
Audio output — [MID]: -∞ dB to +6 dB (ISO)/-26 dB to 6 dB (EQ) — [LOW]: -∞ dB to +6 dB (ISO)/-26 dB to 6 dB (EQ) Crossfader Adjusts the volume balance between the channel output sounds according to the crossfader curve specified with [Crossfader Curve] on the [SETTINGS] screen (page 106). -
Page 88: Adjusting The Sound
Audio output Adjusting the master sound volume 1 Turn the MASTER level knob to adjust the volume for the master sound. The master level indicator lights up when the master sound is output. Adjusting the sound 1 Turn the EQ/ISO (HI, MID, LOW) knobs to adjust the volume of each band. - Page 89 Audio output Setting the crossfader 1 Touch [SETTINGS] on the launcher screen. 2 Set the crossfader curve in [Crossfader Curve]. — THRU: Outputs sounds from Deck 1 and Deck 2 regardless of the crossfader position. — : Gradually raises the volume of the sound assigned to the other side as the crossfader is moved from one side (Deck 1 or Deck 2 side) to the other, and decreases the volume of the sound on the side it is moving away from.
-
Page 90: Monitoring Sound
Monitoring sound Headphones section HEADPHONES 1, 2 buttons Selects the channel to output sound from headphones. MIX knob Adjusts the volume balance between the master sound, Touch Preview sound and the channel selected with the [ HEADPHONES 1, 2] buttons. •... -
Page 91: Monitoring With Headphones
Monitoring sound Monitoring with headphones 1 Connect headphones to one of the PHONES terminals. Read more: Front panel (page 26) 2 Press the [CUE] button to select the channel to monitor. • This operation isn’t necessary when monitoring the sound of Touch Preview. •... -
Page 92: Booth Section
Monitoring sound Booth section BOOTH level knob Adjusts the volume for the sound output to a booth monitor. Using a booth monitor 1 Connect a booth monitor to the [BOOTH/MASTER 2] terminals. • [BOOTH/MASTER 2] is shared terminals. When using as booth terminals, set [Booth/Master 2 Setting] to [Booth] in the Utility setting (page 109). -
Page 93: Microphone
Microphone MIC section MIC 1, MIC 2 knobs Adjusts the volume of sound input from the [MIC 1] or [MIC 2] terminal. ON button Sets the microphone sound output. Press while pressing the [SHIFT] button to turn Talkover mode on. Press and hold to turn Push To Talk on. -
Page 94: Using A Microphone
Microphone Using a microphone 1 Connect a microphone to the [MIC 1] or [MIC 2] terminal. • Microphone gain varies depending on the microphone you use. Adjust the sound level according to your microphone with the [ATT.] knob on the rear of the unit before using it (page 77). -
Page 95: Sound Color Fx
Sound Color FX Sound Color FX section CFX knob Adjusts a filter or an effect. EQ/ISO (HI, MID, LOW) knobs (page 86) -
Page 96: Using Sound Color Fx
Sound Color FX Using Sound Color FX Read more: Sound Color FX types and settings (page 97) 1 Touch the [FX] tab on the [WAVEFORM] screen. The effect information panel appears. 2 Touch [CFX]. The [CFX] panel appears. 3 Touch an effect. The selected effect button lights up, and the selected effect is applied to CH 1/CH 2. -
Page 97: Sound Color Fx Types And Settings
Sound Color FX Sound Color FX types and settings You can adjust the following settings with the knobs. Effect/operation Description SPACE Adds reverberation to the original sound. • CFX: Turn counterclockwise to add reverberation to the middle frequency range and low frequency range. Turn clockwise to add reverberation to the middle frequency range and high frequency range. - Page 98 Sound Color FX Effect/operation Description Outputs a ‘crushed’ version of the original sound. CRUSH • CFX: Turn counterclockwise to apply "crushed" effect to the sound. Turn clockwise to crush sound and apply the high-pass filter effect. Outputs filtered sound. FILTER •...
-
Page 99: Beat Fx
Beat FX Beat FX section BEAT button Sets the number of beats for Beat FX. • Press the [ ] button while pressing the [SHIFT] button to manually set BPM (Tap mode). • Press the [ ] button while pressing the [SHIFT] button to automatically set BPM. •... -
Page 100: Using Beat Fx
Beat FX Using Beat FX Read more: Beat FX types and settings (page 103) 1 Touch [FX] on the [WAVEFORM] screen. The effect information panel appears. 2 Touch [BEAT FX]. The [BEAT FX] panel appears. 3 Touch an effect. 4 Touch [CH SELECT] on the effect information panel. - Page 101 Beat FX The [CH SELECT] panel appears. 5 Touch a channel to apply the Beat FX to. 6 Press the [BEAT ] or [BEAT ] button to set a beat fraction to synchronize the effect with. 7 Turn the [LEVEL/DEPTH] knob to adjust the effect. 8 Press the [ON/OFF] button to turn the Beat FX on.
-
Page 102: Setting Bpm Manually (Tap Mode)
Beat FX Setting BPM manually (Tap mode) 1 Tap [ ] while pressing the [SHIFT] button more than twice in time with the beat of the track. BPM is set according to the average time between taps. • The beat fraction is set to 1/1 when you set BPM with the [ ] button, and the length of one beat is set as the effect time. -
Page 103: Beat Fx Types And Settings
Beat FX Beat FX types and settings You can adjust the following settings with the buttons and knobs. Beat FX/operation Description Outputs a delay sound once according to the beat. DELAY • BEAT Delay time (1/16 to 16 beats) • LEVEL/DEPTH: Balance between the original sound and the effected sound Outputs a delay sound several times while attenuating it ECHO... - Page 104 Beat FX Beat FX/operation Description FLANGER Adds a cyclic flanger effect according to the beat. • BEAT Effect rate (1/16 to 16 beats) • LEVEL/DEPTH: Effect level PITCH Changes the pitch of the original sound. • BEAT Pitch of the effect sound (-50 to 100) •...
-
Page 105: Settings
Settings You can change the settings of the unit from the [SETTINGS] screen, the Utility menu, or on the [PORTABILITY] screen. If you save My Settings (function settings of the unit) to a storage device (SD, USB), you can load them to the unit immediately when you arrive in the booth or take over from another DJ, etc. - Page 106 Settings SETTINGS menu *: Factory setting Setting item Description MIC Setting Adjusts the volume of sound (-12 dB to +12 dB (10 kHz)) MIC EQ HIGH input from the [MIC 1] or [MIC 2] terminal. Adjusts the volume of sound (-12 dB to +12 dB (100 kHz)) MIC EQ LOW input from the [MIC 1] or [MIC 2] terminal.
-
Page 107: Changing The Settings From The Utility Screen
Settings Setting item Description Waveform Setting Waveform Color Sets the waveform color. Sets where to display the current playback point (center or Waveform Current left) on the waveform. Position • Setting values: LEFT*, CENTER Changing the settings from the UTILITY screen 1 Touch [SETTINGS] on the launcher screen. - Page 108 Settings Read more: SETTINGS menu (page 106) 4 Select a setting value. • Touch on the title/status bar to close the [UTILITY] screen. Utility menu Deck category *: Factory setting Setting item Description Determines whether or not you can load another track during playback.
- Page 109 Settings Setting item Description Sets playback mode. • Setting values: Continue, Single* Play Mode • [Continue]: Automatically loads the next track when playback reaches the end of a track. • [Single]: Stops playback when playback reaches the end of a track. The next track isn’t automatically loaded. ...
- Page 110 USB port (Type-C). Mic Output to USB • Setting values: Off, On* Sets the audio output when a PC is connected to the unit. Mixer Mode • Setting values: OMNIS-DUO, MIDI Control* General category *: Factory setting Setting item Description Language Sets the display language.
- Page 111 Settings Setting item Description Restores the settings to the factory settings. Default • Setting values: Cancel*, Ok Info category *: Factory setting Setting item Description Version No. Displays the version of the software on the unit. Displays IP address and MAC address for the wireless LAN Wi-Fi Address connection.
-
Page 112: Changing The Settings From The Portability Screen
Settings Changing the settings from the PORTABILITY screen 1 Touch the status display on the title/status bar. The [PORTABILITY] screen appears. 2 Select a setting value. Read more: PORTABILITY menu (page 113) • Touch on the title/status bar to close the [PORTABILITY] screen. - Page 113 Settings PORTABILITY menu *: Factory setting Setting item Description Sets whether to input sound from a mobile device, etc. • Setting values: OFF*, ON Bluetooth Input • You can set [ON] for either [Bluetooth Input] or [Bluetooth Output]. Sets whether to output sound to a mobile device, etc. •...
-
Page 114: Calling Up My Settings Saved On A Storage Device (Sd, Usb)
Settings Calling up My Settings saved on a storage device (SD, USB) You can call up My Settings from a storage device (SD, USB). • You can call up My Settings from rekordbox connected in the PRO DJ LINK network or rekordbox CloudDirectPlay. -
Page 115: Bluetooth ®/Md Connection
Bluetooth connection ®/MD You can input the sound of your mobile device, etc. to the unit via Bluetooth or output sound from the unit to a mobile speaker, etc. Bluetooth section -PAIRING button Press and hold to pair with a Bluetooth device. button Outputs the Bluetooth sound to headphones. -
Page 116: Pairing With A Bluetooth Device (Bluetooth Input)
Bluetooth connection ®/MD Pairing with a Bluetooth device (Bluetooth input) 1 Touch the status display on the title/status bar. The [PORTABILITY] screen appears. 2 Touch [ON] for [Bluetooth Input] to turn it on. 3 Touch for [Bluetooth Input]. The [Bluetooth Input Setting] screen appears. Pairing Name of the connected device (Remove device) - Page 117 Bluetooth connection ®/MD 6 Allow the connection on the unit. The Bluetooth indicator on the unit stops blinking and lights up when the connection is established. • Perform the pairing procedure on a Bluetooth device while the unit is in paring state. If the unit can’t pair with a Bluetooth device within 2 minutes, the Bluetooth indicator turns gray.
-
Page 118: Djing With The Sound From A Mobile Device, Etc
Bluetooth connection ®/MD DJing with the sound from a mobile device, etc. You can DJ with the sound input from a Bluetooth device. 1 Select a Bluetooth device on the [SOURCE] screen and touch [INPUT PLAYBACK] to turn it on. The playable range (up to 10 minutes) is displayed on the meter. -
Page 119: Connecting To A Mobile Speaker, Etc. (Bluetooth Output)
Bluetooth connection ®/MD Connecting to a mobile speaker, etc. (Bluetooth output) 1 Touch the status display on the title/status bar. The [PORTABILITY] screen appears. 2 Touch [ON] for [Bluetooth Output] to turn it on. 3 Touch for [Bluetooth Output]. The [Bluetooth Output Setting] screen appears. Name of the connected device (Bluetooth connection icon) (Remove device) - Page 120 Bluetooth connection ®/MD 5 Perform the pairing procedure on a Bluetooth device. 6 Allow the connection on the unit. The Bluetooth indicator on the unit stops blinking and lights up when the connection is established. • You may need to enter a passcode, etc., depending on the connected device. Follow the instructions on the screen to connect.
-
Page 121: Wireless Lan (Wi-Fi ) Connection
Wireless LAN (Wi-Fi ) connection ® 1 Touch the status display on the title/status bar. The [PORTABILITY] screen appears. 2 Touch [ON] for [Wi-Fi] to turn it on. 3 Touch for [Wi-Fi]. The unit searches the network and available SSIDs are listed. (Wi-Fi connection icon) SSID list 4 Touch the network (SSID) you want to use. -
Page 122: Checking The Internet Connection
® Wireless LAN (Wi-Fi ) connection The password input screen appears. 5 Enter a password and touch [CONNECT]. If the connection succeeds, [CONNECTED] is displayed in the network name (SSID) field and it’s displayed at the top of the list. •... -
Page 123: Using Dj Software
• For details on the unit’s MIDI messages, visit the URL below. alphatheta.com/support/ • Install DJ software and configure the audio and MIDI settings on a PC/Mac beforehand. • If you rekordbox, you don’t need to configure MIDI settings. - Page 124 Using DJ software • Some buttons on the unit can’t be used for controlling a DJ application. • Control mode turns off when a track is loaded to the unit from a device other than the currently communicating device that’s running the DJ software.
-
Page 125: Specifications
Specifications AC adapter Power requirements...............AC 100 V – 240 V, 50 Hz/60 Hz Rated current ........................1.2 A Rated output ............DC 5 V/3.0 A, DC 9 V/3.0 A, DC 12 V/3.0 A, DC 15 V/3.0 A, DC 20 V/2.25 A General –... - Page 126 Specifications Standard input level/Input impedance MIC......................-57 dBu / 3.3 kΩ Standard output level/Load impedance/Output impedance MASTER 1 ................+6 dBu/10 kΩ/390 Ω or less MASTER 2/BOOTH ...............+2 dBu/10 kΩ/1 kΩ or less PHONES ................... +8 dBu/32 Ω/2 Ω or less Rated output level/Load impedance MASTER 1 ....................+25 dBu/10 kΩ...
- Page 127 * Transmission distances are a guideline. Transmission distance may change depending on the surrounding environment. Specifications of external power supply (for European Union customers) Manufacturer’s name ..............ALPHATHETA EMEA LIMITED Commercial registration number................9230173 Address....... Unit 39, Tileyard Studios, Tileyard Road, London, N7 9AH, U.K.
-
Page 128: Additional Information
Additional information Troubleshooting If you think something is wrong with the unit, check the information below and refer to the [FAQ] for the OMNIS-DUO at the URL below. alphatheta.com/support/ • Inspect devices connected to the unit. • Press the power button for more than 15 seconds to forcibly turn the power off. If you forcibly turn the power off, the device's management data may be deleted or the storage device (SD, USB) may not be able to be read. - Page 129 Additional information The wireless LAN router (access point) can’t be found. • If the unit and thewireless LAN router (access point) are placed far apart, bring them closer together. • If there is an obstacle between this unit and the wireless LAN router (access point), remove Bluetooth ...
-
Page 130: Lcd Display
Additional information The capacity of the storage device (SD, USB) is insufficient. • When using rekordbox CloudDirectPlay, tracks loaded from Dropbox are automatically saved temporarily on a storage device (SD, USB). Enough free space is needed to save the loaded tracks on the storage device (SD, USB). The reference file size for a track is as follows (it depends on the length of the track and the file format). -
Page 131: Battery
Additional information Touch screen • Operate the touch screen with your fingertip. Do not press it with excessive force. • Do not operate the touch screen with hard and sharp-pointed objects such as a ballpoint pen, mechanical pencil, or sharp fingernail. Battery Cautions on battery charge ... -
Page 132: Trademarks And Registered Trademarks
• rekordbox™ is a trademark or registered trademark of AlphaTheta Corporation. • PRO DJ LINK™ is a trademark or registered trademark of AlphaTheta Corporation. • Mac, macOS, iPadOS and Finder are trademarks of Apple Inc., registered in the U.S. and other countries and regions. -
Page 133: Cautions On Copyrights
• The Bluetooth word mark and logos are registered trademarks owned by Bluetooth SIG, Inc. and any use of such marks by AlphaTheta Corporation is under license. Other trademarks and trade names are those of their respective owners. Other product, technology and company names, etc. mentioned herein are trademarks or registered trademarks of their respective owners.
Need help?
Do you have a question about the OMNIS-DUO and is the answer not in the manual?
Questions and answers