Table of Contents

Related Manuals for JVC KD-G385


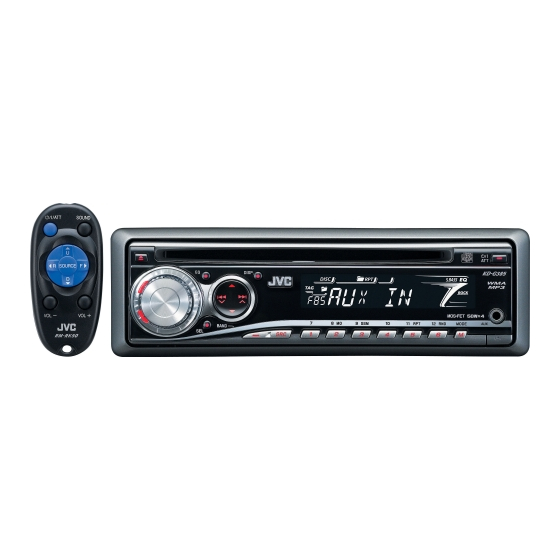
Summary of Contents for JVC KD-G385
- Page 1 All manuals and user guides at all-guides.com CD RECEIVER KD-G386/KD-G385 KD-G386/KD-G385 For canceling the display demonstration, see page 6. For installation and connections, refer to the separate manual. INSTRUCTIONS GET0466-005A [UT]...
- Page 2 All manuals and user guides at all-guides.com Thank you for purchasing a JVC product. Please read all instructions carefully before operation, to ensure your complete understanding and to obtain the best possible performance from the unit. IMPORTANT FOR LASER PRODUCTS 1.
-
Page 3: Table Of Contents
If you press M MODE, the unit goes into functions mode, ∞ then the number buttons and buttons work as Control panel — ..4 KD-G386/KD-G385 different function buttons. Remote controller — ... 5 RM-RK50 Ex.: When number button 2 works as Getting started ........ -
Page 4: Kd-G386/Kd-G385
All manuals and user guides at all-guides.com Control panel — KD-G386/KD-G385 Parts identification Display window Control dial RND (random) button (eject) button M MODE button Loading slot (control panel release) button EQ (equalizer) button Disc information indicators— DISP (display) button... -
Page 5: Rm-Rk50
All manuals and user guides at all-guides.com Remote controller — Main elements and features RM-RK50 Installing the lithium coin battery (CR2025) Aim the remote controller directly at the remote sensor on the unit. Make sure there is no obstacle (standby/on/attenuator) button in between. -
Page 6: Getting Started
All manuals and user guides at all-guides.com Getting started Basic settings • See also “General settings — PSM” on pages 11 and Basic operations Turn on the power. Ÿ * You cannot select “CD” as the playback source if 1 Canceling the display demonstrations there is no disc in the unit. -
Page 7: Radio Operations
All manuals and user guides at all-guides.com Radio operations Storing stations in memory You can preset six stations for each band. FM station automatic presetting — Ÿ SSM (Strong-station Sequential Memory) Lights up when receiving an FM stereo Select the FM band (FM1 – FM3) you want to broadcast with sufficient signal strength. -
Page 8: Disc Operations
All manuals and user guides at all-guides.com To fast-forward or reverse the track Listening to a preset station Select the preset station (1 – 6) you want. To go to the next or previous tracks To go to the next or previous folders (only for MP3 or WMA discs) To check the other information while listening to an FM or AM station... - Page 9 All manuals and user guides at all-guides.com While playing an MP3 or a WMA disc Other main functions • When “TAG DISP” is set to “TAG ON” Skipping tracks quickly during play (see page 12) • For MP3 or WMA discs, you can skip tracks within the same folder.
-
Page 10: Sound Adjustments
All manuals and user guides at all-guides.com 7 Random play Adjusting the sound You can adjust the sound characteristics to your Mode Plays at random preference. FLDR RND * : All tracks of the current folder, then tracks of the next folder and so on. -
Page 11: External Component Operations
All manuals and user guides at all-guides.com External component General settings — PSM operations You can change PSM (Preferred Setting Mode) items listed in the table that follows. You can connect an external component to the AUX (auxiliary) input jack on the control panel. Select a PSM item. - Page 12 All manuals and user guides at all-guides.com Indications Item Selectable settings, [reference page] ( : Initial) DEMO • DEMO ON : Display demonstration will be activated automatically if no Display demonstration operation is done for about 20 seconds, [6]. • DEMO OFF : Cancels.
-
Page 13: Maintenance
All manuals and user guides at all-guides.com To keep discs clean Maintenance A dirty disc may not play correctly. If a disc does become dirty, wipe it with How to clean the connectors a soft cloth in a straight line from center Frequent detachment will deteriorate the connectors. -
Page 14: More About This Unit
All manuals and user guides at all-guides.com • MP3 and WMA “tracks” (words “file” and “track” are More about this unit used interchangeably) are recorded in “folders.” • While fast-forwarding or reversing on an MP3 or Basic operations WMA disc, you can only hear intermittent sounds. Turning on the power Playing a CD-R or CD-RW •... - Page 15 All manuals and user guides at all-guides.com • This unit can display only one-byte characters. No Changing the source other characters can be correctly displayed. • If you change the source, playback also stops • This unit can play back MP3/WMA files meeting the (without ejecting the disc).
-
Page 16: Troubleshooting
All manuals and user guides at all-guides.com Troubleshooting What appears to be trouble is not always serious. Check the following points before calling a service center. Symptoms Remedies/Causes • Sound cannot be heard from the speakers. • Adjust the volume to the optimum level. •... -
Page 17: Specifications
All manuals and user guides at all-guides.com Specifications AUDIO AMPLIFIER SECTION CD PLAYER SECTION Maximum Power Output: Type: Compact disc player Front/Rear: 50 W per channel Signal Detection Non-contact optical pickup System: (semiconductor laser) Continuous Power Output (RMS): Number of Channels: 2 channels (stereo) Front/Rear: 19 W per channel into 4 Ω, 40 Hz to 20 000 Hz at no more... - Page 18 All manuals and user guides at all-guides.com Having TROUBLE with operation? Please reset your unit Refer to page of How to reset your unit EN, CT © 2006 Victor Company of Japan, Limited 1006DTSMDTJEIN...
- Page 19 注意: Notes: • 把保險絲更換為額定負荷值的保險絲。如果保險絲經常燒壞,請向 JVC 汽車音響分銷商詢問。 • Replace the fuse with one of the specified rating. If the fuse blows frequently, consult your JVC car audio • 後置和前置揚聲器的最大輸入功率應大於 50 W,其阻抗為 4 Ω 8 Ω。如果最大功率小於 50 W, dealer. 請調校“AMP GAIN”設定值,以防止揚聲器損壞。(參閱使用說明書的第 12 頁。)...
- Page 20 INSTALLATION (IN-DASH MOUNTING) The following illustration shows a typical installation. If you have any questions or require information 下面的圖解表示了典型的安裝程序。如果您有問題,或需要有關配套元件的資料,請向 JVC regarding installation kits, consult your JVC car audio dealer or a company supplying kits. 汽車音響分銷商或配套元件供應公司詢問。 • If you are not sure how to install this unit correctly, have it installed by a qualified technician.
- Page 21 All manuals and user guides at all-guides.com 中文 ENGLISH 電路連接 ELECTRICAL CONNECTIONS Typical connections / 典型的接線方法 Before connecting: Check the wiring in the vehicle carefully. Incorrect connection may cause serious 接線前:仔細檢查汽車內的線路。不正確的接線會導致本機嚴重損壞。 damage to this unit. 電源線的引線和車身的連接器引線在顏色上可能有所不同。 The leads of the power cord and those of the connector from the car body may be different in color. 依照下圖所示之次序連接電源線的顏色導線。...
- Page 22 將“L/O MODE”設定為“REAR”(參閱使用說 To the remote lead of other equipment or automatic antenna if any 明書的第 12 頁。) 連接至其他裝置上的遙控導線或自動天線(若有裝設) You can connect a power amplifier for rear speakers. 您可為後置揚聲器連接功率放大器。 JVC Amplifier JVC 功率放大器 Rear speakers 後置揚聲器 Front speakers 前置揚聲器 Set “L/O MODE” to “WOOFER” (See page 12 of the INSTRUCTIONS.)