Table of Contents
Advertisement
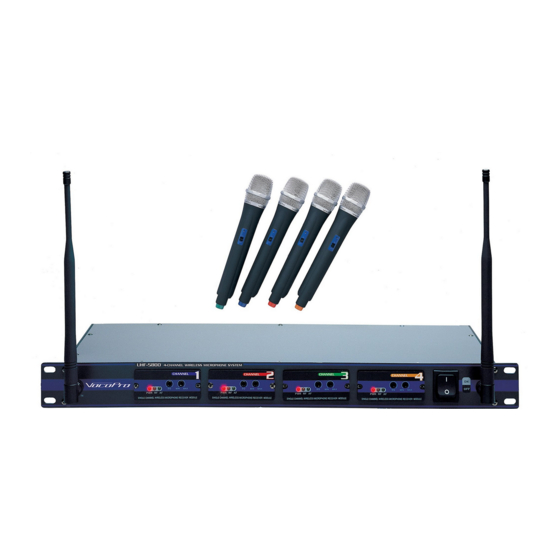
THE SINGER'S ULTIMATE CHOICE
Features:
• 4 mic outputs
• 4 wireless handheld mics included
• Individual Volume controls for precise vocal balancing
• 4 independent field-replaceable Modules (no need for tools)
• Interference-resistant UHF Band operation from 730 MHZ - 790 MHz
• Rugged 1 RU metal receiver chassis
• Battery life: 12 hours
• Dimensions 18.9" (W) x 3.9" (D) x 1.8" (H)
UHF-5800
Advertisement
Table of Contents

Related Manuals for VocoPro UHF-5800


Summary of Contents for VocoPro UHF-5800
- Page 1 • 4 independent field-replaceable Modules (no need for tools) • Interference-resistant UHF Band operation from 730 MHZ - 790 MHz • Rugged 1 RU metal receiver chassis • Battery life: 12 hours • Dimensions 18.9” (W) x 3.9” (D) x 1.8” (H) UHF-5800...
-
Page 2: Table Of Contents
Microphone basics ... 7 Before getting started ... 8 Mounting ... 9 Getting connected ... 10 Front and rear panel descriptions and functions ... 11 Maintenance procedures ... 12 UHF-5800 & stage monitor/P.A. loudspeakers ... 13 Operations ... 13 Troubleshooting ... 14... -
Page 3: Safety Instructions
Safety Instructions CAUTION RISK OF SHOCK CAUTION: To reduce the risk of electric shock, do not remove cover (or back). No user- serviceable parts inside. Only refer servicing to qualified service personnel. Explanation of Graphical Symbols The lightning flash & arrowhead symbol, within an equilateral triangle, is intended to alert you to the presence of danger. -
Page 4: Fcc Information
UNIT!: This product, when installed as indicated in the instructions contained in this manual, meets FCC requirements. Modifications not expressly approved by Vocopro may void your authority, granted by the FCC, to use this product. 2. IMPORTANT: When connecting this product to accessories and/or another product use only high quality shielded cables. -
Page 5: Welcome
Club VocoPro for Karaoke news and events, chat rooms, club directories and even a KJ Service directory! We look forward to hearing you sound like a PRO, with VocoPro, your ultimate choice in Karaoke entertainment. Please record the model number and serial number below, for easy reference, in case of loss or theft. These numbers are located on the rear panel of the unit. -
Page 6: Listening For A Lifetime
Now it’s time to consider how you can maximize the fun and excitement your equipment offers. VocoPro and the Electronic Industries Association’s Consumer Electronics Group want you to get the most out of your equipment by playing it at a safe level. -
Page 7: Specifications
Specifications Receiver Carrier Frequency Range: UHF 730~790MHz Oscillation Mode: Quartz Controlled Fixed Frequency Stability: 10 PPM Sensitivity: 1.6uV @ sinad =12dB Max. Deviation Range: 50Hz S/N Ratio:>105dB T.H.D.: <0.5% @ 1kHz Image rejection: 85dB typical Spurious Rejection: 75dB typical Frequency Response: 40Hz~16kHz Squelch Control: dual-squelch circuit Max. -
Page 8: Microphone Basics
Microphone basics Microphone Position The UHF-5800 is ideal for close-up vocals and can be held in the hand or mounted on a mic stand. The most common applications and placement techniques are listed below. Keep in mind that microphone technique is largely a matter of personal taste, and there is no one “correct”... -
Page 9: Before Getting Started
Before getting started Before starting any installation procedures, it is recommend to completely unpack all the package contents. The original packaging should be kept in the event that re-shipping is needed. Upon unpacking the UHF-5800, you should have received the following items:... -
Page 10: Mounting
3. While aligned, use rack case screws (not included) in the order shown below to stabilize the UHF-5800 in its space, using the “X” rotation (numbered below) will ensure even tension and plush alignment. -
Page 11: Getting Connected
Getting connected System Connection 1. Connect the AC POWER ADAPTER to the UHF-5800 receiver’s POWER INPUT connector, then plug the ADAPTER into a compatible AC electrical outlet. 2. Connect the UHF-5800’s receiver to a sound system, mixer or amplifier’s microphone input(s) with either one ¼”... -
Page 12: Front And Rear Panel Descriptions And Functions
1. ANTENNAS - Provide both RF and AF signals. 2. POWER (LED) - Indicates whether the UHF-5800 is ON or OFF. When it is lit, the power is ON. 3. RF (LED) - Lights when RF signals are received from the microphone channels. -
Page 13: Maintenance Procedures
Maintenance procedures Handheld Microphone Battery Installation 1. To remove the lid, press down on the tab and slide the lid down towards the bottom of the mic. 2. Insert 2 fresh 1.5-volt AA alkaline batteries. Make sure the batteries are inserted in the right direction according to polarity (+/-). -
Page 14: Uhf-5800 & Stage Monitor/P.a. Loudspeakers
Operations 1. Press the POWER button on the UHF-5800 receiver’s front panel. The power LED on the receiver will be BLUE. 2. Adjust the receiver’s VOLUME controls to approximately 50%. -
Page 15: Troubleshooting
Troubleshooting Problems No sound output, RF/AF LED(s) are not glowing Received signal is noisy or contains extraneous sounds with the microphone(s) ON. There is noise coming from the receiver with the microphones turned OFF. Momentary loss of sound as microphone(s) are moved throughout the operating range. - Page 16 Vocopro 2004 V 1.0 WWW.VOCOPRO.COM...
Need help?
Do you have a question about the UHF-5800 and is the answer not in the manual?
Questions and answers