Table of Contents
Advertisement
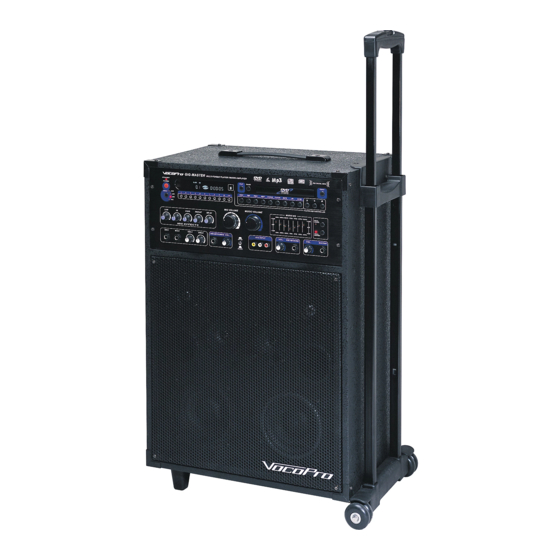
THE SINGER'S ULTIMATE CHOICE
Features:
•
All-in-one design pumps 180W of power through a 6-speaker cabinet
(90W + 90W peak to peak)
•
Multi-format player supports standard CD, DVD, CDG, VCD, MP3, PHOTO-CD, CD-R
and CD-RW formats
•
Dedicated 1/4" Guitar and Keyboard Inputs with individual Volume controls
•
Two 1/4"/XLR Microphone inputs with Bass, Treble, and individual Volume controls
•
Digital Echo with Repeat and Delay controls for vocal enhancement
•
13-step Digital Key Controller to transpose the natural key of disc player audio
•
Vocal Cancel and Partner modes for activating or removing lead vocals from
Multiplex media
•
7-band equalizer to fine tune your tone
•
Internal/External speaker selector with external speaker jacks
•
Remote control for easy operation
•
Inputs/Outputs: 2 pair RCA in and 2 pair RCA out, 2 VIDEO in and out and 1 pair
XLR Balanced Audio out.
•
110V-230V and NTSC/PAL compatible for worldwide use
GIG-MASTER
Advertisement
Table of Contents
Troubleshooting

Summary of Contents for VocoPro GIG-MASTER
- Page 1 Internal/External speaker selector with external speaker jacks • Remote control for easy operation • Inputs/Outputs: 2 pair RCA in and 2 pair RCA out, 2 VIDEO in and out and 1 pair XLR Balanced Audio out. • 110V-230V and NTSC/PAL compatible for worldwide use GIG-MASTER...
-
Page 2: Table Of Contents
Table of Contents Safety instructions ... 2 FCC Information ... 3 Welcome ... 4 Listening For a Lifetime ... 5 Specifications ... 6 Getting Connected AV Inputs ... 7 Audio Outputs ... 7 Video Outputs ... 7 DVD Outputs ... 8-9 Microphone/Instrument Connections ... -
Page 3: Safety Instructions
Safety Instructions CAUTION RISK OF SHOCK CAUTION: To reduce the risk of electric shock, do not remove cover (or back). No user- serviceable parts inside. Only refer servicing to qualified service personnel. Explanation of Graphical Symbols The lightning flash & arrowhead symbol, within an equilateral triangle, is intended to alert you to the presence of danger. -
Page 4: Fcc Information
UNIT!: This product, when installed as indicated in the instructions contained in this manual, meets FCC requirements. Modifications not expressly approved by Vocopro may void your authority, granted by the FCC, to use this product. 2. IMPORTANT: When connecting this product to accessories and/or another product use only high quality shielded cables. -
Page 5: Welcome
Club VocoPro for Karaoke news and events, chat rooms, club directories and even a KJ Service directory! We look forward to hearing you sound like a PRO, with VocoPro, your ultimate choice in Karaoke entertainment. Please record the model number and serial number below, for easy reference, in case of loss or theft. These numbers are located on the rear panel of the unit. -
Page 6: Listening For A Lifetime
Now it s time to consider how you can maximize the fun and excitement your equipment offers. VocoPro and the Electronic Industries Association s Consumer Electronics Group want you to get the most out of your equipment by playing it at a safe level. -
Page 7: Specifications
STEP PAL/NTSC PROG RESUME VOCAL/P VOCAL/C Digital Key Control THE SINGER'S ULTIMATE CHOICE If you find that any of the items mentioned above are missing from the box, please contact VocoPro before proceeding. Quantity POWER SETUP TITLE PAUSE MUSIC PREV... -
Page 8: Getting Connected
Using either the yellow RCA plug from the included RCA patch cable or a separate RCA patch cable, connect one end to the RCA VIDEO OUTPUT jack on the GIG-MASTER and connect the other end to the VIDEO INPUT jack on our TV or monitor device. Both VIDEO OUTPUTS can be connected simultaneously. - Page 9 Connecting to a Dolby Pro Logic Amplifier The GIG-MASTER allows DVD audio output for 5.1 or 7.1 configurations. With a 5.1 Amplifier, you will need six RCA patch cables. Connect the plug from one side of each cable to the ML, CEN, SL, MR, SW and SR outputs on the GIG-MASTER.
- Page 10 Using an S-Video cable, connect one end to the GIG-MASTER’s S-VIDEO OUTPUT jack and connect the other end to the S-VIDEO IN jack on your television. Using a VGA cable, connect one end to the GIG-MASTER’s VGA OUTPUT jack and connect the other end to the VGA IN jack on your HDTV/VIDEO monitor. See above.
- Page 11 To connect MICROPHONES via ¼” mic cables, connect the XLR-end of the cable into the MICROPHONE until it locks into place and connect the ¼” plug into either the MIC 1 or 2 jack on the GIG-MASTER. To connect MICROPHONES via XLR mic cables, attach the XLR “female” end of the cable into the “male”...
-
Page 12: Ac Devices
By using the built-in EFFECT LOOP you can add external effects to vocals and/or music without compromis- ing the quality of the original signal. We have equipped the GIG-MASTER with 3 “Loop Bars” to fill all the EFFECT LOOP inputs and outputs. The Loop Bar for the MIC IN/OUT EFFECT LOOP enables the internal MIC EFFECTS, and without this bar or other effect device in place, there will be no mic signal output. -
Page 13: Front Panel
NOTE: When in STANDBY mode, the GIG-MASTER is not completely powered down and still contains residual power. This button will not turn the GIG-MASTER on if the MAIN POWER switch on the rear panel is switched off. To completely turn the power off, use the MAIN POWER switch on the rear panel of the GIG-MASTER. - Page 14 17. DISC TRAY - This is where discs are placed for playback. The DISC TRAY is operated using the EJECT button on the GIG-MASTER or the OPEN/CLOSE button on the remote. 18. DIGITAL KEY CONTROL - These buttons direct the DIGITAL KEY CONTROLLER to either raise, lower or reset the musical key of audio from the disc player.
- Page 15 Front Panel Cont... 20. LOW - This control increases/decreases the amount of LOW frequency response applied to the MASTER VOLUME output. 21. HI - This control increases/decreases the amount of HI frequency response applied to the MASTER VOLUME output. 22. ECHO - This control adjusts the level of ECHO applied to the MIC channels. Turn control clockwise to INCREASE and counter-clockwise to DECREASE the level of ECHO.
-
Page 16: Front Panel
Front Panel Cont... 32. EQ ON/OFF - This button is used to turn the 7-band Graphic Equalizer ON and OFF. Press the EQ button in to activate the equalizer. In the out position, the equalizer is bypassed. 33. MUSIC VOLUME control - This control increases/decreases the MUSIC VOLUME level. Turn clockwise to increase MUSIC VOLUME and counter-clockwise to decrease the MUSIC VOLUME. -
Page 17: Rear Panel
Doing so may cause severe damage to the unit and void your product warranty. 9. FUSE terminal - This terminal houses the GIG-MASTER’s main system FUSE. NOTE: If fuse replacement is necessary, only replace with the same type and rating of fuse. -
Page 18: Rear Panel
Speacker Selector 10. MAIN POWER switch. This switch turns the GIG-MASTER’s MAIN POWER On and Off. NOTE: The red POWER /STANDBY button on the front panel will not turn the GIG-MASTER on if the MAIN POWER switch is switched OFF. -
Page 19: Remote Control
3. AV 1/2/3 - Use these buttons to select between the GIG- MASTER’s three A/V INPUTs. 4. POWER - This button is used to turn the GIG-MASTER ‘ON’ or place it in STANDBY mode. NOTE: When in STANDBY mode, the GIG-MASTER is not completely powered down and still contains residual power. - Page 20 Remote Control: Description and Functions Cont... OPEN/CLOSE POWER RETURN SETUP ENTER MENU TITLE PLAY STOP PAUSE MUSIC B.SCAN F.SCAN PREV NEXT LANG SUBTITLE ANGLE SLOW STEP REPEAT PAL/NTSC TIME ZOOM PROG RESUME MODE MUTE VOCAL/P Digital Key Control VOCAL/C THE SINGER'S ULTIMATE CHOICE 13.
- Page 21 33. TIME - Press this button to manually input a TRACK or TIME MARKER that the GIG-MASTER will immediately start playback from. 34. PROGRAM - Press this button to enter track PROGRAM mode.
- Page 22 Using the Remote Control When operating the remote control, point the top of the remote control toward the GIG-MASTER’s remote sensor on the front panel and ensure that there is a clear line of sight between the remote control and GIG-MASTER void of obstacles in order to prevent signal deflection.
-
Page 23: Operations
When the right channel is bypassed and the left channel is split to both sides, the vocals disappear, leaving the music only. The L/R button on the GIG-MASTER’s front panel and remote control allows you to select through 4 audio playback modes: LEFT CHANNEL ONLY, RIGHT CHANNEL ONLY, LEFT/RIGHT CHANNELs MIXED and STEREO. - Page 24 Operations Displaying the Elapsed/Remaining Time While the disc is playing, pressing the OSD button on the remote control will display the disc’s playback sta- tus. Press the OSD button to cycle between TOTAL (disc time) REMAINING, SINGLE (track time) REMAINING, TOTAL (disc time) ELAPSED , and SINGLE (track time) ELAPSED.
- Page 25 • The maximum allowable depth of a nested folder is 127, including files. • If a disc contains both audio as well as MP3 tracks, it will not play in the GIG-MASTER. • Multi-session discs are limited to a total of 20 sessions.
- Page 26 Notes on Karaoke Media There are various types of Karaoke media available for playback with the GIG-MASTER. You can perform Kara- oke with DVD, MP3, CDG and VCD formats. The thing to remember is how each type differs as far as audio channels and video support.
- Page 27 Operations While the VCD format is not as popular in North America as it is in other countries, it remains an excellent format to be used for Karaoke. Because video is not limited to 16 colors (as with CDG), VCDs tend to have motion video behind the lyrics instead of a monotone screen, making them a bit more attractive to party atmospheres.
- Page 28 Operations VIEWING VCDS Tips on VCD Discs There are two types of VCDs: VCD 1/1.1 Format This format of VCD has no menu, track search and other video features available, as this format does not support PBC. The same as with audio CD’s, these discs will auto-play with full motion-picture audio and video, but with no support for menus and custom track selection VCD 2.0 Format 2.0 formatted VCDs are equipped with PBC support.
-
Page 29: Setting Your Preferences
Operations Step Mode To ENTER STEP MODE during playback: 1. Press the STEP button. Each press, the program advances one frame. There is no audio during STEP playback. To RETURN to normal playback: 1. Press PLAY Slow Playback To enter SLOW MODE during playback: 1. -
Page 30: Audio Setup Page
7. LAST MEMORY When ON is chosen, the GIG-MASTER will retain the last position of playback in its memory. This feature is cancelled when the power is turned off. When OFF is chosen, the last position of playback will not be re- tained. -
Page 31: Video Setup Page
Operations 3. DOLBY DIGITAL Setup When set to “Stereo”, the player will output the left and right audio channels independently. When set to “L-Mono”, the player will output the left channel to both left and right, when set to “R-Mono” the player will output the right channel to both left and right, and when set to “Mix-Mono”, the left and right channels will be mixed and output to both left and right •... -
Page 32: Preference Page
These classes help to control the types of DVDs that the family watches. There are up to 8 censorship classes for DVDs. 7. DEFAULT Resets all of the GIG-MASTER’s settings to the original manufacturer’s settings. NOTE: Use this only when completely necessary as you will lose all of your personal settings. Password Setup Page 1. -
Page 33: Troubleshooting
The remote control does not work, or does not work correctly. Solutions make sure the power cord is plugged firmly into the back of the GIG-MASTER and into a live outlet. Is there condensation inside the DISC PLAYER? Are the video connections firmly attached? -
Page 34: Troubleshooting
Is the treble turned too high? (Turn down the treble level) Is the cable not plugged in firmly to the mic/instrument input (on the GIG-MASTER or output (on the mic/instrument)? (Make sure the cables are plugged in firmly) Are the audio connections firmly attached? - Page 35 Vocopro 2004 V 1.0 WWW.VOCOPRO.COM...
Need help?
Do you have a question about the GIG-MASTER and is the answer not in the manual?
Questions and answers
DVD tray won’t open
The dvd tray will not open