
Related Manuals for Klarstein BELLA CAFE


Summary of Contents for Klarstein BELLA CAFE
- Page 1 BELLA CAFÉ Espressomaschine Espresso Maker Cafetera espreso Cafetière expresso Macchina per espresso 10045450 10045456 www.klarstein.com...
-
Page 3: Table Of Contents
Sehr geehrter Kunde, wir gratulieren Ihnen zum Erwerb Ihres Gerätes. Lesen Sie die folgenden Hinweise sorgfältig durch und befolgen Sie diese, um möglichen Schäden vorzubeugen. Für Schäden, die durch Missachtung der Hinweise und unsachgemäßen Gebrauch entstehen, übernehmen wir keine Haftung. Scannen Sie den folgenden QR-Code, um Zugriff auf die aktuellste Bedienungsanleitung und weitere Informationen rund um das Produkt zu erhalten. -
Page 4: Sicherheitshinweise
SICHERHEITSHINWEISE • Lesen Sie diese Bedienungsanleitung sorgfältig durch, um Gefahren durch physische Beschädigung, Brand, elektrischen Stromschlag, Verletzungen und Sachschäden zu vermeiden. Bewahren Sie die Bedienungsanleitung zum späteren Nachschlagen auf. • Prüfen Sie vor dem Gebrauch, ob die Netzspannung mit der angegebenen Spannung auf dem Typenschild des Geräts übereinstimmt. - Page 5 • Stellen Sie vor der Verwendung des Gerätes sicher, dass der Wassertank des Geräts stets mit der für die vorgesehene Anwendung erforderlichen Wassermenge befüllt ist, um Schäden am Gerät zu vermeiden. Wenn Sie Wasser in den Wassertank einfüllen, achten Sie darauf, dass der Füllstand die „MAX“-Markierung nicht überschreitet.
-
Page 6: Geräteübersicht
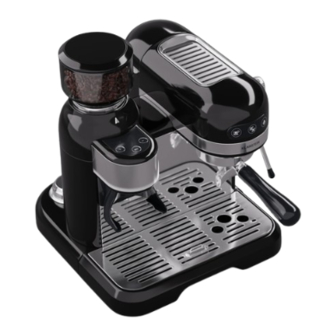
GERÄTEÜBERSICHT Deckel des Displayanzeige Kaffeebohnenbehälters Kaffeebohnenbehäter Handgriff Bedienfeld für das Mahlwerk Dampfrohr Halterung für den Siebträger Ein/Aus-Taste Tropfblech Schwimmer Tropfschale Warmhalteplatte Wassertank-Deckel Stampfer Dampfregler Filtersieb für eine Tasse Kaffee Wassertank Filtersieb für zwei Tassen Kaffee Hinweis: Die Espressomaschine darf nur mit gemahlenen Kaffeebohnen/ Kaffeepulver verwendet werden und dient ausschließlich der Zubereitung von Kaffee und Kaffeegetränken (z. -
Page 7: Verwendung Der Kaffeemühle
VERWENDUNG DER KAFFEEMÜHLE Vor dem ersten Gebrauch • Wischen Sie das Gehäuse und den Kaffeebohnenbehälter mit einem sauberen, feuchten Tuch ab, bevor Sie die Kaffeemühle zum ersten Mal benutzen. • Reinigen Sie den Kaffeepulverbehälter und den Deckel mit warmem Seifenwasser, spülen Sie ihn ab und trocknen Sie ihn ab. Kaffeebohnen mahlen Richten Sie den vorstehenden Teil des Kaffeebohnenbehälters auf die Nut am Gehäuse der Espressomaschine aus und drehen Sie ihn dann... - Page 8 Der für die Kaffeezubereitung einer Tasse Espresso mit der Espressomaschine am besten geeignete Mahlgrad wird mit Stufe 5 erreicht. Tipps für die Verwendung des Mahlwerks Grob gemahlener Kaffee wird in der Regel für Filtersiebe verwendet, mittelgrob gemahlener Kaffee eignet sich im Allgemeinen für Tropfkaffeekannen und Dampfdruck-Kaffeeautomaten, während fein gemahlener Kaffee in der Regel für Druck-Kaffeeautomaten mit Pumpenantrieb geeignet ist.
-
Page 9: Inbetriebnahme Der Espressomaschine
INBETRIEBNAHME DER ESPRESSOMASCHINE Vor dem ersten Gebrauch Öffnen Sie die Verpackung und nehmen Sie die Espressomaschine heraus. Überprüfen Sie, ob das Zubehör vollständig ist, und reinigen Sie alle abnehmbaren Teile. Nehmen Sie den Wassertank heraus und entfernen Sie die rote Silikonkappe am Wasserauslass des Wassertanks. - Page 10 Stellen Sie eine Kaffeetasse auf das abnehmbare Tropfblech und richten Sie sie auf den Kaffeeauslauf aus. Stecken Sie das Netzkabel in eine geerdete Steckdose. Drücken Sie die Ein/Aus-Taste. Alle Anzeigeleuchten blinken und das Gerät beginnt mit dem Vorheizen. Wenn die Anzeigeleuchten permanent leuchten, ist das Vorheizen abgeschlossen.
-
Page 11: Bedienung Der Espressomaschine
BEDIENUNG DER ESPRESSOMASCHINE Bedienfeld Tasten/Anzeigen Dampf-Drehregler Einzel- Doppel- Dampf/ tasse tasse Vorheizen Bedienfunktionen • Drücken Sie die Ein/Aus-Taste und auf dem Display Ein/Aus leuchten etwa 1 Sekunde lang nacheinander die folgenden Anzeigen auf: „Einzeltasse“ > (Hinweis: „Doppeltasse“ > „Dampf/Vorheizen“. Anschließend Die Ein/ blinken alle drei Leuchten gleichzeitig, um den Aus-Taste... - Page 12 • Sobald das Vorheizen beendet ist, drücken Sie Doppeltasse die Doppeltasse-Taste, um die Kaffeeausgabe zu starten. Die Anzeigeleuchte „Doppeltasse“ blinkt. Das Gerät startet und beendet die Kaffeeausgabe automatisch. Wenn Sie die Kaffeeausgabe vorzeitig stoppen möchten, drücken Sie erneut die Doppeltasse-Taste. Die Anzeigen „Einzeltasse“, „Doppeltasse“...
- Page 13 Zubereitung eines (doppelten) Espressokaffees Öffnen Sie den Deckel, nehmen Sie den Wassertank heraus und füllen Sie die benötigte Menge Wasser in den Wassertank. Überschreiten Sie dabei nicht den MAX-Füllstand. Setzen Sie den Wassertank wieder ein und schließen Sie den Deckel. Stecken Sie den Netzstecker in die Steckdose und drücken Sie die Ein/Aus- Taste.
- Page 14 Nachdem der Kaff ee zubereitet wurde, nehmen Sie den Siebträger aus dem Gerät heraus, indem Sie ihn im Uhrzeigersinn drehen. Reinigen das Filtersieb, so dass sich kein Kaff eesatz mehr darin befi ndet, und spülen Sie es mit heißem Wasser aus. Drücken Sie die Einzeltassen-Taste oder die Doppeltassen- Taste, spülen Sie den Kaff eeauslass mit Wasser durch und setzen Sie den Sibeträger mit dem gesäuberten Filtersieb wieder im Gerät ein.
- Page 15 Wenn Sie eine Kaff eemühle verwenden, stellen Sie zunächst den gewünschten Mahlgrad ein und geben Sie dann frische Kaff eebohnen zum Mahlen in die Mahlkammer. Hinweis: Selbst eine geringfügige Änderung der Feinheit des Kaff eepulvers kann einen erheblichen Einfl uss auf den Extraktionsdruck und die Kaff eemenge haben.
- Page 16 Die Menge des gebrühten Kaffees sollte etwa 30 ± 10 g für eine Einzeltasse und 60 ± 15 g für eine Doppeltasse betragen, was durch die Einstellung des Mahlgrads des Kaffeepulvers (ein wichtiger Faktor) fein abgestimmt werden kann. Milch aufschäumen / Zubereitung eines Cappuccinos Bereiten Sie zunächst den Espresso in einer ausreichend großen Tasse entsprechend der Anleitung im Abschnitt: „Zubereitung eines (doppelten) Espressokaffees“...
- Page 17 Drücken Sie die Ein/Aus-Taste, um das Gerät auszuschalten. Hinweis: Lassen Sie die Espressomaschine mindestens 5 Minuten abkühlen, bevor Sie erneut Kaff ee zubereiten. Andernfalls kann es passieren, dass Ihr Espresso einen verbrannten Geruch aufweist. Heißwasserzubereitung • Mit dieser Funktion können Sie Ihre Kaff eetasse vorwärmen, um sicherzustellen, dass die Temperatur des Kaff ees nicht sinkt.
- Page 18 Erhitzen von Flüssigkeit mit Dampf Die Dampfdüse (ohne Aufschäumvorrichtung) kann für die Zubereitung von Heißgetränken wie Trinkschokolade, Wasser oder Tee verwendet werden. Verwenden Sie einen Edelstahlbecher und befüllen Sie ihn zur Hälfte mit kalter Flüssigkeit. Hinweis: Der Durchmesser des Bechers sollte mindestens 70 ± 5 mm betragen, da die Flüssigkeit durch Dampf erhitzt wird.
-
Page 19: Reinigung Und Pflege
REINIGUNG UND PFLEGE Reinigung der Espressomaschine Schalten Sie die Espressomaschine aus und lassen Sie sie abkühlen. Benutzen Sie ein sauberes, feuchtes Tuch, um die Edelstahl-Oberfläche zu reinigen. Hinweis: Verwenden Sie keine Scheuerschwämme, Alkohol oder Lösungsmittel. Tauchen Sie das Gerät nicht in Wasser ein. Reinigen Sie den Auslass und den Dichtungsring unter dem Brühkopf mit einer professionellen Reinigungsbürste. -
Page 20: Übersicht Der Leuchtanzeigen
Drücken Sie die Einzeltassen-Taste oder die Doppeltassen-Taste, um die Entkalkerlösung abzulassen, bis sich kein Entkalker mehr in der Espressomaschine befindet. Befolgen Sie die Schritte der Kaffeezubereitung (ohne Kaffeepulver) und wiederholen Sie Schritt 4 dreimal, ohne 15 Minuten zu warten, bis sich kein Wasser mehr im Wassertank befindet. - Page 21 Einzeltasse Doppeltasse Dampf Ursache Lösung Kurzschluss Wenden Sie oder Defekt sich an einen des Temperatur Fachbetrieb. sensors Drücken Sie Warten Sie, Blinkt Blinkt Blinkt nach der bis das Gerät schnell schnell schnell Dampfabgabe abgekühlt ist die Dampf-Taste oder drücken (die Temperatur Sie die Kaffee/ ist zu hoch).
-
Page 22: Fehlerbehebung
FEHLERBEHEBUNG Problem Mögliche Ursache Lösungsansatz Es kommt kein Der Wassertank ist leer. Füllen Sie Wasser in Wasser aus dem Gerät. den Wassertank. Die Eingangs- Vergewissern spannung oder Sie sich, dass die -frequenz stimmt Netzspannung und nicht mit den -frequenz mit den Angaben auf dem Angaben auf dem Ty- Typenschild des... - Page 23 Problem Mögliche Ursache Lösungsansatz Wasser tritt an der Die Tropfschale ist voll. Reinigen Sie die Unterseite des Geräts Tropfschale. aus. Fehlfunktion der Wenden Sie sich an Espressomaschine. einen Fachbetrieb. Der Netzstecker Stecken Sie den Espressomaschine steckt nicht richtig in Netzstecker richtig in funktioniert nicht.
-
Page 24: Spezielle Entsorgungshinweise Für Verbraucher In Deutschland
SPEZIELLE ENTSORGUNGSHINWEISE FÜR VERBRAUCHER IN DEUTSCHLAND Entsorgen Sie Ihre Altgeräte fachgerecht. Dadurch wird gewährleistet, dass die Altgeräte umweltgerecht verwertet und negative Auswirkungen auf die Umwelt und menschliche Gesundheit vermieden werden. Bei der Entsorgung sind folgende Regeln zu beachten: • Jeder Verbraucher ist gesetzlich verpflichtet, Elektro- und Elek- tronikaltgeräte (Altgeräte) sowie Batterien und Akkus getrennt vom Hausmüll zu entsorgen. - Page 25 • Bei einem Vertrieb unter Verwendung von Fernkommunikationsmitteln ist die unentgeltliche Abholung am Ort der Abgabe auf Elektro- und Elektronikgeräte der Kategorien 1, 2 und 4 gemäß § 2 Abs. 1 ElektroG, nämlich „Wärmeüberträger“, „Bildschirmgeräte“ (Oberfläche von mehr als 100 cm²) oder „Großgeräte“...
-
Page 26: Hinweise Zur Entsorgung
HINWEISE ZUR ENTSORGUNG Wenn es in Ihrem Land eine gesetzliche Regelung zur Entsorgung von elektrischen und elektronischen Geräten gibt, weist dieses Symbol auf dem Produkt oder auf der Verpackung darauf hin, dass dieses Produkt nicht im Hausmüll entsorgt werden darf. Stattdessen muss es zu einer Sammelstelle für das Recycling von elektrischen und elektronischen Geräten gebracht werden. - Page 27 Dear customer, Congratulations on your purchase. Please read the following instructions carefully and follow them to prevent potential damage. We accept no liability for damage caused by disregarding the instructions and improper use. Please scan the QR code to access the latest operating instructions and further information about the product.
-
Page 28: Safety Instructions
SAFETY INSTRUCTIONS • Read these operating instructions carefully to avoid hazards from physical damage, fire, electric shock, injury, and property damage. Keep the operating instructions for future reference. • Before use, check that the mains voltage corresponds to the voltage specified on the type plate of the device. - Page 29 • Keep away from the hot steam coming out of the device. When moving hot components of the device, such as the frother or the fi lter, only use the handles or levers attached to the appliance or its components. •...
-
Page 30: Device Overview
DEVICE OVERVIEW Coffee bean holder lid Display indications Coffee bean holder Handle Control panel for the grinder Steam pipe Holder for the portafilter On / off button Drip tray Floater Drip tray Keep-warm plate Water tank lid Tamper Steam regulator Filter sieve for one cup of coffee Filter sieve for two cups of Water tank... -
Page 31: Using The Coffee Grinder
USING THE COFFEE GRINDER Before first use • Before using the coffee grinder for the first time, wipe the housing and coffee bean holder with a clean, damp cloth. • Clean the ground coffee container and lid with warm soapy water, rinse and dry. - Page 32 Tips for using the grinder Coarse ground coffee is typically used for strainers, medium ground coffee is generally suitable for drip coffee pots and steam pressure coffee makers, while fine ground coffee is generally suitable for pump-driven pressure coffee makers. If you want to brew the freshest, most delicious coffee, it is recommended to grind enough for each use and to clean the grinding chamber, blades, and grinding mechanism after each grind.
-
Page 33: Setting Up The Espresso Machine
SETTING UP THE ESPRESSO MACHINE Before first use Open the packaging and take out the espresso machine. Check that the accessories are complete and clean any detachable parts. Take out the water tank and remove the red silicone cap on the water outlet of the water tank. - Page 34 Place a coffee cup on the removable drip tray and align it with the coffee spout. Plug the power cord into a grounded mains outlet. Press the On/Off button. All indicator lights will flash and the appliance will start preheating. When the indicator lights are solid, preheating is complete. Once the preheating is complete, turn the steam knob anti-clockwise until it stops.
-
Page 35: Operating The Espresso Machine
OPERATING THE ESPRESSO MACHINE Control panel Buttons/indicators Steam dial Single Double Steam/ preheat Operating functions • Press the on/off button and the display will flash On/off the following indicators for about 1 second: “single cup” > “double cup” “steam/preheat”. All three (Note: The lights will then flash simultaneously to indicate power... - Page 36 • Once preheating is complete, press the double cup Double cup button to start brewing coffee. The "double cup" indicator light flashes. The device starts and ends coffee dispensing automatically. If you want to stop the coffee dispensing early, press the double cup button again.
- Page 37 Preparation of a (double) espresso coffee Open the lid, take out the water tank and fill the required amount of water into the water tank. Do not exceed the MAX level. Put the water tank back in place and close the lid. Plug the power cord into the mains outlet and press the on/off button.
- Page 38 NOTE: If you want to brew a single cup of espresso coff ee, use the single-cup fi lter. Press the single cup button to make coff ee. All other steps are the same as preparing a double espresso coff ee. CAUTION Risk of scalding! To avoid scalding, do not touch the hot surfaces of the device with your hands, especially the brew outlet and the...
- Page 39 It is recommended to weigh the coff ee each time it is brewed to ensure the correct amount of ground coff ee is used, and then use a tamper to press the ground coff ee. The level of the pressed coff ee powder should be about 3 mm below the edge of the fi lter sieve (this is an important factor).
- Page 40 Press the steam button and the device will start preheating. The "single cup" and "double cup" indicator lights will turn off and the "steam/preheat" indicator light will flash. Wait until the indicator light stops flashing, then preheating is complete. Place an empty cup under the steam wand, turn the steam knob anti- clockwise to the stop, drain some water into the steam wand, and after steam has escaped, turn the steam knob clockwise back off.
- Page 41 When enough hot water has been prepared, turn the steam control knob clockwise and the hot water dispensing will stop. Note: The hot water function can also be used to quickly cool down the coff ee maker. CAUTION Risk of scalding! Be careful of hot device components during use. This applies in particular to the water outlet (portafi lter), the hot water nozzle and the steam pipe.
-
Page 42: Cleaning And Care
CLEANING AND CARE Cleaning the espresso machine Turn off the espresso machine and let it cool down. Use a clean damp cloth to clean the stainless steel surface. Note: Do not use scouring pads, alcohol or solvents. Do not immerse the device in water. -
Page 43: Overview Of The Indicator Lights
OVERVIEW OF THE INDICATOR LIGHTS Single cup Double cup Steam Cause Solution Device has been Flashes 1 s Flashes 1 s Flashes 1 s switched on. The preheating of coffee and Flashes Flashes Flashes hot water has started. The preheating of coffee and hot water is finished. -
Page 44: Troubleshooting
Single cup Double cup Steam Cause Solution Device has been switched off. Short circuit in Contact a the temperature specialist sensor. company. Standby longer Press a button than 15 minutes on the display. Steam knob is Turn the steam Flashes not tightly closed control knob quickly... - Page 45 Problem Possible cause Solution The coffee is running There is too much Turn off the device out at the edge of the coffee powder in the and wait for it to cool portafilter. filter sieve down. Clean the filter screen and then fill in There is coffee the ground coffee.
-
Page 46: Disposal Considerations
DISPOSAL CONSIDERATIONS If there is a legal regulation in your country regarding the disposal of electrical and electronic equipment, this symbol on the product or on the packaging indicates that this product must not be disposed of with household waste. Instead, it must be taken to a collection point for the recycling of electrical and electronic equipment. - Page 47 Cher client, chère cliente, Toutes nos félicitations pour l’acquisition de ce nouvel appareil. Lisez attentivement les consignes suivantes et suivez-les pour éviter d'éventuels dommages. Nous ne saurions être tenus pour responsables des dommages dus au non-respect des consignes et à la mauvaise utilisation de l’appareil.
-
Page 48: Consignes De Sécurité
CONSIGNES DE SÉCURITÉ • Lisez attentivement ce mode d'emploi pour éviter les risques de dommages physiques, d'incendie, de décharge électrique, de blessures et de dommages matériels. Conservez le mode d'emploi pour vous y référer ultérieurement. • Avant l'utilisation, vérifiez que la tension secteur correspond aux spécifications de la plaque signalétique de l'appareil. - Page 49 • Lorsque la machine à expresso est en marche, certains composants sont chauff és à des températures élevées (par exemple la buse vapeur, la buse vapeur, le porte-fi ltre, le porte-fi ltre, etc.) • Tenez-vous à distance de la vapeur chaude qui sort de l'appareil. Afi n de déplacer les composants chauds de l'appareil tels que le mousseur ou le fi ltre, veuillez utiliser uniquement les poignées ou les leviers fi xés à...
-
Page 50: Aperçu De L'appareil
APERÇU DE L'APPAREIL Couvercle du bac à grains de Témoin d'affichage café Bac à café en grains Poignée Panneau de commande du Buse vapeur broyeur Support pour le porte-filtre Touche de marche/arrêt Plaque d'égouttage Flotteur Bac d'égouttage Plaque de maintien au chaud Couvercle du réservoir d'eau Tasse-mouture Régulateur de vapeur... -
Page 51: Utilisation Du Moulin À Café
UTILISATION DU MOULIN À CAFÉ Avant la première utilisation • Avant d'utiliser le moulin à café pour la première fois, essuyez le boîtier et le réservoir à café en grains avec un chiffon propre et humide. • Nettoyez le récipient à café moulu et le couvercle avec de l'eau chaude savonneuse, rincez et séchez. - Page 52 Conseils d'utilisation du broyeur Le café grossièrement moulu est généralement utilisé avec les cafetières filtres, le café moulu moyen convient généralement aux cafetières goutte à goutte et aux cafetières à pression de vapeur, tandis que le café finement moulu convient généralement aux cafetières à pompe de pression. Pour préparer le plus frais et le plus délicieux des cafés, c'est une bonne idée d'en moudre suffisamment pour chaque utilisation et de nettoyer la chambre de broyage, les lames et le mécanisme de meulage après chaque mouture.
-
Page 53: Mise En Service De La Machine À Expresso
MISE EN SERVICE DE LA MACHINE À EXPRESSO Avant la première utilisation Ouvrez l'emballage et sortez la machine à expresso. Vérifiez que les accessoires sont présents et nettoyez les pièces détachées. Sortez le réservoir d'eau et retirez le capuchon en silicone rouge sur la sortie d'eau du réservoir d'eau Réservoir d'eau Sortie d'eau... - Page 54 Placez une tasse à café sur le bac d'égouttage amovible et alignez-le avec le bec verseur. Branchez le cordon d'alimentation dans une prise mise à la terre. Appuyez sur la touche marche/arrêt. Tous les voyants clignotent et l'appareil commence à préchauffer. Lorsque les voyants lumineux sont fixes, le préchauffage est terminé.
-
Page 55: Utilisation De La Machine À Expresso
UTILISATION DE LA MACHINE À EXPRESSO Panneau de commande Touches / voyants Molette vapeur Deux Vapeur / seule tasses préchauf- tasse fage Fonctions • Appuyez sur le bouton Marche/Arrêt et l'écran Marche/ fera clignoter les indicateurs suivants pendant arrêt environ 1 seconde : « Une tasse » > « Double tasse »... - Page 56 • Une fois le préchauffage terminé, appuyez sur le Double bouton deux tasses pour commencer à préparer le tasse café. Le voyant « deux tasses » clignote. L'appareil démarre et arrête automatiquement la distribution du café. Si vous souhaitez arrêter la distribution de café...
- Page 57 Préparation d'une tasse ou deux de café expresso italien Ouvrez le couvercle, retirez le réservoir d'eau et versez-y la quantité d'eau requise. Ne dépassez pas le niveau MAX. Remettez ensuite le réservoir d'eau dans la machine à expresso et fermez le couvercle.
- Page 58 Une fois le café préparé, retirez le porte-fi ltre de la machine en le tournant dans le sens des aiguilles d'une montre. Nettoyez le fi ltre afi n qu'il ne reste plus de marc de café et rincez à l'eau chaude. Appuyez sur le bouton pour une tasse ou pour deux tasses, rincez la sortie de café...
- Page 59 Lorsque vous utilisez un moulin à café, réglez d'abord le degré de mouture souhaité, puis ajoutez des grains de café frais dans la chambre de broyage. Remarque : Même une légère modifi cation de la fi nesse de la poudre de café...
- Page 60 Moussage de lait / préparation d' un cappuccino Préparez d'abord l'expresso dans une tasse suffisamment grande en suivant les instructions du chapitre : « Préparation d'un (double) café expresso ». Utilisez du lait entier frais et sortant du réfrigérateur (8-10 ℃) et versez 1/3 du lait dans un pot à...
- Page 61 Préparation d'eau chaude • Cette fonction vous permet de préchauff er votre tasse de café pour vous assurer que la température du café ne baisse pas. Cela améliore le goût du café. • Nettoyage de la tasse à café : Après avoir bu du café, vous pouvez également utiliser cette fonction de préparation d'eau chaude pour nettoyer la tasse.
- Page 62 Chauff age de liquides à la vapeur La buse vapeur (sans dispositif de moussage) peut servir à préparer des boissons chaudes telles que du chocolat chaud, de l'eau ou du thé. Utilisez une tasse en inox et remplissez-la à moitié de liquide froid. Remarque : Le diamètre de la tasse doit être d'au moins 70 ±...
-
Page 63: Nettoyage Et Entretien
NETTOYAGE ET ENTRETIEN Nettoyage de la machine à expresso Éteignez la machine à expresso et laissez-la refroidir. Utilisez un chiffon propre et humide pour nettoyer la surface en acier inoxydable. Remarque : n'utilisez pas de produits abrasifs, d'alcool ou de solvants. Ne plongez pas l'appareil dans l'eau. -
Page 64: Vue D'ensemble Des Voyants
VUE D'ENSEMBLE DES VOYANTS Une seule Deux tasses Vapeur Cause Solution tasse L'appareil n'est Clignote 1 s Clignote 1 s Clignote 1 s pas allumé. préchauffage Clignote Clignote Clignote du café et de l'eau chaude a commencé. préchauffage Activé Activé Activé... - Page 65 Une seule Deux tasses Vapeur Cause Solution tasse Court-circuit Contactez ou défaut du capteur de entreprise température spécialisée. Après avoir Attendez que utilisé de la machine Clignotement Clignotement Clignotement la vapeur, refroidisse rapide rapide rapide appuyez sur ou appuyez le bouton sur le vapeur (la bouton café/...
-
Page 66: Résolution Des Problèmes
RÉSOLUTION DES PROBLÈMES Problème Cause possible Solution Aucune eau ne sort Le réservoir d'eau Remplissez le réser- de l'appareil. est vide. voir d'eau. La tension ou la Assurez-vous que fréquence d'entrée la tension et la ne correspond pas fréquence de l'ali- aux informations mentation électrique sur la plaque... - Page 67 Problème Cause possible Solution De l'eau s'échappe au Le bac d'égouttage est Nettoyez le bac bas de l'appareil d'égouttage. plein Dysfonctionnement Contactez une entreprise de la machine à spécialisée. expresso. La machine à La fiche secteur n'est Branchez bien la expresso ne pas bien branchée fiche dans la prise.
-
Page 68: Informations Sur Le Recyclage
INFORMATIONS SUR LE RECYCLAGE S‘il existe une réglementation pour l‘élimination ou le recyclage des appareils électriques et électroniques dans votre pays, ce symbole sur le produit ou sur l‘emballage indique que cet appareil ne doit pas être jeté avec les ordures ménagères. - Page 69 Estimado cliente: Le felicitamos por la adquisición de este producto. Lea atentamente el siguiente manual y siga cuidadosamente las instrucciones de uso con el fin de evitar posibles daños. La empresa no se responsabiliza de los daños ocasionados por un uso indebido del producto o por haber desatendido las indicaciones de seguridad.
-
Page 70: Indicaciones De Seguridad
INDICACIONES DE SEGURIDAD • Lea atentamente estas instrucciones de uso para evitar riesgos de daños físicos, incendios, descargas eléctricas, lesiones y daños materiales. Conserve las presentes instrucciones de uso para futuras consultas. • Antes de utilizar el aparato, compruebe que la tensión de red corresponde a la especificada en la placa de características del aparato. - Page 71 • No se acerque al vapor caliente que sale del aparato. Utilice únicamente las asas o palancas fi jadas al aparato o a sus componentes para mover las partes calientes del aparato, como el espumador o el fi ltro. • No sumerja el aparato ni el enchufe en agua u otros líquidos al limpiarlos para evitar daños eléctricos en el aparato.
-
Page 72: Vista General Del Aparato
VISTA GENERAL DEL APARATO Tapa del depósito de granos Indicación de la pantalla de café Depósito de granos de café Panel de control del molinillo Tubo de vapor Soporte del portafiltros Botón de encendido/apagado Placa de goteo Flotador Bandeja de goteo Placa caliente Tapa del depósito de agua Compactador... -
Page 73: Uso Del Molinillo De Café
USO DEL MOLINILLO DE CAFÉ Antes de estrenarla • Limpie la carcasa y el depósito de granos de café con un paño limpio y húmedo antes de estrenar la cafetera. • Limpie el depósito del café en polvo, así como la tapa, con agua enjabonada caliente, enjuáguelo y séquelo. - Page 74 El grado de molienda óptimo para preparar una taza de café expreso con la cafetera exprés es el 5. Consejos de uso para el molinillo El café de molienda gruesa suele usarse con cafeteras de filtro, el de molienda media se adecúa a la cafetera de goteo y a la italiana, mientras que el café de molienda fina suele ser apropiado para las cafeteras automáticas a presión de bomba.
-
Page 75: Puesta En Marcha De La Cafetera Exprés
PUESTA EN MARCHA DE LA CAFETERA EXPRÉS Antes de estrenarla Abra el envoltorio y saque la cafetera exprés. Compruebe que están todos los accesorios y limpie todas las partes desmontables. Extraiga el depósito de agua y retire el tapón rojo de silicona en la salida del agua del depósito. - Page 76 Coloque una taza de café sobre la placa de goteo desmontable de forma que quede dirigida a la boquilla de salida del café. Conecte el cable a una toma de corriente con conexión a tierra. Pulse el botón ON/OFF. Todas los indicadores parpadean y el aparato comienza a precalentar.
-
Page 77: Funcionamiento De La Cafetera Exprés
FUNCIONAMIENTO DE LA CAFETERA EXPRÉS Panel de control Botones / Advertencias Regulador de vapor Taza Vapor/ taza doble Precalen- Funciones de control • Pulse el botón de encendido y apagado y verá Encender/ como aparecen en pantalla durante 1 segundo apagar de forma consecutiva las siguientes indicaciones: «Una taza»... - Page 78 • En cuanto termine de precalentarse, pulse el botón Taza doble de taza doble para que empiece a servir café. Verá que el indicador luminoso «Taza doble» parpadea. Al servir el café, el aparato se inicia y detiene de forma automática. Si desea detenerlo con antelación, vuelva a pulsar el botón de taza doble.
- Page 79 Preparación de un café expreso doble Abra la tapa, extraiga el depósito de agua y llénelo con el nivel de agua necesario. No supere el límite MAX del depósito. Vuelva a colocar el depósito de agua y cierre la tapa. Enchufe la clavija en la toma de corriente y pulse el botón de encendido y apagado.
- Page 80 Una vez que esté listo el café, extraiga el portafi ltros del aparato girándolo en sentido horario. Limpie la rejilla de fi ltro de forma que no quede ningún residuo de café en el interior y enjuáguelo con agua caliente. Pulse el botón de una taza o el de taza doble, lave la boquilla con agua y vuelva a colocar el portafi ltros con la rejilla de fi ltro limpia en el aparato.
- Page 81 De emplear un molinillo de café, indique a continuación el nivel de molienda deseado e inserte granos de café frescos para molerlos en la cámara correspondiente. Advertencia: incluso un ligero cambio en el nivel de molienda del café en polvo puede infl uir considerablemente la presión de extracción y la cantidad de café.
- Page 82 Espumar la leche / Preparar un capuchino Prepare un expreso en una taza suficientemente grande que se corresponda con las instrucciones de la sección: «Preparar un café expreso (doble)». Emplee leche entera fresca y refrigerada de la nevera (8-10 ℃) y vierta 1/3 de la leche en un recipiente.
- Page 83 Preparar agua caliente • Con esta función puede precalentar la taza para garantizar que el café no se enfríe. De esta manera, mejora el sabor del café. • Limpieza de la taza de café: tras beber el café, esta función permite preparar agua caliente para limpiar la taza.
- Page 84 Calentar líquidos con vapor La boquilla de vapor (sin el mecanismo para espumar) sirve para preparar bebidas calientes como chocolates, agua o té. Emplee un recipiente de acero inoxidable y llénelo hasta la mitad con un líquido frío. Advertencia: el diámetro del recipiente debería ser de al menos 70 ± 5 mm, dado que el líquido se calentará...
-
Page 85: Limpieza Y Cuidado
LIMPIEZA Y CUIDADO Limpieza de la cafetera exprés Apague la cafetera exprés y espere a que se enfríe. Emplee un paño limpie y húmedo para limpiar la superficie de acero inoxidable. Advertencia: no utilice esponjas abrasivas, alcohol o disolventes. No sumerja el aparato en agua. -
Page 86: Vista General De Los Indicadores Luminosos
VISTA GENERAL DE LOS INDICADORES LUMINOSOS Una taza Taza doble Vapor Causa Solución Parpadea Parpadea El aparato está Parpadea 1 s encendido. Ha comenzado a precalentar el Parpadea Parpadea Parpadea café y el agua caliente. Ha finalizado de precalentar el Encendido Encendido Encendido... - Page 87 Una taza Taza doble Vapor Causa Solución El aparato está apagado. Cortocircuito Diríjase a en el sensor de- una tienda Apagado Apagado Apagado temperatura especializada. Modo de espera Pulse una tecla durante más de de la pantalla. 15 minutos Al activar el Gire el regulador Parpadea regulador de...
-
Page 88: Reparación De Anomalías
REPARACIÓN DE ANOMALÍAS Anomalía Posible causa Posible solución No sale agua del El depósito de agua Rellene el depósito aparato. está vacío. con agua. La tensión o Asegúrese de que la frecuencia de tensión y frecuen- entrada no se cia de la red se corresponde con los correspondan con datos de la placa de... - Page 89 Anomalía Posible causa Posible solución Fugas de agua en la La bandeja de goteo está Limpie la bandeja de parte inferior de la goteo. llena. unidad. Error de funciona- Diríjase a una tienda miento de la cafetera especializada. exprés. La cafetera exprés no El cable de ali- Introduzca el cable funciona.
-
Page 90: Indicaciones Sobre La Retirada Del Aparato
INDICACIONES SOBRE LA RETIRADA DEL APARATO Si en su país existe una disposición legal relativa a la eliminación de aparatos eléctricos y electrónicos, este símbolo estampado en el producto o en el embalaje advierte de que no debe eliminarse como residuo doméstico. - Page 91 Gentile cliente, La ringraziamo per l'acquisto del dispositivo. La preghiamo di leggere attentamente le seguenti indicazioni e di seguirle per evitare eventuali danni. Non ci assumiamo alcuna responsabilità per danni scaturiti da una mancata osservanza delle avvertenze di sicurezza e da un uso improprio del dispositivo.
-
Page 92: Avvertenze Di Sicurezza
AVVERTENZE DI SICUREZZA • Leggere attentamente questo manuale d'uso per evitare il rischio di danni fisici, incendi, scosse elettriche, lesioni e danni materiali. Conservare il manuale d'uso per future consultazioni. • Prima dell'uso, controllare che la tensione della rete corrisponda al valore indicato sulla targhetta del dispositivo. - Page 93 • Quando la macchina del caff è è in funzione, alcuni componenti del dispositivo raggiungono temperature elevate (ad es. il tubo e l'ugello del vapore, il supporto del portafi ltro, il portafi ltro, ecc.). • Non avvicinarsi al vapore bollente che fuoriesce dal dispositivo. Quando si desidera muovere le parti bollenti del dispositivo, come il montalatte o il fi ltro, utilizzare esclusivamente le impugnature o le leve collegate a esso o ai suoi componenti.
-
Page 94: Descrizione Del Dispositivo
DESCRIZIONE DEL DISPOSITIVO Coperchio del contenitore per i Indicazione del display chicchi di caffè Contenitore per i chicchi di caffè Impugnatura Pannello di controllo per la Tubo del vapore macina Supporto per il portafiltro Tasto on/off Griglia di gocciolamento Galleggiante Vaschetta di gocciolamento Piastra di mantenimento calore Coperchio del serbatoio... -
Page 95: Utilizzare La Macina Del Caffè
UTILIZZARE LA MACINA DEL CAFFÈ Prima di procedere all'uso • Pulire l'alloggiamento e il contenitore per i chicchi di caffè con un panno pulito e asciutto prima di procedere all'uso della macina. • Pulire il contenitore del caffè in polvere e il coperchio con acqua calda e sapone, sciacquarli e asciugarli. - Page 96 Il grado di macinatura più adatto per la preparazione di un espresso con la macchina del caffè è il livello 5. Consigli per l'utilizzo della macina Il caffè macinato grossolanamente viene utilizzato in genere per la preparazione con filtro all'americana, quello con grado medio per caraffe a gocciolamento o macchinette a pressione di vapore, mentre quello macinato finemente è...
-
Page 97: Messa In Funzione Della Macchina Del Caffè
MESSA IN FUNZIONE DELLA MACCHINA DEL CAFFÈ Prima di procedere all'uso Aprire l'imballaggio e togliere la macchina del caffè. Controllare se sono presenti tutti gli accessori e pulire tutti i componenti rimovibili. Rimuovere il serbatoio e togliere il tappo rosso in silicone sul punto di uscita dell'acqua. - Page 98 Mettere una tazza sulla griglia di gocciolamento rimovibile in corrispondenza del beccuccio di erogazione. Collegare il cavo a una presa con messa a terra. Premere il tasto on/off per avviare il dispositivo. Tutte le indicazioni lampeggiano e il dispositivo inizia a preriscaldarsi. Quando le indicazioni restano accese, il preriscaldamento è...
-
Page 99: Utilizzo Della Macchina Del Caffè
UTILIZZO DELLA MACCHINA DEL CAFFÈ Pannello di controllo Tasti/Indicazioni Manopola del vapore Tazza Tazza Vapore/ singola doppia Preriscal- damento Funzioni di utilizzo • Premere il tasto on/off e sul display si illuminano On/Off in sequenza per circa 1 secondo le seguenti indicazioni: "Tazza singola"... - Page 100 • Quando il preriscaldamento è concluso, premere Tazza il tasto "Tazza doppia" per avviare l'erogazione di doppia caffè. L'indicazione "Tazza doppia" lampeggia. Il dispositivo avvia e conclude l'erogazione di caffè automaticamente. Se si desidera interrompere anticipatamente l'erogazione, premere di nuovo il tasto "Tazza doppia".
- Page 101 Preparare un caffè espresso (doppio) Aprire il coperchio, togliere il serbatoio e aggiungere una quantità d'acqua sufficiente. Non superare l'indicazione MAX. Riposizionare il serbatoio e chiudere il coperchio. Inserire la spina nella presa e premere il tasto on/off. Sul display si illuminano in sequenza per circa 1 secondo le seguenti indicazioni: "Tazza singola"...
- Page 102 Dopo aver preparato il caff è, rimuovere il portafi ltro dal dispositivo girandolo in senso orario. Pulire il fi ltro in modo da eliminare tutto il caff è residuo e sciacquarlo con acqua bollente. Premere il tasto "Tazza singola" o "Tazza doppia"...
- Page 103 Se si utilizza un macinino da caff è, impostare prima di tutto il grado di macinatura desiderato e aggiungere poi i chicchi nell'apposito vano. Nota: anche un minimo cambiamento nella fi nezza del caff è in polvere può infl uire sensibilmente sulla pressione di estrazione e sulla quantità di caff è. Impostare il grado di macinatura rispettando le istruzioni del macinino da caff è...
- Page 104 Montare il latte/Preparare un cappuccino Preparare un espresso in una tazza sufficientemente grande, come indicato nelle istruzioni alla sezione: "Preparare un caffè espresso (doppio)". Utilizzare latte intero, fresco, a temperatura di frigorifero (8-10 °C) e riempire 1/3 del bricco. Nota: utilizzare un bricco di acciaio inox con un diametro non inferiore a 70 ± 5 mm, dato che il volume del latte aumenta quando viene montato.
- Page 105 Preparazione di acqua calda • Con questa funzione è possibile scaldare la tazza, in modo da non abbassare la temperatura del caff è. Questo permette di migliorare il sapore del caff è. • Pulire la tazza del caff è: dopo aver bevuto il caff è, è possibile utilizzare questa funzione per pulire la tazza con l'acqua bollente.
- Page 106 Riscaldare liquidi con il vapore L'ugello del vapore (senza attacco per montare il latte) può essere utilizzato per preparare bevande calde come cioccolata, acqua o tè. Utilizzare un contenitore di acciaio inox e riempirlo a metà con del liquido freddo. Nota: il diametro del contenitore deve essere di almeno 70 ±...
-
Page 107: Pulizia E Manutenzione
PULIZIA E MANUTENZIONE Pulizia della macchina del caffè Spegnere la macchina del caffè e lasciarla raffreddare. Passare un panno umido e pulito sulle superfici di acciaio inox. Nota: non usare spugne abrasive, alcool o solventi. Non immergere il dispositivo in acqua. Pulire il punto di uscita dell'acqua e l'anello di tenuta del gruppo erogatore con una spazzola professionale. -
Page 108: Panoramica Delle Indicazioni Luminose
PANORAMICA DELLE INDICAZIONI LUMINOSE Tazza singola Tazza doppia Vapore Causa Soluzione Lampeggia 1 Lampeggia 1 Lampeggia 1 Il dispositivo è secondo secondo secondo stato acceso. Il preriscalda- mento di caffè Lampeggia Lampeggia Lampeggia e acqua calda è iniziato. Il preriscalda- mento di caffè... - Page 109 Tazza singola Tazza doppia Vapore Causa Soluzione Cortocircuito Rivolgersi a o guasto del un'azienda sensore della specializzata. temperatura Premere il Attendere tasto "Va- che il Lampeggia Lampeggia Lampeggia pore" dopo dispositivo rapidamente rapidamente rapidamente l'erogazione si raffreddi del vapore (la o premere il temperatura è...
-
Page 110: Risoluzione Dei Problemi
RISOLUZIONE DEI PROBLEMI Problema Possibile causa Soluzione Non esce acqua dal Il serbatoio dell'ac- Riempire il serbatoio. dispositivo. qua è vuoto. La tensione o la Assicurarsi che la ten- frequenza d'ingresso sione e la frequenza non corrisponde della rete elettrica alle specifiche sulla corrispondano alle targhetta del dispositivo. - Page 111 Problema Possibile causa Soluzione Perdite d'acqua dal La vaschetta di Pulire la vaschetta di lato inferiore del gocciolamento. gocciolamento è piena. dispositivo. Malfunzionamento Rivolgersi a un'azienda della macchina del caffè. specializzata. La macchina del caffè La spina non è inse- Inserire correttamen- non funziona.
-
Page 112: Avviso Di Smaltimento
AVVISO DI SMALTIMENTO Se nel vostro Paese sono vigenti regolamenti legislativi relativi allo smaltimento di dispositivi elettrici ed elettronici, questo simbolo sul prodotto o sull'imballaggio indica che non è consentito smaltire questo prodotto insieme ai rifiuti domestici. Il dispositivo deve invece essere portato in un centro di raccolta per il riciclaggio di dispositivi elettrici ed elettronici.
Need help?
Do you have a question about the BELLA CAFE and is the answer not in the manual?
Questions and answers