Table of Contents
Advertisement
Quick Links
Advertisement
Table of Contents

Related Manuals for Visioneer 4400


Summary of Contents for Visioneer 4400
- Page 1 Visioneer 4400 USB Scanner Installation Guide F O R W I N D O W S...
- Page 2 International, Inc. All Rights Reserved. All other products mentioned herein may be trademarks of their respective companies. Information is subject to change without notice and does not represent a commitment on the part of Visioneer. The software described is furnished under a licensing agreement.
-
Page 3: Table Of Contents
........1 The Visioneer 4400 USB Scanner What You Need . -
Page 4: Welcome
ELCOME Congratulations on purchasing your Visioneer 4400 USB scanner. With your scanner, you can quickly scan paper documents and color photos to place their electronic images on your computer. ’ S IN THE Before starting the installation, check the contents of the box to make sure that all parts are included. -
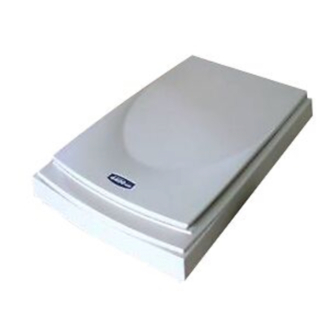
Page 5: The Visioneer 4400 Usb Scanner
Power jack USB cable Document cover. Close the document cover after placing items on the scanner glass. Document pad. Helps to secure the document in place on the scanner glass. Glass. Place items face down on the glass, aligned at the lower left corner. -
Page 6: What You Need
ETTING The PaperPort software includes a complete help system that answers questions about the scanner and its software. If you have questions, or the scanner doesn’t seem to work correctly, please use the help. To get help while using the PaperPort software: Press the F1 key, or from the Help menu, choose PaperPort Help Topics to display the Help Topics window. -
Page 7: Installing The Scanner Software
Note: You must install the scanner software before connecting the scanner to your computer. Otherwise, the correct driver software for your scanner will not be installed and it may not work properly. To install the scanner software: 1. Start Microsoft Windows 98 or Microsoft 2000 and make sure that no other applications are running. -
Page 8: Connecting The Scanner
ONNECTING THE CANNER Your Visioneer 4400 USB scanner connects to any available USB port. Check your computer’s manual for the USB port location. Note: You do not have to shut off the power to your computer when connecting the scanner. -
Page 9: Setting Up The Scanner
ETTING P THE CANNER The steps to set up the scanner identify the type of scanner you have and prepares the PaperPort software to scan with it. To set up the scanner: 1. If the PaperPort software isn’t currently running, double-click the PaperPort icon on the Windows Desktop to start it. -
Page 10: Scanning An Item
PaperPort icon on the Windows desktop to start it. The PaperPort Desktop appears. 2. Open the scanner cover, place the item you want to scan face down aligned at the lower left corner of the scanner glass, and close the cover. - Page 11 “Color Document-Faster.” 5. Click the Preview button. The scanner scans a preview of the item and displays it in the Scan Manager. In the example on the next page, the picture being scanned is a close-up of a friendly cow.
- Page 12 7. Check the preview image. If you want to change the scanner setting for the item, click one of the options in the list to “Scan Page For.” For example, to scan a black and white image instead of a color photo, select Black &...
-
Page 13: Adjusting Scanner Settings
The scanned item appears as a thumbnail image in the ScanSoft PaperPort Desktop. Thumbnail image DJUSTING You can adjust the scanner settings to fine tune the scanned item. This section tells you how to: Select a predefined scanner setting. Select scan configuration options. -
Page 14: Selecting A Predefined Scanner Setting
ELECTING A In the Scan Manager, you can select one of the predefined scanner settings from the list “Scan Page For.” The settings are described in the following table. Scan Page For Default Setting Editing Text Black-and-white (OCR) 300 dpi... -
Page 15: Selecting Scan Configuration Options
Color Grayscale B&W symbols next to the setting names indicate the scan mode—color, grayscale, or black and white. The scanner settings affect the speed of the scan and the file size. The Scan Manager shows the approximate file size of a scanned item to help you decide whether to use a particular scanner setting. -
Page 16: Customizing A Scanner Setting
When AutoCrop is selected, the scanner makes two passes—the first pass senses the item’s size, and the second pass scans the image. This option overrides the selections for Size. -
Page 17: Adjusting The Brightness And Contrast
4. Click the Save As button. The Save As dialog box appears. 5. Type a name for the new scanner setting. 6. Click Save. The new setting is added to the list of “Scan Page For” options at the top of the dialog box. -
Page 18: Selecting The Area Of The Item You Want To Scan
3. Drag the Brightness slider to the left to make the item darker or to the right to make the item lighter. 4. Drag the Contrast slider to the left to decrease the contrast or to the right to increase the contrast. 5. -
Page 19: Cleaning The Scanner Glass
LASS Scanning items that have excessive amounts of dirt or dust may dirty the glass. To ensure the best quality scanned item, wipe the scanner glass with a soft clean cloth to rid the glass of dust or other debris. -
Page 20: Visioneer 4400 Usb Scanner Specifications
4400 USB S ISIONEER Bit Depth Scanning resolution Maximum Item sizes Scanner dimensions Height Width Length Weight Operating temperature Relative humidity Power supply Input voltage/frequency Output voltage/watt Safety and agency certifications UL, ULc, FCC Class B, Hardware warranty CANNER PECIFICATIONS...
Need help?
Do you have a question about the 4400 and is the answer not in the manual?
Questions and answers