Table of Contents
Advertisement
Advertisement
Table of Contents

Related Manuals for Carimali Armonia Soft Plus


Summary of Contents for Carimali Armonia Soft Plus
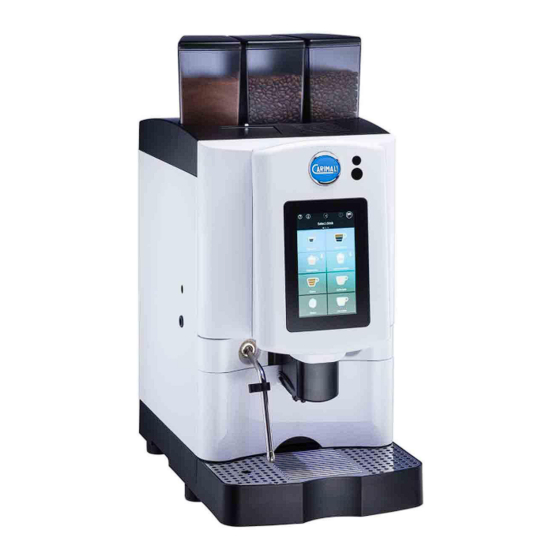
- Page 1 USER’S MANUAL Translation of original instructions Armonia Soft Plus...
-
Page 3: Table Of Contents
CONTENTS 1 GENERAL SAFETY WARNINGS .... 5 8 INSTALLATION AND STARTUP ... 31 PACKAGING CONTENTS ... 31 2 IDENTIFICATION ........9 PRIOR CHECKING AFTER RECEIPT ......32 3 INTRODUCTION ........10 POSITIONING ......32 SYMBOLS ........10 8.4. INSTALLATION ......33 8.4.1 Power mains connection .. - Page 4 11 TROUBLESHOOTING ......67 11.1 HOW TO DETECT AN ERROR ... 68 11.2 OPERATING ALARMS ....69 12 DECOMMISSIONING AND DISPOSAL ........70...
-
Page 5: General Safety Warnings
The weighted, equivalent sound pres- chine and/or incorrect sure level is below 70 dB. maintenance. After unpacking the machine, veri- fy its integrity. In case of damage or doubts about the packaging contents, please contact the CARIMALI Ser- vice Centre. - Page 6 WARNING If residues of inedible material are found in- side beverages dur- ing machine use, it is necessary to carry out maintenance. Keep packaging parts (box, inner pro- tections, etc.) out of reach of children For more detailed information about since they are potentially dangerous.
- Page 7 WARNING Manufacturer declines any liability for failure to comply with the above or for damages caused by the failure to properly ground. Unroll the power cord for its entire The machine can be used by children length to prevent the risk of danger- aged from 8 years and above and per- ous overheating.
- Page 8 Con- chine on before hav- tact. a. qualified. service. engineer. or. ing reconditioned it the CARIMALI Service Centre. for at least 1 hour at a suitable room temper- WARNING ature. If it is installed...
-
Page 9: Identification
CARIMALI S.p.A. - www.carimali.com Via Industriale, 1 - 24040 Chignolo d’Isola - ITALY MADE IN ITALY AA01-11481112 s/n XXXXXXXX TYPE: 10/2017 ARMONIA SOFT PLUS LM MODEL: 220-240 V 1~ 50/60 Hz INPUT: WARNING 3150 W NOMINAL POWER:... -
Page 10: Introduction
There is a shutoff mag- situation that net that only the ENGI- cause minor injury or NEER from CARIMALI machine damage. or a QUALIFIED SER- VICE ENGINEER will have, and this allows NOTE access to moving or This points out notes or hot parts. -
Page 11: Intended Use
INTENDED USE 3.3.1 Reasonably foreseeable misuse This machine was designed and manufactured for dispensing: WARNING ● Coffee; ● Cappuccino; In order to ensure ● Powdered drinks; safety of the operator ● Milk; and the machine, it is ● Hot water; strictly forbidden to ●... -
Page 12: Description Of The Machine
4 DESCRIPTION OF THE MACHINE MACHINE CONFIGURATIONS EASY Dispensable products: COFFEE, POWDERED DRINKS 1 Grinder 1 Grinder + 2 Grinders + 1 Powdered 1 Powdered drinks container drinks container 1 Grinder + 2 Powdered drinks containers Dispensable products: COFFEE, MILK, POWDERED DRINKS 1 Grinder 2 Grinders 1 Grinder +... - Page 13 Optional: ● Premium Grinder Setup; ● Milk pump (Version LM); ● Larger containers; ● MaxSave Energy Saving; ● Aroma diffusion; ● Cup holder; ● Lock and key for containers; ● Direct solid grounds discharge; ● Premium Self-Cup Station; ● Card reader; ● Telemetry system;...
-
Page 14: General Description Of The Machine
GENERAL DESCRIPTION OF THE MACHINE Product containers Card reader Decaf door Touch screen display Presence sensor Front door Door lock Steam wand rubber Steam wand Adjustable delivery nozzles Grounds drawer Drip tray NOTE The machine can be configured (modular) to have more or fewer options installed according to the needs of the customer. -
Page 15: Details Of
4.2.1 Details of coffee / instant containers CONTAINER CAPACITY 06 - Coffee Coffee (standard) 0.6 kg Coffee (maxi) 1.1 kg Instant (standard) 2.0 kg Instant (maxi) 3.0 kg Coffee Instant WARNING When the container is filled with the product, close the lock lever of the container and open it after filling. NOTE Never fill the containers above the max level indicated. -
Page 16: Touch Screen Display
TOUCH SCREEN DISPLAY 4.3.1 Using the display 7 - Sample page Pressure Scrolling up / down Scrolling right / left... -
Page 17: Switching On
4.3.2 Switching on Info Modem Alarm Language menu light Clock light selection Info bar Power On button Help menu Setup menu NOTE If the coffee boiler and steam boiler (if fitted) have not reached the correct working temperature, the heating page will be shown when the machine is switched on. NOTE The info bar icons described refer to the machine with all op- tional extras. -
Page 18: Boiler Heating
4.3.3 Boiler heating NOTE There are two types of boiler heating: • Coffee and steam boilers together; • Coffee boiler be- fore steam boiler (sequential). Temperature gauge 4.3.4 Introduction NOTE This page appears when the machine is Intro screen switched on. If the boiler tempera- ture falls to below the minimum threshold,... -
Page 19: Drink Selection (Free Vend Examples)
4.3.5 Drink selection 4.3.6 Drink delivery (free vend examples) in progress Delivery stop button Delivery progress Selected beverage icon NOTE Press the icon to dispense the re- delivery stop quired drink. button can be disa- bled in the machine NOTE settings (access re- During dispensing of served to qualified... -
Page 20: Dose Settings
Drinks Selection page. Then select Set Doses. ATTENTION Dose setting is re- served to a qualified service engineer or the CARIMALI Ser- vice Centre. NOTE The symbol sig- nals the drink is dis- abled and can be re-... -
Page 21: Alarm Signals
4.3.8 Alarm signals 4.3.9 Alarm history In case of alarm, the signal light will Press setup and enter the password begin to flash red and the alarm mes- from the first screen: 11111. sage will appear on the display. Select the Alarms history menu. Alarm message NOTE NOTE The menu will show Press on the light the last 10 alarms to open and view the... -
Page 22: Display Adjustment
4.3.10 Display adjustment Press setup and enter the password NUMBER OF INTERFACE TYPE from the first screen: 11111. DRINKS Select the display adjustment menu. Traditional 4, 6, 8, 10 Self Service 4, 6, 8, 10 Beverage format 6, 9, 12 Set the preferences for and the ap- pearance of the display to customize the drinks selection and the dispens- ing in progress pages. -
Page 23: Touch Screen Display Variation
TOUCH SCREEN DISPLAY VARIATION 4.4.1 Cup station NOTE If the “Cup Station” option is enabled, every time delivery of a drink is selected, the system checks the closing state of the front door. NOTE The version with “Cup Station” features one only front door. Open the door with the key for emptying the drawer of used grounds. -
Page 24: Energy Save
4.4.2 Energy save NOTE When the energy saving option is enabled (reserved to a qual- ified service engineer only), it will be applied only with the ma- chine on. The software will activate the energy saving mode according to five conditions: • User’s presence, if no user is detected. • Cup presence, if no cup is detected. •... -
Page 25: Manual Delivery Stop
4.4.3 Manual delivery stop NOTE If the “Stop Dispensing” function is enabled, the user can stop delivery manually. Press “Stop Dispensing” to stop beverage delivery manually. Manual delivery stop NOTE The manual delivery stop is not instant, but occurs when the system detects a safe situation for machine operation. -
Page 26: Mdb Payment System
4.4.4 MDB payment system NOTE If the MDB payment system is installed and enabled, it is nec- essary to insert the required money to delivery the beverage. WARNING The management of drinks prices and change is managed by software (reserved to the qualified service engineer) and is different according to the type of MDB installed. -
Page 27: Technical Characteristics
5 TECHNICAL CHARACTERISTICS TECHNICAL DATA FEATURES DATA Dispensing group adjustment 95 - 155 mm Coffee grounds capacity Coffee bean 0.6 kg container capacity Instant product container capacity 2.0 l Capacity of raised coffee bean con- 1.1 kg tainer (optional) Capacity of raised instant beverage 3.0 kg container (OPT) Coffee boiler capacity... -
Page 28: Overall Dimensions
6 RESIDUAL RISKS OVERALL DIMENSIONS The Manufacturer pre-sets all neces- sary measures to ensure operator’s safety when using the machine. Anyway, some inconveniences may occur in certain conditions and/or sit- uations. The causes may be: ● Operator not suitably trained and/ or experienced. -
Page 29: Handling And Storage
7 HANDLING AND STORAGE WARNING COFFEE MACHINES COFFEE MACHINES Made in Italy Made in Italy COFFEE MACHINES Made in Italy COFFEE MACHINES COFFEE MACHINES Made in Italy Made in Italy NOTE Handle the packaging by means of the apposite carrying han- dles. - Page 30 WARNING Should you decide not to use the machine any longer, unplug it and then make it inoperative by cutting off the power cord. NOTE The disposal of the machine is not responsibility of the Manu- facturer and must be carried out in compliance with the applica- ble regulations.
-
Page 31: Installation And Startup
8 INSTALLATION AND STARTUP PACKAGING CONTENTS Machine User’s manual Brush 95.01806 Shut-off magnet Brush 95.00678 Front door key Adhesive hook for Power Cleaner drain 95.05046 Container removal key 37.00836 O-ring C O F F E E M A C H IN M a d e 87.00142 in It a... -
Page 32: Prior Checking After Receipt
PRIOR CHECKING AFTER RECEIPT 30°C > > 5°C Check the integrity of: = 30÷70% ● External packaging non-condensing ● Internal packaging 20 mm ● Machine components (external and internal) ● Supplied accessories. NOTES In case damages or anomalies of the sup- ply are noticed, con- NOTES tact the Manufacturer... -
Page 33: Installation
8.4. INSTALLATION 8.4.2 Water mains connection 8.4.1 Power mains connection Liquid DANGER drain, if fitted Do not carry out this Filter for external operation with wet or softener to damp hands. be fitted by the customer ATTENTION mains water pressure must nev- er exceed 6 bar (0.6 MPa);... -
Page 34: Milk Circuit Connection
Use the certified CARIMALI HOSE (95.01889). < 4°C To prevent damages to the hydraulic cir- If an additional unit is fitted, connect cuit, the optimal range the Milker outlet to the unit. -
Page 35: Boiler.filling
8.4.4 Boiler filling This operation serves to fill the water circuit and the boiler. ATTENTION By omitting this op- eration, the machine Hole for seriously milk pipe inlet damaged manufacturer’s liabil- NOTES ity for machine func- tioning will lapse im- The fridge was designed and built to mediately. -
Page 36: Instructions For Use
9 INSTRUCTIONS FOR USE GETTING STARTED Before using the machine, it is impor- tant to carry out the following: ● Dispenser group washing; ● Power Cleaner washing. For further details, refer to the main- tenance chapter. Close the container. NOTES After washing, fill the water circuit. -
Page 37: Switching On
SWITCHING ON The following screen will appear when the machine switches on. After carrying out the installation and the preliminary operations, proceed to switch on the machine. Open the front door with the special key. Drinks selection Press the on button. -
Page 38: Dispensing Circuit Washing
9.2.1 Dispensing circuit washing DRINK DISPENSING Allow the coffee and steam boilers (if WARNING present) to heat up before proceeding with drink dispensing. When using for the first time, or after a long period of disuse, wash the dispensing circuit to eliminate any impurities that may be in the boiler or system. - Page 39 NOTES NOTES Based on the ma- During the heating chine settings, it is stage, when the cof- possible to heat the fee boiler reaches boilers in sequence 50°C (122°F), the or together. machine will carry In case of sequen- out an automatic dis- tial heating, if the pensing group rinse.
- Page 40 NOTES If the “A” icon is pres- ent, it is possible to dispense beverages with Extramilk. To use this option, hold down the drink button for a few sec- onds. NOTES Adjust the dispensing group height accord- ing to the height of the cup.
-
Page 41: Switching Off
SWITCHING OFF Then press “Machine off”. To switch off the machine, press The display will return to the initial screen. -
Page 42: Ordinary Maintenance
ORDINARY WARNING MAINTENANCE Each operation re- quiring disassembly of the machine parts must be performed DANGER by a skilled techni- The intervention of cian. routine maintenance and cleaning must be performed by the op- ATTENTION erator only after: When carrying out ● switching off the maintenance, only... - Page 43 TYPE OF OPERATION FREQUENCY PARAGRAPH OPERATION Touch screen 10.1.1 Manual Daily display cleaning 10.2.8 External cleaning of chrome-plated sur- Manual Daily 10.1.2 faces External cleaning of Manual Daily 10.1.3 machine surfaces Emptying and clean- Daily or before if ing the liquid grounds Manual 10.1.4 necessary...
-
Page 44: External Cleaning
To clean the internal components, 10.1.2 Cleaning of chrome-plated open the front door of the machine surfaces using the keys supplied. WARNING cleaning chrome-plated sur- 10.1 EXTERNAL CLEANING faces, use a damp cloth, an antistatic cloth or similar. Do 10.1.1 Cleaning the display abrasive agents to carry out this operation. -
Page 45: Cleaning The Solid/Liquid Grounds Container
10.1.4 Cleaning the solid/liquid 10.1.5 Instant product / grounds container coffee container cleaning Slide out the drip tray and grounds Open the upper front door. drawer and rinse them in water Solid grounds tray Liquid Remove the instant product contain- grounds tray ers from the machine and open them. -
Page 46: Cleaning Of Functional Units
10.2 CLEANING OF FUNCTIONAL UNITS 10.2.1 Power Cleaner washing WARNING The Power Cleaner wash cleans the milk circuit to prevent build up on the inside, and it needs to be carried NOTE out every time after In case the contain- a milk-based bever- ers required by the age is dispensed or... - Page 47 NOTE Wait for the end of the wash.
-
Page 48: All In One Wash
10.2.2 All in One wash NOTES Before an All in One This type of wash makes it possible to wash accord- carry out all possible washes accord- ing to the machine ing to the machine configuration and configuration, place in the following sequence: a 2 litres container 1. - Page 49 NOTE Skip previous wash- es by pressing SKIP. Raise the dispensing unit completely and remove the dregs drawer. Press (YES) to switch the machine back on at the Power On screen at the end of washing, or press (NO) to switch the machine on at the drinks selection screen.
- Page 50 NOTE If the machine has a milk circuit, insert the float in a container (min. capacity 500 ml) with water and Carimali sanitizer (06.00136). Follow the instruc- tions on the sanitizer package for a proper dilution. Take out, empty and refit the drip tray.
- Page 51 Open the front door.
- Page 52 Close the front door to start the wash- NOTE ing cycle. Wait for the end of the wash for: ● Coffee group; ● Mixer; ● Milker (optional). ATTENTION Once the “All in One” washing cycle has been completed, re- move the milk float (if present) from the container water...
-
Page 53: Coffee Group Wash
NOTE ATTENTION If the cleaning cycle Before proceeding is stopped suddenly with the normal use before its completion, of the machine, car- always repeat ry out some test dis- procedure from the pensing cycles. beginning, making sure the rinsing stage is carried out. - Page 54 Open the front door to access the cof- fee group. Close the front door to start the wash- ing cycle.
-
Page 55: Mixer Wash
ATTENTION Before proceeding with the normal use of the machine, car- ry out some test dis- pensing cycles. 10.2.4 Mixer wash NOTE This procedure can be carried out follow- ing the instructions on the display. NOTES Place a container (ap- prox. - Page 56 NOTE If the cleaning cycle is stopped suddenly before its completion, always repeat procedure from the beginning, making sure the rinsing stage is carried out. Press and select the manual wash menu from the Drinks Selection page. NOTE Skip previous wash- es by pressing SKIP.
-
Page 57: Disassembly And Manual Cleaning Of The Mixer
10.2.5 Disassembly and manual cleaning of the mixer Open the upper front door on the ma- chine. Slide the mixer out towards the front of the machine. ATTENTION Disconnect the hoses that might interfere with this procedure. Rotate the ring nut to match the tabs ATTENTION with the relevant slots and free the mixer. -
Page 58: Milker Wash (Optional)
NOTE ATTENTION For cleaning oper- Make sure the com- ations, use the CA- ponents are perfectly RIMALI cleaning dry before installing agent (06.00136). them again on the machine, to prevent bacteria growth. NOTE Assemble the Mixer by proceeding in the reverse order com- pared to the above instructions. - Page 59 Connect the Milker circuit to a con- tainer with water and CARIMALI san- Press and select the manual wash itizer (06.00136). Follow the instruc- menu from the Drinks Selection page.
- Page 60 NOTE Put a container of approx. 2 l under the dispensing nozzle. NOTE Wait for the end of the wash. NOTE complete rinsing of the Milker circuit, use more than 1 l of fresh water. When shown on the display, connect the Milker circuit to a container with fresh water for rinsing.
-
Page 61: Disassembly And Manual Milker Cleaning (Optional)
~2 litres NOTE Wait for the end of the wash. 10.2.7 Disassembly and manual Milker cleaning (optional) NOTE This process is only available if the milk circuit is fitted. - Page 62 ATTENTION During the disassem- bly phase of the Milk- er, do not damage its components. Open the front door on the machine. Remove the lid of the dispensing group Release the lid by pressing on the side hooks and sliding it upwards Remove the Milker from its position.
- Page 63 RIMALI cleaning agent (06.00136). NOTE Required tools for cleaning: Check the O-rings ● Brush (CARIMALI 95.01806) and replace them, if ● Hot water necessary. ● Cleaning agent Immerse all components in a solution of hot water and cleaning agent CA-...
- Page 64 ATTENTION Brush the Milker dispensing nozzle with the brush to remove the residues. Make sure the com- ponents are perfectly dry before installing them again on the machine, to prevent bacteria growth. NOTE To assemble the Milk- er, follow the removal steps in reverse or- der.
-
Page 65: Cleaning The Display
10.2.8 Cleaning the display NOTE This procedure can be carried out follow- ing the instructions on the display. Press and select the manual wash menu from the Drinks Selection page. NOTE Skip previous wash- es by pressing SKIP. 10.2.9 Recommended washes NOTE This procedure can be carried out follow-... - Page 66 NOTE Scroll through pages of the doc- ument with the < > keys.
-
Page 67: Troubleshooting
TROUBLESHOOTING FAULT POSSIBLE CAUSE POSSIBLE SOLUTION USER Wrong connection to Check and repair the power mains. wiring. The machine does not turn on. Faulty door safety (display off). Check micro switch. micro switch. Contact the Service General electric failure. centre. Drinks dispensed Obstructed dispensing Carry out an All in One... -
Page 68: How To Detect An Error
11.1 HOW TO DETECT AN ERROR Follow the instructions on the display... -
Page 69: Operating Alarms
ATTENTION For any other type of message or in case of alarms that switch off the machine, please contact the CARIMALI Service Cen- tre. -
Page 70: Decommissioning And Disposal
DECOMMISSIONING The Customer is held to: ● Disassemble the machine parts. AND DISPOSAL ● Separate them according to ma- terial type. This machine is compliant with the ● Deliver the material to the desig- Directive 2012/19/EU. nated collection facilities. WARNING WARNING Should you decide Follow the aforesaid... - Page 72 Carimali S.p.A. single member company Via Industriale, 1 Chignolo d’Isola (BG) 24040 - ITALY +39 035 4949555 +39 035 905447 info@carimali.com www.carimali.com...
Need help?
Do you have a question about the Armonia Soft Plus and is the answer not in the manual?
Questions and answers