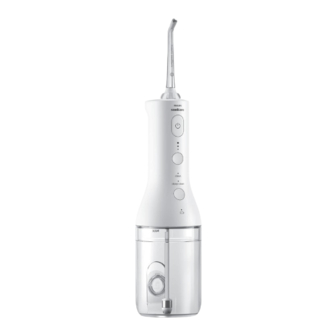
Philips sonicare 3000 Series Manual
Cordless power flosser
Hide thumbs
Also See for sonicare 3000 Series:
- User manual ,
- Manual (588 pages) ,
- Quick start manual (3 pages)
Table of Contents
Advertisement
Available languages
Available languages
Quick Links
Advertisement
Table of Contents

Related Manuals for Philips sonicare 3000 Series


Summary of Contents for Philips sonicare 3000 Series
- Page 1 Cordless Power Flosser 3000 Series 2000 Series...
- Page 4 empty page before TOC...
- Page 5 English 6 Español 27 Français (Canada) 45...
-
Page 6: Important Safety Instructions
- Children should be supervised to ensure that they do not play with the product. - Charge only with Philips WAA1001, WAA2001, or safety adapters with input ratings (100 - 240V~; 50/60Hz; 3.5W) and output ratings (5Vdc;... - Page 7 English - To avoid physical injury, do not fill the reservoir with hot water. Do not put foreign objects in the reservoir. - Do not clean any part of the product in the dishwasher. - The maximum altitude of use is 4500 meters. - This product has only been designed for cleaning teeth and gums.
-
Page 8: Battery Safety Instructions
Misuse can lead to hazards or serious injuries. Accessories supplied may vary for different products. - Only use original Philips accessories and consumables. Only use detachable supply unit WAAxxxx. - Keep product and batteries away from fire and do not expose them to direct sunlight or high temperatures. -
Page 9: Electromagnetic Fields (Emf)
Tape battery terminals or put batteries in a plastic bag before you discard them. Electromagnetic fields (EMF) This Philips appliance complies with all applicable standards and regulations regarding exposure to electromagnetic fields. Storage and transportation conditions Temperature between -10 °C and +60 °C (14 °F... -
Page 10: Intended Use
English Introduction Welcome to Philips! Congratulations on your new Sonicare Cordless Power Flosser. To fully benefit from the support that Philips offers, register your product at philips.com/welcome. Intended Use The Philips Sonicare Cordless Power Flosser is an oral irrigator intended to remove plaque and... - Page 11 English Note: The contents of the box may not include all items shown depending on the product configuration purchased. Nozzles To see what type of nozzles you have, check the code at the base of the nozzle. Each nozzle type provides different benefits.
- Page 12 English Note: The contents of the box may not include all items shown depending on the product configuration purchased. Modes and intensities Modes (Specific models only) Depending on your model, your Cordless Power Flosser is equipped with either one or two different modes.
-
Page 13: Getting Started
English Deep clean (3000 Series) This mode utilizes Pulse Wave technology, to guide you tooth by tooth, using strong and gentle pulses of water for a thorough clean. With Pulse Wave technology the flow of the water increases and decreases in intensity, providing a brief pause during which you can move the nozzle to the next space between your teeth. -
Page 14: Filling The Reservoir
English 3 Connect the USB-A cable into a 5V USB wall adapter. Note: Wall adapter not included in all models. Only use a 5V IPX4 adapter. 4 The battery indicator flashes while charging (see 'Charging'). Note: It can take up to 8 hours to fully charge the battery, but you can use the Cordless Power Flosser before it is fully charged. - Page 15 English Note: Remove the charger from the Cordless Power Flosser prior to filling the reservoir and using the device. Option 1: Lift the flip top to the side of the reservoir and fill the reservoir through the quick side fill port. Option 2: 1 Twist to detach the reservoir and fill the reservoir through the wide mouth opening.
- Page 16 English To remove the nozzle, press the nozzle release button and pull the nozzle from the handle. Using your Cordless Power Flosser 1 Before turning on the device, point the nozzle tip at the sink. Press the on/off button on the handle to turn on the Cordless Power Flosser.
- Page 17 English b Starting from your back teeth in your upper or lower jaw, slide the nozzle tip along the gum line and pause briefly between each tooth. c Continue to clean both inside (15 seconds) and outside (15 seconds) of your teeth for a total of 30 seconds in one arch of your mouth.
-
Page 18: After Each Use
English teeth have been cleaned for a total of at least one minute. Cleaning Orthodontic Brackets with the Quad Stream Nozzle 1 To clean around orthodontic brackets, place the nozzle tip over each bracket. 2 Gently rotate the nozzle tip around the bracket in a small circle before moving to the bracket on the next tooth. -
Page 19: Battery Status
English Charging Battery Status This Cordless Power Flosser is designed to provide at least 25 flossing sessions, each session lasting 1 minute. The battery indicator shows the battery status when you complete the flossing session, or when you pause the Power Flosser. Note: The device will shut off after 2 minutes of use. - Page 20 English Empty Flashing amber for 5 seconds and the Power Flosser turns off automatically Note: When the low battery indicator appears, the Power Flosser is designed to provide at least 3 flossing sessions, each session lasting 1 minute. Cleaning The Cordless Power Flosser needs to be cleaned once a week.
- Page 21 English - Every few months, or if your nozzle becomes clogged: Soak the nozzle in a container of 2 parts water and 1 part vinegar for 5 minutes. Rinse the nozzle with warm water. Internal components, hose and handle Fill the reservoir with warm water and add 1-2 tablespoons of white vinegar.
- Page 22 English 1 Twist reservoir to detach. 2 Remove the nozzle by pressing the nozzle eject button on the back of the handle. 3 Insert bottom of nozzle into the bottom of the Power Flosser. 4 Twist the reservoir to reattach. Note: Be sure to dry the inside of the reservoir and the nozzle prior to using this functionality.
-
Page 23: Warranty And Support
Replacement Replace nozzles every 6 months or immediately when damaged. To buy accessories or spare parts, visit philips.com or go to your local Philips Sonicare dealer. Locating the model number Look on the box for the model number of your device. -
Page 24: Warranty Exclusions
WARRANTIES SET FORTH ABOVE. IN SOME STATES LIMITATIONS ON DURATION OF IMPLIED WARRANTIES DO NOT APPLY. LIMITATION OF REMEDIES IN NO EVENT SHALL PHILIPS OR ANY OF ITS AFFILIATED OR SUBSIDIARY COMPANIES BE LIABLE FOR ANY SPECIAL, INCIDENTAL OR CONSEQUENTIAL DAMAGES BASED UPON... - Page 25 1-800-822-8837 or visit www.call2recycle.org for battery drop-off locations. - For assistance, visit our website www.philips.com/support or call 1-800-682-7664 toll free. - Your product is designed and manufactured with high quality materials and components, which can be recycled and reused. For...
- Page 26 Special handling may apply for these materials, for more information, go to: www.dtsc.ca. gov/hazardouswaste/perchlorate The built-in rechargeable battery must be removed by a qualified professional when the product is discarded. Instructions for removal of built-in rechargeable batteries can be found on www.philips.com/support.
-
Page 27: Instrucciones Importantes De Seguridad
Evite que los niños jueguen con este producto. Realiza la carga solo con adaptadores Philips WAA1001, WAA2001 o adaptadores de seguridad con valores de entrada (100 - 240 V~; 50/60 Hz;... - Page 28 Los accesorios incluidos pueden variar según el producto. Use únicamente accesorios y productos consumibles originales Philips. Usa únicamente la unidad de suministro desmontable WAAxxxx. Mantenga el producto y las baterías lejos del fuego y no los exponga a la luz solar directa ni a altas temperaturas.
-
Page 29: Campos Electromagnéticos (Cem)
Campos electromagnéticos (CEM) Este Philips aparato cumple con todos los estándares y las regulaciones aplicables sobre la exposición a campos electromagnéticos. Condiciones de almacenamiento y transporte Temperatura: entre -10 °C y +60 °C (14 °F y 140 °F). -
Page 30: Uso Indicado
Español Introducción ¡Bienvenido a Philips! ¡Felicidades por haber adquirido su nuevo limpiador dental eléctrico Sonicare Cordless Power Flosser! Para aprovechar al máximo el soporte que ofrece Philips, registra tu producto en philips.com/welcome. Uso indicado El limpiador dental eléctrico Philips Sonicare Cordless Power Flosser es un irrigador bucal que se diseñó... - Page 31 Español Nota: Según la configuración del producto que haya adquirido, es posible que la caja no contenga todas las piezas que se muestran aquí. Boquillas Para ver qué tipo de boquillas tiene, ve el código en la base de la boquilla. Cada tipo de boquilla brinda distintos beneficios.
- Page 32 Español Modos e intensidades Modos (solo modelos específicos) En función del modelo, el limpiador dental eléctrico Cordless Power Flosser cuenta con uno o dos modos diferentes. Si tienes un dispositivo con dos modos, presiona el botón de modos para alternar entre el modo Standard Clean (limpieza estándar) y el modo Deep Clean (limpieza profunda) a fin de seleccionar el deseado.
-
Page 33: Antes De Empezar
Español Intensidades El limpiador dental eléctrico Cordless Power Flosser tiene con tres niveles diferentes de intensidad. Para cambiar la ×3 intensidad al ajuste que prefieras, presiona el botón de ×2 intensidad. ×1 Nota: Se recomienda comenzar a usar este limpiador dental eléctrico Power Flosser con la intensidad más baja y aumentarla en el transcurso de algunas semanas. - Page 34 Español 4 El indicador de la batería parpadea mientras está cargando (ver 'Carga'). Nota: La batería puede demorar hasta 8 horas en cargarse totalmente, pero puedes usar el limpiador dental eléctrico Cordless Power Flosser antes de que se complete la carga. Nota: Vuelve a colocar la tapa del puerto de carga en el limpiador dental eléctrico Cordless Power Flosser cuando no se esté...
- Page 35 Español Opción 1: Levanta la tapa abatible al costado del depósito y llena el depósito a través del puerto lateral de llenado rápido. Opción 2: 1 Gira el depósito para poder separarlo y llénalo a través de la abertura de la boca ancha. 2 Llena el depósito.
- Page 36 Español Utiliza el limpiador dental eléctrico Cordless Power Flosser 1 Antes de encender el dispositivo, dirige la punta de la boquilla hacia el lavabo. Presiona el botón de encendido/apagado en el mango para encender el limpiador dental eléctrico Cordless Power Flosser. Deja que el agua se rocíe en el lavabo.
- Page 37 Español Continúa limpiando el interior (15 segundos) y el exterior (15 segundos) de los dientes durante un total de 30 segundos en un arco de la boca. Nota: Recuerda limpiar las partes internas de los dientes. Nota: Puedes utilizar el rotor de boquillas para girar y colocar la punta de la boquilla y, de esta forma, poder limpiar el interior de los dientes.
-
Page 38: Después De Cada Uso
Español 2 Gira suavemente la punta de la boquilla alrededor del bracket, dibujando un pequeño círculo antes de pasar al bracket del siguiente diente. Después de cada uso 1 Apagas el limpiador dental eléctrico Cordless Power Flosser. 2 Retira el depósito y vacíalo 3 Presiona el botón de liberación que está... - Page 39 Español Estado de la batería Indicador de batería Completa Verde permanente Carga Verde parpadeante Nota: El indicador de batería parpadeará hasta que esté completamente cargado. Cuando se completa la carga y sigue enchufado, la luz quedará permanentemente en verde durante 30 segundos y, luego, se apagará Cuando el limpiador dental eléctrico Power Flosser no se está...
- Page 40 Español Depósito Retira con cuidado el depósito del limpiador dental eléctrico Cordless Power Flosser con un movimiento giratorio. El depósito se puede lavar a mano con agua tibia y jabón neutro, o bien, se puede introducir en el estante superior del lavavajillas. Mango Cuando sea necesario, puedes limpiar el mango con un paño suave y jabón neutro.
- Page 41 Español 1 Gira el depósito para separarlo. 2 Presiona el botón de expulsar que está en la parte trasera del mango para retirar la boquilla. 3 Inserta la parte inferior de la boquilla en la parte inferior del limpiador dental eléctrico Power Flosser. 4 Gira el depósito para volver a colocarlo.
-
Page 42: Garantía Y Asistencia
Garantía y asistencia La garantía de Philips cubre los productos por un periodo de 2 años después de la fecha de compra. Philips se hará cargo de la reparación o sustitución de los defectos debidos a materiales defectuosos o de fabricación, siempre y cuando se presente una prueba convincente de compra en el plazo estipulado. - Page 43 ANTERIORMENTE. EN ALGUNOS ESTADOS NO SE APLICAN LÍMITES EN LA DURACIÓN DE LA GARANTÍA. LIMITACIÓN DE RECURSOS EN NINGÚN CASO PHILIPS O CUALQUIERA DE SUS EMPRESAS AFILIADAS O SUBSIDIARIAS SERÁ RESPONSABLE DE DAÑOS ESPECIALES, INCIDENTALES O CONSECUENCIALES DEL INCUMPLIMIENTO DE LA GARANTÍA O DEL CONTRATO, NEGLIGENCIA, AGRAVIO O...
- Page 44 Un profesional calificado debe retirar la batería recargable incorporada cuando se desecha el producto. Las instrucciones para retirar las baterías recargables incorporadas están disponibles en www.philips.com/support. Extracción de la batería recargable integrada CONTIENE CELDAS RECARGABLES DE IONES DE LITIO. DEBE RECICLARSE O DESECHARSE CORRECTAMENTE.
-
Page 45: Importantes Consignes De Sécurité
Les enfants doivent être surveillés pour s’assurer qu’ils ne s’amusent pas avec le produit. Chargez votre appareil uniquement avec des adaptateurs Philips WAA1001, WAA2001 de sécurité ou 100 - 240 V~/ 50/60 Hz /3,5 W en entrée et 5 Vcc /2,5 W en sortie. Pour connaître la liste des adaptateurs compatibles, veuillez consulter le site philips.com/support. - Page 46 Les accessoires fournis peuvent varier selon les différents produits. N’utilisez que des accessoires et des consommables Philips d’origine. N’utilisez que le bloc d’alimentation amovible WAAxxxx. Gardez le produit et les piles éloignés du feu et ne les exposez pas aux rayons directs du soleil ou à...
-
Page 47: Champs Électromagnétiques (Cem)
Champs électromagnétiques (CEM) Cet Philips appareil est conforme à toutes les normes et à tous les règlements applicables relatifs à l'exposition aux champs électromagnétiques. -
Page 48: Utilisation Prévue
Philips, enregistrez votre produit à l’adresse philips.com/welcome. Utilisation prévue Le Philips Sonicare Cordless Power Flosser est un irrigateur bucco-dentaire conçu pour enlever la plaque dentaire et les résidus alimentaires entre les dents et à la surface de celles-ci, afin de réduire les caries, d’améliorer et de maintenir la santé... - Page 49 Français (Canada) 15 Étui de voyage (Certains modèles seulement) 16 USB-A vers petit connecteur 17 Adaptateur d’alimentation USB-A (Certains modèles seulement) Remarque : Le contenu de la boîte peut ne pas contenir tous les éléments illustrés selon la configuration du produit acheté. Les buses Pour voir quel type de buse vous avez, vérifiez le code au bas de la buse.
- Page 50 Français (Canada) Modes et intensités Modes (certains modèles uniquement) Selon votre modèle, votre Cordless Power Flosser est équipé d’un ou deux modes différents. Si votre appareil comporte deux modes, appuyez sur le bouton mode pour basculer entre le Standard Clean (nettoyage standard) et le Deep Clean (nettoyage en profondeur) et sélectionner le mode désiré.
-
Page 51: Premiers Pas
Français (Canada) Intensité Votre Cordless Power Flosser offre trois réglages d’intensité différents. Pour modifier l’intensité en ×3 fonction du réglage que vous préférez, appuyez sur le ×2 bouton d’intensité. ×1 Remarque : il est recommandé de commencer à utiliser le Power Flosser sur la plus faible intensité et d’augmenter l’intensité... -
Page 52: Remplissage Du Réservoir
Français (Canada) 4 Le témoin de pile clignote pendant la charge (voir « Charge en cours »). Remarque : une charge complète peut prendre jusqu’à 8 heures, mais vous pouvez utiliser le Cordless Power Flosser avant qu’il ne soit complètement chargé. Remarque : replacez le couvercle du port de charge sur le Cordless Power Flosser lorsqu’il n’est pas en charge. - Page 53 Français (Canada) Option 2 : 1 tournez le réservoir pour le détacher et le remplir par la grande ouverture. 2 Remplissez le réservoir. 3 Tournez le réservoir pour le remettre en place. Insertion et retrait des buses Insérez la buse de votre choix dans le manche. Appuyez sur la buse jusqu’à...
- Page 54 Français (Canada) 2 Placez l’embout de la buse dans votre bouche. Penchez-vous au-dessus du lavabo et refermez partiellement vos lèvres sur la buse pour éviter les éclaboussures. Laissez suffisamment d’espace pour permettre à l’eau de s’écouler de votre bouche dans l’évier.
-
Page 55: Après Chaque Utilisation
Français (Canada) d Répétez l’opération pour l’autre mâchoire sec. pendant 30 secondes (15 secondes à l’intérieur, sec. 15 secondes à l’extérieur), jusqu’à ce que tous les espaces autour et entre vos dents aient été sec. nettoyés pendant au moins une minute. sec. Remarque : vous pouvez arrêter le débit d’eau pendant l’utilisation en appuyant sur le bouton marche/arrêt du Cordless Power Flosser. - Page 56 Français (Canada) 5 Essuyez l’excès d’eau sur la buse, l’extérieur du manche et le réservoir. 6 Remettez la buse sur le manche ou rangez-la dans le rangement intégré au réservoir (voir « Rangement »). Remarque : pour faciliter le séchage, gardez l’orifice de remplissage latéral du réservoir ouvert ou laissez le Cordless Power Flosser démonté...
- Page 57 Français (Canada) Remarque : lorsque le témoin de pile faible apparaît, le Power Flosser peut fournir au moins 3 séances d’hydropulsion d’une minute. Nettoyage Le Cordless Power Flosser doit être nettoyé une fois par semaine. Nettoyez l’appareil et les accessoires de la manière suivante. Les accessoires peuvent varier selon le modèle.
- Page 58 Français (Canada) Étui de voyage Nettoyez l'étui de voyage avec un chiffon doux et un mélange d’eau chaude et de savon doux. Essuyez l'étui de voyage avec un chiffon pour le sécher. Rangement Rangement des buses intégré au réservoir Votre Power Flosser est conçu de telle sorte que vous pouvez ranger votre buse dans le réservoir dans le bas du manche.
-
Page 59: Garantie Et Assistance
à la clientèle au 1-800-682-7664 ou sur www.philips.com/sonicare-warranty. Sinon, communiquez avec le centre de service à la clientèle Philips de votre pays. Pour en savoir plus sur nos produits et accéder aux instructions d’utilisation en ligne, visitez le site : https://www.usa.philips.com/c-w/support- home/sonicare (Amérique du Nord) ou... - Page 60 DE DURÉE RELATIVES AUX GARANTIES IMPLICITES, LES RESTRICTIONS CI-DESSUS NE S'APPLIQUENT PAS FORCÉMENT À VOTRE CAS. RESTRICTION DES RECOURS NI LA SOCIÉTÉ PHILIPS ORAL HEALTHCARE, INC. NI AUCUNE DE SES SOCIÉTÉS ASSOCIÉES OU FILIALES NE POURRONT ÊTRE TENUES RESPONSABLES DES DOMMAGES SPÉCIFIQUES, ACCESSOIRES OU INDIRECTS RÉSULTANT D'UNE RUPTURE DE GARANTIE, D'UNE...
-
Page 61: Mise Au Rebut
Pour obtenir de l'aide, visitez le site Web www.philips.com/support ou composez le numéro sans frais 1-800-682-7664. Votre produit a été conçu et fabriqué avec des matériaux et composants de grande qualité, qui peuvent être recyclés et réutilisés. - Page 63 Empty page before back cover...
- Page 64 Philips Oral Healthcare, LLC and/or KPNV. ©2022 Koninklijke Philips N.V. (KPNV). Tous droits réservés. Philips et le blason Philips sont des marques de commerce de KPNV. Sonicare et le logo Sonicare sont des marques de commerce de Philips Oral Healthcare, LLC et (ou) KPNV.
Need help?
Do you have a question about the sonicare 3000 Series and is the answer not in the manual?
Questions and answers