Table of Contents
Advertisement
Quick Links
Advertisement
Table of Contents

Summary of Contents for Sencor STM 8970
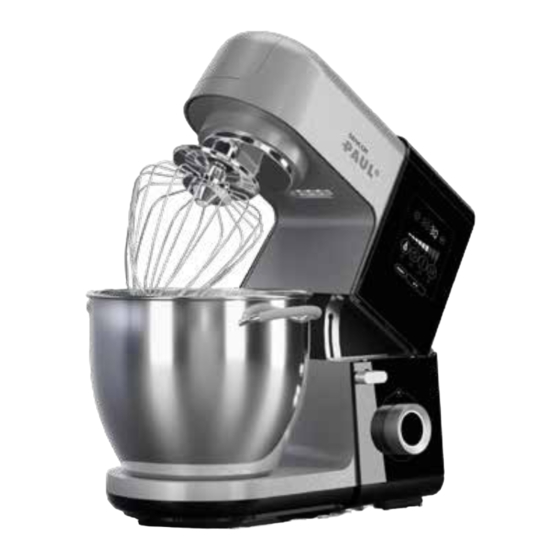
- Page 1 STM 8970 MULTIFUNCTIONAL STAND MIXER Translation of the original manual...
- Page 2 STM 8970...
-
Page 12: Important Safety Instructions
EN Multifunctional Stand Mixer Important safety instructions READ CAREFULLY AND STORE FOR FUTURE USE. General warnings This appliance may be used by persons with physical, • sensory or mental impairments or by persons with insufficient experience and knowledge, if they are properly supervised or have been informed about how to use the appliance in a safe manner and understand the potential dangers. - Page 13 blending jar, especially when installing and removing accessories, when filling or emptying the blending jar and when cleaning. The surfaces of the appliance and its accessories that • come into contact with food must always be cleaned according to the instructions in this user’s manual. This user’s manual includes processing times and speed •...
- Page 14 Warning: Using non-original accessories may result in a dangerous situation arising. • It is forbidden to modify the surface of the appliance in any way, e.g. with self-adhesive wallpaper, foils, etc. • Only use the appliance and its accessories in accordance with the instructions contained in this user's manual. •...
-
Page 15: Description Of The Appliance And Accessories
EN Multifunctional Stand Mixer User's manual B8 Touch button for starting/ B9 Touch button RESET • Thank you for purchasing a SENCOR brand product and we hope that you will be happy with it. stopping the preset program B10 Start/Pause touch button for the blender •... -
Page 16: Control Elements
• Prior to first use, clean all the parts that are intended for coming into • To put the multifunctional stand mixer into operation from the contact with food in the following manner: stand-by mode, use the control elements described further in this user’s manual. -
Page 17: Soft Start Function
BEATING, WHIPPING AND KNEADING Touching this button in the stand-by mode will start the preset program for whipping with the balloon Warning: whisk. Button B5 Before installing or removing accessories, the Pressing this button again will end the program. multifunctional stand mixer must always be turned off and disconnected from the power Touching this button in the stand-by mode will start the socket. - Page 18 Attention: • In the stand-by mode, start the work cycle with a preset speed and duration by touching the button of one of the preset programs. When tilting down the multi-function head A1, The following buttons will be lit: B9−B10, the button of the take care not to crimp your fingers between the currently selected program, speed indicator B4 (the current speed tilting and rigid part of the multifunctional stand...
- Page 19 • Set the speed control knob A11 back to the 0 position. Ending operation and disassembling the accessories • After you have finished using the appliance, set the control knob Attention: A11 to the 0 position and disconnect the power cord from the power The maximum continuous operating time is socket.
- Page 20 Assembling the grinder for stuffing sausage casings (fig. C and C set the lowest speed and then increase it as required. The display will show the elapsed operating time. • Insert the screw shaft C6 into the grinding chamber C1. At the same time, make sure that the screw shaft C6 is inserted in the grinding •...
- Page 21 • With one hand hold the sausage casing on the attachment C15 GRATING and use the other hand to push the ground meat mixture with the Warning: pusher C5 through the feed tube of the grinder C2. If the sausage casing sticks to the attachment C15, it is necessary to moisten it Before installing or removing accessories, the with water again.
- Page 22 • Connect the power cord to an el. power socket. Touch button B10 • The table provides an overview of the most frequently used food. to set the multifunctional stand mixer to stand-by mode. Ending operation and removing the grating attachment •...
- Page 23 along its entire perimeter. Insert the inner cap E1 into the hole in the the speed setting while the appliance is running. We recommend lid E2 and ensure that it is properly seated in it. to start at a lower speed and to increase it gradually. The recommended food processing times and recommended speed settings are provided in the table Quick guide to blending.
-
Page 24: Cleaning And Maintenance
• Make sure that the blade assembly E4 has stopped rotating. used whisk A16 under cold water. If you were to use hot water, the Carefully remove the assembled blending jar from the multi- egg white remains would harden and their removal would be more function head A1 by turning it towards the opened padlock symbol difficult. -
Page 25: Technical Specifications
TECHNICAL SPECIFICATIONS Rated voltage range ................220−240 V Rated frequency ..................50/60 Hz Rated power input ..................1,800 W Weight (without accessories) ..............10.5 kg Total volume of the stainless steel bowl ............6.7 l Maximum filling capacity of the stainless steel bowl ......4.5 l The maximum filling capacity of the glass blending jar ...... - Page 26 FAST ČR, a.s. U Sanitasu 1621 CZ-251 01 Říčany www.sencor.eu...


Need help?
Do you have a question about the STM 8970 and is the answer not in the manual?
Questions and answers