Table of Contents
Advertisement
Advertisement
Table of Contents

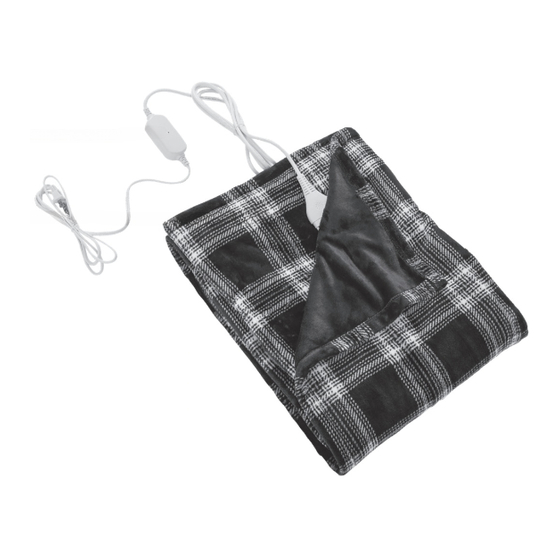
Summary of Contents for Berkshire HEATED THROW
- Page 1 with Built-in One-Touch Remote...
-
Page 2: Warnings And Safeguards
IMPORTANT INSTRUCTIONS DO NOT DESTROY WARNINGS AND SAFEGUARDS To operate this warming product properly and safely, there are some critical safety precautions you need to follow. As with all electrical appliances, there is an inherent danger of overheating, fire or personal injury with the product is not used correctly. - Page 3 • Always turn off the electric current when the warming product is not in use, either by turn off the controller or unplugging from the wall outlet. • Wrapping of the cord around the controls may damage the cord. Loop loosely when storing.
-
Page 4: Controller Features
CONTROLLER FEATURES ON/OFF Button / Heat Level Settings OFF - no lights lit LEVEL 1: Lowest Heat LEVEL 2 LEVEL 3 LEVEL 4: Highest heat... -
Page 5: Heat Mode
HEAT MODE There are 4 Heat Setting Levels, with 1 light lit being the lowest heat and all 4 lit being the highest heat. The temperature goes up from 1 to 4 each time the ON/OFF Button is pressed. AUTO SHUT-OFF FEATURE Controller will automatically shut off 4 hours after being turned on. -
Page 6: Setup Procedure
SET-UP PROCEDURE PARTS OF HEATED PRODUCT Indicator Light Cord Connector EZ Touch Control Button STEP 1 Locate cord connector on the product. NOTE: PLUG CONTROLLER CORD TO PRODUCT FIRST! Do not plug controller into the wall outlet until you have connected the controller cord to the product. - Page 7 STEP 3 Plug the power cord into a 120V wall outlet and look for the light on the circuit box on the cord to light up. STEP 4 Turn on using the ON/OFF button located on the silicone disk found on the product itself.
-
Page 8: Care Instructions
CARE INSTRUCTIONS CARE AND CLEANING OF YOUR HEATED PRODUCT We recommend washing before initial use. Before washing or storing your heated product: • Disconnect power cord from wall BEFORE detaching control cord from the heated product. • Ensure that no cords are still connected and none of the wires have worn through the fabric. -
Page 9: Machine Wash
MACHINE WASH • Presoak for 15 minutes in mild soap and cold water. • Wash in mild soap and cold water on Delicate Cycle in the washer for two minutes. Remember, do not use bleach. • Rinse in fresh, cold water. •... -
Page 10: Troubleshooting
TROUBLESHOOTING Please attach the cord to this product before plugging the cord into the electrical outlet. My product doesn’t work? What could be possible causes? • Controller is not properly connected or is loose: Check whether the controller is properly connected. •... -
Page 11: Warranty
(b) all other implied warranties and any liability not based upon contract are hereby disclaimed and excluded. To the extent permitted by law, in no event shall Berkshire Blanket & Home Co. be liable for any indirect, punitive, incidental or consequential damages, or special damages, regardless of whether a claim for such damages is based on warranty, contract, negligence or otherwise. -
Page 12: Product Specifications
PRODUCT SPECIFICATIONS HEATED THROW WITH EZ TOUCH CONTROLLER Model Number HLT1-GJT-F Item Name Heated Throw Size Throw Product 50in x 60in Dimensions (127cm x 152cm) Heat Settings 4 Settings Input Voltage AC 120V/60Hz Rated power 110W Timer Settings None Auto Shut-Off... - Page 13 CAUTION: This product should be only used in conjunction with the specified controller. Prior to use, please make sure this product is free from damage. If you have any doubt, DO NOT use and contact Customer Service at: berkshireblanket.com/heated email customercare@berkshireblanket.com or call 1-800-372-2018 between the hours of 8AM-5PM Eastern Time, Monday through Friday.
- Page 14 FCC CERTIFIED This device complies with part 15 of the FCC Rules. Operation is subject to the following two conditions: 1. This device may not cause harmful interference, and 2. This device must accept any interference received, including interference that may cause undesired operation. Note: This equipment has been tested and found to comply with the limits for a Class B digital device, pursuant to part 15 of the FCC Rules.
- Page 16 Designed in New England ©Berkshire Blanket & Home Co. | 44 East Main Street, Ware, MA 01082 berkshireblanket.com/questions | MAN1017RP...

Need help?
Do you have a question about the HEATED THROW and is the answer not in the manual?
Questions and answers
I have lost my controller and cord. Can I buy a replacement?
@Mary Snow No, it says in the manual that they don't sell replacements.
The circuit box of my heated blanket is blinking, and the blanket won't turn on. The light turns itself off after about thirty seconds. I tried different outlets, cleaning out around the prongs both on the blanket and cord side, and tried leaving it unplugged for a week and nothing changed.
If the circuit box indicator light is flashing, turn the controller off, unplug it from the wall outlet, and disconnect the controller cord from the product. Wait 30 seconds, then reconnect, ensuring the arrows are properly aligned. Plug it back into a 110~120V wall outlet and set the temperature to high. If the issue persists, contact Customer Service.
This answer is automatically generated
Can I get a new power cord ?
Yes, a replacement power cord for the Berkshire HL-GJT-03 Heated Throw is available.
This answer is automatically generated