Advertisement
Quick Links
Quick Start Installation
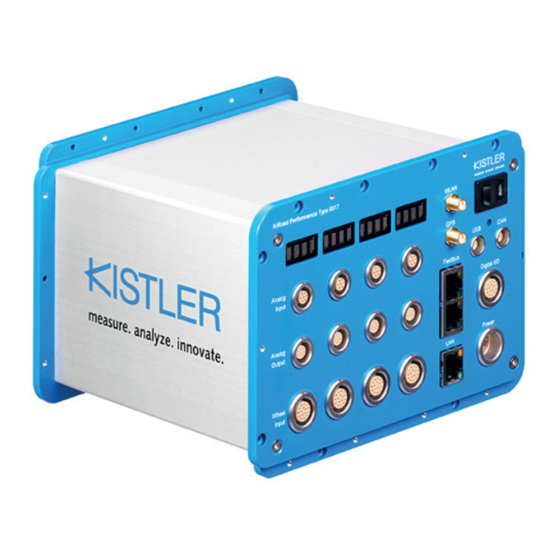
KiRoad Performance
Type 9817A
Contents
1. General Information
2. Scope of Delivery
3. Hardware Setup
4. Software Installation
5. LAN Connection Setup
6. Settings
7. Operation Basics
8. Important Events
Foreword
Information in this document is subject to change without
notice. Kistler reserves the right to change or improve its
products and make changes in the content without obligation
to notify any person or organization of such changes or
improvements.
To the extent permitted by law Kistler does not accept any
liability if this Quick Start Installation guide is not followed or
products other than those listed under Accessories are used.
©2016 ... 2018, Kistler Group. All rights reserved.
For safety notes and other important information
please refer to instruction manual 002-767e.
1.
General Information
KiRoad Performance is a state of the art signal processing
unit for Kistler RoaDyn wheel force transducers (WFT)
and measuring hubs. It supports up to 4 WFTs and
provides analog and digital signal outputs. The web-
based graphical user interface (GUI) allows general
WFT and system configuration, calibration matrices
administration and online value monitoring. KiRoad is
designed to install in a test vehicle under environmental
or laboratory conditions.
Dimensions (W x H x D): 182 x 127 x 200 mm
Weight: 2,9 kg
Power Supply: 10 - 36 V DC, 150 W, min. 12 A
2.
Accessories
The following accessories are included in the scope of
delivery:
• KiRoad signal processing unit
• Wireless LAN antenna
• BNC breakout cable
• BNC input adapter
• Ethernet cable
• USB cable
• CAN cable
• Sync cable
• Power cable
• USB flash drive
• This Quick Start Installation Guide
3.
Hardware Setup
m
wheel
General Section
1. Connect the circular end of the power cable to the
"Power" connector
and the pin plug on the other end to the power
supply or battery (not included).
2. Connect one end of the ethernet cable to the
"LAN" connector
end to the computer.
3. Screw the wireless LAN antenna to the "WLAN"
plug adapter
4. Connect the circular end of the Sync cable to the
"Digital I/O" connector
Performance and the BNC connectors on the other
end to the synchronization clock and trigger of the
9817A_002-742e-04.18
data acquisition system (DAQ).
For
specifications, please refer to the instruction manual.
5. Connect the circular end of the CAN cable to the
"CAN" connector
and the DE 9 connectors on the other end to the
CAN bus interface of the DAQ.
6. Alternative to Ethernet cable: Connect the circular
end of the USB cable to the "USB" connector
your KiRoad Performance and the other end to the
computer.
7. Optional: Screw the circular end of the GPS sensor
cable (not included) to the "GPS" connector
your KiRoad Performance.
For a list of supported GPS antennas or sensors (e.g.
Kistler CGPSSA) and signal specification, please refer
to the instruction manual.
Wheel Section
1. Connect the end of the RoaDyn WFT sensor cable
(not included) to the "Wheel Input" connector
of your KiRoad Performance.
For a list of supported RoaDyn WFT, please refer to
the instruction manual.
2. Connect the circular end of the BNC breakout cable
to the "Analog Output" connector
KiRoad Performance and the BNC connectors on
the other end to the analog input channel connectors
of the DAQ.
If needed, please use corresponding BNC extension
cables.
3. Optional: Connect the circular end of the BNC input
adapter to the "Analog Input" connector
KiRoad Performance and the other end to the BNC
output cable of the additional sensor.
For analog input signal specification, please refer to
the instruction manual.
4.
Software Installation
KiRoad Performance can be operated via web browser
GUI. For extended functionality (e.g. data management
and firmware update) please use the "KiCenter"
software. There are two options for KiCenter installation:
(a) Use the included KiCenter Software USB flash
drive. Insert the flash drive in your computer and
follow the on-screen instructions. For more
detailed information please refer to KiCenter
Installation Guide included on the flash drive.
(b) Download the software online: www.kistler.com.
Run the installation file and follow the on-screen
instructions.
For the latest KiCenter software version and
operating system support please visit the Kistler
website www.kistler.com.
1
2
3
4
wheel section
general section
(a)
of your KiRoad Performance
(b)
of your KiRoad and the other
(c)
of your KiRoad Performance.
(d)
of your KiRoad
synchronization
of
clock
and
(e)
of your KiRoad Performance
(i)
(j)
5.
LAN Connection Setup
Turn on your KiRoad Performance by throwing the
power toggle switch (k). The red LED will light up and
the wheel displays
messages including the current IP address of your
KiRoad Performance. The unit is ready to use as soon
as the wheel names (default: LF, RF, LR, RR) are
displayed.
Don't connect the KiRoad Performance to the local
network when the WLAN is activated and a fixed IP
address is set. This will create an additional DHCP
server within your local network and may lead to IP
address conflicts and a network crash.
Don't plug or unplug the RoaDyn WFT while your
KiRoad Performance is turned on.
Turn off your KiRoad Performance any time the WFT
cable configuration is changed.
Ensure that either the LAN or the USB cable is
connected to your KiRoad Performance as well as to
the PC, thereby creating a peer-to-peer direct
connection (A). Alternatively, you can establish a
wireless LAN connection between your KiRoad
Performance and the PC, (B). WLAN operation has to
be enabled first in the general settings. If possible,
connect your KiRoad Performance to the local computer
network, (C). Ensure that the IP address of your KiRoad
Performance does not conflict with another client in the
network.
For network connection settings and support, please
contact your local network administrator and refer
to the instruction manual.
trigger
(f)
of
Once the network connection is working, open the web
(g)
of
browser and enter the IP address of your KiRoad
Performance into the URL command line, for example
http://192.168.160.70. After an initialization screen
(loader), the KiRoad Performance GUI will appear
showing the System Status window.
The KiRoad Performance GUI is optimized for the
Google Chrome web browser. The usage of other
web browsers can lead to minor differences in
(h)
appearance.
of your
menu
of your
To show the current IP address of your KiRoad
Performance, please press the reset button
a pointer for less than 3 s. To reset the network
settings to factory default press the reset button
for more than 3 s.
Default network settings:
IP address: 192.168.160.70
Mask: 255.255.255.0
DHCP: disabled
W-LAN: disabled
6.
Settings
The first time your RoaDyn WFT is connected to
KiRoad Performance you need to set up the sensor
parameter and calibration matrix by switching to
Sensor Settings in the GUI menu. Here, you can
configure Wheel Name, Wheel Position, Angle Steps
and Lever Arm and check the Loadcell Radius of the
WFT. Please enter or change the Wheel Name (max. 4
characters length) that will be shown on the display
above the connected wheel input.
(m)
will show the booting sequence
resume button
settings window
(l)
with
(l)
Advertisement

Related Manuals for Kistler KiRoad Performance 9817A


Summary of Contents for Kistler KiRoad Performance 9817A
- Page 1 System Status window. To the extent permitted by law Kistler does not accept any liability if this Quick Start Installation guide is not followed or The KiRoad Performance GUI is optimized for the Wheel Section products other than those listed under Accessories are used.
- Page 2 Event Log of the GUI. There are three kinds measurement data. of messages: Errors (Err), Warnings (Warn) and Kistler Group products are protected by several intellectual property Information (Info). rights patents. For more details see: www.kistler.com Kistler Group Tel.
Need help?
Do you have a question about the KiRoad Performance 9817A and is the answer not in the manual?
Questions and answers