Table of Contents

Related Manuals for Westinghouse WPX2700e


Summary of Contents for Westinghouse WPX2700e
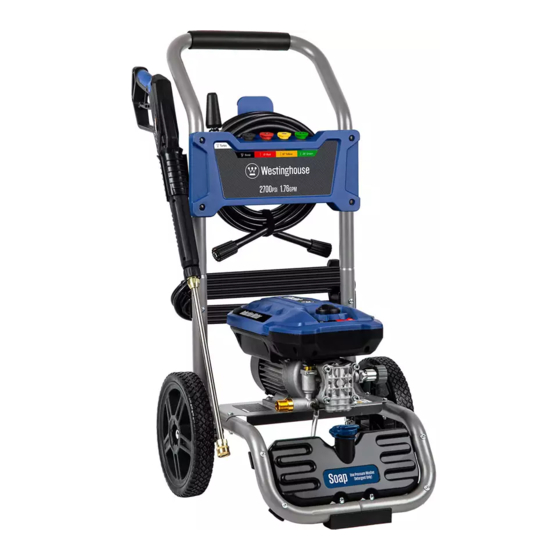
- Page 1 USER MANUAL WPX2700e/WPX3200e ELECTRIC PRESSURE WASHER WPX2700e 2700 PSI | 1.76 GPM WPX3200e 3200 PSI | 1.76 GPM DO NOT RETURN THIS PRODUCT TO THE STORE If you have questions or need assistance, please call customer service at 855-944-3571.
-
Page 2: Table Of Contents
Warranty registration 777 Manor Park Drive UPDATES Columbus, OH 43228 The latest User Manual for your Westinghouse products can be found under our support tab. IMPORTANT: Keep your purchase receipt for trouble- wpowereq.com/pages/manuals free warranty coverage. -
Page 3: Introduction
Failure to heed this warning could result in serious injury, electric shock, or death. If you have a question or experience a prob- lem with your Westinghouse purchase, call us at NOTICE NEVER allow the pressure 1-855-944-3571 to speak with an agent. -
Page 4: Safety
SAFETY SAFETY DEFINITIONS SAFETY SYMBOLS The words DANGER, WARNING, CAUTION, and Follow all safety information contained in this user’s NOTICE are used throughout this manual to highlight manual as well as the information on the product important information. Make sure that the meanings labeling. - Page 5 SAFETY IMPORTANT SAFETY INSTRUCTIONS to property and to maximize your pressure washing WARNING To reduce the risk of injury, the experience. user must read and understand the instructions l Understand and know how to safely stop the product before using this product. and bleed pressures quickly.
- Page 6 NEVER use lances or other parts that are not compatible for this specific Westinghouse unit. l Examine the hose regularly. Replace if damaged. Due to the high pressure involved, it cannot be repaired if cut l NEVER spray any electrical outlet with your pressure or damaged.
- Page 7 SAFETY SAFETY LABELS AND DECALS 7 On/Off The pressure washer has a two position switch for The following information is on your pressure washer’s turning the motor on and off. labels and decals. 1 Specifications 8 Performance label (See page 3) This pressure washer can deliver 2700 psi at 1.76 gallons per minute.
-
Page 8: Electrical
ELECTRICAL GROUNDING To test the GFCI: See Figure 1. l .Plug the power supply cord into a receptacle. This product must be grounded. Grounding creates a l .Press the TEST button and listen for a “click” indicating path of least resistance for electrical current in the case that the connection to the power supply was broken. -
Page 9: Components
COMPONENTS FIG. 2 F - Power Cord K - Water Inlet A - Spray Gun G - Cord Retainer L - Caster B - On/Off Switch H - Handle M - Nozzles C - Lance I - Hose Retainer N - Soap Tank D - Turbo Nozzle J - High Pressure Hose O - Gun Holster... -
Page 10: Assembly
ASSEMBLY l .Carefully cut down the sides of the packaging and WARNING Do not connect the pressure remove the carton contents. washer to a power supply until it is fully assembled. l .Inspect the carton contents. Verify that all the items in To avoid accidental starting and possible serious the INCLUDED LIST are present and undamaged. - Page 11 ASSEMBLY INSTALLING THE WHEELS l Slide the handle onto the frame until it contacts the buttons. See Figure 4. l Depress the buttons and continue sliding the handle l Place the pressure washer on a flat surface. down into place. l Lift the rear of the pressure washer high enough to gain l Pull the handle up until the buttons snap into the access to the bottom of the frame.
- Page 12 ASSEMBLY ATTACHING THE HOSE RETAINER AND FIG. 8 GUN HOLSTER See Figure 7 - 8. l Align the posts on the hose retainer with the holes in the frame. l Press the hose retainer onto the frame and push the posts into the hole.
- Page 13 ASSEMBLY CONNECTING THE HIGH PRESSURE FIG. 10 HOSE TO THE SPRAY GUN See Figure 10. l Pull the collar on the high pressure hose back and push the hose fitting firmly into the spray gun. l Screw the collar onto the spray gun and tighten securely. NOTE: Be careful not to damage the threads on the spray gun doing so could cause the gun to leak during use.
-
Page 14: Operation
ASSEMBLY OVERVIEW NOTICE ALWAYS turn the water supply This pressure washer can produce very high levels of “ON” before turning the pressure washer power to “ON”. water pressure and can be used for a variety cleaning Running the pump dry of water will cause damage to applications such as cleaning decks and walkways, the internal components and render the pressure washing vehicles and equipement;... - Page 15 OPERATION USING THE SPRAY GUN CLEANING WITH THE PRESSURE See Figure 14. WASHER See Figures 16 - 17. WARNING Hold the spray gun and lance To clean with detergent: with two hands (one hand to pull the trigger and the l Stop the pressure washer and turn the water faucet other to stabilize the gun) until you get used to the completely off.
- Page 16 OPERATION l Fill the soap tank with a properly formulated detergent- l Keep a nozzle cleaning tool nearby for unclogging the to-water ratio, following the detergent manufacturer’s nozzles. instructions. l The O-rings in the high pressure hose should be cleaned NOTE: Use detergents designed for pressure washers.
-
Page 17: Care And Maintenance
CARE AND MAINTENANCE l Release the pressure in the spray gun and unplug WARNING ALWAYS turn off the pressure the pressure washer. Wrap the cord around the cord washer, release the pressure in the spray gun, and retainer. unplug the pressure washer before performing l Remove the garden hose and store it properly. -
Page 18: Troubleshooting
Unit will not turn on. GFCI is tripped Press the RESET button on the power cord Defective motor or power cord. Contact Westinghouse customer service toll-free at 1 (855) 944-3571. Improper water source Connect the pressure washer to a water main. -
Page 19: Warranty
Westinghouse unit. Should a product difficulty occur, you must, at your expense, deliver or ship your Westinghouse unit to an Authorized Service Dealer for warranty repairs (which must occur within the applicable warranty period), and arrange for pick-up or return of your unit after the repairs have been made.
Need help?
Do you have a question about the WPX2700e and is the answer not in the manual?
Questions and answers