Table of Contents
Advertisement
Quick Links
Advertisement
Table of Contents

Summary of Contents for Maxxus SmartGym H1
- Page 1 SmartGym...
-
Page 2: Table Of Contents
This publication may not be reproduced, stored in a retrieval system, or transmitted in whole or in part, in any form or by any means, electronic, mechanical, photocopying, recording, or otherwise without the prior written permission of Maxxus Group GmbH & Co. KG. -
Page 3: Safety Instructions
Any manipulation of or interference with the device can cause damage to the device and be a danger to people. I you have any questions or queries contact your specialist dealer or the MAXXUS Service Team and they will be pleased... -
Page 4: Assembly
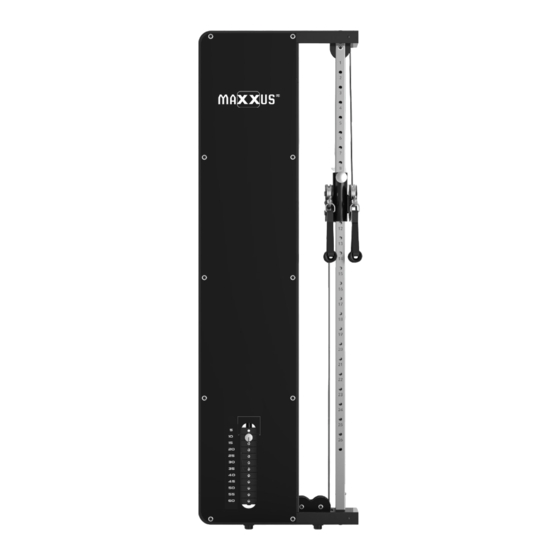
Assembly Carefully unpack all delivered parts. Have someone there to help you as some of the training device parts are bulky and heavy. Check that all the parts and xing materials (screws, nuts, etc.) have been delivered. Assemble the parts carefully as any damages or defects occurring due to mistakes made at the time of assem- bly are not covered by the warranty or guarantee. - Page 5 Assembly Step 2: Insert the locking pin (24) into the traction unit of the HomeGym H1. Then attach the rear panel (31) to the back of the HomeGym H1 using the M6 x15 screws (52). Step 3: Fix the HomeGym H1 to the wall. Once you have xed the our screws make sure they are properly secured and rmly xed.
- Page 6 Assembly Step 4: Fix the front cover using the washers (18) and screws M8x15 (41) to the front of the HomeGym H1. Step 5: Hook the 2 handles (29) onto the two brackets on the traction unit using the snap hooks (22). If you need this to be longer, use the chains included in delivery (53).
-
Page 7: Functions
Functions You can adjust the traction unit o the HomeGym H1 in 26 dierent vertical positions. To do this, pull out the handle o the saety pin rom the traction unit. Now adjust it to the desired position and let the safety pin snap back in to place again. -
Page 8: Cleaning & Maintenance
To achieve this clean them with a damp cloth and some liquid soap or washing up liquid. Alternatively, you can use the MAXXUS® degreaser spray (optionally available). Ater this, dry the guide pipes o thoroughly and lubricate them with MAXXUS® lubricant spray (optionally available) leaving a thin lm on the surface. -
Page 9: Training Recommendations
Training Recomendations Preparation Before Training Before you start training make sure that not only your training device is in perfect condition, your body must also be prepared for training. Therefore, if you have not done any endurance training for some time, you should con- sult your GP and undergo a tness check-up. - Page 10 Training Recomendations Intake of Liquids The intake o sufcient liquids beore and during training is vital. During a 60-minute training session it is possible to lose up to 0.5 litres o liquid. To compensate or this loss, you can drink a mix o one third apple juice to two thirds water to replace all electrolytes and minerals which your body loses through sweat.
-
Page 11: Exploded Drawing
Exploded Drawing... -
Page 12: Spare Parts List
Spare Parts List Description Spec. Base feet Head piece Left upright Right upright Stainless steel upright Sliding seat Double pulley Stainless steel guide bar Connection wall board Double pulley seat Pulley connection, long Ø10x36,5 Pulley connection, short Ø10x27,5 Double pulley connection shaft Ø10x56,5 Small pulley shaft Ø10x29,5... - Page 13 Spare Parts List Description Spec. Screw M8x15 Screw M6x15 Screw M6x15 Screw M8x15 Screw M8x60 Screw M10x20 Screw M6x10 Screw M8x10 M12x1,75 Washer Ø8,5xØ16xT1,5 Washer Ø10,5xØ20xT2,0 Nylon sleeve Ø22x13 Nylon rope Ø2,0x850 Screw M6x15 Chain...
-
Page 14: Warranty
The warranty period for your training device starts on the date of purchase and applies solely to products which were purchased directly rom the MAXXUS Group GmbH & Co KG or one o the MAXXUS Group GmbH & Co KG direct and authorised distribution partners. -
Page 15: Service Contract
I accept the General Terms and Conditions o MAXXUS® Group GmbH & Co. KG. I hereby instruct the company MAXXUS® Group GmbH & Co. KG to repair the above deects. In Warranty cases I will not be charged for the cost. The costs for repairs which are excluded from liability for defects in quality will be charged to me and must be settled immediately. - Page 16 Maxxus Group GmbH & Co. KG Nordring 80, 64521 Groß-Gerau Germany E-Mail: ino@maxxus.de www.maxxus.com...


Need help?
Do you have a question about the SmartGym H1 and is the answer not in the manual?
Questions and answers