Table of Contents
Advertisement
Quick Links
Advertisement
Table of Contents

Related Manuals for Solplanet ASW S-G2 Series


Summary of Contents for Solplanet ASW S-G2 Series
-
Page 2: Table Of Contents
Solplanst inverter Table of Contents 1 Notes on this Manual............................4 1.1 General Notes .............................. 4 1.2 Area of validity ............................. 4 1.3 Target group..............................4 1.4 Symbols used in this manual ........................5 2 Safety ..................................6 2.1 Intended use ..............................6 2.2 Important safety information ........................ - Page 3 5.5.3 Residual current protection ......................23 5.5.4 Overvoltage category ........................23 5.5.5 Grounding conductor monitoring ....................24 5.5.6 Rating of miniature circuit-breaker ....................24 5.6 DC Connection ............................24 5.6.1 Requirements for the DC Connection ..................... 24 5.6.2 Assembling the DC connectors ......................25 5.6.3 Disassembling the DC connectors ....................
- Page 4 10.1 DC input data ............................42 10.2 AC output data............................45 10.3 General data ............................47 10.4 Safety regulations ............................ 48 10.5 Tools and torque ............................. 50 11 Troubleshooting ............................... 51 12 Maintenance ..............................52 12.1 Cleaning the contacts of the DC switch ....................53 12.2 Cleaning the heat sink ..........................
-
Page 5: Notes On This Manual
1 Notes on this Manual 1.1 General Notes Solplanet inverter is a transformerless solar inverter with two independent MPP trackers. It converts the direct current (DC) from a photovoltaic (PV) array to grid-compliant alternating current (AC) and feeds it into the grid. -
Page 6: Symbols Used In This Manual
• Knowledge of all applicable laws, standards and directives • Knowledge of and compliance with this document and all safety information 1.4 Symbols used in this manual Safety instructions will be highlighted with the following symbols: DANGER indicates a hazardous situation which, if not be avoided, will result in death or serious injury. -
Page 7: Safety
2 Safety 2.1 Intended use The inverter converts the direct current from PV array into grid-compliant alternating current. The inverter is suitable for indoor and outdoor use. The inverter must only be operated with PV arrays (PV modules and cabling) of protection class II, in accordance with IEC 61730, application class A. - Page 8 Danger to life due to high voltages of the PV array When exposed to sunlight, the PV array generates dangerous DC voltage which is present in the DC conductors and the live components of the inverter. Touching the DC conductors or the live components can lead to lethal electric shocks.
-
Page 9: Symbols On The Label
Damage to the inverter due to electrostatic discharge Internal components of the inverter can be irreparably damaged by electrostatic discharge. • Ground yourself before touching any component. 2.3 Symbols on the label Symbol Explanation Beware of a danger zone This symbol indicates that the product mus be additionally grounded if additional grounding or equipotential bonding is required at the installation site. -
Page 10: Unpacking
array. Wait at least 5 minutes to allow the energy storage capacitors to fully discharge. Observe the documentation Observe all documentation supplied with the product 3 Unpacking 3.1 Scope of delivery UM0023_ASW1000-6000-S-G2_EN_V01_1122... - Page 11 Object Description Quantity Inverter 1 piece Wall mounting bracket 1 piece Wall anchors and hexagon bolts (2×) 1 set M5 screw (2×) DC connector 2 pairs AC Plug connector 1 piece WiFi stick 1 piece 2 pieces RS 485 COM plug(Optional) Documentation 1 set Smart meter terminal(Optional)...
-
Page 12: Mounting
4 Mounting 4.1 Ambient conditions Be sure the inverter is installed out of the reach of children. Mount the inverter in areas where it cannot be touched inadvertently. Ensure good access to the inverter for installation and possible service. Make sure that heat can dissipate, observe the following minimum clearance to walls, other inverters, or objects: Direction Min. -
Page 13: Selecting The Mounting Location
The mounting method, location and surface must be suitable for the inverter's weight and dimensions. If mounted in a residential area, we recommend mounting the inverter on a solid surface. Plasterboard and similar materials are not recommended due to audible vibrations when in use. 10. - Page 14 Mount the inverter vertically or tilted backward by a maximum of 15°. Never mount the inverter tilted forward or sideways. Never mount the inverter horizontally. Mount the inverter at eye level to make it easy to operate and to read the display. The electrical connection area must point downwards.
-
Page 15: Mounting The Inverter With The Wall Bracket
4.3 Mounting the inverter with the wall bracket Risk of injury due to the weight of the inverter • •When mounting, be careful that the inverter weighs approx.:18.5kg. Mounting procedures: 1. Use the wall bracket as a drilling template and mark the positions of the drill holes . Drill 2 holes with a 10 mm drill. - Page 16 3. Position and hang the inverter onto the wall bracket ensuring the two studs located on the outer ribs of the inverter are slotted into the respective slots in the wall bracket. 4. Check both sides of the heat sink to ensure that it is securely in place. insert one screw M5x12 each into the lower screw hole on both sides of the inverter anchorage bracket respectively and tighten them.
-
Page 17: Electrical Connection
5 Electrical Connection 5.1 Safety Danger to life due to high voltages of the PV array When exposed to sunlight, the PV array generates dangerous DC voltage which is present in the DC conductors and the live components of the inverter. Touching the DC conductors or the live components can lead to lethal electric shocks. -
Page 18: System Layout Of Units Without Integrated Dc Switch
Damage to the inverter due to electrostatic discharge Touching electronic components can cause damage to or destroy the inverter through electrostatic discharge. • Ground yourself before touching any component. 5.2 System layout of units without integrated DC switch Local standards or codes may require that PV systems are fitted with an external DC switch on the DC side. The DC switch must be able to safely disconnect the open-circuit voltage of the PV array plus a safety reserve of 20%. -
Page 19: Overview Of The Connection Area
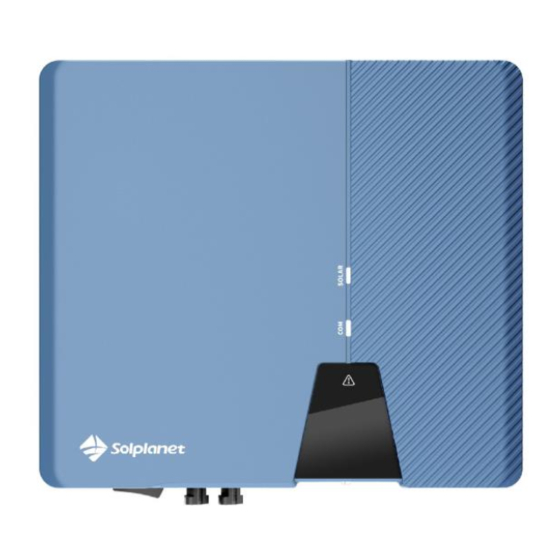
5.3 Overview of the connection area Object Description DC SWITCH: switch on or off for PV-load. DC input: plug-in connector to connect the strings. COM: Network port with protective cap. Connector for meter. WiFi: transmit and Wi-Fi signal. Connection point for an additional grounding. AC OUTPUT: plug-in connector, connect the grid. -
Page 20: Ac Connection
Procedure: 1. Insert the grounding conductor into the suitable terminal lug and crimp the contact. 2. Align the terminal lug with the grounding conductor on the screw. 3. Tighten it firmly into the housing (screwdriver type: PH2, torque: 2.5 Nm). Information on grounding components: Object Description... -
Page 21: Grid Connection
The grid connection is established using three conductors (L, N, and PE). We recommend the following specifications for stranded copper wire. The AC plug housing has the lettering of length for stripping cable.. ASW3000-S-G2/ASW3680-S-G2/ASW4000-S-G2/ASW5000-S-G2/ASW6000-S-G2 Object Description Value External diameter 10 to 16mm Conductor cross-section 4 to 8 mm²... - Page 22 Risk of injury due to electric shock and fire caused by high leakage current • The inverter must be reliably grounded in order to protect property and personal safety. • The PE wire should longer 2 mm than L,N during strip the outer sheath of AC cable. Damage to the seal of the cover in sub-zero conditions If you open the cover in sub-zero condition, the sealing of the cover can be damaged.
- Page 23 Connect the AC connector plug to the inverter´s AC output terminal. UM0023_ASW1000-6000-S-G2_EN_V01_1122...
-
Page 24: Residual Current Protection
5.5.3 Residual current protection The inverter is equipped with an all-pole sensitive residual current monitoring unit (RCMU) with an integrated differential current sensor which fulfills the requirements of DIN VDE 0100-712 (IEC60364-7- 712:2002). Therefore an external residual current device (RCD) is not required. If an external RCD needs to be installed because of local regulations, a RCD type A or type B can be installed as an additional safety measure. -
Page 25: Grounding Conductor Monitoring
5.5.5 Grounding conductor monitoring The inverter is equipped with a grounding conductor monitoring device. This grounding conductor monitoring device detects when there is no grounding conductor connected and disconnects the inverter from the utility grid if this is the case. Depending on the installation site and grid configuration, it may be advisable to deactivate the grounding conductor monitoring. -
Page 26: Assembling The Dc Connectors
Use of Y adapters for parallel connection of strings The Y adapters must not be used to interrupt the DC circuit. • Do not use the Y adapters in the immediate vicinity of the inverter. The adapters must not be visible or freely accessible. •... - Page 27 Cable requirements: The cable must be of type PV1-F, UL-ZKLA or USE2 and comply with the following properties: External diameter: 5 mm to 8 mm Conductor cross-section: 2.5 mm² to 6 mm² Qty single wires: at least 7 ...
-
Page 28: Disassembling The Dc Connectors
If the stranded wires are visible in the chamber • Proceed to step 5. of the clamping bracket, the cable is correctly positioned. If the stranded wires are not visible in the • Release the clamping bracket. To do so, insert a chamber, the cable is not correctly positioned. -
Page 29: Connecting The Pv Array
5.6.4 Connecting the PV array The inverter can be destroyed by overvoltage If the voltage of the strings exceeds the maximum DC input voltage of the inverter, it can be destroyed due to overvoltage. All warranty claims become void. • Do not connect strings with an open-circuit voltage greater than the maximum DC input voltage of the inverter. -
Page 30: Communication Equipment Connection
Ensure that all DC connectors are securely in place. Damage to the inverter due to moisture and dust penetration • Seal the unused DC inputs so that moisture and dust cannot penetrate the inverter. • Make sure all DC connectors are securely sealed. 5.7 Communication equipment connection Danger to life due to electric shock when live components are touched. -
Page 31: Rs485 Cable Connection
5.7.1 RS485 cable connection The pin assignment of the RJ45 socket is as follows: The network cable meeting the EIA/TIA 568A or 568B standard must be UV resistant if it is to be used outdoors. Cable requirement : - Shielding wire - CAT-5E or higher - UV-resistant for outdoor use - RS485 cable maximum length 1000m... -
Page 32: Smart Meter Cable Connection
5. Insert the network cable into the corresponding communication terminal of the inverter according to the arrow sequence, tighten the thread sleeve, and then tighten the gland. Disassemble the network cable in reverse order. 5.7.2 Smart meter cable connection Connection diagram UM0023_ASW1000-6000-S-G2_EN_V01_1122... -
Page 33: Wifi/4G Stick Connection
Procedure: Loosen the gland of the connector. Insert the crimped conductors into the corresponding terminals and tighten screws with a screwdriver as shown. Torque: 0.5-0.6 Nm Remove the dust cap from the terminal of the meter connector,and connect the meter plug. 5.7.3 WiFi/4G stick connection 1. -
Page 34: System Monitoring Via Wlan/4G
6.1 System monitoring via WLAN/4G User can monitor the inverter through the external WiFi/4G stick module. The connection diagram between the inverter and internet is shown as following two pictures, both two methods are available. Please note that each WiFi/4G stick can only connect to 5 inverters in method1. Tablet WIFI …... -
Page 35: Active Power Control With Smart Meter
(https://solplanet.net/installer-area/#monitoring) for system information. And download the user manual for the AISWEI Cloud Web or AISWEI APP. 6.2 Active power control with Smart meter The inverter can control activepower output via connecting smart meter, following picture is the system connection mode through WiFi stick. - Page 36 DRMS application description • Only applicable to AS/NZS4777.2:2015. • DRM0, DRM5, DRM6, DRM7, DRM8 are available. The inverter shall detect and initiate a response to all supported demand response commands , demand response modes are described as follows: Mode Requirement DRM 0 Operate the disconnection device DRM 1...
-
Page 37: Communication With Third-Party Devices
AiMonitor. 6.4 Communication with third-party devices Solplanet inverters can communicate with Solarlog or Meteocontrol, in other words, you can use Solarlog or Meteocontrol to monitor solplanet inverters. For more information, please refer to their user manual. UM0023_ASW1000-6000-S-G2_EN_V01_1122... -
Page 38: Commissioning
7 Commissioning Risk of injury due to incorrect installation • We strongly recommend carrying out checks before commissioning to avoid possible damage to the device caused by faulty installation. 7.1 Electrical checks Carry out the main electrical tests as follows: Check the PE connection with a multimeter: make sure that the inverter’s exposed metal surface has a ground connection. -
Page 39: Mechanical Checks
Check the grid voltage: check that the grid voltage at the point of connection of the inverter complies with the permitted value. 7.2 Mechanical checks Carry out the main mechanical checks to ensure the inverter is waterproof: ① Make sure the inverter has been correctly mounted with wall bracket. ②... -
Page 40: Operation
8 Operation The information provided here covers the LED indicators. 8.1 Overview of the panel The inverter is equipped with three LEDs indicators. Object Description Normal (White LED) Communication (White LED) Fault (Red LED) UM0023_ASW1000-6000-S-G2_EN_V01_1122... -
Page 41: Leds
8.1.1 LEDs The inverter is equipped with two LED indicators “white” and “red” which provide information about the various operating states. LED A: The LED A is lit when the inverter is operating normally. The LED A is off The inverter is not feeding into the grid. -
Page 42: Disconnecting The Inverter From Voltage Sources
9 Disconnecting the Inverter from Voltage Sources Prior to performing any work on the inverter, disconnect it from all voltage sources as described in this section. Always adhere strictly to the prescribed sequence. Destruction of the measuring device due to overvoltage •... -
Page 43: Technical Data
10 Technical Data 10.1 DC input data Type ASW1000-S-G2 ASW1500-S-G2 ASW2000-S-G2 Max. PV array power(STC) 1500Wp 2250Wp 3000Wp Max. input voltage 600V MPP voltage range 60V-560V Rated input voltage 360V Initial feeding-in voltage Min. feed-in power Max. input current per MPP input Isc PV(absolute maximum) - Page 44 Type ASW2500-S-G2 ASW3000-S-G2 ASW3680-S-G2 Max. PV array power(STC) 3750Wp 4500Wp 5520Wp Max. input voltage 600V MPP voltage range 60V-560V Rated input voltage 360V Initial feeding-in voltage Min. feed-in power Max. input current per MPP input Isc PV(absolute maximum) Number of independent MPP inputs Strings per MPP input Max.
- Page 45 Type ASW4000-S-G2 ASW5000-S-G2 ASW6000-S-G2 Max. PV array power(STC) 6000Wp 7500Wp 9000Wp Max. input voltage 600V MPP voltage range 60V-560V Rated input voltage 360V Initial feeding-in voltage 100V Min. feed-in power Max. input current per 16A/16A MPP input Isc PV(absolute 22.5A/22.5A maximum) Number of independent MPP inputs...
-
Page 46: Ac Output Data
10.2 AC output data Type ASW1000-S-G2 ASW1500-S-G2 ASW2000-S-G2 Rated active power 1000W 1500W 2000W Rated apparent AC 1000VA 1500VA 2000VA power Max. apparent AC power 1100VA 1650VA 2200VA Nominal AC voltage/ 220V,230V.240V/180V-295V range AC power frequency/ 50, 60/±5Hz range Rated output current 7.5A Max. - Page 47 Type ASW2500-S-G2 ASW3000-S-G2 ASW3680-S-G2 Rated active power 2500W 3000W 3680W Rated apparent AC 2500VA 3000VA 3680VA power Max. apparent AC power 2750VA 3300VA 3680VA Nominal AC voltage/ 220V,230V.240V/180V-295V range AC power frequency/ 50, 60/±5Hz range Rated output current 12.5A Max. output current 12.5A Max.
-
Page 48: General Data
Max. apparent AC power 4400VA 5500VA 6600VA Nominal AC voltage/ 220V,230V.240V/180V-295V range AC power frequency/ 50, 60/±5Hz range Rated output current Max. output current Max. output fault current 42.5A Max. output overcurrent 45 A protection Initial short-current AC current Inrush current <20% of nominal AC current for a maximum of 10ms Power factor (@rated power) -
Page 49: Safety Regulations
WIFI/Meter/RS485/GP Display Earth Fault Alarm cloud based, audible(AU) Zero power output Via connecting Smart meter Dimensions 368x325x145 (W x H x D mm) 9.5Kg Weight convection Cooling concept < 30 dB(A)@1m Noise emission (typical) indoor & outdoor Installation wall mounting bracket Mounting information XLIX DC connection technology... - Page 50 DC isolator ● PV iso / Grid monitoring ● / ● DC reverse polarity protection / AC ● / ● short- circuit current capability Residual current monitoring(GFCI) ● function Protection class (according to IEC 62103) / overvoltage category I / II(DC), III(AC) (according to IEC 60664-1) Internal overvoltage protection Integrated...
-
Page 51: Tools And Torque
10.5 Tools and torque Tools and torque required for installation and electrical connections. Tools, model Object Torque Torque screwdriver, T25 Screws for the cover 2.5Nm Screw for second protective grounding connection Torque screwdriver, T20 1.6Nm Screws for connecting the inverter and wall bracket Flat-head screwdriver, DEVALAN DC connector... -
Page 52: Troubleshooting
11 Troubleshooting When the PV system does not operate normally, we recommend the following solutions for quick troubleshooting. If an error occurs, the red LED will light up. There will have “Event Messages" display in the monitor tools. The corresponding corrective measures are as follows: Object Error Corrective measures... -
Page 53: Maintenance
• Check the open-circuit voltages of the strings and make sure it is below the maximum DC input voltage of the inverter. If the input voltage lies within the permitted range and the fault still occurs, please call service. •Check the PV array’s insulation to ground and make sure that the insulation resistance to ground is greater than 1 MOhm. -
Page 54: Cleaning The Contacts Of The Dc Switch
12.1 Cleaning the contacts of the DC switch Clean the contacts of the DC switch annually. Perform cleaning by cycling the switch to on and off positions 5 times. The DC switch is located at the lower left of the enclosure. 12.2 Cleaning the heat sink Risk of injury due to hot heat sink •... -
Page 55: Warranty
The factory warranty card is enclosed with the package, please keep well the factory warranty card. Warranty terms and conditions can be downloaded at www.solplanet.net,if required. When the customer needs warranty service during the warranty period, the customer must provide a copy of the invoice, factory warranty card, and ensure the electrical label of the inverter is legible. -
Page 56: Contact
• Type and number of connected PV modules • Error code • Mounting location • Installation date • Warranty card EMEA Service email: service.EMEA@solplanet.net APAC Service email: service.APAC@solplanet.net LATAM Service email: service.LATAM@solplanet.net AISWEI Pty Ltd. Hotline: +61 390 988 674 Add.: Level 40, 140 William Street, Melbourne VIC 3000, Australia... - Page 57 UM0023_ASW1000-6000-S-G2_EN_V01_1122...
Need help?
Do you have a question about the ASW S-G2 Series and is the answer not in the manual?
Questions and answers