Table of Contents
Advertisement
Available languages
Available languages
Quick Links
Advertisement
Table of Contents

Summary of Contents for Kiwi 2
-
Page 3: Product Details
Welcome to the world of KIWI! Congratulations, as of today, you are part of a community founded on important values that the KIWI team constantly develops. Our goal is to o er alternative solutions for your health, quality of life, and sustainable development. This user manual contains all the information you need to use your device correctly. -
Page 4: Instructions For First Use
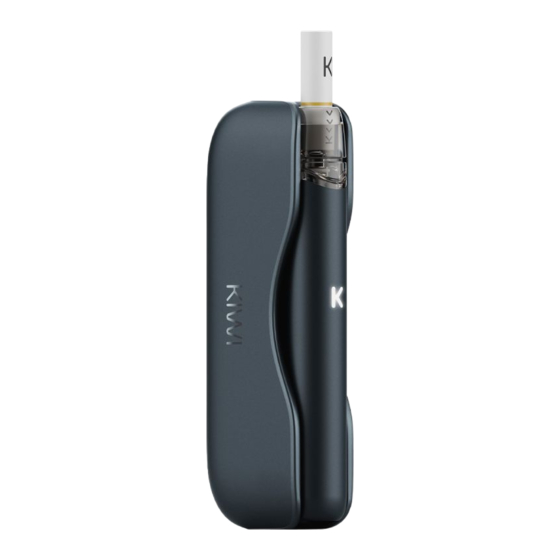
Power indicator Power indicator Magnetic contact pin USB-C 2. INSTRUCTIONS FOR FIRST USE Start using the Pod by opening the Child proof protection. To open the Pod pull the metal part downwards. A er the protection has been lowered, li the silicone cap of the Pod. - Page 5 Fill the tank with liquid, cover it with the silicone cap, and pull the metal shield to the right position. Leave the Pod for around 5 minutes to ensure that the liquid fully enters the Pod. Insert the Pod into the Pen. The white light will illuminate once, followed by a quick vibration three times.
- Page 6 0-10% power: Red LED lights up 10-100% power: White LED lights up PEN CHARGE LEVEL DURING USE The "K" LED indicates the battery level during the suction process as follows: 10% to 100% power: white LED light 5% to 10% power: red LED light Below 5% power: Unable to vape, red LED ashes three times and vibrates once, indicating the need to charge.
- Page 7 CHARGING THE PEN WITH THE POWERBANK The indication of the Powerbank charging the Pen is as follows: 0% to 10% power: red LED lights up 10% to 100% power: white LED lights up Fully charged: LED light turns o 0-10% power: 10-100% power: Red LED lights up White LED lights up...
- Page 8 INDICATIONS FOR POD INSERTION AND REMOVAL Insert and remove the Pod: Insertion - The white "K" LED will ash once accompanied by three vibrations, indicating a good contact. Removal - The red "K" LED will ash once to indicate the Pod has been successfully removed.
- Page 9 LED will light up ve times, accompanied by three vibrations, indicating overheating and serving as a reminder. 2. Indication for continuous suction for 8 seconds: The red LED will light up eight times, accompanied by one vibration, indicating that the device has been in continuous suction for 8 seconds and it is time to stop to prevent overheating.
- Page 10 Press the So Touch button on the top of the Powerbank (or remove the Pen). The power indicator will gradually illuminate and then turn o . 1 LED lights up 2 LED lights up 0-25% 26-50% 3 LED lights up 4 LED lights up...
- Page 11 CHARGING THE POWERBANK WITH THE USB-C CABLE Insert the USB-C cable into the USB-C port located at the bottom of the Powerbank. The power indicator will illuminate, indicating that the device is receiving power. 0-25% power: The rst LED ashes. 26-50% power: The rst LED is continuously on, and the second LED ashes.
- Page 12 0-25% power: 1 LED lights up. 26-50% power: 2 LEDs light up. 51-75% power: 3 LEDs light up. 76-100% power: 4 LEDs light up. When the Pen is fully charged, the power indicator turns o .
- Page 13 10%, the charging process will stop, and the rst white LED will ash 10 times to indicate low power. 2. During the charging process of the Powerbank, if the surface temperature of the battery cell exceeds 45°C or falls below 0°C, the charging will be halted, and the second white LED will ash 8 times.
-
Page 14: Troubleshooting
5. TROUBLESHOOTING The Pen will not turn on To charge the Pen, use the USB-C cable or connect it to a Powerbank. If the device still does not turn on a er charging, please contact customer service for assistance. The Pen does not release smoke Check for any liquid leaks or dust on contact pins and clean them thoroughly. - Page 15 6. WARNINGS To ensure your safety and prevent potential dangers, please read the following safety precautions carefully before using the device. While these precautions cover many situations, they may not encompass all possible scenarios. Therefore, please exercise caution and use the device responsibly. We have provided important information in the warning section below.
- Page 16 It is important to NOT use this product in the presence of ammable materials, liquids, or gases, such as gas stations, chemical plants, and other similar environments. This precaution is necessary to ensure your safety and prevent potential accidents. This product is not waterproof. Please refrain from washing it with water or exposing it to moist environments.
-
Page 17: Specifiche Del Prodotto
Benvenuto nel mondo di KIWI! Congratulazioni, da oggi fai parte di una comunità fondata su importanti valori che il team di KIWI sviluppa costantemente. Il nostro obiettivo è o rire soluzioni alternative per la tua salute, la qualità della vita e lo sviluppo sostenibile. Questo... - Page 18 Pin magnetico di contatto Tasto USB–C So Touch Indicatore stato della batteria Indicatore stato della batteria Pin magnetico di contatto USB-C ISTRUZIONI PER IL PRIMO UTILIZZO Inizia ad utilizzare la Pod aprendo la protezione a prova di bambino. Per aprire la Pod, tirando la parte metallica verso il basso.
- Page 19 Riempi il serbatoio con il liquido, coprilo con il tappo in silicone e solleva la protezione metallica nella posizione corretta. Lascia la Pod per circa 5 minuti per assicurarti che il liquido entri completamente nella Pod. Inserisci la Pod nella Pen. La luce LED bianca si illuminerà...
- Page 20 K 0-10% di carica: LED rosso K 10-100% di carica: LED bianco STATO DI CARICA DELLA PEN DURANTE L'USO La luce LED a forma di "K" indica il livello della batteria durante il processo di aspirazione come segue: Dal 10% al 100% di livello di batteria: luce LED bianca Dal 5% al 10% di livello di batteria: luce LED rossa...
- Page 21 RICARICARE LA PEN TRAMITE POWERBANK L'indicazione della ricarica della Pen tramite il Powerbank è la seguente: Da 0% a 10% di livello di batteria: il LED rosso si accende Dal 10% al 100% di livello di batteria: si accende il LED bianco Completamente carica: La luce del LED si spegne.
- Page 22 INDICAZIONI PER L'INSERIMENTO E LA RIMOZIONE DELLA POD Inserimento e rimozione della Pod: Inserimento - Il LED a forma di "K" lampeggia una volta del colore bianco accompagnato da tre vibrazioni, indicando un buon contatto. Rimozione - Il LED a forma di "K" lampeggia di rosso una volta per indicare che la Pod è...
- Page 23 2. Indicazione di aspirazione massima: La durata massima dell’aspirazione è di 8 secondi. Dopo 8 secondi il circuito di protezione si attiva, disattivando la Pod ed evitando il surriscaldamento.
- Page 24 Premere il pulsante So Touch sulla parte superiore del Powerbank (o rimuovere la penna). L'indicatore di batteria si accende gradualmente e poi si spegne. 1 LED si accende 2 LED si accendono 0-25% 26-50% 3 LED si accendono 4 LED si accendono...
- Page 25 RICARICARE IL POWERBANK TRAMITE CAVO USB-C Inserire il cavo USB-C nella porta USB-C situata nella parte inferiore del Powerbank. L'indicatore di carica si accende, indicando che il dispositivo sta ricevendo energia. 0-25% di carica: il primo LED lampeggia. 26-50% di carica: il primo LED è acceso in modo continuo e il secondo LED lampeggia.
- Page 26 0-25% di carica: si illumina 1 LED. 26-50% di carica: si illuminano 2 LED. 51-75% di carica: si illuminano 3 LED. 76-100% di carica: si illuminano 4 LED. Quando la Pen è completamente carica, l'indicatore di alimentazione si spegne.
- Page 27 LED bianco lampeggia 10 volte per indicare un basso livello di energia. 2. Durante il processo di carica del Powerbank, se la temperatura della super cie della batteria supera i 45°C o scende al di sotto di 0°C, la carica si interrompe e il secondo LED bianco lampeggia 8 volte.
- Page 28 5. MALFUNZIONAMENTI La Pen non si accende Per caricare la Pen, utilizzare il cavo USB-C o collegarla a un Powerbank. Se il dispositivo non si accende dopo la ricarica, contattare il servizio clienti per assistenza. La Pen non produce vapore Controllare che non vi siano perdite di liquido o polvere sui pin di contatto e pulirli accuratamente.
- Page 29 6. AVVERTENZE Per garantire la vostra sicurezza e prevenire potenziali pericoli, leggete attentamente le seguenti precauzioni di sicurezza prima di utilizzare il dispositivo. Sebbene queste precauzioni coprano molte situazioni, potrebbero non comprendere tutti gli scenari possibili. Pertanto, si raccomanda di prestare attenzione e di utilizzare il dispositivo in modo responsabile.
- Page 30 È importante NON utilizzare questo prodotto in presenza di materiali, liquidi o gas in ammabili, come stazioni di servizio, impianti chimici e altri ambienti simili. Questa precauzione è necessaria per garantire la vostra sicurezza e prevenire potenziali incidenti. Questo prodotto non è impermeabile. Si prega di evitare di lavarlo con acqua o di esporlo ad ambienti umidi.
- Page 31 Willkommen in der Welt von KIWI! Herzlichen Glückwunsch, ab heute gehörst du zu einer Gemeinscha , die auf wichtigen Werten basiert, die das KIWI-Team kontinuierlich entwickelt. Unser Ziel ist es, alternative Lösungen für deine Gesundheit, Lebensqualität und nachhaltige Entwicklung anzubieten. Dieser Benutzerleitfaden enthält alle erforderlichen Informationen zur...
- Page 32 Magnetischer Kontaktsti USB–C So -Touch-Taste Batterie- Statusanzeige Batteriestatusanzeige Magnetischer Kontaktsti USB-C ANLEITUNG FÜR DIE ERSTE VERWENDUNG Beginnen Sie mit der Verwendung des Pods, indem Sie den kindersicheren Schutz ö nen. Um den Pod zu ö nen, ziehen Sie den Metallteil nach unten.
- Page 33 Füllen Sie den Tank mit Flüssigkeit, bedecken Sie ihn mit der Silikonkappe und heben Sie den Metallschutz in die richtige Position. Lassen Sie den Pod etwa 5 Minuten stehen, um sicherzustellen, dass die Flüssigkeit vollständig in den Pod gelangt. Setzen Sie den Pod in den Pen ein. Die weiße LED-Leuchte wird einmal au euchten, gefolgt von drei schnellen Vibrationen.
- Page 34 K 0-10% Ladung: LED rot K 10-100% Ladung: LED weiß LADESTATUS DES PENS WÄHREND DER VERWENDUNG Die "K"-förmige LED-Leuchte zeigt den Batteriesta- tus während des Inhalationsvorgangs wie folgt an: 10% bis 100% Batteriestand: weiße LED-Leuchte 5% bis 10% Batteriestand: rote LED-Leuchte Unter 5% Batteriestand: Kein Dampfen möglich, die rote LED-Leuchte blinkt dreimal und es erfolgt eine Vibration, um anzuzeigen, dass das Gerät...
- Page 35 DIE PEN ÜBER DIE POWERBANK AUFLADEN Die Anzeige des Ladestatus der Pen über die Powerbank ist wie folgt: Von 0% bis 10% Batteriestand: Die rote LED leuchtet auf. Von 10% bis 100% Batteriestand: Die weiße LED leuchtet auf. Vollständig aufgeladen: Die LED erlischt. 0-10% Batteriestand: 10-100% Batteriestand: Die rote LED leuchtet auf...
- Page 36 INDIKATIONEN FÜR DAS EINSETZEN UND ENTFERNEN DER POD Einsetzen und Entfernen der Pod: Einsetzen - Die "K"-förmige LED blinkt einmal weiß und es erfolgen drei Vibrationen, um einen guten Kontakt anzuzeigen. Entfernung - Die "K"-förmige LED blinkt einmal rot, um anzuzeigen, dass die Pod erfolgreich entfernt wurde.
- Page 37 Die LED leuchtet fünfmal blau auf und es erfolgen drei Vibrationen, um eine Überhitzung anzuzeigen und als Warnsignal zu dienen. 2. Anzeige der maximalen Inhalationsdauer: Die maximale Inhalationsdauer beträgt 8 Sekunden. Nach 8 Sekunden aktiviert sich der Schutzmechanismus, die Pod wird deaktiviert und Überhitzung wird vermieden.
- Page 38 4. POWERBANK DER LADUNGSINDIKATOR DER POWERBANK Drücken Sie die So -Touch-Taste oben auf der Powerbank (oder entfernen Sie den Sti ). Die Batterieanzeige leuchtet allmählich auf und erlischt dann. Eine LED leuchtet auf Zwei LEDs leuchten auf 0-25% 26-50% Drei LEDs leuchten auf Vier LEDs leuchten auf 51-75% 76-100%...
- Page 39 DAS POWERBANK KANN ÜBER EIN USB-C-KABEL AUFGELADEN WERDEN Stecken Sie das USB-C-Kabel in den USB-C-Anschluss an der Unterseite des Powerbanks ein. Die Ladeanzeige leuchtet auf und zeigt an, dass das Gerät mit Strom versorgt wird. 0-25% Ladestand: Die erste LED blinkt. 26-50% Ladestand: Die erste LED leuchtet kontinuierlich und die zweite LED blinkt.
- Page 40 Setzen Sie den Pen in die Powerbank ein und stellen Sie sicher, dass ein guter Kontakt besteht. Überprüfen Sie, ob die Ladeanzeige leuchtet und der Batteriestandsindikator sich einschaltet. 0-25% der Ladung: Eine LED leuchtet auf. 26-50% der Ladung: Zwei LEDs leuchten auf. 51-75% der Ladung: Drei LEDs leuchten auf.
- Page 41 Ladevorgang unterbrochen und die erste weiße LED blinkt 10 Mal, um einen niedrigen Energiestand anzuzeigen. 2. Während des Ladevorgangs der Powerbank wird die Ladung unterbrochen und die zweite weiße LED blinkt 8 Mal, wenn die Ober ächentemperatur der Batterie 45°C überschreitet oder unter 0°C fällt.
-
Page 42: Störungen
5. STÖRUNGEN Der Pen schaltet sich nicht ein Um den Pen aufzuladen, verwenden Sie das USB-C-Kabel oder schließen Sie ihn an eine Powerbank an. Wenn das Gerät nach dem Au aden nicht einschaltet, kontaktieren Sie bitte den Kundenservice für Unterstützung. Der Pen erzeugt keinen Dampf Bitte überprüfen Sie, ob keine Flüssigkeits- oder Staubablagerungen auf den Kontaktsti en... - Page 43 6. WARNUNGEN Um Ihre Sicherheit zu gewährleisten und potenzielle Gefahren zu vermeiden, lesen Sie bitte die folgenden Sicherheitsvorkehrungen sorgfältig durch, bevor Sie das Gerät verwenden. Obwohl diese Vorkehrungen viele Situationen abdecken, könnten sie nicht alle möglichen Szenarien umfassen. Daher wird empfohlen, aufmerksam zu sein und das Gerät verantwortungsbewusst zu verwenden.
- Page 44 Es ist wichtig, dieses Produkt NICHT in der Nähe von ent ammbaren Materialien, Flüssigkeiten oder Gasen wie Tankstellen, chemischen Anlagen und ähnlichen Umgebungen zu verwenden. Diese Vorsichtsmaßnahme ist erforderlich, um Ihre Sicherheit zu gewährleisten und potenzielle Unfälle zu vermeiden. Dieses Produkt ist nicht wasserdicht. Bitte vermeiden Sie es, es mit Wasser zu waschen oder feuchten Umgebungen auszusetzen.
-
Page 45: Spécifications Du Produit
Bienvenue dans le monde de KIWI ! Félicitations, à partir d'aujourd'hui, vous faites partie d'une communauté fondée sur des valeurs importantes que l'équipe de KIWI développe constamment. Notre objectif est de fournir des solutions alternatives pour votre santé, votre qualité de vie et le développement durable. - Page 46 Pin magnétique de contact USB–C Bouton So Touch Indicateur d'état de la batterie Indicateur d'état de la batterie Pin magnétique de contact USB-C INSTRUCTIONS POUR LA PREMIÈRE UTILISATION Commencez par utiliser le Pod en ouvrant la protection avec sécurité enfant. Pour ouvrir le Pod, tirer la partie métallique vers le bas.
- Page 47 Remplisser le réservoir avec le liquide, refermer le bouchon en silicone et replacer la protection métallique dans la position correcte. Laisser le Pod reposer pendant environ 5 minutes pour vous assurer que le liquide pénètre complètement dans le Pod. Insérer le Pod dans le Pen. Le voyant LED blanc s'allumera une fois, suivi de trois vibrations rapides.
- Page 48 K 0-10% de charge: LED rouge K 10-100% de charge: LED blanc ÉTAT DE CHARGE DU PEN PENDANT L'UTILISATION Le voyant LED en forme de "K" indique le niveau de charge de la batterie pendant le processus d'aspiration de la manière suivante: De 10% à...
- Page 49 RECHARGER LE PEN À L'AIDE DU POWERBANK L'indication de la charge du Pen via le Powerbank est la suivante: De 0% à 10% de niveau de batterie: la LED rouge s'allume De 10% à 100% de niveau de batterie: la LED blanche s'allume Entièrement chargé: le voyant LED s'éteint.
- Page 50 INDICATIONS POUR L'INSERTION ET LE RETRAIT DU POD Insertion et retrait du Pod: Insertion - Le voyant LED en forme de "K" clignote une fois en blanc accompagné de trois vibrations, indiquant un bon contact. Retrait - Le voyant LED en forme de "K" clignote une fois en rouge pour indiquer que le Pod a été...
- Page 51 La LED s'allume en bleu cinq fois, accompagnée de trois vibrations, indiquant la surchau e et servant de signal d'avertissement. 2. Indication de l'aspiration maximale : La durée maximale d'aspiration est de 8 secondes. Après 8 secondes, le circuit de protection s'active, désactivant le Pod et évitant la surchau e.
- Page 52 INDICATEUR DE CHARGE DU POWERBANK Appuyer sur le bouton So Touch situé sur le dessus du Powerbank (ou retirer le Pen). L'indicateur de batterie s'allume progressivement, puis s'éteint. 1 LED s'allume 2 LED s'allument 0-25% 26-50% 3 LED s'allument 4 LED s'allument 51-75% 76-100% Lorsque le niveau de batterie est inférieur à...
- Page 53 RECHARGER LE POWERBANK VIA UN CÂBLE USB-C Insérer le câble USB-C dans le port USB-C situé dans la partie inférieure du Powerbank. L'indicateur de charge s'allume, indiquant que l'appareil reçoit de l'énergie. 0-25% de charge: la première LED clignote. 26-50% de charge: la première LED est allumée en continu et la deuxième LED clignote.
- Page 54 Pen s'allume. 0-25% de charge: 1 LED s'allume. 26-50% de charge: 2 LED s'allument. 51-75% de charge: 3 LED s'allument. 76-100% de charge: 4 LED s'allument. Quand le Pen est complètement chargé, le témoin d'alimentation s'éteint.
- Page 55 LED blanche clignote 10 fois pour indiquer un faible niveau d’énergie. 2. Pendant le processus de charge du Powerbank, si la température de la surface de la batterie dépasse 45°C ou descend en dessous de 0°C, la charge s’arrête et la deuxième LED blanche...
- Page 56 5. DYSFONCTIONNEMENTS Le Pen ne s’allume pas Pour charger le Pen, utilisez le câble USB-C ou connectez-le à un Powerbank. Si l’appareil ne s’allume pas après la charge, contacter le service clientèle pour obtenir de l’aide. Le Pen ne produit pas de vapeur Véri ez qu’il n’y a pas de fuite de liquide ou de poussière sur les broches de contact et nettoyez-les soigneusement.
- Page 57 6. AVERTISSEMENTS Pour assurer votre sécurité et prévenir les dangers potentiels, lisez attentivement les précautions de sécurité suivantes avant d’utiliser l’appareil. Bien que ces précautions couvrent de nombreuses situations, elles peuvent ne pas inclure tous les scénarios possibles. Par conséquent, il est recommandé...
- Page 58 Il est important de NE PAS utiliser ce produit en présence de matériaux, de liquides ou de gaz in ammables, tels que des stations-service, des installations chimiques et d’autres environnements similaires. Cette précaution est nécessaire pour assurer votre sécurité et prévenir les accidents potentiels.
-
Page 59: Especificaciones Del Producto
¡Bienvenido al mundo de KIWI! ¡Felicitaciones, a partir de hoy formas parte de una comunidad fundada en valores importantes que el equipo de KIWI desarrolla constantemente! Nuestro objetivo es ofrecer soluciones alternativas para tu salud, calidad de vida y desarrollo sostenible. - Page 60 Pin magnético de contacto USB–C Botón So Touch Indicador de estado de la batería Indicador de estado de la batería Pin magnético de contacto USB-C INSTRUCCIONES PARA LA PRIMERA UTILIZACIÓN Comience a usar la Pod abriendo el protector a prueba de niños. Para abrir la Pod, tire de la parte metálica hacia abajo.
- Page 61 Llene el tanque con líquido, cúbralo con la tapa de silicona y levante la protección metálica en la posición correcta. Deja el Pod durante unos 5 minutos para asegurarte de que el líquido entra completamente en el Pod. Inserta la Pod en la Pen. La luz LED blanca se encenderá...
- Page 62 K 0-10% de carga: LED rojo K 10-100% de carga: LED blanco ESTADO DE CARGA DE LA PEN DURANTE EL USO La luz LED en forma de "K" indica el nivel de carga de la batería durante el proceso de inhalación de la siguiente manera: Del 10% al 100% de nivel de carga: luz LED blanca.
- Page 63 RECARGAR EL PEN MEDIANTE POWER- BANK ¡Aquí está la traducción al español manteniendo la longitud de las frases y conservando las palabras solicitadas! La indicación de carga del Pen mediante el Powerbank es la siguiente: De 0% a 10% de nivel de batería: se enciende el LED rojo Del 10% al 100% de nivel de batería: se enciende el LED blanco...
- Page 64 INDICACIONES PARA LA INSERCIÓN Y REMOCIÓN DE LA POD Inserción y extracción de la Pod Inserción - El LED en forma de "K" parpadea una vez en color blanco, acompañado de tres vibraciones, indicando un buen contacto. Extracción - El LED en forma de "K" parpadea una vez en color rojo para indicar que la Pod ha sido removida exitosamente.
- Page 65 2. Indicación de aspiración máxima: La duración máxima de la aspiración es de 8 segundos. Después de 8 segundos, se activa el circuito de protección, desactivando la Pod y evitando el sobrecalentamiento.
- Page 66 Presiona el botón So Touch en la parte superior del Powerbank (o retira la tapa). El indicador de batería se encenderá de manera gradual y luego se apagará. 1 LED se enciende 2 LED se encienden 0-25% 26-50% 3 LED se encienden 4 LED se encienden...
- Page 67 RECARGA DEL POWERBANK MEDIANTE UN CABLE USB-C Inserta el cable USB-C en el puerto USB-C ubicado en la parte inferior del Powerbank. El indicador de carga se encenderá, indicando que el dispositivo está recibiendo energía. 0-25% de carga: el primer LED parpadea. 26-50% de carga: el primer LED está...
- Page 68 0-25% de carga: se enciende 1 LED. 26-50% de carga: se encienden 2 LED. 51-75% de carga: se encienden 3 LED. 76-100% de carga: se encienden 4 LED. Cuando el Pen está completamente cargado, el indicador de alimentación se apaga.
- Page 69 LED blanco parpadea 10 veces para indicar un bajo nivel de energía. 2. Durante el proceso de carga del Powerbank, si la temperatura de la super cie de la batería supera los 45°C o desciende por debajo de 0°C, la carga se interrumpe y el segundo LED blanco parpadea 8 veces.
- Page 70 5. MAL FUNCIONAMENTOS El Pen no se enciende Para cargar la Pen, utiliza el cable USB-C o conéctala a un Powerbank. Si el dispositivo no se enciende después de cargarlo, por favor, ponte en contacto con el servicio al cliente para obtener asistencia.
- Page 71 6. ADVERTENCIAS Para garantizar su seguridad y prevenir posibles peligros, lea detenidamente las siguientes precauciones de seguridad antes de usar el dispositivo. Si bien estas precauciones cubren muchas situaciones, es posible que no incluyan todos los escenarios posibles. Por lo tanto, se recomienda prestar atención y utilizar el dispositivo de manera responsable.
- Page 72 Es importante NO utilizar este producto en presencia de materiales, líquidos o gases in amables, como estaciones de servicio, plantas químicas y otros entornos similares. Esta precaución es necesaria para garantizar su seguridad y prevenir posibles accidentes. Este producto no es resistente al agua. Por favor, evite lavarlo con agua o exponerlo a ambientes húmedos.
- Page 73 Συγχαρητήρια, από σή ερα είστε έρο ια κοινότητα που βασίζεται σε ση αντικέ αξίε που η ο άδα του KIWI αναπτύσσει συνεχώ . ΣΤΟΧΟΣ α είναι να προσφέρου ε εναλλακτικέ λύσει για την καλύτερη ποιότητα ζωή και την υγεία σα . Αυτό το εγχειρίδιο...
- Page 74 Ενδειξη κατάσταση παταρία Ση είο επαφή USB-C 2. Ο ΗΓΙΕΣ ΓΙΑ ΤΗΝ ΠΡ ΤΗ ΧΡΗΣΗ Ξεκινήστε να χρησι οποιείτε τη συσκευή ανοίγοντα το προστατευτικό καπάκι (childproof). Για να ανοίξετε τη δεξα ενή, τραβήξτε το εταλλικό τ ή α προ τα κάτω.
- Page 75 Γε ίστε τη δεξα ενή ε το υγρό, καλύψτε την ε το καπάκι σιλικόνη και ανασηκώστε το εταλλικό προστατευτικό στη σωστή θέση. Αφήστε τη συσκευή για περίπου 5 λεπτά για να βεβαιωθείτε ότι η αντίσταση έχει ε ποτιστεί πλήρω . Τοποθετήστε...
- Page 76 K 0-10% φόρτιση: Κόκκινη λυχνία LED K 10-100% φόρτιση: Λευκό LED ΕΠΙΠΕ Α ΜΠΑΤΑΡΙΑΣ ΚΑΤΑ ΤΗ ΧΡΗΣΗ Η λυχνία LED σχή ατο "K" υποδεικνύει τη στάθ η τη παταρία κατά τη διάρκεια τη λειτουργία ω εξή : 0% έω 100% στάθ η παταρία : Λευκό φω LED 5% έω...
- Page 77 ΦΟΡΤΙΣΗ ΜΕΣ POWERBANK Η ένδειξη τη φόρτιση έσω του Powerbank είναι η εξή : 0% έω 10% στάθ η παταρία : Ανάβει η κόκκινη λυχνία LED 10% έω 100% στάθ η παταρία : Λευκά λυχνία Πλήρω φορτισ ένο : Η λυχνία ένδειξη σβήνει. 0-10% στάθ...
- Page 78 ΕΝ ΕΙΞΕΙΣ ΓΙΑ ΤΗΝ ΕΙΣΑΓ ΓΗ ΚΑΙ ΤΗΝ ΑΦΑΙΡΕΣΗ ΤΗΣ ΕΞΑΜΕΝΗΣ Εισαγωγή και αφαίρεση τη δεξα ενή : Εισαγωγή - η λυχνία LED σχή ατο "K" αναβοσβήνει ία φορά ε λευκό χρώ α ε τρει δονήσει , υποδεικνύοντα καλή επαφή. Αφαίρεση...
- Page 79 Η λυχνία LED ανάβει πλε πέντε φορέ , συνοδευό ενη από τρει δονήσει , υποδεικνύοντα υπερθέρ ανση και ενεργώντα ω σή α. 2. Μέγιστο χρόνο εισπνοή : Ο έγιστο χρόνο εισπνοή είναι 8 δευτερόλεπτα. Μετά από 8 δευτερόλεπτα το κύκλω α προστασία...
- Page 80 Πατήστε το κου πί αφή στο επάνω έρο του Powerbank (ή αφαιρέστε τη συσκευή). Η ένδειξη παταρία ανάβει σταδιακά και στη συνέχεια σβήνει. Ανάβει η λυχνία LED 2 λυχνίε LED ανα ένε 0-25% 26-50% 3 λυχνίε LED ανα 4 λυχνίε LED ανα...
- Page 81 ΦΟΡΤΙΣΗ ΤΟΥ POWERBANK ΜΕΣ ΚΑΛ ΙΟΥ USB C Τοποθετήστε το καλώδιο USB-C στη θύρα USB-C που βρίσκεται στο κάτω έρο του Powerbank. Η ενδεικτική λυχνία φόρτιση ανάβει, υποδεικνύοντα ότι η συσκευή λα βάνει ρεύ α. Φόρτιση 0-25%: Η πρώτη λυχνία LED αναβοσβήνει.
- Page 82 παταρία είναι ανα ένη. 0-25% ισχύ : 1 λυχνία. 26-50% ισχύ : Ανάβουν 2 λυχνίε LED. 51-75% ισχύ : Ανάβουν 3 λυχνίε LED. 76-100% ισχύ : Ανάβουν 4 λυχνίε LED. Οταν η συσκευή είναι πλήρω φορτισ ένη, η ένδειξη λειτουργία απενεργοποιείται.
- Page 83 διαδικασία φόρτιση στα ατά και η πρώτη λευκή λυχνία LED αναβοσβήνει 10 φορέ για να υποδείξει ένα χα ηλό επίπεδο ενέργεια . 2. Κατά τη διάρκεια τη διαδικασία φόρτιση εάν η θερ οκρασία τη παταρία υπερβαίνει του 45oC ή πέφτει κάτω από 0oC η φόρτιση θα στα ατήσει...
- Page 84 5. ΥΣΛΕΙΤΟΥΡΓΙΕΣ Η συσκευή δεν ενεργοποιείται Για να φορτίσετε τη συσκευή, χρησι οποιήστε το καλώδιο USB-C ή συνδέστε το στο Powerbank. Εάν η συσκευή σα δεν ενεργοποιείται ετά τη φόρτιση, επικοινωνήστε ε το τ ή α εξυπηρέτηση πελατών για βοήθεια. Η...
- Page 85 6. ΠΡΟΕΙ ΟΠΟΙΗΣΕΙΣ Για να διασφαλίσετε την ασφάλειά σα και να αποτρέψετε πιθανού κινδύνου , διαβάστε προσεκτικά τι ακόλουθε προφυλάξει ασφαλεία πριν χρησι οποιήσετε τη συσκευή. Αν και αυτέ οι προφυλάξει καλύπτουν πολλέ καταστάσει , πορεί να ην περιλα βάνουν όλα τα πιθανά...
- Page 86 Είναι ση αντικό να ην χρησι οποιείτε αυτό το προϊόν παρουσία εύφλεκτων υλικών, υγρών ή αερίων, όπω βενζινάδικα, χη ικά εργοστάσια και άλλα παρό οια περιβάλλοντα. Αυτή η προφύλαξη είναι απαραίτητη για να διασφαλιστεί η ασφάλειά σα και να αποφευχθούν πιθανά ατυχή ατα. Αυτό...
- Page 87 Welkom in de wereld van KIWI! Gefeliciteerd, vanaf vandaag maak je deel uit van een community die is gebaseerd op belangrijke waarden die het KIWI-team voortdurend ontwikkelt. Ons doel is om alternatieve oplossingen te bieden voor uw gezondheid, levenskwaliteit en duurzame ontwikkeling. Deze...
- Page 88 So Touch-knop Batterijstatusindicator Batterijstatusindicator Magnetische contactpen USB-C 2. INSTRUCTIES VOOR EERSTE GEBRUIK Gebruik de Pod door de kindveilige beschermer te openen. Trek het metalen deel naar beneden om de Pod te openen. Nadat u de bescherming hee verlaagd, tilt u...
- Page 89 Vul de tank met de vloeistof, bedek hem met de siliconen dop en til de metalen afscherming in de juiste positie op. Laat de Pod ongeveer 5 minuten staan om ervoor te zorgen dat de vloeistof volledig in de Pod komt. Steek de Pod in de Pen.
- Page 90 K 0-10% lading: rode LED K 10-100% lading: witte LED STAAT VAN PEN TIJDENS GEBRUIK Het "K" -vormige LED-licht gee het batterijniveau tijdens het zuigproces als volgt aan: 10% tot 100% batterijniveau: wit LED-licht 5% tot 10% batterijniveau: rood LED-licht Batterijniveau onder 5%: kon niet vapen, de rode LED knippert drie keer en trilt eenmaal, wat aangee dat het apparaat opnieuw moet...
- Page 91 OPLADENDE DE PEN VIA POWERBANK De aanduiding van het opladen van de pen via de Powerbank is als volgt: 0% tot 10% batterijniveau: rode LED gaat branden 10% tot 100% batterijniveau: witte LED-verlichting Volledig opgeladen: LED-lampje gaat uit. 0-10% batterijniveau: 10-100% batterijniveau: De rode LED de witte LED...
- Page 92 INDICATIES VOOR INSERTIE EN VERWIJDERING VAN POD Invoegen en verwijderen van Pod: Inbrengen - De "K" -vormige LED knippert eenmaal wit met drie trillingen, wat wijst op een goed contact. Verwijdering - De "K" -vormige LED knippert één keer rood om aan te geven dat de Pod met succes is verwijderd.
- Page 93 1. Oververhitting beveiligingssignaal: De LED licht vijf keer blauw op, vergezeld van drie trillingen, wat wijst op oververhitting en werkt als een signaal. 2. Maximale inname-indicatie: De maximale zuigtijd is 8 seconden. Na 8 seconden is het beveiligingscircuit geactiveerd, de Pod deactiveren en oververhitting voorkomen.
- Page 94 Druk op de So Touch-knop bovenaan de Powerbank (of verwijder de pen). De batterij-indicator gaat geleidelijk aan branden en gaat dan uit. 1 LED gaat branden 2 LED's gaan aan 0-25% 26-50% 3 LED's gaan aan 4 LED's gaan aan...
- Page 95 DE POWERBANK VIA USB-C-KABEL OPLADEN Steek de USB-C-kabel in de USB-C-poort onderaan de Powerbank. De laadindicator gaat branden, wat aangee dat het apparaat stroom ontvangt. 0-25% lading: de eerste LED knippert. 26-50% lading: de eerste LED gaat continu aan en de tweede LED knippert. 51-75% lading: de eerste en tweede LED zijn continu aan en de derde LED knippert.
- Page 96 Zorg ervoor dat de laadindicator brandt en dat de batterijlaadindicator is ingeschakeld. 0-25% lading: 1 LED-lampjes. 26-50% lading: 2 LED's lichten op. 51-75% lading: 3 LED's lichten op. 76-100% lading: 4 LED's lichten op. Als de pen volledig is opgeladen, wordt de stroomindicator uitgeschakeld.
- Page 97 LED 10 keer om een laag energieniveau aan te geven. 2. Als tijdens het laadproces van de Powerbank de oppervlaktetemperatuur van de batterij hoger is dan 45 oC of lager is dan 0 oC, de lading wordt onderbroken en de tweede witte LED knippert 8 keer.
- Page 98 5. MALFUNCTIES De pen gaat niet aan Gebruik de USB-C-kabel om de pen op te laden of sluit deze aan op een Powerbank. Als uw apparaat na het opladen niet wordt ingeschakeld, neem dan contact op met de klantenservice voor hulp. Pen produceert geen stoom Controleer of er geen vloeistof of stof op de contactpennen lekt en reinig ze grondig.
- Page 99 6. WAARSCHUWINGEN Lees de volgende veiligheidsmaatregelen zorgvuldig door voordat u het apparaat gebruikt om uw veiligheid te garanderen en mogelijke gevaren te voorkomen. Hoewel deze voorzorgsmaatregelen veel situaties omvatten, bevatten ze mogelijk niet alle mogelijke scenario's. Daarom wordt aanbevolen om op te letten en het apparaat verantwoord te gebruiken.
- Page 100 Het is belangrijk om dit product NIET te gebruiken in aanwezigheid van brandbare materialen, vloeisto en of gassen, zoals benzinestations, chemische fabrieken en andere soortgelijke omgevingen. Deze voorzorgsmaatregel is nodig om uw veiligheid te garanderen en mogelijke ongevallen te voorkomen. Dit product is niet waterdicht.
-
Page 101: Especificações Do Produto
Bem-vindo ao mundo da KIWI! Parabéns, a partir de hoje você faz parte de uma comunidade baseada em valores importantes que a equipe da KIWI constantemente desenvolve. Nosso objetivo é oferecer soluções alternativas para sua saúde, qualidade de vida e desenvolvimento sustentável. - Page 102 Indicador de estado da bateria Pin de contato magnético USB-C 2. INSTRUÇÕES DE PRIMEIRA UTILIZAÇÃO Comece a usar o Pod abrindo o protetor à prova de crianças. Para abrir o Pod, puxe a parte de metal para baixo.
- Page 103 Encha o tanque com o líquido, cubra-o com a tampa de silicone e levante o protetor de metal na posição correta. Deixe o Pod por cerca de 5 minutos para garantir que o líquido entre totalmente no Pod. Insira o Pod na Pen. A luz LED branca acenderá uma vez, seguida de três vibrações rápidas.
- Page 104 K 0-10% de carga: LED vermelho K 10-100% carga: LED branco ESTADO DA PEN DURANTE A UTILIZAÇÃO A luz LED em forma de "K" indica o nível da bateria durante o processo de sucção do seguinte modo: 10% a 100% nível da bateria: luz LED branca 5% a 10% nível da bateria: luz LED vermelha Abaixo do nível da bateria de 5%: Não poderia vape, o LED vermelho pisca três vezes e vibra...
- Page 105 CARREGAR A PEN ATRAVÉS DO POWERBANK A indicação do carregamento da Pen através do Powerbank é a seguinte: 0% a 10% nível da bateria: LED vermelho acende 10% a 100% nível da bateria: luzes LED brancas Totalmente carregado: luz LED apaga. 0-10% nível da bateria: nível da bateria de O LED vermelho...
- Page 106 INDICAÇÕES PARA INSERÇÃO E REMOÇÃO DE POD Inserção e remoção da Pod: Inserção - O LED em forma de "K" uma vez pisca branco com três vibrações, indicando um bom contato. Remoção - O LED em forma de "K" pisca em vermelho uma vez para indicar que o pod foi removido com sucesso.
- Page 107 O LED acende azul cinco vezes, acompanhado por três vibrações, indicando superaquecimento e agindo como um sinal. 2. Indicação da ingestão máxima: O tempo máximo de sucção é de 8 segundos. Após 8 segundos o circuito de proteção é ativado, desativar o Pod e evitar o superaquecimento.
- Page 108 Carregue no botão So Touch na parte superior do Powerbank (ou remova a caneta). O indicador da bateria acende-se gradualmente e depois desliga-se. 1 LED acende as luzes 2 LEDs ligar 0-25% 26-50% 3 LEDs ligar 4 LEDs ligar 51-75% 76-100% Quando o nível da bateria está...
- Page 109 CARREGAR O POWERBANK ATRAVÉS DO CABO USB-C Insira o cabo USB-C na porta USB-C localizada na parte inferior do Powerbank. O indicador de carga acende, indicando que o dispositivo está recebendo energia. 0-25% de carga: o primeiro LED pisca. 26-50% de carga: o primeiro LED está ligado continuamente e o segundo LED pisca.
- Page 110 0-25% de carga: 1 luzes LED. 26-50% de carga: 2 LEDs acendem. 51-75% de carga: 3 LEDs acendem. 76-100% de carga: 4 LEDs acendem. Quando a caneta está totalmente carregada, o indicador de energia desliga.
- Page 111 LED branco pisca 10 vezes para indicar um baixo nível de energia. 2. Durante o processo de carregamento do Powerbank, se a temperatura da superfície da bateria exceder 45 ºC ou for inferior a 0 ºC, a carga deve ser interrompida e o segundo LED branco pisca 8 vezes.
- Page 112 5. AVARIAS A Pen não liga o Para carregar a caneta, use o cabo USB-C ou conecte-o a um Powerbank. Se o dispositivo não ligar após o carregamento, contacte o serviço de apoio ao cliente para obter assistência. A Pen não produz vapor Veri que se não há...
- Page 113 6. AVISOS Para garantir sua segurança e evitar possíveis perigos, leia as seguintes precauções de segurança cuidadosamente antes de usar o dispositivo. Embora essas precauções cubram muitas situações, elas podem não incluir todos os cenários possíveis. Portanto, recomenda-se prestar atenção e usar o dispositivo com responsabilidade.
- Page 114 É importante NÃO usar este produto na presença de materiais in amáveis, líquidos ou gases, tais como postos de gasolina, plantas químicas e outros ambientes similares. Esta precaução é necessária para garantir a sua segurança e evitar potenciais acidentes. Este produto não é à prova d'água. Evite lavá-lo com água ou expô-lo a ambientes úmidos.
- Page 115 Dobrodošli u svijet KIWI-ja! Čestitamo, od danas ste dio zajednice utemeljene na važnim vrijednostima koje tim KIWI-ja kontinuirano razvija. Naš cilj je ponuditi alternativna rješenja za vaše zdravlje, kvalitetu života i održivi razvoj. Ovaj korisnički priručnik sadrži sve informacije koje vam trebaju kako biste ispravno koristili svoj uređaj.
- Page 116 Tipka So Touch Indikator baterije Indikator baterije Magnetski kontakt pin USB-C 2. UPUTE ZA PRVO KORIŠTENJE Počnite koristiti Pod tako da otvorite zaštitni poklopac za djecu. Da biste otvorili Pod, povucite metalni dio prema dolje. Nakon spuštanja zaštite podignite silikonsku kapicu Poda.
- Page 117 Napunite spremnik tekućinom, zatvorite silikonskim čepom i postavite zaštitu na pravilan položaj. Ostavite spremink sa tekućinom otprilike 5 minuta kako bi se osiguralo da tekućina potpuno uđe u Pod. Umetnite spremnik s tekućinom u Pod. Bijelo svjetlo jednom će se upaliti, nakon što se umetne Pod slijedi brza vibracija tri puta.
- Page 118 K 0-10% napunjenosti: crveno LED svijetlo K10-100% napunjenosti: bijelo LED svijetlo RAZINA NAPUNJENOSTI PENA TIJEKOM NJEZINOG KORIŠTENJA LED "K" pokazuje razinu napunjenosti baterije tijekom procesa inhalacije na sljedeći način: 10% do 100% napunjenosti: bijelo LED svijetlo 5% do 10% napunjenosti: crveno LED svijetlo Manje od 5% napunjenosti:crveno LED svijetlo trepće tri puta i vibrira jednom, što ukazuje na potrebu za punjenjem.
- Page 119 PUNJENJE PEN-A POMOĆU POWERBANKA Indikacija punjenja Pena pomoću Powerbanka je sljedeća: 0% do 10% napunjenosti: Crveno LED svijetlo se pali 10% do 100% napunjenosti: Bijelo LED svijetlo se pali Potpuno napunjeno: LED svijetlo se gasi 0-10% napunjenosti: crveno 10-100% napunjenosti: LED svijetlo se pali bijelo LED svijetlo se pali PUNJENJE PENA POMOĆU USB-C...
- Page 120 INDIKACIJE ZA UMETANJE I UKLANJANJE PODOVA Umetanje i uklanjanje Poda: Umetanje - Bijeli LED "K" će jednom treptati uz tri vibracije, što ukazuje na dobar kontakt. Uklanjanje - Crveni LED "K" će jednom treptati kako bi označio da je Pod uspješno uklonjen. PROMJENA NAČINA UZDISAJA VIBRACIJE PENA Za uključivanje ili isključivanje vibracije Pena,...
- Page 121 će se upaliti pet puta uz tri vibracije, što ukazuje na pregrijavanje Poda te ujedno služi kao podsjetnik. 2. Indikacija za kontinuirani uzdisaj od 8 sekundi: Crveno LED svijetlo će se upaliti osam puta uz jednu vibraciju, što ukazuje da je ure aj bio u kontinuiranom uzdisaju tijekom 8 sekundi i kako si se spriječlo pregrijavanje mora se na trenutak...
- Page 122 Pritisnite tipku So Touch na vrhu Powerbanka (ili uklonite Pen). Indikator napajanja postupno će svijetliti i zatim se isključiti. 1 LED svijetlo se pali 2 LED svijetla se pale 0-25% 26-50% 3 LED svijetla se pale 4 LED svijetla se pale...
- Page 123 PUNJENJE POWERBANKA POMOĆU USB-C KABELA Umetnite USB-C kabel u USB-C priključak smješten na dnu Powerbanka. Indikator napajanja će se upaliti, što ukazuje da uređaj započeo s napajanjem. 0-25% snage: prva LED dioda treperi. 26-50% snage: prva LED lampica stalno svijetli, a druga LED trepće.
- Page 124 0-25% napunjenosti: 1 LED svijetlo se pali 26-50% napunjenosti: 2 LED svijetla se pale 51-75% napunjenosti: 3 LED svijetla se pale 76-100% napunjenosti: 4 LED svijetla se pale Kada je POD totoalno puna, indikator napanjanja se gasi.
- Page 125 10%, proces punjenja će se zaustaviti, a prva bijela LED lampica će zatreperiti 10 puta kao znak niske snage. 2. Tijekom procesa punjenja Powerbanka, ako površinska temperatura baterije prijeđe 45°C ili padne ispod 0°C, punjenje će se zaustaviti, a drugi bijeli LED će zatreperiti 8...
-
Page 126: Otklanjanje Problema
5. OTKLANJANJE PROBLEMA Pen se ne pali Za punjenje olovke koristite USB-C kabel ili je spojite na Powerbank. Ako se uređaj i dalje ne uključuje nakon punjenja, obratite se korisničkoj službi za pomoć. Pen ne proizvodi dim Provjerite ima li curenja tekućine ili prašine na kontaktnim pinovima i temeljito ih očistite. - Page 127 6. OPREZ Kako biste osigurali svoju sigurnost i spriječili potencijalne opasnosti, pažljivo pročitajte sljedeće mjere opreza prije uporabe uređaja. Iako ove mjere opreza pokrivaju mnoge situacije, one možda neće obuhvatiti sve moguće scenarije. Stoga vas molimo da budete oprezni i da odgovorno koristite uređaj.
- Page 128 Važno je NE koristiti ovaj proizvod u prisutnosti zapaljivih materijala, tekućina ili plinova, kao što su benzinske postaje, kemijska postrojenja i druga slična okruženja. Ova mjera opreza je neophodna kako bi se osigurala vaša sigurnost i spriječile moguće nezgode. Ovaj proizvod nije vodootporan. Molimo suzdržite se od pranja vodom ili izlaganja vlažnom okruženju.
- Page 129 KIWI! KIWI. – : KIWI 2 Powerbank: 1800mAh Pen: 400mAh Powerbank USB-C: DC5V/2A Pen USB-C: DC5V/0.5A Powerbank Pen: ≈ 4 (0-100% : 1.8 : 0°C~45°C...
- Page 130 USB–C USB-C Pod, Pod, Pod.
- Page 131 Pod. Pod Pen. Powerbank USB-C ). Pen "K" 100%, 10%.
- Page 132 K 0-10% K 10-100% "K" 100%: 10%: 100%...
- Page 133 POWERBANK Powerbank 100% 0-10% 10-100% USB-C USB-C USB-C 100% 0-10% 10-100%...
- Page 134 Pod: – « » "K" Pen, , Pen...
- Page 136 4. POWERBANK POWERBANK Soft Touch Powerbank ( Pen). 0-25% 26-50% 51-75% 76-100% 10%,...
- Page 137 POWERBANK USB-C USB-C USB-C, Powerbank. 0-25% 26-50% 51-75% 76-100% 100% POWERBANK POWERBANK...
- Page 138 0-25% 26-50% 51-75% 76-100% POWERBANK USB-C USB-C USB-C Powerbank. 0-25% 26-50% 51-75% 76-100%...
- Page 139 POWERBANK Powerbank 10%, Powerbank, 45°C 0°C, Powerbank Powerbank Soft Touch Pen, USB-C.
- Page 140 Pen, USB-C Powerbank. Powerbank kiwivapor.com.
- Page 143 KIWI! KIWI. : KIWI 2 Powerbank: 1800mAh Pen: 400mAh Powerbank USB-C: DC5V/2A Pen USB-C: DC5V/0.5A Powerbank Pen: ≈ 4 (0-100% : 1.8 : 0°C~45°C...
- Page 144 USB–C USB-C Pod, Pod, Pod.
- Page 145 Pod. Pod Pen. Powerbank ( USB-C «K» 100%, 10%.
- Page 146 K 0-10% K 10-100% "K" 100%: 10%: 100%,...
- Page 147 POWERBANK Powerbank 100% 0-10% 10-100% USB C USB-C USB-C 100% 0-10% 10-100%...
- Page 148 Pod: « » — «K» Pen, , Pen...
- Page 150 4. POWERBANK POWERBANK Soft Touch Powerbank ( 0-25% 26-50% 51-75% 76-100% 10%,...
- Page 151 POWERBANK USB-C USB-C USB-C Powerbank. 0-25% 26-50% 51-75% 76-100% 100% POWERBANK POWERBANK...
- Page 152 0-25% 26-50% 51-75% 76-100% POWERBANK USB-C USB-C USB-C, Powerbank. 0-25% 26-50% 51-75% 76-100%...
- Page 153 POWERBANK Powerbank 10%, Powerbank, 45°C 0°C, , Powerbank , Powerbank Soft Touch Pen, USB-C.
- Page 154 USB-C Powerbank. Powerbank kiwivapor.com.
-
Page 157: Specyfikacje Produktu
Witamy w świecie KIWI! Gratulacje, od dziś jesteś częścią społeczności opartej na ważnych wartościach, które zespół KIWI stale rozwija. Naszym celem jest oferowanie alternatywnych rozwiązań dla zdrowia, jakości życia i zrównoważonego rozwoju. Ta instrukcja obsługi zawiera wszystkie informacje potrzebne do prawidłowego korzystania z urządzenia. - Page 158 USB–C Przycisk Soft Touch Wskaźnik stanu baterii Wskaźnik stanu baterii USB-C Magnetyczny styk 2. INSTRUKCJA PIERWSZEGO UŻYTKU Zacznij korzystać z kapsuły, otwierając zabezpieczenie przed dziećmi. Aby otworzyć kapsułę, pociągnij metalową część w dół. Po obniżeniu ochrony podnieś silikonową nasadkę kapsuły.
- Page 159 Napełnij zbiornik płynem, przykryj go silikonowym korkiem i podnieś metalową osłonę w odpowiednie miejsce. Pozostaw Pod przez około 5 minut, aby upewnić się, że płyn w pełni wniknął do Pod. Włóż kapsułę do wstrzykiwacza. Białe światło LED zaświeci się raz, a następnie trzy szybkie wibracje.
- Page 160 K 0-10% ładowania: czerwona dioda LED K 10-100% ładowania: biała dioda STAN PEN PODCZAS UŻYTKU Światło LED w kształcie litery „K” wskazuje poziom baterii podczas procesu ssania w następujący sposób: Poziom baterii od 10% do 100%: białe światło LED Poziom baterii od 5% do 10%: czerwone światło LED Poniżej 5% poziomu baterii: Nie można wapować, czerwona dioda LED miga trzy razy i wibruje raz, co wskazuje na potrzebę...
- Page 161 ŁADOWANIE POWERBANKU PEN VIA Wskazanie ładowania Pen za pośrednictwem Powerbanku jest następujące: Poziom baterii od 0% do 10%: świeci czerwona dioda LED Poziom baterii od 10% do 100%: białe światła LED W pełni naładowany: gaśnie światło LED. 0-10% poziom naładowania 10-100% di livello di baterii: Czerwona dioda LED batteria: il LED bianco si...
- Page 162 WSKAZANIA WSTAWY I USUWANIA POD Wstawianie i usuwanie kapsuły: Wstawianie - dioda LED w kształcie litery „K” miga na biało trzema wibracjami, co wskazuje na dobry kontakt. Usuwanie - dioda LED w kształcie litery „K” miga raz na czerwono, wskazując, że kapsuła została pomyślnie usunięta.
- Page 163 Światła LED świecą niebiesko pięć razy, czemu towarzyszą trzy wibracje, wskazujące na przegrzanie i działające jako sygnał. 2. Maksymalne wskazanie spożycia: Maksymalny czas ssania wynosi 8 sekund. Po 8 sekundach obwód ochronny zostaje aktywowany, dezaktywacja kapsuły i unikanie przegrzania. Wskazuje na to dioda LED pióra, który świeci na czerwono 8 razy.
- Page 164 WSKAŹNIK OPŁATY POWERBANK Naciśnij przycisk Soft Touch na górze Powerbanku (lub wyjmij pióro). Wskaźnik baterii świeci się stopniowo, a następnie wyłącza. 1 dioda LED świeci 2 diody LED włączają się 0-25% 26-50% 3 diody LED włączają się 4 diody LED włączają się...
- Page 165 ŁADOWANIE KABLA USB-C POWERBANK Włóż kabel USB-C do portu USB-C znajdującego się na dole Powerbank. Wskaźnik ładowania świeci się, wskazując, że urządzenie odbiera zasilanie. 0-25% ładowania: pierwsza dioda LED miga. 26-50% ładowania: pierwsza dioda LED jest włączona w sposób ciągły, a druga dioda błyskuje. 51-75% ładowania: pierwsza i druga dioda LED są...
- Page 166 ładowania jest zapalony i że wskaźnik ładowania akumulatora jest włączony. 0-25% ładowania: 1 dio da LED. 26-50% ładowania: zapalają się 2 diody LED. 51-75% ładowania: zapalają się 3 diody LED. 76-100% ładowania: zapalają się 4 diody LED. Gdy pióro jest w pełni naładowane, wskaźnik mocy wyłącza się.
- Page 167 10%, proces ładowania zatrzymuje się, a pierwsza biała dioda LED miga 10 razy, wskazując niski poziom energii. 2. Podczas procesu ładowania Powerbank, jeśli temperatura powierzchni akumulatora przekracza 45 ° C lub spada poniżej 0 ° C, ładunek zostanie przerwany, a druga biała dioda LED miga 8 razy.
- Page 168 SPOŁECZNOŚCI Pen się nie włącza Aby naładować Pen, użyj kabla USB-C lub podłącz go do Powerbanku. Jeśli urządzenie nie włączy się po naładowaniu, skontaktuj się z obsługą klienta w celu uzyskania pomocy. Pen nie wytwarza pary Sprawdź, czy na stykach nie ma wycieku cieczy lub pyłu i dokładnie je wyczyść.
- Page 169 OSTRZEŻENIA Aby zapewnić bezpieczeństwo i zapobiec potencjalnym zagrożeniom, należy uważnie przeczytać następujące środki bezpieczeństwa przed użyciem urządzenia. Chociaż te środki ostrożności obejmują wiele sytuacji, mogą nie obejmować wszystkich możliwych scenariuszy. Dlatego zaleca się zwrócenie uwagi i odpowiedzialne korzystanie z urządzenia. Ważne informacje znajdują się w sekcji ostrzegawczej.
- Page 170 Ważne jest, aby NIE używać tego produktu w obecności materiałów łatwopalnych, cieczy lub gazów, takich jak stacje benzynowe, zakłady chemiczne i inne podobne środowiska. To środki ostrożności są niezbędne, aby zapewnić bezpieczeństwo i zapobiec potencjalnym wypadkom. Ten produkt nie jest wodoodporny. Unikaj mycia go wodą...
- Page 171 اﻟﻤﺴﺘﺪاﻣﺔ. ﻳﺤﺘﻮي دﻟﻴﻞ اﻟﻤﺴﺘﺨﺪم ﻫﺬا ﻋﻠﻰ ﺟﻤﻴﻊ اﻟﻤﻌﻠﻮﻣﺎت اﻟﺘﻲ ﺗﺤﺘﺎﺟﻬﺎ ﻻﺳﺘﺨﺪام ﺟﻬﺎزك ﺑﺸﻜﻞ .ﺻﺤﻴﺢ ١..ﺗﻔﺎﺻﻴﻞ اﻟﻤﻨﺘﺞ 2 اﻟﻨﻤﻮذج: ﻛﻴﻮي ﻧﻮع اﻟﺒﻄﺎرﻳﺔ: ﺑﻄﺎرﻳﺔ ﻟﻴﺜﻴﻮم أﻳﻮن ﻗﺎﺑﻠﺔ ﻟﻠﺸﺤﻦ ﺳﻌﺔ اﻟﺒﻨﻚ اﻟﻄﺎﻗﺔ: 0081 ﻣﻠﻠﻲ أﻣﺒﻴﺮ ﻓﻲ اﻟﺴﺎﻋﺔ ﺳﻌﺔ اﻟﻘﻠﻢ: 004 ﻣﻠﻠﻲ أﻣﺒﻴﺮ ﻓﻲ اﻟﺴﺎﻋﺔ...
- Page 172 دﺑﻮس اﻻﺗﺼﺎل اﻟﻤﻐﻨﺎﻃﻴﺴﻲ USB–C زر اﻟﻠﻤﺲ اﻟﻨﺎﻋﻢ ﻣﺆﺷﺮ اﻟﻄﺎﻗﺔ اﻟﺒﻮد ﻣﺆﺷﺮ اﻟﻄﺎﻗﺔ دﺑﻮس اﻻﺗﺼﺎل اﻟﻤﻐﻨﺎﻃﻴﺴﻲ USB-C ٢.ﺗﻌﻠﻴﻤﺎت ا � �ﺳﺘﺨﺪام ا � �وﻟﻲ اﺑﺪأ ﺑﺎﺳﺘﺨﺪام اﻟﺒﻮد ﻋﻦ ﻃﺮﻳﻖ ﻓﺘﺢ ﺣﻤﺎﻳﺔ اﻟﻄﻔﻞ اﻵﻣﻨﺔ. ﻟﻔﺘﺢ اﻟﺒﻮد، اﺳﺤﺐ اﻟﺠﺰء اﻟﻤﻌﺪﻧﻲ ﻟﻸﺳﻔﻞ. ﺑﻌﺪ ﺧﻔﺾ اﻟﺤﻤﺎﻳﺔ، ارﻓﻊ .ﻏﻄﺎء...
- Page 173 ،اﻣﻸ اﻟﺨﺰان ﺑﺎﻟﺴﺎﺋﻞ، واﺳﺘﺨﺪم اﻟﻐﻄﺎء اﻟﺴﻴﻠﻴﻜﻮﻧﻲ ﻟﺘﻐﻄﻴﺘﻪ واﺳﺤﺐ اﻟﺪرع اﻟﻤﻌﺪﻧﻲ إﻟﻰ اﻟﻤﻮﺿﻊ اﻟﺼﺤﻴﺢ. اﺗﺮك اﻟﺒﻮد ﻟﻤﺪة .ﺗﻘﺮﻳ ﺒ ً ﺎ ٥ دﻗﺎﺋﻖ ﻟﻠﺘﺄﻛﺪ ﻣﻦ أن اﻟﺴﺎﺋﻞ ﻳﺪﺧﻞ اﻟﺒﻮد ﺑﺎﻟﻜﺎﻣﻞ أدﺧﻞ اﻟﺨﺮﻃﻮﺷﺔ ﻓﻲ اﻟﻘﻠﻢ. ﺳﻴﻀﻲء اﻟﻀﻮء اﻷﺑﻴﺾ ﻣﺮة واﺣﺪة ، ﺗﻠﻴﻬﺎ اﻫﺘﺰاز ﺳﺮﻳﻊ ﺛﻼث ﻣﺮات. أدﺧﻞ اﻟﻄﺮف .واﺳﺘﻤﺘﻊ...
- Page 174 0-01% اﻟطﺎﻗﺔK LED :ﻣؤﺷر اﻷﺣﻣر :٪100-10 K ﻗوة أﺑﯾضLED ﻣﺻﺑﺎح ﻣﺴﺘﻮى ﺷﺤﻦ اﻟﻘﻠﻢ أﺛﻨﺎء ا � �ﺳﺘﺨﺪام " إﻟﻰ ﻣﺴﺘﻮى اﻟﺒﻄﺎرﻳﺔ ﺧﻼل ﻋﻤﻠﻴﺔK" LED ﻳﺸﻴﺮ ﻣﺼﺒﺎح :اﻟﺸﻔﻂ ﻋﻠﻰ اﻟﻨﺤﻮ اﻟﺘﺎﻟﻲ أﺑﻴﺾLED 01٪ إﻟﻰ 001٪ ﻣﻦ اﻟﻄﺎﻗﺔ: ﺿﻮء ...
- Page 175 ﺷﺤﻦ اﻟﻘﻠﻢ ﻣﻦ ﺧ � �ل ﺑﻨﻚ اﻟﻄﺎﻗﺔ :"ﺑﻨﻚ اﻟﻄﺎﻗﺔ" ﻫﻲ ﻛﻤﺎ ﻳﻠﻲ "إﺷﺎرة ﺷﺤﻦ اﻟﻘﻠﻢ إﻟﻰ Powerbank ﺣﻤﺮاءLED 0٪ إﻟﻰ 01٪ ﻣﻦ اﻟﻄﺎﻗﺔ: إﺿﺎءة ﺑﻴﻀﺎءLED 01٪ إﻟﻰ 001٪ ﻣﻦ اﻟﻄﺎﻗﺔ: إﺿﺎءة " ﻣﻄﻔﺄLED ﻣﺸﺤﻮﻧﺔ ﺑﺎﻟﻜﺎﻣﻞ: ﺿﻮء 0-01% اﻟطﺎﻗﺔ: ﯾﺿﻲء ...
- Page 176 اﻟﻤﺆﺷﺮات � �دﺧﺎل وإزاﻟﺔ اﻟﺤﺎوﻳﺎت اﻟﻘﺎﺑﻠﺔ (POD) ﻟﻠﺘﺒﺪﻳﻞ :إدﺧﺎل وإزاﻟﺔ اﻟﺒﻮد " اﻷﺑﻴﺾ ﻣﺮة واﺣﺪة ﻣﻊK" اﻹدﺧﺎل - ﺳﻴﻮﻣﺾ ﻣﺼﺒﺎح .ﺛﻼث اﻫﺘﺰازات، ﻣﺸﻴﺮ ً ا إﻟﻰ وﺟﻮد اﺗﺼﺎل ﺟﻴﺪ " اﻷﺣﻤﺮ ﻣﺮة واﺣﺪة ﻟﻺﺷﺎرةK" اﻹزاﻟﺔ - ﺳﻴﻮﻣﺾ ﻣﺼﺒﺎح .إﻟﻰ أن اﻟﺒﻮد ﺗﻤﺖ إزاﻟﺘﻪ ﺑﻨﺠﺎح ﺗﺒﺪﻳﻞ...
- Page 177 ، اﻷزرق ﺧﻤﺲ ﻣﺮات ، ﻣﺼﺤﻮ ﺑ ً ﺎ ﺑﺜﻼﺛﺔ اﻫﺘﺰازاتLED .ﻣﻤﺎ ﻳﺸﻴﺮ إﻟﻰ ارﺗﻔﺎع درﺟﺔ اﻟﺤﺮارة وﻳﻌﻤﻞ ﺑﻤﺜﺎﺑﺔ ﺗﺬﻛﻴﺮ 2. إﺷﺎرة إﻟﻰ اﻟﺸﻔﻂ اﻟﻤﺴﺘﻤﺮ ﻟﻤﺪة 8 ﺛﻮان ٍ : ﺳﻴﻀﻲء ، اﻷﺣﻤﺮ ﺛﻤﺎﻧﻲ ﻣﺮات ، ﻣﺼﺤﻮ ﺑ ً ﺎ ﺑﺬﺑﺬﺑﺔ واﺣﺪةLEDﻣﺆﺷﺮ...
- Page 178 POWERBANK ٠٤. ﺗﻌﻠﻴﻤﺎت POWERBANK ﻟﺤﺎﻟﺔ Powerbank اﻟﻤﻮﺟﻮد أﻋﻠﻰSoft Touch اﺿﻐﻂ ﻋﻠﻰ زر )أو ﻗﻢ ﺑﺈزاﻟﺔ اﻟﻘﻠﻢ(. ﺳﻴﻀﻲء ﻣﺆﺷﺮ اﻟﻄﺎﻗﺔ ﺗﺪرﻳﺠﻴ ً ﺎ ﺛﻢ .ﻳﻨﻄﻔﺊ LED 1 ﺗﻀﻲء LED 2 ﺗﻀﻲء 0-25% 26-50% LED 3 ﺗﻀﻲء LED ﺗﻀﻲء 4 ﻣﺼﺎﺑﻴﺢ 51-75% 76-100% ﻋﻨﺪﻣﺎ...
- Page 179 USB-C ﺷﺤﻦ ﺑﺎور ﺑﺎﻧﻚ ﺑﻜﺎﺑﻞ . اﻷولLED ٠٪- ٢٥٪ اﻟﻄﺎﻗﺔ: ﻳﻮﻣﺾ ﻣﺆﺷﺮ ، اﻷول ﻗﻴﺪ اﻟﺘﺸﻐﻴﻞ ﺑﺎﺳﺘﻤﺮارLED ٢٦٪-٥٠٪ اﻟﻄﺎﻗﺔ: ﻣﺆﺷﺮ . اﻟﺜﺎﻧﻲLED وﻳﻮﻣﺾ ﻣﺆﺷﺮ اﻷول واﻟﺜﺎﻧﻲ ﻳﻌﻤﻼنLED ٥١٪ -٧٥٪ ﻣﻦ اﻟﻄﺎﻗﺔ: ﻣﺼﺒﺎﺣﺎ .ﺑﺎﺳﺘﻤﺮار ، وﻳﻮﻣﺾ اﻟﻤﺼﺒﺎح اﻟﺜﺎﻟﺚ اﻷوﻟﻰ واﻟﺜﺎﻧﻴﺔ واﻟﺜﺎﻟﺜﺔLED ٧٦٪-١٠٠٪ اﻟﻄﺎﻗﺔ: ﻣﺆﺷﺮات ....
- Page 180 ، ﻣﻤﺎ ﻳﻀﻤﻦ اﺗﺼﺎﻻ ً ﺟﻴﺪً ا. ﺗﺤﻘﻖknabrewoP أدﺧﻞ اﻟﻘﻠﻢ ﻓﻲ ﻣﻦ أن ﻣﺆﺷﺮ اﻟﻄﺎﻗﺔ ﻣﻀﺎء وأن ﻣﺆﺷﺮ ﻣﺴﺘﻮى اﻟﺒﻄﺎرﻳﺔ .اﻟﺤﺎﻟﻲ ﻳﻀﻲء .٠٪- ٢٥٪ ﻣﻦ اﻟﻄﺎﻗﺔ: 1 ﻳﻀﻲء .62-05٪ اﻟﻄﺎﻗﺔ: ﻣﺼﺒﺎﺣﺎن ﻣﻀﺌﺎن 15-75٪ اﻟﻄﺎﻗﺔ: ﺗﻀﻲء 3 ﻣﺼﺎﺑﻴﺢ .ﺗﻀﻲء 67-001٪ اﻟﻄﺎﻗﺔ: 4 ﻣﺼﺎﺑﻴﺢ .ﻋﻨﺪ...
- Page 181 ،ﻣﺴﺘﻮى اﻟﻄﺎﻗﺔ إﻟﻰ أﻗﻞ ﻣﻦ 10٪، ﺳﻴﺘﻮﻗﻒ ﻋﻤﻠﻴﺔ اﻟﺸﺤﻦ وﺳﻴﻮﻣﺾ اﻟﺼﻤﺎم اﻷﺑﻴﺾ اﻷول 10 ﻣﺮات ﻟﻺﺷﺎرة إﻟﻰ .اﻧﺨﻔﺎض اﻟﻄﺎﻗﺔ 2. ﺧﻼل ﻋﻤﻠﻴﺔ اﻟﺸﺤﻦ ﻟﻠﺒﺎورﺑﺎﻧﻚ، إذا ﺗﺠﺎوزت درﺟﺔ ﺣﺮارة ﺳﻄﺢ اﻟﺨﻠﻴﺔ اﻟﺒﻄﺎرﻳﺔ 45 درﺟﺔ ﻣﺌﻮﻳﺔ أو اﻧﺨﻔﻀﺖ إﻟﻰ أﻗﻞ ﻣﻦ 0 درﺟﺔ ﻣﺌﻮﻳﺔ، ﺳﻴﺘﻢ إﻳﻘﺎف اﻟﺸﺤﻦ، وﺳﻴﻮﻣﺾ اﻟﺼﻤﺎم...
- Page 182 ٥. اﺳﺘﻜﺸﺎف ا � �ﺧﻄﺎء وإﺻ � �ﺣﻬﺎ ﻟن ﯾﺗم ﺗﺷﻐﯾل اﻟﻘﻠم أو ﻗﻢ ﺑﺘﻮﺻﻴﻠﻪ ﺑـUSB-C ﻟﺸﺤﻦ اﻟﻘﻠﻢ ، اﺳﺘﺨﺪم ﻛﺎﺑﻞ ، . إذا اﺳﺘﻤﺮ ﻋﺪم ﺗﺸﻐﻴﻞ اﻟﺠﻬﺎز ﺑﻌﺪ اﻟﺸﺤﻦPowerbank .ﻓﺎﻟﺮﺟﺎء اﻻﺗﺼﺎل ﺑﺨﺪﻣﺔ اﻟﻌﻤﻼء ﻟﻠﺤﺼﻮل ﻋﻠﻰ اﻟﻤﺴﺎﻋﺪة ﻻ ﯾطﻠق اﻟﻘﻠم دﺧﺎ ﻧ ً ﺎ ﺗﺤﻘﻖ...
- Page 183 ٦. ﺗﺤﺬﻳﺮات ﻟﻀﻤﺎن ﺳﻼﻣﺘﻚ وﻣﻨﻊ اﻷﺧﻄﺎر اﻟﻤﺤﺘﻤﻠﺔ ، ﻳﺮﺟﻰ ﻗﺮاءة اﺣﺘﻴﺎﻃﺎت اﻟﺴﻼﻣﺔ اﻟﺘﺎﻟﻴﺔ ﺑﻌﻨﺎﻳﺔ ﻗﺒﻞ اﺳﺘﺨﺪام اﻟﺠﻬﺎز. ﺑﻴﻨﻤﺎ ﺗﻐﻄﻲ ﻫﺬه اﻻﺣﺘﻴﺎﻃﺎت اﻟﻌﺪﻳﺪ ﻣﻦ اﻟﻤﻮاﻗﻒ ، ﻓﻘﺪ ﻻ ﺗﺸﻤﻞ ﺟﻤﻴﻊ اﻟﺴﻴﻨﺎرﻳﻮﻫﺎت اﻟﻤﻤﻜﻨﺔ. ﻟﺬﻟﻚ ، ﻳﺮﺟﻰ ﺗﻮﺧﻲ اﻟﺤﺬر واﺳﺘﺨﺪام اﻟﺠﻬﺎز ﺑﺸﻜﻞ ﻣﺴﺆول. ﻟﻘﺪ ﻗﺪﻣﻨﺎ ﻣﻌﻠﻮﻣﺎت ﻣﻬﻤﺔ ﻓﻲ...
- Page 184 ﻣﻦ اﻟﻤﻬﻢ ﻋﺪم اﺳﺘﺨﺪام ﻫﺬا اﻟﻤﻨﺘﺞ ﻓﻲ ﺣﺎﻟﺔ وﺟﻮد ﻣﻮاد أو ﺳﻮاﺋﻞ أو ﻏﺎزات ﻗﺎﺑﻠﺔ ﻟﻼﺷﺘﻌﺎل ، ﻣﺜﻞ ﻣﺤﻄﺎت اﻟﻮﻗﻮد واﻟﻤﺼﺎﻧﻊ اﻟﻜﻴﻤﺎوﻳﺔ واﻟﺒﻴﺌﺎت اﻟﻤﻤﺎﺛﻠﺔ اﻷﺧﺮى. ﻫﺬا اﻻﺣﺘﻴﺎط ﺿﺮوري ﻟﻀﻤﺎن ﺳﻼﻣﺘﻚ وﻣﻨﻊ اﻟﺤﻮادث .اﻟﻤﺤﺘﻤﻠﺔ ﻫﺬا اﻟﻤﻨﺘﺞ ﻟﻴﺲ ﻣﻘﺎوﻣ ً ﺎ ﻟﻠﻤﺎء. ﻳﺮﺟﻰ اﻻﻣﺘﻨﺎع ﻋﻦ ﻏﺴﻠﻬﺎ ﺑﺎﻟﻤﺎء...
- Page 185 ている重要な価値観に基づいたコミュニティ の一員となりました。 私たちの目標は、 あなた の健康、 生活の質、 そして持続可能な開発のた めの代替的な解決策を提供することです。 この ユーザーマニュアルには、 デバイスを正しく使 用するために必要なすべての情報が記載され ています。 商品内容 モデル : KIWI 2 バッテリーの種類 リチウムイオン充電池 パワーバンク の容量 : 1800mAh ペンの容量 : 400mAh パワーバンクのUSB-C入力 : DC5V/2A対応 ペンのUSB-C入力 : DC5V/0.5A対応 ペン用パワーバンク充電回数 : 最大4回 (0-100%パワー) タンク容量 : 1.8ml 動作温度...
- Page 186 マグネッ ト式接 触ピン USB–C ソフトタッチボタン 電源ランプ ポッ ド 電源ランプ マグネッ ト式接触ピン USB-C 初回使用時の注意事項 チャイルドプルーフを開けて、 ポッ ドの使用を開始し ます。 ポッ ドを開けるには、 金属部分を下方向に引っ 張ります。 補助を下ろした後、 ポッ ドのシリコンキャップを持ち 上げてください。...
- Page 187 タンクにリキッ ドを注入し、 シリコンキャップで覆い、 金属シールドを正しい位置まで引っ張ります。 リキッ ドがポッ ドに完全に浸透する為に、 5分程度放置して ください。 カートリッジをペンに挿入します。 白いランプが1 回点灯し、 その後3回素早く振動します。 チップを 挿入してお楽しみください。 ペンデバイスの機能 ペンの充電レベル ペンをパックから取り出し、 パワーバンクにセッ トします ( またはUSB-Cに接続して充電します) 。 ペンが1回振動し、 「 K」 のLEDが3回点滅します。 現在のバッテリー残量はLED の色で示されます。 白は10%から100%の電力を示し、 赤 は0%から10%の電力を示します。...
- Page 188 K 0-10%電力 : 赤色 K 10-100%電力 : 白色 使用中のペン充電量 「K」 のLEDは、 吸引中に以下のようにバッテリー残量を 表示します : 10%〜100% : 白色LEDライ ト 5%〜10% : 赤色LEDランプ 5%以下の電力 : 吸引できず、 赤色LEDが3回点滅し、 1回 振動し、 充電の必要性を示します。 5〜10%の電力 : 10-100%電力 : 赤色LED点灯 白色LEDが点灯します。...
- Page 189 パワーバンクでペンを充電する パワーバンクがペンを充電している際の表示は、 以下の通り です : 0%から10%の電力 : 赤色LEDが点灯 10%から100%の電力 : 白色のLEDが点灯 完全に充電されました : LEDライ トが消灯 10〜100%の電力 : 0〜10%の電力 赤色LED点灯 白色LED点灯 USB-Cケーブルでペンを充電する USB-C電源を入力した際の表示は、 現在の電源レベルの 表示が3回点滅し、 1回振動する。 USB-Cの充電表示は以下の通りです : 0%から10%の電力 : 赤色LEDが点灯 10%から100%の電力 : 白色のLEDが点灯 完全に充電された状態 : LEDライ トが消灯 10〜100%の電力 : 0〜10%の電力 赤色LED点灯...
- Page 190 ポッドの挿入と取り外しの適応 Podを出し入れする : 挿入-白い 「K」 のLEDが1回点滅し、 3回振動して、 接触 が良好であることを示します。 取り外し-赤い 「K」 のLEDが1回点滅し、 Podが正常に取り 外されたことを示します。 ペンの吸引振動モードの切り替え ペンの吸引振動モードをオンまたはオフにするには、 次 の手順に従います : デフォルトでは、 ペンは振動を伴う吸引モードに設定さ れています。 ポッ ドを4秒以内に5回抜き差ししてください。 正しく行われた場合、 ペンは吸引バイブレーションモー ドに切り替わります。 モードが正常に切り替わると、 白いライ トが2秒間点滅し 、 同時にモーターが2秒間振動します。 吸引振動モードでは、 吸引の際に軽い振動があります。...
- Page 191 ペンプロテクションシステム 1. 過熱保護リマインダー : 青いLEDが5回点灯し、 3回の振 動を伴って、 過熱を示し、 リマインダーとして機能します。 2. 8秒間連続吸引の表示 : 赤色LEDが8回点灯し、 1回の 振動を伴い、 8秒間連続吸引したことを示し、 過熱を防ぐ ために停止するタイミングであることを示します。 3. ショートや 高温を表示します : 赤色LEDが10回点灯し、 2回の振動を伴い、 ショートや 高温など加熱エレメントに 問題があることを示します。 4. 低電力保護機能 : 加熱開始前や加熱中に電力が低下 しすぎると、 赤色LEDが3回点灯し、 モーターが1回振動し、 加熱が自動的に停止し、 機器を保護します。 20パフのリマインダー 吸引量が20パフになると、 モーターが2回振動します。 パフカウンターは、 10分の間隔をあけて2回吸引すると...
- Page 192 パワーバンク パワーバンクの状態に関する指示 パワーバンクの上部にあるソフトタッチボタンを 押す (またはペンを取り外す) 。 電源ランプが徐々 に点灯し、 その後消灯します。 2 つの LED が点灯 1つのLEDが点灯 0-25% 26-50% 3つの LED が点灯 4 つの LED が点灯 51-75% 76-100% 電源が10%以下になると、 電源ランプの最初のバーが10 回ほど早く点滅し、 充電を促します。...
- Page 193 USB-Cケーブルでパワーバンクを充電する USB-Cケーブルをパワーバンクの底面にある USB-Cポートに差し込みます。 電源ランプが点灯し、 デバイスに電力が供給されていることが示されます。 0〜25%電力 : 1つ目のLEDが点滅します。 26-50%電力 : 1つ目のLEDが連続点灯し、 2つ目の LEDが点滅します。 51-75%電力 : 1つ目のLEDと2つ目のLEDが連続点灯 し、 3つ目のLEDが点滅します。 76-100% 電力 : 1つ目、 2つ目、 3つ目のLEDが連続点 灯し、 4つ目のLEDが点滅します。 100% 電力 : 4つのLEDが3秒間点灯し、 その後消灯 します。 パワーバンクの状態に関する指示 - パワーバ ンクがペンを充電する...
- Page 194 ペンをパワーバンクに挿入し、 接触が良好であるこ とを確認します。 電源ランプが点灯し、 現在のバッテ リー残量表示が点灯していることを確認します。 0〜25% 電力 : 1つのLEDが点灯します。 26-50%電力 : 2つのLEDが点灯します。 51-75%電力 : 3つのLEDが点灯します。 76-100% 電力 : 4つのLEDが点灯します。 ペンが完全に充電されると、 電源ランプが消灯しま す。 パワーバンクはUSB-C経由で他のデバイスを 充電することができます。 USB-Cケーブルをパワーバンクの底面にある USB-Cポートに接続します。 ケーブルのもう一方の 端を他のデバイスに接続し、 接触が良好であること を確認します。 電源ランプが点灯していること、 およ び現在のバッテリー残量ランプが点灯していること を確認します。 0〜25% 電力 : 1つのLEDが点灯します。 26-50%電力 : 2つのLEDが点灯します。...
- Page 195 パワーバンクのトラブルシューティング 1. パワーバンクがペンを充電しているとき、 電力レ ベルが10%以下になると、 充電が停止し、 1つ目の白 色LEDが10回点滅して電力不足を知らせます。 2. パワーバンクの充電中、 バッテリーセルの表面温 度が45 を超えるか、 0 を下回ると充電が停止し、 2 つ目の白色LEDが8回点滅します。 3. 出力がショートまたは過電流保護された場合、 パ ワーバンクは出力を停止し、 3番目の白色LEDが5回 点滅して保護状態を表示します。 4. データの書き込み、 読み出し中に充電ICの通信 に不整合が発生した場合、 パワーバンクは出力を停 止し、 4つ目の白色LEDが3回点滅して保護状態を表 示します。 5. 保護タイプを確認するには、 保護表示が終了した 後にソフトタッチボタンを押します。 現在の保護タ イプが表示され、 上記と同じ表示となります。 6. 保護を解除するには、 ペンの抜き差し、 または...
- Page 196 トラブルシューティング ペンの電源が入らない ペンの充電には、 USB-Cケーブルを使用するか、 パ ワーバンクに接続してください。 充電しても電源が 入らない場合は、 カスタマーサービスまでご連絡く ださい。 ペンから蒸気が出ない 接触ピンに液漏れやホコリが付着していないか確 認し、 十分に清掃してください。 接点部の清掃には、 外側のクリーニングには、 湿らせた糸くずの出ない 布を使用してください。 キッチンペーパーやハンカ チをご使用ください。 それでも煙が出ない場合は、 カスタマーサービスにご連絡ください。 ポッドから液体が漏れている ポッ ドは使い古されたため、 買い替えが必要です。 パワーバンクが充電されない 機器に付属の純正充電器のみを使用してください。 互換性のある交換用充電器を使用した場合、 デバ イスの正常な機能を保証することはできません。 その他の種類の故障については、 カスタマーサー ビスにご連絡いただくか、 当社のウェブサイ ト kiwivapor.comをご覧ください。 改造をすると保証が 無効になるので、 改造しないことが重要です。...
- Page 197 警告 お客様の安全を確保し、 潜在的な危険を防止するため に、 機器を使用する前に、 以下の安全に関する注意事項 をよくお読みください。 これらの注意事項は、 多くの状況 を想定していますが、 すべての可能なシナリオを網羅し ているわけではあ りません。 以下の警告欄には、 重要な 情報を記載しています。 このマニュアルは、 将来参照す るために保管してください。 本製品は、 18歳以上の成人の方の使用を想定していま す。 お子様や18歳未満の方、 妊娠中や授乳中の方、 心臓 病、 高血圧、 糖尿病、 喘息、 てんかんの方、 ニコチンに対 してアレルギーのある方には適しておりません。 これら に該当する方は、 本製品の使用を控えることを強くお勧 めします。 本製品を使用中に、 腹痛、 胸痛、 息苦しさ、 咳、 呼吸困難、 めまい、...
- Page 198 ガソリンスタンドや化学工場など、 可燃性の物質や液 体、 ガスが存在する場所では、 本製品を使用しないよう にすることが重要です。 このことは、 お客様の安全を確 保し、 事故を未然に防ぐために必要なことです。 本製品は防水ではありません。 水洗いや湿気の多い環 境での使用はお控えください。 水洗いや湿気の多い場 所での使用は避けてください。 デバイスの表面を酸性溶液で触れたり、 洗浄したり し ないでください。 デバイスを損傷し、 性能に影響を与え る可能性があります。 . 充電中や使用中に表面が非常に熱くなった場合は、 す ぐに使用を中止してください。 過充電はしないでください。 充電が完了したら、 速やか に電源ケーブルを抜き、 電池寿命への悪影響や安全上 の危険を回避することが重要です。 本製品にはニッケルが含まれています。 ニッケルアレ ルギーの既往症がある方、 過去にアレルギー反応を起 こしたことのある方は、 本製品のご使用をお控えくださ いますようお願いいたします。 地域の環境政策、 分類、 リサイクル要件に従って、 デバ イスを適切にリサイクルするようにしてください。...
- Page 199 Importer for EU: Vapour International d.o.o. Digitronska 2 Buje, Hrvatska, Tel.00385 52 220 041, email: support@kiwivapor.com...
Need help?
Do you have a question about the 2 and is the answer not in the manual?
Questions and answers