Table of Contents
Advertisement
Quick Links
Advertisement
Table of Contents

Related Manuals for Dometic RH 430 LD


Summary of Contents for Dometic RH 430 LD
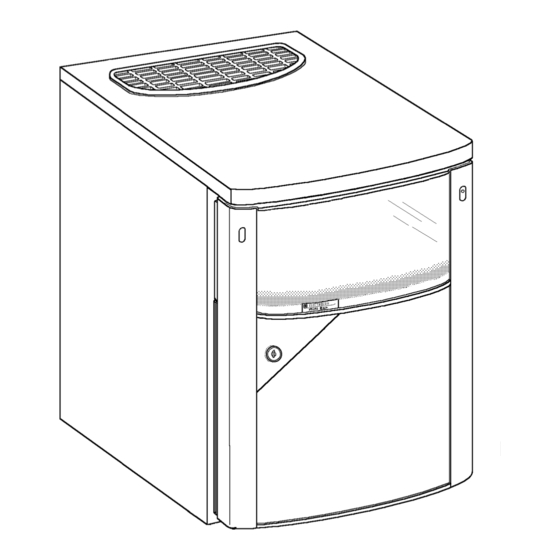
- Page 1 INSTRUCTION for USE ABSORPTION-REFRIGERATOR RH 436 D RH 430 LD RH 438 D RH 438 LD RH 447 D RH 440 LD RH 448 D RH 441 LD RH 468 D RH 448 LD RH 460 LD RH 455 LD...
-
Page 2: Table Of Contents
INTRODUCTION FOR YOUR SAFETY 2.1 Warnings and Safety Advice 2.2 Coolants WARRANTY AND CUSTOMER SERVICE INSTALLATION 4.1 The Purpose of this Manual 4.2 Tools/Materials Required 4.3 Unpacking 4.4 Cleaning 4.5 Installation 4.6 Securing 4.7 Connecting the Device to the Electricity Supply 4.8 Changing the Sliding Hinge 4.9 Changing the Doorhang INSTRUCTION FOR USE... -
Page 3: Introduction
Any damage due to improper use is not covered by the warranty. The warranty does not cover any modifications to the appliance or the use of non-original Dometic parts; the warranty does not apply if the installation and operating instructions are not adhered to and no liability shall be entertained. Parts can be ordered throughout Europe from our Dometic Service department. -
Page 4: Installation
4 4 . . 0 0 INSTALLATION The Purpose of this Manual The manual shows you how to: install the miniBar correctly. Ÿ operate the miniBar correctly. Ÿ guarantee the miniBar´s correct maintenance and functioning. Ÿ deal with faults by yourself. Ÿ... -
Page 5: Installation
Installation 200 cm² 20 mm IMPORTANT: Please follow the installation details below carefully. Guarantee is valid for products installed as described only. 1. The refrigerator must be level both directions 2. There sould be 20mm clearance to the wall 3. Ventilation must be provided as shown in alternatives A,B,C or D 4. -
Page 6: Securing
Securing 4.6.1 RH456LD/E 1. Tighten screw. 2. Put on cap. 4.6.2 RH430LD, RH440LD, RH441LD, RH460LD, RH461LD RH436D, RH447D, RH438(L)D, RH448(L)D The miniBar must be screwed onto the cupboard using the lower hinges. 1. Tighten screw. 2. Put on cap. -
Page 7: Connecting The Device To The Electricity Supply
If this is not the case, do not connect the device and contact your dealer! If the connection cable is damaged it must be replaced by the Customer Service at Dometic, or by respectively qualified personnel, in order to prevent any hazards. 4.7.1... -
Page 8: Changing The Sliding Hinge
If the plug supplied on the mains lead is not suitable for the socket in your home, it should be cut off and disposed of safely, or destroyed, to avoid any possible shock hazard resulting from the plug being inserted into a 13 amp socket elswhere in the use. -
Page 9: Changing The Doorhang
Changing the Doorhang ( RH436D, RH447D, RH430LD, RH440LD, RH441LD, RH460LD, RH461LD, RH438LD, RH448LD) -
Page 10: Instruction For Use
5 5 . . 0 0 INSTRUCTION FOR USE Initial Operation The device must be plugged into a properly Ÿ earthed socket. The miniBar achieves its operating Ÿ temperature after several hours. The miniBar operates silently ! Temperature Control The miniBar is fitted with an electronic temperature control. -
Page 11: Automatic Door Control (Adc)
Automatic Door Control (ADC) The following descriptions only apply to devices with ADC. Using a red dot in the display window (A, point 3), the ADC shows that the miniBar´s door has been opened. 1. Open the miniBar, check its contents and - if applicable- stock it up again. -
Page 12: Interior Light
Changing the LED-board: 1. Pull out the 2. Remove the reflector 3. Remove defective mains plug. disk. bulb. 5. Clip reflector disk 4. Insert new bulb. back in. To obtain spare electronic boards please contact your Dometic Service Centre. -
Page 13: Environmental Advice
Environmental Advice miniBars manufactured by Dometic GmbH are free from CFCs / HCFCs and fluorinated hydrocarbons. The cooling unit uses ammonia as the coolant (a natural compound of hydrogen and nitrogen). Cyclopentane, which does not damage the ozone layer, is used as propellant for the insulation made from PU-foam. -
Page 14: Check List
5.11 Check List Failure : No cooling (the aggregate at the back of the device is cold). Possible Cause Self Help Authorised Service a.) The thermostat is set to “0”. a.) Set temperature control to middle position. b.) The device plug is not b.) Plug in device plug. -
Page 15: Technical Data
5.12 Technical Data Model RH430/438LD RH440/448LD RH441LD RH455LD Built-in Built-in Freestanding / Freestanding Built-in Casing Metal Metal Metal Wood Gross Contentss (litres) cooled / uncooled 30 / - 40 / - 40 / - 35 / 20 Dimensions (mm) (H x W xD) 522x384x412 554x401x446 554x401x449... - Page 16 Dometic GmbH In der Steinwiese 16 D-57074 Siegen Phone: +49-(0) 271 / 692 0 Fax: +49-(0) 271 / 692 300 www.dometic.de/minibar www.dometic.com © Dometic GmbH - 2003 - Subject to change without notice - Printed in Germany...
Need help?
Do you have a question about the RH 430 LD and is the answer not in the manual?
Questions and answers