Advertisement
Quick Links
Advertisement

Related Manuals for GTR Simulator GTM Motion Platform V2

Summary of Contents for GTR Simulator GTM Motion Platform V2
- Page 1 GTM Motion Platform V2 Installation Manual...
- Page 2 Parts List...
- Page 3 Step 1 1. Align the U-Joint Coupler: Start by aligning the U-Joint coupler with the flush side of the frame assembly. 2. Insert Bolts: Insert the provided bolts through the corresponding holes in the coupler and frame assembly. 3. Attach Locking Washer and Nut: Once the bolts are through, slip a locking washer and then a nut over each bolt.
- Page 4 Step 2...
- Page 5 Step 3...
- Page 6 Step 4...
- Page 7 Step 5 1. Positioning the Frame: Center the upper platform frame assembly (part# F) over the upright U-Joint coupler of the Lower Seat Frame Assembly, directing it toward the motion unit. 2. Aligning and Inserting the U-Joint Coupler: Gently lower the frame, allowing the inner lip of the U-Joint coupler to insert through the center opening.
- Page 8 Step 6 Gently position the steel actuator rods on the motion unit, aligning them towards the rear tabs on either side of the rear seat frame assembly. Once aligned, insert the threaded bolts through the rear tabs on each side. After inserting the bolts, place a locking washer over each one, then secure each with a nut.
- Page 9 Step 7 Install the front upper platform frame using pat# H...
- Page 10 Step 8 Install the side upper platform frame using part# I and J...
- Page 11 Step 9 1. Gathering Components: Assemble the upper platform frame by locating parts labeled #I, #K, and #L. 2. Securing the Parts: Use M8 bolts to securely fasten these parts together, ensuring each bolt is tightly fitted to avoid any instability or wobbling.
- Page 12 Step 10...
- Page 13 Step 11 1. Positioning the Cover: Place the platform plate cover in the designated area, ensuring proper alignment with the side nut holes. 2. Securing the Cover: Utilize the appropriate bolts and align them with the side nut holes. Once aligned, insert the bolts and securely fasten them to ensure the platform plate cover is firmly attached...
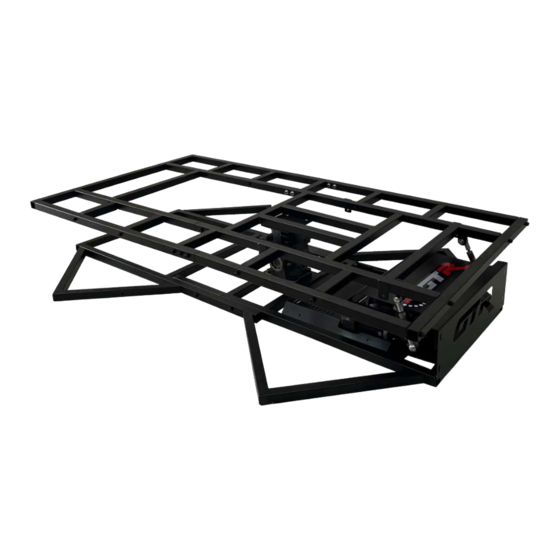
- Page 14 Complete...
Need help?
Do you have a question about the GTM Motion Platform V2 and is the answer not in the manual?
Questions and answers