
Related Manuals for Orion e Series


Summary of Contents for Orion e Series
- Page 1 OPERATING INSTRUCTION MANUAL eSeries Electric Balance Bikes 2024 e12 Xtreme | e16 Xtreme | e20 Xtreme VER.2.0/2023-2024...
- Page 2 Please read it thoroughly before embarking on the initial ride with your new bike, and keep it for future reference. If you encounter any uncertainties or have questions, prioritize your safety and contact Orion Moto customer service at 817-350-4520 or info@orionmoto.com. IMPORTANT: YOUR INSURANCE POLICIES MAY NOT EXTEND COVERAGE TO ACCIDENTS INVOLVING THE UTILIZATION OF THIS BICYCLE.
-
Page 3: Table Of Contents
TABLE OF CONTENTS INTRODUCTION ............................1 A FEW WORDS ABOUT SAFETY ......................... 2 Before Riding ............................3 PRE-RIDE SAFETY ............................3 Safety Equipment ............................ 5 Things to Consider ..........................6 MESSAGE TO RIDERS ..........................6 COMPONENT LOCATION ......................... 8 BIKE ASSEMBLY ............................9 Tool Kit .............................. -
Page 4: Introduction
This information will alert you to some potential hazards that could harm you or others. Orion cannot foresee every potential situation that may result in harm or fatality during operation or maintenance. Hence, it is crucial for the consumer and end user to exercise their... -
Page 5: A Few Words About Safety
A FEW WORDS ABOUT SAFETY Your safety, and the safety of others, is very important and operating this electric balance bike safely is an important responsibility. DANGER!: You could be SERIOUSLY HURT if you don’t follow instructions. CAUTION!: You could be HURT if you don’t follow instructions. Always use an Never use on Never carry... -
Page 6: Before Riding
Any major service or adjustments on your bike not covered in this manual should be carried out by an authorized Orion dealer. If you wish to make adjustments yourself, this manual contains important tips on how to do it. - Page 7 9. If any components become loose while riding, (STOP IMMEDIATELY!!) and tighten, or bring to a Authorized Orion Dealer for repair. TO PREVENT INJURY, IT IS IMPERATIVE THAT THIS PRODUCT BE THOROUGHLY ASSEMBLED BEFORE USE. WE STRONGLY ADVISE REVIEWING THE COMPLETE ASSEMBLY GUIDE AND CONDUCTING THE CHECKS OUTLINED IN THE OWNER'S MANUAL BEFORE RIDING.
-
Page 8: Safety Equipment
SAFETY EQUIPMENT Orion Moto promotes the use of safety equipment during the use of your electric balance bike; the following list is an advisory guideline of the equipment that should be obtained before using your electric balance bike for the first time, and to be used for every ride regardless of experience and skill level. -
Page 9: Things To Consider
MESSAGE TO RIDERS Your safety is of utmost importance to Orion Moto. Therefore, we strongly encourage you to read this message before using this electric balance bike. Making informed decisions regarding if, when, and how you ride this electric balance bike can significantly contribute to accident prevention. - Page 10 Make sure the accessory: • Does not reduce ground clearance and lean angle • Limit steering travel • Alter your riding position • Interfere with operating any controls MODIFICATIONS We strongly advise you not to remove any original equipment or modify your electric balance bike in any way that would change its design or operation.
-
Page 11: Component Location
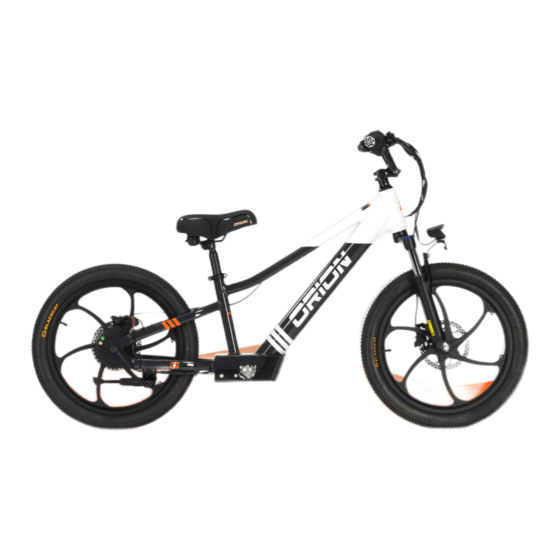
COMPONENT LOCATION 1. Frame 7. Front Forks 12. Head light 17. Kickstand 2. Handlebars 8. Front Axle 13. Seat clamp 18. Control Panel 3. Brake levers 9. Rear Axle 14. Charging port 19. Seat 4. Throttle 10. Hub motor 15. Brake Caliper 20. -
Page 12: Bike Assembly
2. Allow the bike to cool down for a sufficient period (up to 30 minutes) 3. Secure the bike for repair or maintenance In case of uncertainty about any repair or maintenance, please contact Orion Moto Customer Service at (817) 350-4520. -
Page 13: Front Wheel Installation
FRONT WHEEL INSTALLATION The front axle is located in the TOOL KIT. The washers and spacers are already arranged in the correct order. Visual references are provided below. XTREME Nut | Washer | Fork | Washer | Spacer (both sides). XTREME Nut | Washer | Fork | Spacer (both sides). -
Page 14: Handlebar Installation
HANDLEBAR INSTALLATION STEERING STEM 1. Loosen the M4 SCREWS that secure the lower handlebar clamp onto the steering stem. 2. Rotate the lower clamp approximately 180 degrees, ensuring it faces forward and is evenly balanced between the fork. 3. Securely tighten the M4 SCREWS. 4. -
Page 15: Foot Peg Installation
HANDLEBARS 1. Use the 4MM HEX WRENCH provided to remove the bolts from the handlebar clamp. 2. Once the clamp is open, place the lower crossbar of the handlebar in the groove of the top crown. 3. Loosely tighten the handlebar clamp with 4mm hex wrench and adjust the handlebar to a 90 degree angle aligning with the forks. - Page 16 INSTRUCTIONS FOR ASSEMBLING FOLDABLE METAL FOOT PEGS: CAUTION: USE APPROVED SAFETY GLASSES The folding metal foot pegs are side specific. The mounting position for the return spring is in the down position for each foot peg. See picture. 1. Gather the provided M6 SCREW, mounting bracket, grooved washer, and spacer, and assemble them in the following order.
-
Page 17: Seat Adjustment
7. While holding the foot peg in place, push the mounting pin into position from the top, ensuring it passes through both sides of the mounting bracket. 8. Insert the safety cotter pin and bend it to secure it in place. 9. -
Page 18: Brake Light Installation
2. Put the washer on the long M5 screw, insert it into the headlight mounting bracket and push it through the hole in the fork above the front tire. 3. Put the 10mm nut on the screw at the back of the fork and tighten. 4. -
Page 19: Pre-Ride Check List
• Check the condition of both tires and ensure the tread is in good condition, and free from punctures, cracks, and deformations. • Maintain proper tire pressure. Orion Moto recommends a range of 25-35 PSI dependent on the weight of the rider and the type of terrain. -
Page 20: Operating Bike
OPERATING BIKE WALK MODE - E12 Parents can help teach kids how the motor feels by using WALK MODE (e12 only). 1. Set gear position to 0 in order to prevent accidental acceleration. The parent can walk alongside the bike and press and hold (-) MINUS. 2. -
Page 21: Race Mode
Once your child has become skilled with the bike and you are confident in their riding ability, you can begin transitioning between modes. For a smooth acceleration in modes 1, 2, and 3, there is a 1.5-second delay implemented in the STANDARD PROGRAM. RACE MODE INSTANT THROTTLE RESPONSE In RACE MODE, the twist throttle delay is minimized to just 0.1 seconds, resulting in an... -
Page 22: Charging
CHARGING Check the battery capacity while the power is on. We suggest charging the battery either when the red light comes on or after riding. 1. Plug the charger into the AC outlet before plugging into battery port on the bike. 2. -
Page 23: Proper Cleaning Procedures
PROPER CLEANING PROCEDURES Follow these guidelines when cleaning your electric balance bike: 1. Turn off the power to the balance bike and unplug it from the charger. 2. Begin by rinsing your electric balance bike thoroughly with cool water to remove loose dirt. 3. -
Page 24: Troubleshooting
POSSIBLE CAUSE SOLUTION Loose battery or wire connection(s) Recharge or replace battery Faulty power switch Contact your local Orion Moto authorized dealer/service center for diagnosis and repair Faulty throttle Do not exceed the weight limit of 120lb, ride on flat terrain... -
Page 25: Specifications
SPECIFICATIONS E12 EXTREME E16 EXTREME E20 EXTREME 250W BRUSHLESS HUB 350W BRUSHLESS HUB 500W BRUSHLESS HUB POWER MOTOR MOTOR MOTOR REMOVABLE 24V 8AH REMOVABLE 36V 8AH REMOVABLE 48V 8AH BATTERY LIFEPO4 BATTERY LIFEPO4 BATTERY LIFEPO4 BATTERY (UL TESTED/APPROVED) (UL TESTED/APPROVED) (UL TESTED/APPROVED) 4 HOURS (RUN TIMES VARY 4 HOURS (RUN TIMES VARY... -
Page 26: Warranty
What Will Be Repaired or Replaced Under Warranty Orion Moto through its Dealers will repair or replace, at its option, any part that is proven to be defective in material or workmanship under normal use during the applicable warranty period. Warranty repairs and replacements will be made without charge for parts for the specified warranty period. -
Page 27: Disclaimer & Contact Information
The consumer absolves our company, its agents, and affiliates from any liability arising from or related to the use or ownership of any product. The consumer fully accepts responsibility and releases the Orion Moto from any personal injuries, fatal injuries, losses, costs, or damages incurred as a result of operating this item. - Page 28 ORION 529 Martin Luther King Freeway Fort Worth, TX 76119 817.350.4520 https://orionmoto.com...
Need help?
Do you have a question about the e Series and is the answer not in the manual?
Questions and answers