Table of Contents
Advertisement
Quick Links
Advertisement
Table of Contents

Related Manuals for Flymaster LIVE C


Summary of Contents for Flymaster LIVE C
- Page 1 User Manual Flymaster Avionics, Lda...
- Page 2 Flymaster LIVE C . Flight safety is the sole responsibility of the pilot. It is unsafe to operate the Flymaster LIVE C while in the air. Failure by the pilot equipped with a Flymaster LIVE C to pay full attention to the aircraft and conditions while wing could result in accident with property damage and/or personal injury.
- Page 3 Regulation for the Responsible Use and Utilization of Flymaster's Live Tracking Service 1.Introduction This regulation aims to establish guidelines for the responsible use of Flymaster's Live Tracking service. Proper and conscious use of the service is essential to prevent abusive usage resulting in excessive data consumption, which the service was not designed for.
-
Page 4: Table Of Contents
Page 1 - Thermal 1 .......................... 28 Page 2 - Transition 1 ........................29 Page 3 - Start ..........................30 Page 4 - Task........................... 31 Page 5 - Goal ..........................32 Page 6 - Airspace ..........................33 Page 4 Flymaster Live C User Manual... - Page 5 Dist.Edge ............................36 Dist.Goal ............................36 Dist.Line ............................36 Dist.Next ............................36 Dist.Start ............................36 Dist.Thermal ........................... 36 Dist.Toff ............................36 Dur..............................36 Flight Level ............................. 36 Floor .............................. 37 G-Force ............................37 Page 5 Flymaster Live C User Manual...
- Page 6 Trans.G.R............................38 Triangle Size ........................... 38 TTD ..............................38 TTG ..............................38 Turnpoint size..........................39 Vario .............................. 39 VMG .............................. 39 Wind Dir............................39 Wind Speed ............................ 39 Objects (Graphical Elements) ....................40 Page 6 Flymaster Live C User Manual...
- Page 7 Vario integrator -..............................69 Track interval - ................................ 69 UTC offset - ................................69 Vario acoustics ..........................70 Sink Threshold - ............................... 70 Climb Threshold - ..............................70 Sink Alarm - ................................70 Page 7 Flymaster Live C User Manual...
- Page 8 FAI comp - ................................79 Airspace Settings ..........................80 Enabled - ................................. 80 Dist. CTR - ................................80 Alt. to CTR - ................................80 Ref. altitude - ................................80 Ignore Above - ................................. 80 Page 8 Flymaster Live C User Manual...
- Page 9 Customizing data fields and objects....................94 Page Triggers ..........................95 Manual firmware update ........................ 96 Maps Management ........................97 SOS SD card tool ........................99 Settings and instrument info....................100 IMEI ..................................100 Page 9 Flymaster Live C User Manual...
- Page 10 CCID ..................................100 Status of the FLARM AWARE licence ........................100 Flymaster Link APP ......................101 Flymaster Link App - ........................101 Pairing Instrument ........................102 Waypoints ............................ 103 Waypoints list - ..............................103 Import Waypoints from file - ..........................103 Tasks ...........................
- Page 11 Page 11 Flymaster Live C User Manual...
-
Page 12: Tech Specs
FLARM………………………………………………..Flarm ready (optional Flarm Aware RX+TX mode) Bluetooth……………………………………………………………………Bluetooth 5 low energy module Native USB Type C Connection……………………………………………..Allows connection to the PC Battery Charging…………………………………………………………….From wall adapter or usb port Firmware update by USB (upgrades are free) Size……………………………………………………………………………………………152x90x18 mm Weight……………………………………………………………………………………………..Aprox.220g Page 12 Flymaster Live C User Manual... -
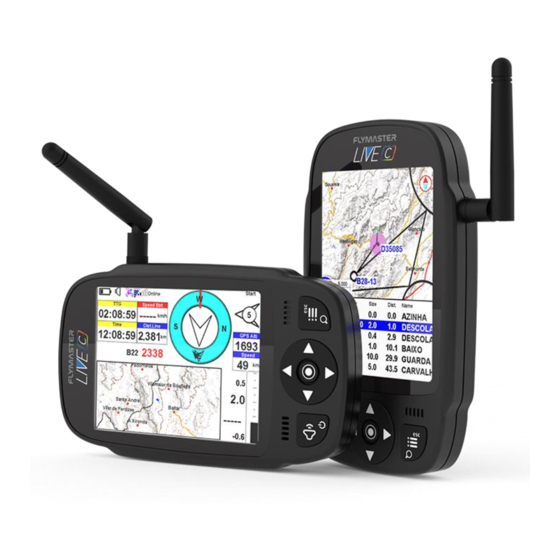
Page 13: Overview
Overview Page 13 Flymaster Live C User Manual... -
Page 14: Flarm Antenna
FLARM module) Warning: The Flymaster utilizes an external antenna that has been precisely tuned to the Flarm board circuit, specifically for the frequency band it operates on. While it may be perceived as a minor inconvenience during takeoff, this antenna plays a crucial role in ensuring the system functions optimally, allowing Flarm to operate effectively over the necessary distances. -
Page 15: Recommended Take-Off Position
Recommended take-off position Antenna cap - When the pilot does not want or does not need to fly with the Flarm antenna, must place the rubber cap (supplied) to cover the antenna socket. Page 15 Flymaster Live C User Manual... -
Page 16: First Steps
Connect your instrument to the computer via USB. The instrument will appear as a mass storage. Inside you will find a folder called "Flymaster Instrument Manager" where the installation files are located. Alternatively, you can and should download the latest version available on the Flymaster website in the "downloads"... - Page 17 “Device Info” option. THIS IS NOT THE INSTRUMENT SERIAL NUMBER. After receiving a confirmation email with the activation code, you must enter it in Flymaster Instrument manager, with the instrument connected. The cost is 50 Euros for a lifetime activation.
-
Page 18: Reset And Recovering Instrument
Press the power button together with Menu/Esc at the same time for 2 or 3 seconds and release. After releasing the buttons, the instrument should switch off. Turn the instrument back on normally. Page 18 Flymaster Live C User Manual... -
Page 19: Force Firmware Install (Recover The Instrument)
Instrument Manager. When you click on the tool, you will follow a pop-up that will guide you through the procedure of ejecting the SD card from your LIVE C and inserting it into your computer's card reader. After being detected by your computer, the process is automatic and the necessary files will be copied to the card. - Page 20 Method 2 - Download "livec-firmware.zip" from the Flymaster website (downloads for this instrument are available on the Flymaster website under Products -> Live C -> Downloads tab) to your computer. Unzip this zip file, to the SD card (its contents to the root directory of the card, extract the folder hierarchy and keep them in the SD card root, replacing files and folders when asked).
-
Page 21: Charging And Battery Management
To charge the Flymaster LIVE C battery we recommend the usage of the supplied wall charger and USB cable via USB Type-C port. Original Flymaster accessories are recommended in order to avoid damage to the power management system. -
Page 22: Check Battery Status And Time Remaining
Check battery status and time remaining: Flymaster LIVE C is charging turned off Flymaster Live C is off charging. The remaining time of usage can be seen in the display. Page 22 Flymaster Live C User Manual... - Page 23 Flymaster LIVE C is charging turned on. It's possible to check the time remaining to achieve full charge. Page 23 Flymaster Live C User Manual...
-
Page 24: How To Preserve The Battery Lifespan
The Flymaster lithium-ion battery uses fast charging to quickly reach 80% of its capacity, then switches to slower trickle charging. The amount of time it takes to reach that first 80% will vary depending on your settings and which instrument you're charging. -
Page 25: Avoid Extreme Ambient Temperatures
Place your instrument in a cool, moisture-free environment that's less than 32° C. • If you plan to store your device for longer than six months, charge it to 50% every six months. Page 25 Flymaster Live C User Manual... -
Page 26: Keys And User Interface
Use Map pan keys (up and down only) do choose option. Push enter/mark key or to select When selected use up and down keys to change values, press Enter to confirm. Press ESC to exit. Page 26 Flymaster Live C User Manual... -
Page 27: Setting The Volume
1 – Long press Power/menu key to change between zoom and pan mode. 3 – Use up key to zoom in. Use Down key to zoom out. In pan mode use Up/down/left/right keys to pan (move) map. Page 27 Flymaster Live C User Manual... -
Page 28: Default Pages
Default Pages Flymaster LIVE C allows you to design up to 8 pages (portrait and landscape mode) using the Flymaster Instrument Manager. In flight mode you can change pages manually using the Enter key. In Flight mode long press Enter to show page shortcut menu. On the following pages we will show which pages Flymaster designed and which will be default to the instrument. -
Page 29: Transition 1
7 – GPS altitude 8–Time 9 – Flight duration 10 –Transition G.R. 11 – Wind Arrow 12 – Average Vario 13 – Dist. Take-off 14 – Profile Map 15 – Analog vario 16 – Multilayer Map Page 29 Flymaster Live C User Manual... -
Page 30: Page 3 - Start
9 – Analog Vario 10 –Wind Arrow 11 – Average Vario 12 – Navigation Wheel 13 – GPS altitude 14 – Distance Line 15 – Distance Edge 16 – Active Waypoint 17- Multilayer Map Page 30 Flymaster Live C User Manual... -
Page 31: Page 4 - Task
9 – Analog Vario 10 –Wind Arrow 11 – Average Vario 12 – Navigation Wheel 13 – GPS altitude 14 – Distance Line 15 – Distance Edge 16 – Active Waypoint 17- Multilayer Map Page 31 Flymaster Live C User Manual... -
Page 32: Page 5 - Goal
12 – Navigation Wheel 13 – G.R. to Goal 14 – Transition G.R. 15 – Current G.R. 16 – Dist. to Edge 17- Arrival altitude 18 – Dist. To line 19 – Active waypoint Page 32 Flymaster Live C User Manual... -
Page 33: Page 6 - Airspace
7 – Barometric Altitude 8–CTR Status 9 – Alt. to CTR 10 –Dist. To CTR 11 – CTR Floor 12 – CTR Ceiling 13 – CTR Name 14 – Profile Map 15 – Multilayer Map Page 33 Flymaster Live C User Manual... - Page 34 2 – Sound level 3 – GPS Status 4 – Com. status 5 – Page info 6 – GPS Altitude 7 – Ground Speed 8–Flight Level 9 – Bearing (GPS) 10 –Compass 11 – Flarm “Radar” Page 34 Flymaster Live C User Manual...
- Page 35 Average ground speed calculated using a filter to show a smoothed speed, eliminating erratic speed changes due to glider pitching, etc. Ave.Vario Average Vario calculated using an integration time constant in order to indicate smoother climbing rates. Page 35 Flymaster Live C User Manual...
- Page 36 Distance to take off is the distance between the current point and the flight starting point. Dur. Flight Duration. Duration of the current flight. Flight Level Current altitude in hundreds of feet, based on a fixed QNH of 1013.25hPa. Page 36 Flymaster Live C User Manual...
- Page 37 Speed Section. The value of this data field varies between 0 and 100%. At 0%, leading the race scores no points, and at 100%, the points scored for leading the race are at their highest. Max. Altitude Maximum altitude reached during current flight. This is based on barometric altitude. Page 37 Flymaster Live C User Manual...
- Page 38 "Dur", which in this case is the time elapsed since takeoff. The takeoff event is triggered when Page 38 Flymaster Live C User Manual...
- Page 39 Velocity made good, is the speed at which the pilot is approaching the active turn point. Wind Dir. Wind direction in degrees, calculated from gps when drifting. Wind Speed Calculated wind speed using GPS speed. Page 39 Flymaster Live C User Manual...
-
Page 40: Battery
Graphical elements are characterized by providing information in a graphical way. Most of the graphical elements have fixed dimensions, although their position can be altered. As the LIVE C firmware evolves the list of Graphical Elements will likely grow. The current list includes the following graphical elements. -
Page 41: Gps
(select settings icon without pressing ENTER) Vario When the LIVE C detects that the pilot is climbing, a black bar starts to grow on the left, from the bottom of the scale to the top ,with 0.1 m/s increments. The same bar grows on the right, from the top of the scale to the bottom, if sinking is detected. -
Page 42: Navigation Arrows
Waypoint. The small arrow 6 points to the Turnpoint after the next. The combination of all three arrows provides a spatial location of the pilot relative to the next 2 waypoints. Page 42 Flymaster Live C User Manual... -
Page 43: Thermal Ball
(together with the navigation arrows).During a thermal climb the LIVE C keeps track of the strongest climb values point for each 50m layer. The point of strongest lift is then graphically represented by the black ball in the inner Navigation Circle, showing where the thermal core is relative to the pilot's position. -
Page 44: Profile Map
Profile Map Using the Flymaster Instrument Manager, you can choose what is displayed on this graphical element among the various available layers. These layers are "Airspaces," "Task points or Task," or "Landings (waypoints must be defined as landings in waypoints list)."... -
Page 45: Thermal Trace Map ( "Thermal Widget")
Additionally, the color changes, with warmer colors indicating higher climb values and cooler colors representing smaller climb values. This creates a visually perfect image of the thermal we are in. Page 45 Flymaster Live C User Manual... -
Page 46: Multilayer Maps
All the available layers have two crucial small indicators of (North-South cardinal and Next Turn point direction) As Live C evolves in terms of firmware, more types of layers will emerge. There are currently 4 available: - Airspaces - Task - Thermal "snake trail"... -
Page 47: Airspaces
The Compass element show all the data provided by the LIVE C built in magnetic compass. The compass includes an red top arrow which is always aligned with the LIVE C . If the LIVE C is turned the cardinal points will also turn in order the arrow tip points the right cardinal point. -
Page 48: Flarm Aware Radar (Optional Paid Service)
Red - High risk of collision. Paragliders and hang gliders will not be shown for obvious reasons. The close proximity that paragliders and hang gliders fly in would trigger constant alarms of potential collision. Page 48 Flymaster Live C User Manual... -
Page 49: Lpf Graph
The Compass element show all the data provided by the LIVE C built in magnetic compass. The compass includes an red top arrow which is always aligned with the LIVE C . If the LIVE C is turned the cardinal points will also turn in order the arrow tip points the right cardinal point. -
Page 50: Thermal Profiler
Using an axis of ascent rate intensity and an axis of altitude, it represents graphically the behavior of thermal activity at various layers of altitude. This tool brings significant advantages for decision-making when having a visualization of thermal behavior during a flight day. Page 50 Flymaster Live C User Manual... -
Page 51: Waypoints
If the GPS is fix, then the co-ordinates and altitude used for the waypoint are based on the current position. If “Landing” is set to YES, the waypoint will be considered as a landing place, and can be listed in “Nearby landings” feature. Page 51 Flymaster Live C User Manual... - Page 52 Delete Waypoint It is possible to delete just a single waypoint on the LIVE C from the waypoints list . Select the waypoint to be deleted. Once the waypoint is highlighted, press ENTER and press YES to confirm it’s deletion. Waypoint will be removed from the waypoint list.
- Page 53 Delete all waypoints It is possible to delete all waypoints on the LIVE C from the waypoints list. All waypoint will be removed from the waypoint list. If a waypoint is in use in the active Task, the task will be preserved. Any saved task will be kept. Also the waypoints file will not be changed.
- Page 54 Delete waypoints file It is possible to delete any waypoints file from the SD card , directly on the LIVE C. If a waypoint is in use in the active Task, the task will be preserved. Any saved task will be kept.
- Page 55 Get Waypoints from group - If your instrument (serial) belongs to a user's group on the platforms lt.flymaster.net or livetrack360.com, you can import the waypoints from that group using this option. Simply put the group ID in this field, and the waypoints will be automatically imported using the data service (LTE).
-
Page 56: Task
Entering this option, it is possible to choose the waypoint to edit from the Edit task point - active task on the colour display. You can change its characteristics for the Task when you select it. Page 56 Flymaster Live C User Manual... - Page 57 Load Task from file - This feature allows to load a saved task, and set it as the active task. Be aware that the current task will be erased. All the task files are stored in the SD card in the folder called “Waypoints”. Page 57 Flymaster Live C User Manual...
- Page 58 Save Task to file - This feature allows to save the active task to the SD card. Use scroll wheel to input the task file name, use Save or Cancel. Delete Task file - This feature allows to delete a task from the SD card. Page 58 Flymaster Live C User Manual...
- Page 59 Get Task from group - This feature allows to force a request of a task shared in a Flymaster group account. Page 59 Flymaster Live C User Manual...
-
Page 60: Task Navigator
Scrolling through the list using up and down cursor keys, the waypoints are being highlighted. You can select and press enter to “go to Task Point” or enter in Map mode. In map mode you can pan and zoom freely to explore the task. Page 60 Flymaster Live C User Manual... - Page 61 "shortcut" to a certain turn point. Just access the "task navigator" use button up or down the cursor/pan and press enter at the desired point. The instrument starts navigating to the chosen turnpoint. Page 61 Flymaster Live C User Manual...
-
Page 62: Airspace Browser
Using the zoom mode and pan keys, you can freely navigate the map, aiming the crosshairs, to the desired airspace. Pressing enter in the highlighted airspace, the details will be shown. Page 62 Flymaster Live C User Manual... -
Page 63: Nearby Landings
(I.E. are below your position), their distance from your current position. Pressing Enter on a “nearby landing” will allow you to navigate to it, or enter in map mode to explore the map, using zoom and pan resources. Page 63 Flymaster Live C User Manual... -
Page 64: Flight Log
Press Enter to perform the desired operation. Press Esc to exit. View Flight Details Flights can be selected using UP and DOWN keys. For the selected flight additional information is displayed when pressing ENTER. Page 64 Flymaster Live C User Manual... -
Page 65: Delete Flight
You can access them by connecting the instrument to your computer using it as a mass storage device or alternatively by removing the micro SD card from its slot and using a card reader. Page 65 Flymaster Live C User Manual... -
Page 66: Send To Xc Server
By pressing enter on the selected flight, it will force the flight to be sent to the XC server configured in the user's account on lt.flymaster.net or livetrack360.com when the option for automatic sending to the XC server is not active in the instrument settings of the user's account. -
Page 67: Report Back
Choosing the option “report back events” it’s possible to see in the the status of each message, pending or sent. This messages will be forwarded via SMS, Email, or Telegram to your configured recipients from your livetrack360.com account. Page 67 Flymaster Live C User Manual... -
Page 68: Settings
Settings Set Altimeter Page 68 Flymaster Live C User Manual... -
Page 69: Altimeter
Flight Starts, or 30 seconds before if using FAI COMP mode. However, when a task is active the LIVE C will store a track log point immediately as it enters a turn point cylinder, Goal, or Start. -
Page 70: Vario Acoustics
These thresholds correspond to the climbing and sinking rates at which the sound activates. The user can also define in the the Acoustic Thresholds option the sink alarm and the sound volume of is the LIVE C. Sink Threshold - The Sink Threshold is the rate of descent at which the vario will emit a low frequency sound. -
Page 71: Increments
This value is set between 0 and 9 with each unit corresponding to be 0.1 m/s, ie. 3 is 0.3m/s. Subtracting this decimal value from the climb threshold will give us the value at which the LIVE C will start buzzing. -
Page 72: Damper
A practical example of the advantages of the buzzer feature can be illustrated in Figure bellow In this example both pilots are sinking at -1.0 m/s. The orange paraglider has a LIVE C for which the climbing threshold is set to 0.1 m/s and the Buzzer parameter is set to 3 (0.3 m/s). The green paraglider has a typical vario for which the climbing threshold is set to 0.1 m/s. -
Page 73: Alerts
To help the pilot, the Live C can warn with a voice assistant warning that the pilot is deviating from his ideal route. This warning is voice only whenever the heading is ideal or is deviating from it. -
Page 74: Maps
FAI Triangle flight. When the choice is set to "YES," the instrument switches to triangle navigation mode, and all task navigation or waypoint destination navigation is cancelled in favour of (check page 87) the triangle assistant. Page 74 Flymaster Live C User Manual... -
Page 75: Screen
UDFs, which stand for User Data Fields, represent customizable data fields within the Flymaster Instrument Manager design possibilities . The LIVE C device offers the flexibility to incorporate up to six of these UDFs into its page layout. These data fields are easily configurable through the settings page, empowering users to assign specific data types to each field. -
Page 76: Language/Units
Speed units can be in Km/h, Knots or Miles per hour. Dist. Units - Distance units can be in Km, or Miles. Temperature - Temperature units can be Celsius or Fahrenheit. Coords. - Coordinates format. These can be either. DD°MM'SS; DD°MM.mmm'; DD.dddd; UTM Page 76 Flymaster Live C User Manual... -
Page 77: Device Settings
This option provides you with the ability to set the network connection priority for your LIVE C device. When the setting is set to YES, the preferred connection is prioritized to LTE CAT-M (4G). When the setting is set to NO, the instrument can switch between LTE or GPRS (2G) if the LTE connection is not available in the current area. -
Page 78: Calibration
In order to eliminate these errors a proper magnetometer calibration should be made. Calibration parameters are kept when the LIVE C is turned off, reset or when a firmware update is done. The magnetometer calibration process is described bellow. -
Page 79: Navigation Settings
Datum - Two datum models can be set on the LIVE C . Options available are WGS 84 and FAI sphere. At the start of any competition, be sure to check what Datum is used by the scoring system to ensure that the correct distances are being reported. -
Page 80: Airspace Settings
Margin Above Draw Solid - With this option set to YES, in the map that contains an airspace layer, the violation (in red) or imminent violation (in yellow) will be filled. Page 80 Flymaster Live C User Manual... -
Page 81: Airspace Classes
Airspace Classes Aispace Classes (A to TMZ) - This option allows you to enable and disable processing by airspace classes individually. Page 81 Flymaster Live C User Manual... -
Page 82: Load Airspace
YES – All previously loaded airspaces (including the build-in World.asf) will be removed and only the .txt one will be considered. NO – The instrument will keep working with the World.asf (world airspace file – Provided by Flymaster) and the loaded Open Air one, at same time. -
Page 83: Flarm Aware
This option allows you to update the firmware of the Flarm module. This procedure should be performed when the validity period of the Flarm system has expired. You can check the status of the Flarm system under "device info." Page 83 Flymaster Live C User Manual... -
Page 84: Flarmaware Licence
In this option, it's possible to input the activation code for the additional FlarmAware service (which can be purchased through our online store). Alternatively, you can activate this through the Flymaster Instrument Manager (refer to page 15 of this manual). FlarmAware - After FlarmAware is active, in this option you can view the Flarm "radar,"... -
Page 85: Gps Status
In this option, you can check the GPS status, including visible satellites and the signal strength of each one. You current position with latitude, longitude and Gps altitude is also shown. Pressing Enter on this page allows you to reset the GPS module. Page 85 Flymaster Live C User Manual... -
Page 86: Device Info
Flarm Firmware version Global ID - Flarm Global ID State - Current battery state : Charging / Discharging Level - Current Battery Level Full Charge - Estimate time to full charge Charging Current Voltage Page 86 Flymaster Live C User Manual... -
Page 87: Gsm Status
GSM Status < Page 87 Flymaster Live C User Manual... -
Page 88: Triangle Assistant
"triangle closure" area. If you are a pilot who frequently wishes to fly FAI triangles, we recommend creating a page layout that includes a larger-sized map and features the "Triangle Size" data field. Page 88 Flymaster Live C User Manual... -
Page 89: Flymaster Instrument Manager
Flymaster Instrument Manager Automatic firmware update - After launching the "Flymaster Instrument Manager" application and if your instrument is connected to your computer's USB port, it may be possible that there is a new firmware version available for your instrument. If you want to update, just answer “start update” and the process will be automatic. -
Page 90: Main Screen And Tools
6 – Upload Waypoints file 7 – Current tool 8 - Pages Layouts 9 - Update firmware tool 10 – Maps tool (maps management) 11 – SOS SD card tool 12 – Settings Page 90 Flymaster Live C User Manual... -
Page 91: Copy Airspaces File To Instrument Using F.i.m.(Open Air)
Copy Airspaces File to instrument using F.I.M.(Open Air) Here you can copy any Open Air file (txt) into the instrument (SD card). Later you can use it to activate it (load to memory) using the Airspace Settings. Page 91 Flymaster Live C User Manual... -
Page 92: Copy Waypoints File To Instrument (Open Air)
Copy Waypoints File to instrument (Open Air) Here you can copy any waypoints file (GPX, WPT,CUP) into the instrument (SD card). Later you can use it to activate it (load to memory) using the Waypoints settings. Page 92 Flymaster Live C User Manual... -
Page 93: Pages Layouts Data Fields And Objects
20 – Profile Map object 21 – Navigation Wheel object 22 – Flarm Aware radar object 23 - Volume indicator object 24 – Communication status object 25 – Data Field 26 – Design and alignment tools Page 93 Flymaster Live C User Manual... -
Page 94: Customizing Data Fields And Objects
It’s possible to change : The data field (data you want to see) The title colour and font size The title background The border colour The data field font and colour The data field background Page 94 Flymaster Live C User Manual... -
Page 95: Page Triggers
The page trigger it’s a auto page switching when the instrument “understands” the pilot position of behaviour. When that behaviour is achieved the page is automatically called. 1 – Create or open a Layout 2 – Click on “triggers” tool Page 95 Flymaster Live C User Manual... -
Page 96: Manual Firmware Update
In this tool you can force manual firmware update. Just download the firmware package file, from the Flymaster website and save it to your hard drive. Then just point your location and the process Very important: Be sure you have the .zip file in your will proceed normally. -
Page 97: Maps Management
F.I.M. will ask if you want to make a backup of them. It is convenient to proceed using the check, and make the backup, because in the future, if you want to use the same maps, you no longer need to download them. Page 97 Flymaster Live C User Manual... - Page 98 After clicking on "start process", the entire sequence of copying and managing the maps is automatic. At the end of the process, you receive a message saying that you are ready to eject the card and insert into LIVE C. Page 98...
-
Page 99: Sos Sd Card Tool
VERY IMPORTANT: Ensure that the SD card is formatted in FAT32. Page 99 Flymaster Live C User Manual... -
Page 100: Settings And Instrument Info
In this tool it is possible to see information about the instrument such as: IMEI CCID Status of the FLARM AWARE licence Is also possible to use this page to activate the Flarm Aware licence. Page 100 Flymaster Live C User Manual... -
Page 101: Flymaster Link App
Bluetooth technology to facilitate communication and seamlessly expand the capabilities of your LiVE C device. This translates into a more user-friendly experience, reducing the need for extensive reliance on a desktop computer for various routine tasks. -
Page 102: Pairing Instrument
Pairing Instrument Page 102 Flymaster Live C User Manual... -
Page 103: Waypoints
Waypoints Waypoints list - List of recorded waypoints from the Flymaster Link app. There are tools in the waypoint list. The "three horizontal lines" allow you to create a waypoint or delete all waypoints. The small downward arrow allows you to view waypoint details, such as coordinates, altitude, and current straight-line distance to the waypoint. -
Page 104: Tasks
Tasks Tasks list - List of recorded tasks from the Flymaster Link app. There are tools in the tasks list. The "three horizontal lines" allow you to create a task or delete all tasks. The small downward arrow allows you to view task details and task configuration . -
Page 105: Update Airspaces
This tool allows you to automatically and easily update the Airspaces around Make sure that the operation Menu - your position within a radius of about 110 km. > Settings -> Load Airspace -> link.air is performed after updating the airspaces. Page 105 Flymaster Live C User Manual...
Need help?
Do you have a question about the LIVE C and is the answer not in the manual?
Questions and answers