Table of Contents
Advertisement
Available languages
Available languages
Quick Links
Advertisement
Chapters
Table of Contents

Related Manuals for Stealth Cam STC-GX45NG


Summary of Contents for Stealth Cam STC-GX45NG
- Page 1 INSTRUCTION MANUAL MODEL: STC-‐GX45NG V.01 ...
- Page 2 **IMPORTANT NOTE** To ensure the product is being utilized to its full potential, we recommend checking our website for new product updates. If your unit is having trouble, please check the website to determine you are using the latest firmware or software version.
-
Page 3: Table Of Contents
TABLE OF CONTENTS Camera Overview 4 -‐ 5 General Information / Specifications 6 Switch / Button Functions 7 On-‐Screen Display 8 On-‐Screen Display Icons 9 ... -
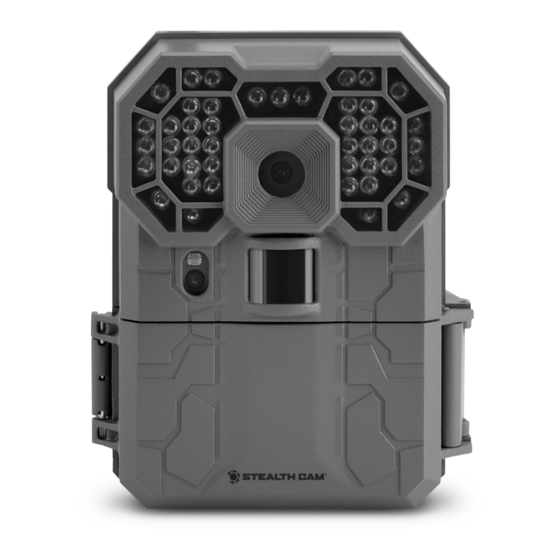
Page 4: Camera Overview
CAMERA OVERVIEW (Inside) ... - Page 5 CAMERA OVERVIEW (cont.) ( Bottom) ...
-
Page 6: General Information / Specifications
GENERAL INFORMATION Operating Environment: 14 to 104 deg F (-‐10 to 40 deg C). 20-‐85% relative humidity, non-‐condensing. The camera is designed to be weather resistant. Never attempt to immerse the unit in water or any other liquid. -
Page 7: Switch / Button Functions
SWITCH / BUTTON FUNCTIONS 3 Position Switch OFF position: The unit will be OFF when the switch is in this position. ON position: When the camera is in the ON position, the LCD screen will display the STEALTH CAM logo for 2 seconds while the unit powers on. -
Page 8: On--Screen Display
ON-‐SCREEN DISPLAY Auto Mode View Photo / V ideo Count CUSTOM 08541 Operational ... -
Page 9: On--Screen Display Icons
ON-‐SCREEN DISPLAY ICONS Operational Mode: The icons are displayed in the mode the camera is currently operating under and they are QSET 1, QSET 2, QSET 3 and CUSTOM. The second line will display PIR Photo, ... -
Page 10: Functions & Features 10
FUNCTIONS & FEATURES Start Up When the unit is powered ON for 2 seconds, the Stealth Cam logo will be displayed on the screen. After 2 seconds, the unit will show the Auto Mode screen. (Shown on Page 8) ... - Page 11 For all the QSET’s, (*) most of the settings information will be displayed on the screen. QSET 1 The unit will be set to the following settings: Operational Mode: PIR Photo * Photo Resolution: 8.0 MP * PIR Delay: 30 seconds * ...
-
Page 12: Main Menu
MAIN MENU To access the Main Menu, the user must turn the camera ON and then press the MENU Button. The user will have the option to choose between three menu options shown below. Main Menu ... - Page 13 CAMERA SETUP If the Menu button is pressed while in Camera Setup Mode, the camera will enter Auto Mode. Setup Date: Set the Date for the camera. The default date is 01/01/15 Time: Set the Time for the camera. The default time is 12:00AM ...
- Page 14 CAMERA SETUP (cont.) Time Lapse: Camera takes a still image per preset time. Time Lapse Settings are: Photo Resolution, PIR Delay, Time Lapse Delay, Time Lapse Start, Time Lapse Stop, Blur Reduction, Camera Name, Temperature, Information Bar, ...
- Page 15 CAMERA SETUP (cont.) Activity Control (Default – Always ON): This setting tells the camera what specific hours to operate “scheduled” or to “always” be on. Always ON Scheduled Activity Start (Default-‐08:00AM) Time ranges from 00:00 to 23:59 [HH:MM] ...
- Page 16 CAMERA SETUP (cont.) Reduce Blur (Default -‐ Advanced) ADVANCED – This setting will use a maximum exposure time of 1/40sec for the night photos. Other adjustments are made to increase the brightness and clarity of the photo.
- Page 17 CAMERA SETUP (cont.) Time Lapse Delay – to set the delay between photos. Will display as “TL DELAY” in Camera Setup. The camera will wait a specified amount of time between Time Lapse photos. The camera will take PIR photos during the Time Lapse Session when the Time Lapse ...
- Page 18 CAMERA SETUP (cont.) Video Resolution (Default – 1280x720) 1920 x 1080 (Codec – H.264) 1280 x 720 (Codec – H.264) Video Length (Default -‐ 10 sec) Set the video length from 10 to 180 seconds in 5-‐second increments. The maximum night time video length will be 30 seconds to conserve battery life ...
-
Page 19: Advanced Settings 19
ADVANCED SETTINGS Temperature (Default – Fahrenheit) The temperature is imprinted on each photo in either Celsius or Fahrenheit. Information Bar (Default – ON) The Stealth Cam logo, Time, Date, Temperature Moon Phase, and Camera Name are imprinted on the bottom of each picture. - Page 20 ADVANCED SETTINGS (cont.) The icons for the moon phase are as follows (see Symbol): 20 www.stealthcam.com Page 877-‐269-‐8490 ...
- Page 21 ADVANCED SETTINGS (cont.) Latitude: This function will allow the user to manually set the latitude coordinates for the camera. The default coordinates will be 000.000000 N, this number can be set to 000.000000 -‐ 179.999999 N or S.
-
Page 22: Installation
MEMORY CARD INSTALLATION To insert the SD memory card into the camera: first locate the SD card slot on the right hand side of the of the camera case. Next with the SD card label facing towards the rear of the camera, insert the SD card. -
Page 23: Formatting
FORMATTING SD CARD It always best to format your SD cards from the actual device your using, in this case the camera. This will allow the camera to format the card in the proper fashion. ... -
Page 24: Battery Removal & Installation
BATTERY REMOVAL & INSTALLATION To remove the batteries from the unit; open the case and press the EJECT button on the lower right hand corner. This will cause the battery tray to be released and slide downwards. -
Page 25: View And Deleting Files
VIEW & DELETING IMAGES The camera allows for three (3) ways to view your images. First is directly from the built-‐in screen using the Playback function. -
Page 26: Definitions
DEFINITIONS REFLEX (Sub 1-‐Second Trigger) – Ultra-‐fast trigger speed. Never miss a crucial moment. MATRIX (Blur Reduction Technology) – Advanced blur reduction dramatically reduces blur effects resulting in sharper, clearer images. -
Page 27: Frequently Asked Questions (Faqs) 27
FREQUENTLY ASKED QUESTIONS Q: Can I mix batteries together? A: NO, you should never mix old with new OR Alkaline with Lithium with Rechargeable. Q: Is my game camera Mac compatible? A: Yes, This camera model works with 10.6 and above. ... - Page 28 FREQUENTLY ASKED QUESTIONS (CONT) Q: Can I use my game camera through a window or glass door? A: Glass may disrupt your sensor beam we don’t advise using the camera in this fashion. Q: Do I need to recharge my 12V Battery Kit during the seasons if it’s not in use? A: The 12V Battery Kit should be recharge at least every 3 months, regardless if it is being used or ...
-
Page 29: Fcc Compliance
FCC COMPLIANCE GSM STC-‐GX45NG NOTE: This equipment has been tested and found to comply with the limits for Class B digital ... -
Page 30: Limited Warranty Information
LIMITED WARRANTY INFORMATION Your Stealth Cam scouting camera is covered by a 365 Day Limited Warranty on parts and labor from the date of original purchase, and purchases must be made through an authorized dealer. The warranty covers defects in workmanship and materials. The warranty does not apply to units, which have been damaged or abused intentionally or ... - Page 31 MANUEL D'INSTRUCTIONS MODÈLE : STC-‐GX45NG V.01 31 www.stealthcam.com Page 877-‐269-‐8490 ...
- Page 32 **NOTE IMPORTANTE** Pour vous assurer que le produit soit utilisé à son plein potentiel, nous vous recommandons de vérifier notre site Web pour obtenir les nouvelles mises à jour du produit.
- Page 33 TABLE DES MATIÈRES APERÇU DE L'APPAREIL PHOTO 34 -‐ 35 INFORMATIONS GÉNÉRALES / CARACTÉRISTIQUES 36 SWITCH / FONCTIONS DES BOUTONS 37 SUR ECRAN 38 ...
-
Page 34: Aperçu De L'appareil Photo
APERÇU DE L'APPAREIL PHOTO Devant Devan ouvert t Bas 34 www.stealthcam.com ... - Page 35 APERÇU DE L'APPAREIL PHOTO (SUITE) Côté Arrière Compartiment à pile 35 www.stealthcam.com ...
-
Page 36: Informations Générales / Caractéristiques
INFORMATIONS GÉNÉRALES Environnement de fonctionnement: de 14 à 104 ° F (-‐10 à 40 ° C). Humidité relative de 20 à 85%, sans condensation. instructions de soins spéciaux !! L'appareil photo est conçu pour être résistant aux intempéries. Ne essayez jamais d'immerger l'unité dans l'eau ou tout autre liquide. -
Page 37: Switch / Fonctions Des Boutons
SWITCH / FONCTIONS DES BOUTONS 3 Interrupteur de position Position OFF: L'appareil sera éteint lorsque l'interrupteur est dans cette position. Position ON: Lorsque l'appareil est en position ON, l'écran LCD affiche le logo Stealth Cam pendant 2 secondes tandis que les puissances unitaires sur. -
Page 38: Sur Ecran
SUR ECRAN Vue de mode automatique Photo / c omte de la v idéo CUSTOM 08541 Mode ... -
Page 39: À L'écran Icônes D'affichage
À L'ÉCRAN icônes d'affichage • Mode de fonctionnement: Les icônes sont affichés dans la mode, l'appareil fonctionne actuellement sous et ils sont QSet 1, QSet 2, 3 et QSet CUSTOM. La deuxième ligne affiche PIR photo, vidéo ou PIR TL (Time Lapse). -
Page 40: Fonctions Et Caractéristiques 40
FONCTIONS ET CARACTÉRISTIQUES Commencez Lorsque l'appareil est allumé pendant 2 secondes, le logo Stealth Cam sera affiché sur l'écran. Après deux secondes, l'appareil affiche l'écran du mode Auto. (Indiqué à la page 38) ... - Page 41 Pour tous de l'QSet, (*) la plupart des informations de réglages sera affiché sur l'écran. QSet 1 L'unité sera réglé sur les paramètres suivants: Mode opérationnel: PIR photo * Résolution photo: 8,0 MP * PIR Délai: 30 secondes * ...
-
Page 42: Main Menu
MAIN MENU Pour accéder au menu principal, l'utilisateur doit activer l'appareil photo et appuyez sur le bouton MENU. L'utilisateur aura la possibilité de choisir entre trois options de menu ci-‐dessous. ... -
Page 43: Camera Setup 43
CAMERA SETUP Si le bouton Menu est pressée alors que dans le mode de configuration de la caméra, la caméra passe en mode Auto. Date de configuration: Fixer la date de l'appareil photo. La date par défaut est 01/01/15 ... - Page 44 CAMERA SETUP (suite.) Time Lapse: L'appareil photo prend une image fixe par unité de temps prédéfini. Time Settings Accéléré sont: Photo Résolution, PIR Delay, Accéléré Delay, Accéléré Démarrer, Accéléré Stop, Réduction du flou, Nom de la caméra, la température, la barre d'informations, Latitude, Longitude, Réinitialisation usine, la clé...
- Page 45 CAMERA SETUP (suite.) Contrôle d'activités (par défaut -‐ Toujours ON): Ce paramètre indique la caméra ce que heure spécifique à fonctionner "prévue" ou "toujours" être sur. Toujours ON Prévu ! Début de l'activité (par défaut-‐08: 00 heures) o Temps varie 00:00-‐23:59 [HH: MM] ...
- Page 46 CAMERA SETUP (suite.) Réduire le flou (par défaut -‐ Advanced) ADVANCED -‐ Ce paramètre va utiliser un temps d'exposition maximum de 1 / 40sec pour les photos de nuit. Autres ajustements sont effectués pour augmenter la luminosité et la clarté de la photo. STANDARD -‐...
- Page 47 CAMERA SETUP (suite.) Accéléré Delay -‐ Pour définir le délai entre les photos. Se affiche comme "DELAY TL» dans les réglages de l'appareil photo. L'appareil photo attendre un certain laps de temps entre les photos Accéléré. L'appareil photo prend des photos pendant la PIR Accéléré...
- Page 48 CAMERA SETUP (suite.) Résolution de la vidéo (par défaut -‐ 1280x720) 1920 x 1080 (Codec – H.264) 1280 x 720 (Codec – H.264) Durée de la vidéo (par défaut -‐ 10 sec) Régler la longueur de la vidéo de 10 à...
-
Page 49: Reglages Acances 49
REGLAGES ACANCES Température (par défaut -‐ Fahrenheit) La température est imprimé sur chaque photo en degrés Celsius ou Fahrenheit. Barre d'informations (par défaut -‐ ON) Le logo Stealth Cam, heure, date, Température Phase de Lune, et le nom de l'appareil photo sont imprimées sur le fond de chaque image. - Page 50 REGLAGES ACANCES (suite.) Les icônes de la phase de lune sont les suivantes (voir Symbole): ...
- Page 51 REGLAGES ACANCES (suite.) Latitude: Cette fonction permet à l'utilisateur de régler manuellement les coordonnées de latitude pour la caméra. Les coordonnées par défaut seront 000.000000 N, ce nombre peut être réglé sur 000.000000 -‐ 179.999999 N ou S.
-
Page 52: Carte Mémoire Installation
CARTE MÉMOIRE INSTALLATION Pour insérer la carte mémoire SD dans l'appareil: localisez la fente de la carte SD sur le côté droit du boîtier de l'appareil photo. ... -
Page 53: Fomatage De La Carte Sd
FOMATAGE DE LA CARTE SD Il est toujours mieux de formater vos cartes SD à partir de l'appareil actuel que vous utilisez, dans ce cas l'appareil photo. Ce qui permettra à l'appareil photo de formater la carte dans le mode approprié. -
Page 54: Installation Et Retrait De La Pile
INSTALLATION ET RETRAIT DE LA PILE Pour retirer les piles de l'appareil, ouvrez le boîtier et appuyez sur le bouton ÉJECTION situé dans le coin inférieur droit. Ce qui permettra de glisser et de retirer le Compartiment à... -
Page 55: Affichage Et Suppression Des Images
AFFICHAGE ET SUPPRESSION DES IMAGES La caméra offre deux (2) façons de voir vos images. La première est la connexion directe de l'appareil photo à l'ordinateur via un câble USB (non fourni). Il s'agit d'un mini câble USB vers un câble USB standard (type A/B). Il suffit de mettre l'appareil à... -
Page 56: Définitions
DÉFINITIONS REFLEX (Sensibilité avancée à faible luminosité) -‐ Vitesse de déclenchement ultra-‐rapide. Ne manquez jamais un moment crucial. MATRIX(Technologie de réduction du flou) – Avancée réduction du flou réduit considérablement les effets de flou résultant en plus nettes, des images plus claires. -
Page 57: Foire Aux Questions (Faq) 57
FOIRE AUX QUESTIONS Q : Mon appareil de jeu pour Mac est-‐i compatible? R : Oui, ce modèle d'appareil photo fonctionne avec la version 10.6 et plus. Q : Puis-‐je utiliser des piles rechargeables dans l'appareil photo? R : Les piles rechargeables sont très bien pour l'appareil;... - Page 58 FOIRE AUX QUESTIONS (SUITE) Q : Puis-‐je utiliser mon appareil de jeu par une fenêtre ou une porte de verre? R : Le verre peut perturber le faisceau de votre détecteur; nous ne vous conseillons pas d'utiliser l'appareil photo dans ce mode.
-
Page 59: Conformité Fcc
CONFORMITÉ FCC Remarque : Cet équipement a été testé et se conforme aux exigences des appareils numériques de classe B, conformément à la partie 15 des Règles FCC. Ces limites sont conçues pour fournir une protection raisonnable contre les interférences nuisibles présentes dans une installation résidentielle. -
Page 60: Renseignements Sur La Garantie Limitée
RENSEIGNEMENTS SUR LA GARANTIE LIMITÉE Votre appareil photo d'exploration Stealth Cam est couverte par une garantie limitée de 365 jours sur les pièces et la main-‐d'œuvre à partir de la date d'achat initial, et les achats ...
Need help?
Do you have a question about the STC-GX45NG and is the answer not in the manual?
Questions and answers