Table of Contents
Advertisement
Quick Links
Advertisement
Table of Contents

Related Manuals for Furrion CHILL FACR18VS-SA-BL


Summary of Contents for Furrion CHILL FACR18VS-SA-BL
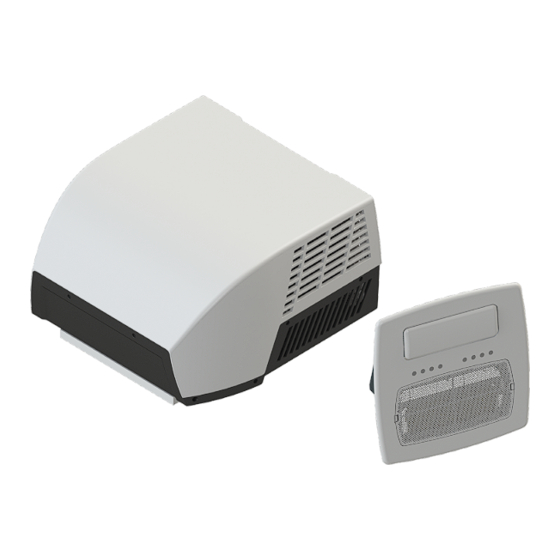
- Page 1 CHILL® CUBE VARIABLE SPEED RV ROOFTOP AIR CONDITIONER MODEL/MODÈLE : FACR18VS-SA-BL, FACR18VS-SA-PS, FACT18MA-PS LIPPERT #: 2023010865, 2023010866, 2023010867 USER MANUAL/MANUEL DE L’UTILISATEUR * Picture shown here is for reference only. * L’image présentée ici n’est qu’une référence...
-
Page 2: Table Of Contents
FACT18MA-PS 2023010867 Thank you for purchasing this Furrion® product. Before operating your new appliance, please read these instructions carefully. This instruction manual contains information for safe use, installation and maintenance of the appliance. Please keep this instruction manual in a safe place for future reference. This will ensure safe use and reduce the risk of injury. -
Page 3: Important Safety Instructions
The refrigerant must never be released into the air. • Fire hazards • Injury WARNING All Furrion product referenced in this manual is to be installed • The electrical power supply must only be connected by a in accordance with local and national codes, including the qualified electrician. -
Page 4: Warning For Using R32 Refrigerant
CAUTION CAUTION • Do not use device for any other purpose than its intended • Turn off he air conditioner and disconnect the power if you use. are not going to use it for a long time. • Do not climb onto or place objects on top of the outdoor •... -
Page 5: Choosing The Proper Location For The Air Conditioner
Roof Thickness The installation of air conditioner suits for roof thickness from 3.5” (90mm) to 6” (152mm). For other thickness, please contact Furrion or Furrion authorized service agent. Center line of rooftop Keep this air flow area free of... -
Page 6: Preparing Wire Connections
Installing in an Existing Opening 2. Using the roof opening as a guide, cut a matching hole in the ceiling. 1. Unscrew and remove the roof vent. NOTE: Maintain structural integrity. Otherwise damage to 2. Remove all caulking compound around the opening. product and/or RV could occur. -
Page 7: Installation
115VAC Supply NOTE: The wire gauge is generally acceptable per NEC code, refer to rooftop unit nameplate and applicable code for proper 1. Prepare a dedicated 20 amp rated circuit for each air sizing. conditioner unit, protected with a time delay fuse or circuit breaker. - Page 8 3. Dry fit the mounting frame, making sure the “THIS WAY 7. Install the assembled mounting frame into the rooftop FRONT” mark is facing front (the direction of the vehicle), and opening. measure the gap from the top of the insulated foam divider to the base of the AC unit.
-
Page 9: Electronic Work
Electronic Work 5. Fit all cables into the cable compartment in the electrical box and tuck any excess wires up out of the way. WARNING 6. Fix the electrical box cover to the mounting frame attached to the air conditioning unit to seal the electrical box using the 2 BEFORE PERFORMING ANY ELECTRICAL OR WIRING provided “short”... - Page 10 3. Remove wire mesh filter from the ADB to access the wires in 5. Place loose wires inside the electrical box, and close the the return. electrical box panel door. Secure the panel door shut using the screw provided. 4. Connect the Chill Cube wires from the control box to the wires from the faceplate of the ADB.
-
Page 11: Operation
OPERATION Operating Panel Diagrams NOTE: Different models may have different buttons and indicator lights. Not all the buttons and indicator lights described are available on all units. Please check the operating panel of your unit. The following graphics are for explanatory purposes only. Wireless Fan speed ECO/GEAR mode... -
Page 12: Remote Diagram
Remote Diagram Remote Display UP/DOWN/ TURBO button TEMP button Power button TURBO TIMER ON MODE button button FAN button TIMER OFF button FOLLOW ME button LED button SLEEP button ECO/GEAR SWING button button Button/Function Effect Power Button Turns the unit on and off. Toggles between the operational modes of the unit. -
Page 13: Handling The Remote Control
Handling the Remote Control Using the Remote • The remote control must be used within 26.25 feet (8 meters) of the unit. NOTE: Remote not available for all units. • The unit will beep when remote signal is received. NOTE: Remote requires 2 AAA batteries. Some models come •... -
Page 14: Basic Function Operation
Basic Function Operation Advanced Function Operation Auto Mode Operation ECO/GEAR Operation 1. Set the unit to AUTO mode by pressing the MODE button 1. Press the ECO/GEAR button. The ECO indicator LED will until “AUTO” is selected. illuminate on the unit, and the remote will display ECO/GEAR. -
Page 15: Operating The Timer Function
Operating the Timer Function To set the Auto-off time Press the TIMER ON button to set the auto-on time of the unit. 1. Press the TIMER OFF button. The remote control LCD Press the TIMER OFF button to set the auto off time of the unit display will read TIMER OFF, the last Auto-off setting time, and the letter “H”... - Page 16 TIMER OFF (Auto-off Operation) The TIMER OFF feature is useful for turning the unit off automatically at a set time, such as after going to bed. The air conditioner will automatically start operating at the set time. Example: To stop the air conditioner after 10 hours - 1.
-
Page 17: Cleaning And Maintenance
The set temperature is Select a lower temperature. too high. The evaporator fan is Contact an authorized service agent or Furrion (see the detail contact info at the damaged. back page of this manual). Not cooling well The condenser fan is Contact an authorized service agent or Furrion (see the detail contact info at the damaged. -
Page 18: Specifications
SPECIFICATIONS FACR18VS-SA-BL FACR18VS-SA-PS Nominal Cooling (Btu) 18,000 18,000 Dehumidification (pint/h) Applicable vehicle length (feet) Refrigerant Charge (Oz) 18.34 18.34 Roof top Unit Dimensions (L x W x H) (inch) 29 x 29 x 14 29 x 29 x 14 ELECTRICAL Volts/Frequency 115V~/60Hz/1Ph 115V~/60Hz/1Ph... -
Page 19: Notes
NOTES - 19 - CCD-0007294 Rev: 08.10.23... - Page 20 ● Toll free/Numéro gratuit/Línea telefónica gratuita:1-800-789-3341 ● Email/Courriel/Correo electrónico: support@furrion.com ©2007-2023 Furrion Ltd. Furrion® and the Furrion logo are trademarks licensed for use by Furrion Ltd. and registered in the U.S. and other countries. ©2007-2023 Furrion Ltd. Furrion® et le logo Furrion sont des marques commerciales utilisées sous licence par Furrion Ltd.
Need help?
Do you have a question about the CHILL FACR18VS-SA-BL and is the answer not in the manual?
Questions and answers