
Related Manuals for J.A. Woollam M-2000

Summary of Contents for J.A. Woollam M-2000
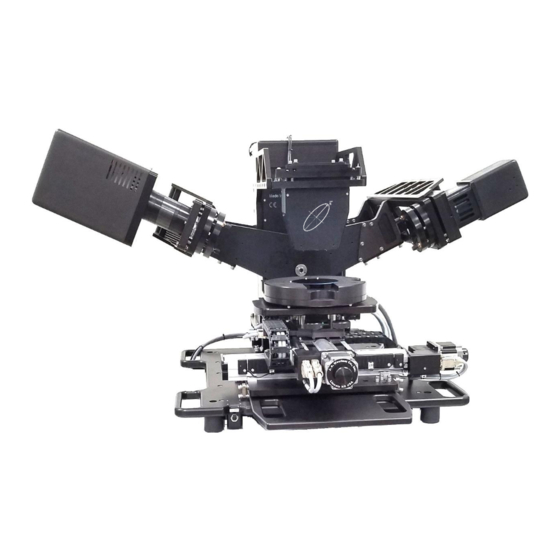
- Page 1 M-2000® Spectroscopic Ellipsometer Hardware Manual Auto-Angle ESM-300 Base CompleteEASE Software ®...
- Page 2 ©2023 J.A. Woollam Co. M-2000® Hardware Manual...
- Page 3 The contents of this manual are subject to change without notice and do not constitute a commitment on the part of J.A. Woollam Co. Every effort has been made to ensure the accuracy of this document. However, due to ongoing product improvements and revisions, J.A.
-
Page 5: Table Of Contents
4 Preparing the System for Use ................. 51 4.1 Power up Procedure ......................51 4.2 Conventions Used in this Manual ..................52 4.3 File Organization & Manipulation ..................53 4.4 Operation .......................... 53 System Alignment ............................54 M-2000® Hardware Manual ©2023 J.A. Woollam Co. - Page 6 6.3 Lens Correction ....................... 110 6.4 Sample Alignment & System Check with Focusing Optics ..........111 6.5 Data Acquisition with Focusing Optics ................113 6.6 Removal .......................... 114 7 Automated Translation (Optional) ..............115 ©2023 J.A. Woollam Co. M-2000® Hardware Manual...
- Page 7 11.5 Verify System Alignment ....................156 11.6 Angle of Incidence Offset Correction ................157 11.7 System Calibration ......................157 Overview ..............................158 System Calibration ............................158 Wavelength Calibration ..........................163 12 Troubleshooting .................... 165 M-2000® Hardware Manual ©2023 J.A. Woollam Co.
- Page 8 Electronics Control (EC) Module ......................... 173 Detector / Lamp Power Supply Modules ....................174 Power Control Module ..........................176 Surge Suppressor ............................178 Computer ..............................178 Monitor ............................... 178 13.2 Environmental Operating Range..................178 viii ©2023 J.A. Woollam Co. M-2000® Hardware Manual...
- Page 9 M-2000® Hardware Manual ©2023 J.A. Woollam Co.
-
Page 11: Safety Instructions
Keep hands/fingers/body parts away from the instrument while making motor position changes. Pinch points may be applicable (see below). M-2000® Hardware Manual ©2023 J.A. Woollam Co. -
Page 12: Environmental Operating Range
Wear face protection, such as a full- face shield, gloves and a long sleeve shirt whenever handling lamps. 1.3 Environmental Operating Range Temperature: 10°C to 35°C Humidity: 20% to 80% (non-condensing) ©2023 J.A. Woollam Co. M-2000® Hardware Manual... -
Page 13: Hardware Description
2 Hardware Description 2.1 System Configurations This manual covers the full line of M-2000 based spectroscopic ellipsometers mounted on the auto-angle ESM-300 base. MODEL SPECTRAL RANGE LAMP(S) M-2000D(I) 193-1000 (1690) nm 30W Deuterium and 20W QTH M-2000X(I) 210 (245)-1000 (1690) nm 75W Xenon arc... - Page 14 200 Light Source houses the D2 (Deuterium) and QTH (Quartz Tungsten Halogen) lamps. Power for the lamps is supplied through highly regulated switching DC power supplies located in the M-2000 XLS light source. The Source Unit also contains the beam collimation optics, a fixed polarizer, and a compensator located in a continuously rotating stepper motor.
- Page 15 M-2000X(I) ellipsometers use the FLS-860 Source Unit. The FLS-860 Light Source houses the 75W Xenon arc lamp and igniter circuitry. The Source Unit also contains the beam collimation optics, a fixed polarizer, and a compensator located in a continuously rotating stepper motor. M-2000® Hardware Manual ©2023 J.A. Woollam Co.
- Page 16 The intensity can also be set by the user to a specified value by un-checking the "Auto" box and selecting the filter value from the drop down menu. This can be helpful during system alignment. Figure 2-6. Auto Filter Wheel intensity selection option. ©2023 J.A. Woollam Co. M-2000® Hardware Manual...
- Page 17 Rotate the filter wheel to select the amount of light intensity needed for the sample under measurement. Filter shown at the 100% light throughput position Figure 2-7. Source Unit Manual Filter Wheel. FQTH-100 Source Unit Figure 2-8. FQTH-100 Source Unit. M-2000® Hardware Manual ©2023 J.A. Woollam Co.
-
Page 18: Receiver Units
Warning: The QTH lamp gets extremely hot during operation. Always allow it to cool adequately before replacing the lamp. Receiver Units The following receiver units are used for M-2000 ellipsometers. There is also an optional Internal Alignment Camera used for fast sample alignment. MQD-Single Receiver Unit Figure 2-10. -
Page 19: Fiber Optic Cables
Figure 2-12. Optical fiber. Fiber Optic Cables are used to couple the beam from the Receiver Unit to the Detector(s) located in the M-2000 Detector and Lamp Power Supply Module. The fibers have a 200 micron core diameter (standard), and are terminated on each end with an SMA connector for easy insertion and removal. -
Page 20: Detector/Lamp Power Control Module
Detector/Lamp Power Control Module Figure 2-13. M-2000 Detector and Lamp Power Supply Module. The M-2000 Detector and Lamp Power Supply Module contains a UV-VIS Spectrometer covering a wavelength range of 193-1000 nm and an optional NIR Spectrometer that covers a wavelength range of 1000-1690 nm. It also contains highly regulated DC switching power supply for the Light Source. -
Page 21: Computer
Auto-Angle ESM-300 Base Unit The M-2000 spectroscopic ellipsometer system on the auto-angle base comes in three sizes depending on the mapping stage (if present). A small auto-angle base is used for systems with no mapping or a small manual mapping stage. -
Page 22: Power Control Module (Optional)
5Amp UL489 listed circuit breaker that has an AIC (Ampere Interrupting Capacity) rating of 5KA. The EPM-221 model contains a 10Amp circuit breaker along with additional 24VDC power and I/O interface. ©2023 J.A. Woollam Co. M-2000® Hardware Manual... -
Page 23: Installation
Lower the ESM-300 onto the table. Be sure that all persons are clear before lowering the ESM-300 base onto the table. Roll the table and ESM-300 base away from the forklift. M-2000® Hardware Manual ©2023 J.A. Woollam Co. - Page 24 Figure 3-1. Forklift details for lifting the ESM-300 Base. Figure 3-2. ESM-300 dimensions with respect to forklift placement. ©2023 J.A. Woollam Co. M-2000® Hardware Manual...
-
Page 25: Base Assembly
1. Remove the base from the shipping container (DO NOT LIFT THE BASE USING THE ARMS) and set it the table. Do Not Do Not Lift Here Lift Here Lift Here Lift Here Figure 3-4. Lifting locations. M-2000® Hardware Manual ©2023 J.A. Woollam Co. - Page 26 3. Hold the arms at the center of the base to support the weight of the tower (lift slightly) and remove the Z-stage locking screw located on the right side of the base using a 4mm metric Allen wrench. Support Stage Here Figure 3-6. Z-stage locking screw. ©2023 J.A. Woollam Co. M-2000® Hardware Manual...
- Page 27 Lift the sample chuck off of the translator. iii. Remove the (6) SHC screws to remove the orange shipping lock. The top four require a 4mm metric Allen wrench, and the front/back two require a 3mm metric Allen wrench. M-2000® Hardware Manual ©2023 J.A. Woollam Co.
- Page 28 Figure 3-9. Source unit mounting (FQTH-100 Light Source shown). 7. Attach the receiver unit to the receiver tilt stage on the base using (2) M3 socket head screws with the cable connectors pointing to the rear of the base. ©2023 J.A. Woollam Co. M-2000® Hardware Manual...
-
Page 29: Ac Wiring
2. Attach the computer and monitor AC power cords to the surge suppressor. 3. Attach AC power cords to the EC box, and the M-2000 Detector and Lamp Power Supply Module. 4. Attach the other end of the AC power cords to the appropriately labeled jack on the surge suppressor(s). - Page 30 DO NOT in any case bypass this ground conductor. It is essential to the safety of the equipment and its user. ©2023 J.A. Woollam Co. M-2000® Hardware Manual...
-
Page 31: Cabling
Optional Aux. Port J19 (EC) J20 (Base Option) J21 (EC) RJ-45 RJ-45 Network Card in PC J23 / J33 (M-2000) P23 / P33 P24 / P34 J24 / J34 (Source Unit) J25 (M-2000) J26 (Receiver Unit) J29 (EC) J30 (System Option) - Page 32 Figure 3-14. Connector locations. Tilt-Camera USB Z-Camera USB Figure 3-15. Lookdown Camera option. Note: If the Camera(s) is USB 3.0 (USB-C connector), it MUST be connected to USB 3.0 or higher port on the PC. ©2023 J.A. Woollam Co. M-2000® Hardware Manual...
-
Page 33: Computer
Figure 3-16. Electronics Control rear view (example). Figure 3-17. M-2000 Detector and Lamp Power Supply Module Rear View (example). Computer 1. Attach the monitor cable to the computer. 2. Attach keyboard to the computer. 3. Attach the mouse to the computer. - Page 34 5. Plug in the EMO Switch cable (DB-25) to the EMO box on the arm bracket. Monitor Post Monitor Arm Bracket EMO Box Figure 3-20. Assembled system (simulated). ©2023 J.A. Woollam Co. M-2000® Hardware Manual...
- Page 35 4. Attach surge suppressor to the AC power outlet and ensure it is switched IEC - 320 C14 receptacle. Cord should have IEC - 320 C13 plug and 12A continuous rating Figure 3-21. Power Control Module back panel. Power Control Figure 3-22. (110V AC) Configuration. M-2000® Hardware Manual ©2023 J.A. Woollam Co.
-
Page 36: System Enclosure Option
If the enclosure option is supplied, follow these instructions to assemble/integrate. 1. Uncrate the entire system. Transport to final location. 2. Open the front door by lifting upwards by the handles as indicated. ©2023 J.A. Woollam Co. M-2000® Hardware Manual... - Page 37 Figure 3-26. Panel latch operation. 4. Remove shipping restraints from the Base Unit. Install Ellipsometer and connect cables as described in previous section. M-2000® Hardware Manual ©2023 J.A. Woollam Co.
- Page 38 May vary based on model. This is setup for safe and convenient use at the Factory. If adjustments are desired, below are brief descriptions. More detailed instructions are available on the Ergomart website (https://www.ergomart.com). ©2023 J.A. Woollam Co. M-2000® Hardware Manual...
- Page 39 Figure 3-29. Monitor Tilt Adjustment. Figure 3-30. Arm height position tension. Figure 3-31. Arm swing tension. M-2000® Hardware Manual ©2023 J.A. Woollam Co.
- Page 40 3. Attach the other end of the AC power cord to the appropriately labeled jack on the surge suppressor. 4. Attach surge suppressor to the AC power outlet and ensure it is switched Power Control Module Figure 3-33. 110V AC Configuration. ©2023 J.A. Woollam Co. M-2000® Hardware Manual...
-
Page 41: Lamp Installation (If Applicable)
Figure 3-35. Assembled System – control summary. Lamp Installation (if applicable) The Xenon lamp housing requires the Xenon lamp to be removed during shipping. See Chapter 10 Scheduled Maintenance for instructions on installing the lamp. M-2000® Hardware Manual ©2023 J.A. Woollam Co. -
Page 42: Electronics Control (Ec) Module Setup
Caution: Incorrect setup of the EC will prevent the system from operating. Only qualified personnel should change the TCP/IP address if it is necessary. Contact J.A. Woollam Co. if assistance is needed. 1. With the power off, press and hold the up and down arrows while turning the power on. -
Page 43: Operator Computer Setup
4. If a change is made, save the file, and changes will be in effect the next time CompleteEASE is started. 3.3 Operator Computer Setup If the operator computer was not sent with the instrument, there are some additional steps required. M-2000® Hardware Manual ©2023 J.A. Woollam Co. -
Page 44: Software Installation
Ellipsometer connection, and then install the secondary card for any external network connections. 1. In Windows Network and Sharing Center (Control Panel), select ‘Change adapter settings’ from the left-hand side pane. ©2023 J.A. Woollam Co. M-2000® Hardware Manual... - Page 45 Option: rename to “Ellipsometer” Choose “Properties” Figure 3-44. Select Properties. 3. Disable all items except Internet Protocol Version 4 (TCP/IPv4). Figure 3-45. NIC Properties. 4. With Internet Protocol Version 4 (TCP/IPv4) selected, choose Properties. M-2000® Hardware Manual ©2023 J.A. Woollam Co.
-
Page 46: Usb Camera
1. Restart the PC, and enter the one-time boot menu. Typically, by pressing F12 on the keyboard during the boot sequence. Figure 3-47. One-time boot menu access (example). 2. Select the BIOS Setup, find the C-States Control Setting, and then disable. ©2023 J.A. Woollam Co. M-2000® Hardware Manual... - Page 47 If the Camera (Imaging and/or Alignment Camera) is a USB 3.0 Camera (USB-C connector), the Drivers must installed to run. 1. Run the ‘ids_peak_x.x.x.x.exe’ installer from the CompleteEASE\jar\Drivers folder. Figure 3-49. IDS camera driver installation. M-2000® Hardware Manual ©2023 J.A. Woollam Co.
- Page 48 Figure 3-51. IDS software shortcut. Note: It is a good idea to remove this to avoid launching the IDS program as CompleteEASE will not be able to connect the Camera(s) if this program is also running. ©2023 J.A. Woollam Co. M-2000® Hardware Manual...
-
Page 49: High Performance Mode
High Performance Mode It is also recommended to set the Windows Power Options to High Performance. Hard Disk, Sleep, and Hibernate settings as shown below. Figure 3-52. Power Options. M-2000® Hardware Manual ©2023 J.A. Woollam Co. -
Page 51: Preparing The System For Use
4.1 Power up Procedure Turn on the components of the M-2000 system in the following order. 1. Turn on the lamp power supply button on the M-2000 module. Wait 3 seconds and press the ignition button (not applicable on M-2000V and VI systems). -
Page 52: Conventions Used In This Manual
“Pipeline” descriptions of command selections: Command selection sequences will be described as a “pipeline” in this order: Tab>Panel>‘Button’, (R), etc. For example: the ‘Open’ button within the Model: panel under the Analysis tab is described as Analysis>Model:>‘Open’ ©2023 J.A. Woollam Co. M-2000® Hardware Manual... -
Page 53: File Organization & Manipulation
The typical ellipsometric measurement involves the following steps: Typical Ellipsometer Operation Power up Align Acquire Data Procedure Sample Data Analysis Figure 4-3. Flow chart. The following definitions should be understood before operating the system: M-2000® Hardware Manual ©2023 J.A. Woollam Co. -
Page 54: System Alignment
System Alignment System alignment is the adjustment of the Light source and Receiver components relative to the base of the M-2000 system (in the “straight-through” configuration). The straight-through configuration is when the angle of incidence is set at 90°; the beam of light will directly enter the receiver (the sample is not needed in this case). - Page 55 Figure 4-5. Filter position 4 with iris closed to avoid overloading the spectrometer. Figure 4-6. Overloaded spectrometer. M-2000® Hardware Manual ©2023 J.A. Woollam Co.
- Page 56 The MQD-Dual may be equipped with a manual ND filter wheel option that has four (4) detent positions for each fiber coupler to optimize the Intensity for each Detector: POSITION INTENSITY 100% IIII Table 4-1. Manual Filter Wheel positions. ©2023 J.A. Woollam Co. M-2000® Hardware Manual...
-
Page 57: Sample Alignment
Z-Height. System Check (Calibration) A System Check must be performed every time the M-2000 hardware is re- mounted on the ex situ base or in situ chamber. This is required to determine the azimuthal angles of the polarizer, compensator, and analyzer optical elements with respect to the plane of incidence. -
Page 58: System Alignment (With Manual Tip/Tilt)
Alignment (with Automated Tip/Tilt). System alignment is the adjustment of the source and receiver components relative to the variable angle base of the M-2000 system. It is required when the system is first delivered, when first mounting the system onto a base or chamber, or whenever the integrity of the alignment is in question. -
Page 59: Source Unit Alignment
Receiver Unit aperture. 1. Select Hardware>Controls>System>‘Angle’. Choose an Angle of 90°. The base will move to the straight-through position. Figure 4-11. Angle button. M-2000® Hardware Manual ©2023 J.A. Woollam Co. - Page 60 English Allen wrench. When the beam is aligned, there should be a uniform white halo around the aperture (shown below). Misalignment results in a "crescent" halo that is larger on one side of the black aperture. ©2023 J.A. Woollam Co. M-2000® Hardware Manual...
-
Page 61: Receiver Unit Alignment
Receiver Unit to the measurement beam if necessary. 1. Select Hardware>Controls>General>‘Align Sample’. The software will ask “Would you like to perform a full sample alignment?” Select ‘No’. Figure 4-15. Align Sample button. M-2000® Hardware Manual ©2023 J.A. Woollam Co. - Page 62 “gray area” but the cross hair positioning is still valid. Figure 4-18. Alignment Screen – Receiver Camera. b. The Alignment Camera image can be viewed by selecting Hardware>Controls>Misc>‘Additional Hardware Functions’. ©2023 J.A. Woollam Co. M-2000® Hardware Manual...
-
Page 63: Verify Signal
2. This will display a plot of the magnitude of the signal from all detector channels, as shown in Figure 4-21. The intensities below are typical for an M-2000 in the straight-through configuration. M-2000® Hardware Manual ©2023 J.A. Woollam Co. - Page 64 In the straight-through position, the gain should be either 1 or 2. Otherwise, the system is not aligned properly or the lamp needs to be replaced and/or aligned. For your specific M-2000 intensity distribution of all channels please refer to the system test report. A hard copy is shipped with each system and a soft copy is included on the backup CD.
- Page 65 Detector Overloaded Figure 4-22. Optional NIR spectrometer overloaded on M-2000 system. Figure 4-23. MQD-Single iris operation. M-2000® Hardware Manual ©2023 J.A. Woollam Co.
-
Page 66: System Alignment (With Automated Tip/Tilt)
System Alignment (with Manual Tip/Tilt). System alignment is the adjustment of the source and receiver components relative to the variable angle base of the M-2000 system. It is required when the system is first delivered, when first mounting the system onto a base or chamber, or whenever the integrity of the alignment is in question. - Page 67 M-2000 system, and this naming convention will be followed throughout these instructions. In the straight-through position (angle = 90°), the white light beam should be centered on both the Receiver Unit aperture and the 4-quadrant alignment detector that is located inside the Receiver Unit.
-
Page 68: Source Unit Alignment
Receiver Unit. If in a well-lit room, it may be difficult to view the light beam. Reduce room lights for next step of operation. Figure 4-28. Z-Stage button. ©2023 J.A. Woollam Co. M-2000® Hardware Manual... -
Page 69: Receiver Unit Alignment
Receiver Unit. In this section, we will verify alignment and adjust the Receiver Unit to the measurement beam if necessary. 1. Select Hardware>Controls>General>‘Align Sample’. The software will ask “Would you like to perform a full sample alignment?” Select ‘No’. M-2000® Hardware Manual ©2023 J.A. Woollam Co. - Page 70 Receiver Unit. a. If the Receiver Unit has the optional Internal Alignment Camera, there is no “gray area” but the cross hair positioning is still valid. ©2023 J.A. Woollam Co. M-2000® Hardware Manual...
-
Page 71: Verify Signal
Verify Signal Inside the Receiver Unit, the light is directed into a fiber optic cable(s) which carries the light to the Spectrometer(s). 1. View the signal reaching the Spectrometer by selecting Hardware>Controls>General>‘Display Signal’. M-2000® Hardware Manual ©2023 J.A. Woollam Co. - Page 72 In the straight-through position, the gain should be either 1 or 2. Otherwise, the system is not aligned properly or the lamp needs to be replaced and/or aligned. For your specific M-2000 intensity distribution of all channels please refer to the system test report. A hard copy is shipped with each system and a soft copy is included on the backup CD.
- Page 73 The following signal screen is a generic screen shot. Refer to the system test report for your specific intensity values. Detector Overloaded Figure 4-37. Optional NIR spectrometer overloaded on M-2000 system. Figure 4-38. MQD-Single iris operation. M-2000® Hardware Manual ©2023 J.A. Woollam Co.
-
Page 74: Sample Stage Alignment
1. Remove any custom mounts or samples and mount the 25nm Oxide on Silicon Calibration Wafer directly to the sample stage. Make sure to switch on the vacuum to hold wafer in place. ©2023 J.A. Woollam Co. M-2000® Hardware Manual... - Page 75 Screen, change the Detector to "Receiver". Figure 4-41. Align Sample button. Figure 4-42. Sample Alignment dialog box. Note: The following alignment screen is a generic screen shot. Refer to the system test report for your specific intensity values. M-2000® Hardware Manual ©2023 J.A. Woollam Co.
- Page 76 If the Receiver Unit has the Alignment Camera, no gray intensity will appear. If the beam is not entering the Receiver Unit at all, it will display ‘Out of Range.’ Figure 4-45. Cross hair example – Receiver Camera installed. ©2023 J.A. Woollam Co. M-2000® Hardware Manual...
-
Page 77: Lookdown Detector Alignment
1. The Alignment Screen should still be open from the previous section. If not, repeat steps in the previous section (Sample Stage Alignment) to open the Alignment Screen again. In the Alignment Screen, change the Detector to “Lookdown". M-2000® Hardware Manual ©2023 J.A. Woollam Co. - Page 78 ½-1 full turn. If so, it is likely something is not mounted/aligned properly; check previous steps to be sure they were done correctly. Lookdown Tilt Lookdown Tilt (with Camera) (no Camera) Figure 4-48. Adjusting the Lookdown Detector (Align Unit). ©2023 J.A. Woollam Co. M-2000® Hardware Manual...
- Page 79 Figure 4-50. Lookdown Alignment Camera. 1. The reference sample must still be aligned from the previous section. If not, repeat steps in the previous section to verify the sample well aligned on the Receiver Internal Detector. M-2000® Hardware Manual ©2023 J.A. Woollam Co.
- Page 80 If the image is out of focus and this is desired, see Chapter 7 for adjustment instructions. Tilt Camera Z/Image Camera (may not be centered) Figure 4-52. Tilt/Z Camera Alignment Utility window. ©2023 J.A. Woollam Co. M-2000® Hardware Manual...
- Page 81 7. Select ‘Yes’ to the message box for each selected calibration. Figure 4-54. Camera Calibration message box. 8. Test the Automated Alignment by performing Sample Alignment, choose “Automatic” Sample Tilt and “Automatic-Camera” Sample Height. M-2000® Hardware Manual ©2023 J.A. Woollam Co.
-
Page 82: Sample Alignment (With Manual Tip/Tilt)
2. Place the sample on the sample stage. 3. Select Hardware>Controls>System>‘Angle’. Type 65 in the dialog box and press ‘Ok’. Figure 4-56. Move Angle dialog box. ©2023 J.A. Woollam Co. M-2000® Hardware Manual... - Page 83 Figure 4-59. Cross hair centered. a. If the Receiver Unit has the Alignment Camera, no gray intensity will appear. If the beam is not entering the Receiver Unit at all, it will display ‘Out of Range.’ M-2000® Hardware Manual ©2023 J.A. Woollam Co.
-
Page 84: Sample Alignment (With Automated Tip/Tilt)
1. Place the reference sample supplied with the instrument (~25nm SiO2 on Si) on the sample stage. 2. Select Hardware>Controls>General>‘Align Sample’ 3. Choose Automatic for Tip/Tilt. If sample thickness is known, enter this value in the Sample Alignment dialog box and select “Automatic-Quick”. ©2023 J.A. Woollam Co. M-2000® Hardware Manual... -
Page 85: System Check (Calibration)
Lookdown detector is disabled. 4.9 System Check (Calibration) Note: A System Check must be performed the first time the system is operated, or if the source/receiver units have been remounted. The M-2000® Hardware Manual ©2023 J.A. Woollam Co. - Page 86 Figure 4-63. Mount Calibration Wafer. 4. CompleteEASE will automatically open the sample alignment screen. Align the sample as described in the Sample Alignment sections above. Figure 4-64. Alignment screen. ©2023 J.A. Woollam Co. M-2000® Hardware Manual...
-
Page 87: Evaluating Calibration Results
Figure 4-67. A good fit to system check data. It is good practice to verify the system check fit even when the system check is successful. If the system check is successful, basic testing is finished and the ellipsometer is ready for general use. M-2000® Hardware Manual ©2023 J.A. Woollam Co. -
Page 88: Instrument Shutdown
3. Exit Windows. 4. Turn off the Computer, Monitor, EC box and the Lamp Power Supply Module (M-2000 box). There is no particular order for the turning off system components. ©2023 J.A. Woollam Co. -
Page 89: Data Acquisition
Figure 5-1. Prompt for Acquisition Parameters. 3. Choose ‘Measure’. 4. If ‘Save Data after Measurement’ was checked, the Save Data window appears. Navigate to desired folder, give a filename and comment (optional), and then choose ‘Save’. M-2000® Hardware Manual ©2023 J.A. Woollam Co. - Page 90 Time’ (in seconds). With High Accuracy Mode checked, data is collected with input polarizer set to +45˚ and -45˚ and averaged. This improves data accuracy and is recommended for most applications. 7. Under Alignment Options, there are multiple selections. ©2023 J.A. Woollam Co. M-2000® Hardware Manual...
- Page 91 If automatic alignment options were selected, the software will automatically perform the sample alignment and no action is necessary. Ellipsometric data acquisition will start after the sample alignment selections are executed. System Status will show measurement progress. M-2000® Hardware Manual ©2023 J.A. Woollam Co.
-
Page 92: Recipes
Use of a Recipe requires that Data Acquisition Parameters and an Analysis Model have been saved previously. An example drop-down list containing multiple Recipes is shown below. ©2023 J.A. Woollam Co. M-2000® Hardware Manual... -
Page 93: Prompt For Recipe Components
Figure 5-8. <Prompt for Recipe Components>. Choose desired Acq. Parms and Model and click ‘Ok’ to start the measurement. (The Scan Pattern option in the figure below is available only for systems with optional sample translation.) M-2000® Hardware Manual ©2023 J.A. Woollam Co. -
Page 94: Creating New Recipes
Create/Edit Recipe dialog box. Choose desired Acq. Parms and Model and click ‘Save Recipe’ when finished. (The Scan Pattern option in the figure below is available only for systems with optional sample translation.) Figure 5-10. Create/Edit Recipe. ©2023 J.A. Woollam Co. M-2000® Hardware Manual... -
Page 95: Creating New Acquisition Parameters
This is discussed in detail in the CompleteEASE Data Analysis Manual. View the CompleteEASE Data Analysis Manual by selecting: Options>Miscellaneous>‘Show Manual’ (or Press F1) Using a Recipe 1. To measure and analyze a sample using a Recipe, select the desired Recipe from: Measurement>Measurement Controls>Recipe: M-2000® Hardware Manual ©2023 J.A. Woollam Co. - Page 96 Figure 5-14. Example data after measurement with Recipe. 4. To view the Model used, switch to the Analysis tab. Note that the Analysis>Data panel indicates the data filename given, or if the data has not yet been saved. ©2023 J.A. Woollam Co. M-2000® Hardware Manual...
-
Page 97: Data Types
Acquisition Parameters Setup window. Standard The Standard Data Type is used for most applications. This data type acquires Ellipsometric Psi and Delta data, as well as reflectance and depolarization data. M-2000® Hardware Manual ©2023 J.A. Woollam Co. -
Page 98: Mueller Matrix
Figure 5-17. DC Offset correction. Mueller Matrix Mueller Matrix data is required for complicated samples with both anisotropy and depolarization. The M-2000 measures 11 Mueller Matrix elements. Figure 5-18. Mueller Matrix data acquisition. After measurement, data are displayed. To view Mueller Matrix elements, select the Graph ‘+Data’... -
Page 99: Reflection Intensity
(thermal oxide on silicon). Note: Reflection Intensity is also measured with “Standard” Data Type, but no baseline is used. Reflection Intensity Data Type is recommended for best accuracy. Figure 5-21. Reflection Intensity data acquisition. M-2000® Hardware Manual ©2023 J.A. Woollam Co. - Page 100 After the measurement, Psi and Delta data are initially displayed in the Graph. To view Reflection Intensity data, select the ‘+Data’ Graph button and choose “Intensity” from the Isotropic Items. Figure 5-25. Intensity graph selection. ©2023 J.A. Woollam Co. M-2000® Hardware Manual...
-
Page 101: Routine Test Measurements
“Measurement Period” parameter to a value greater than 0. For example, if the “Measurement Period” is set to “1” then the software will prompt the user to perform a test measurement once per day. M-2000® Hardware Manual ©2023 J.A. Woollam Co. -
Page 102: Viewing Results
“Show Results” button in the “Routine Test Measurement” section (see Figure 5-26). The results are displayed on a graph with the parameters plotted versus date. An example is shown in Figure 5-28. Figure 5-28. Routine Test Measurement results. ©2023 J.A. Woollam Co. M-2000® Hardware Manual... -
Page 103: Focusing Optics
Receiver unit aperture. Related configuration parameters can be viewed by selecting Hardware>System Information>‘Edit Hardware Config’. Under Focusing Option, the Windows option should be enabled (= true) and set to “Measure Offsets in ST” (= true). M-2000® Hardware Manual ©2023 J.A. Woollam Co. -
Page 104: Installation
These pins may prevent proper alignment of the focusing optics or cause damage to the focusing tilt stages due to improper strain. 1. Select Hardware>Controls>System>‘Install Focus Probes’. ©2023 J.A. Woollam Co. M-2000® Hardware Manual... -
Page 105: Standard Receiver Unit
Standard Receiver Unit 1. The first prompt is to attach the Receiver probe. Using the three captive thumb screws, attach the Receiver focusing probe to the Receiver probe tilt stage. Figure 6-5. Adjust Receiver probe. M-2000® Hardware Manual ©2023 J.A. Woollam Co. - Page 106 4. Carefully center the beam on the Alignment Target by translating the target with the Vertical Receiver (VR) and Horizontal Receiver (HR) adjustment screws. MOVE THE TARGET, NOT THE ELLIPSOMETER BEAM. Click OK when finished. ©2023 J.A. Woollam Co. M-2000® Hardware Manual...
- Page 107 Receiver side lens. Click OK when finished. Figure 6-10. Remove target. 9. Lastly, adjust ONLY the RECIEVER LENS (Vertical and Horizontal) adjustment screws to maximize the Intensity. Click OK when finished and go to Section 6.3. M-2000® Hardware Manual ©2023 J.A. Woollam Co.
-
Page 108: Alignment Camera Receiver Unit
3. Carefully center the cross hair by translating the Source side lens with the Vertical Source (VS) and Horizontal Source (HS) adjustment screws. Close alignment screen when finished. Note: If the beam is not entering the Receiver Unit at all, ‘Out of Range’ will be displayed. ©2023 J.A. Woollam Co. M-2000® Hardware Manual... - Page 109 Figure 6-16. Attach Receiver probe. 5. Lastly, adjust ONLY the RECIEVER LENS (Vertical and Horizontal) adjustment screws to maximize the Intensity. Click OK when finished and go to Section 6.3. Figure 6-17. Adjust Receiver probe. M-2000® Hardware Manual ©2023 J.A. Woollam Co.
-
Page 110: Lens Correction
The limit switches behind the probes prevent the stage from moving past 75° (or 65° in some configurations). This prevents the probes from running into the sample stage and damaging them. ©2023 J.A. Woollam Co. M-2000® Hardware Manual... -
Page 111: Sample Alignment & System Check With Focusing Optics
With the focusing probes attached, the Sample Tilt Alignment does not appear unless the system has the Auto Tip/tilt feature. The system is not as sensitive to tilt with a focused beam on the sample. Z height is very critical. M-2000® Hardware Manual ©2023 J.A. Woollam Co. - Page 112 (shown in Chapter 4). They may have been closed previously to avoid a detector overload, but with the focusing optics present and off sample, they can be opened to allow more light into the fiber(s). ©2023 J.A. Woollam Co. M-2000® Hardware Manual...
-
Page 113: Data Acquisition With Focusing Optics
Select Hardware>‘Edit Hardware Config’ to open the Hardware Configuration window. Check ‘Show Advanced Config. Options’. Under ‘Alignment Parameters’, verify ‘Focus Option: Z Align Each Angle = true’. Figure 6-24. Hardware Configuration window. M-2000® Hardware Manual ©2023 J.A. Woollam Co. -
Page 114: Removal
Loosen the three captive thumb screws for each probe to remove. Store the Focusing Probes with protective caps over the lenses. Figure 6-25. Remove Focus Probes button. Figure 6-26. Focus Probe Removal message box. ©2023 J.A. Woollam Co. M-2000® Hardware Manual... -
Page 115: Automated Translation (Optional)
This is a generic section; options may vary. 7.1 General Operation General translator controls are located in the Hardware tab. Select Hardware>Controls>System>‘Translator’ to open the Translator dialog box. Figure 7-1. Translator controls. M-2000® Hardware Manual ©2023 J.A. Woollam Co. -
Page 116: Scan Patterns
To create a Scan Pattern, open the Scan Pattern Editor window. From the Measurement tab, choose the Recipe option “Create/Edit Recipe”. Then, next to Scan Pattern, click “Edit/Create”. Figure 7-3. Edit/Create Scan Pattern. Figure 7-4. Scan Pattern Editor. ©2023 J.A. Woollam Co. M-2000® Hardware Manual... -
Page 117: Substrate Dimensions
Point’. A measurement point is added using X and Y coordinates or the current Translator position. A list of coordinates created in another program can also be added using the ‘Paste From Clipboard’ button. M-2000® Hardware Manual ©2023 J.A. Woollam Co. - Page 118 Point List. The sequence of the point list is the order in which locations will be measured. ‘Delete Point’ removes the selected point from the Point List. ‘Delete All’ removes all points from the Point List. ©2023 J.A. Woollam Co. M-2000® Hardware Manual...
-
Page 119: Grid And Line Fill
Figure 7-11. R-T Grid Fill. For a Line Fill, the Line Direction, Grid Spacing, Grid Margin, and X or Y Axis Coordinate must be specified. Multiple Line Fills can be added. Figure 7-12. Line Fill. M-2000® Hardware Manual ©2023 J.A. Woollam Co. -
Page 120: Test Scan
Figure 7-13. Scan Pattern Test. Note: A 180˚ Pattern Offset may be required for correct orientation of wafers with wafer notch. Use the ‘Test Scan’ function to confirm desired orientation. Figure 7-14. Pattern Offset options. ©2023 J.A. Woollam Co. M-2000® Hardware Manual... -
Page 121: Alignment Position
Z height. Figure 7-15. Alignment Position. Save When all Scan Pattern options have been specified, click ‘Save’ to save the Scan Pattern for use in a Recipe. Figure 7-16. Save Scan Pattern. M-2000® Hardware Manual ©2023 J.A. Woollam Co. -
Page 122: Rotator Option
Stage to allow for wobble correction and can be used for sample tilt alignment. When creating a scan pattern, using the R-Theta option may also be considered. Figure 7-18. Scan Pattern Editor – R-Theta option. ©2023 J.A. Woollam Co. M-2000® Hardware Manual... -
Page 123: Wobble Correction
3. Adjust the Sample Tilt to move the Lookdown cross hair position half of the distance it has changed. Figure 7-20. Sample Tilt adjustment. 4. For example, if X=8, Y=-6.5 : adjust so X=4, Y=-3.25. M-2000® Hardware Manual ©2023 J.A. Woollam Co. - Page 124 Loosen lock-downs adjust tilt plate Figure 7-21. Bottom Tilt Plate adjustment. 8. Confirm the procedure, lockdown the bottom tilt plate, and the sample is ready for measurement. ©2023 J.A. Woollam Co. M-2000® Hardware Manual...
-
Page 125: Sample Camera
There are (2) types of illumination on the Standard Camera – “Ring” and “In- Line.” These can be used to view the sample image using the camera. Ring Illumination – useful for non-reflective (rough) surfaces. In-Line Illumination – useful for reflective (“mirror-like”) surfaces. M-2000® Hardware Manual ©2023 J.A. Woollam Co. -
Page 126: Marking The Measurement Beam Position
Location’. This is going to be used to set the “beam size” and not the “beam position.” Use the appropriate camera adjustment so the beam position remains in the center of the image. Figure 8-3. Additional Camera Functions – Mark Measurement Beam Location. ©2023 J.A. Woollam Co. M-2000® Hardware Manual... - Page 127 Turn all (3) adjustment screws by the same amount in the same direction to move the camera in the Z direction. Figure 8-5. Standard Camera adjustment. M-2000® Hardware Manual ©2023 J.A. Woollam Co.
- Page 128 Remount the business card and perform Intensity-based Z alignment again or flip calibration wafer over to rough side. Loosen lock-downs and Translate Figure 8-7. Z Align/Imaging Camera translation adjustment. ©2023 J.A. Woollam Co. M-2000® Hardware Manual...
- Page 129 Under the Sample Tilt Alignment drop down menu, select ‘Skip’. Under the Sample Height Alignment drop down menu, select ‘Automatic-Quick’. Enter the sample thickness into the box. (Cal. Wafer ≈ 0.55mm). Press ‘Ok’. M-2000® Hardware Manual ©2023 J.A. Woollam Co.
- Page 130 ‘Mark Measurement Beam Location’. 5. Follow the instructions at the top of the window: “ Use the mouse to drag a rectangle over the measurement spot to mark the current beam position and ©2023 J.A. Woollam Co. M-2000® Hardware Manual...
- Page 131 Figure 8-13. Sample Alignment – Intensity-based Z only. 3. Block the measurement beam to view only the Alignment beam(s). 4. Verify the Tilt Align Beam first. Select Hardware>Controls> Misc>‘Additional Hardware Functions’ to open the Hardware Functions M-2000® Hardware Manual ©2023 J.A. Woollam Co.
- Page 132 5. Adjust the Camera Position to the Tilt Align Beam using the “Imaging Camera Translation” (left side access holes) to center. Z LED Adjust Imaging Camera Translation Figure 8-15. Camera Fine Adjustment access holes. ©2023 J.A. Woollam Co. M-2000® Hardware Manual...
- Page 133 Z Align Beam Tilt Align Beam Figure 8-17. Z Alignment Beam centered on Imaging Camera. 7. Unblock the Measurement Beam. Repeat the previous section, Marking the Measurement Beam Position, to verify the Camera position. M-2000® Hardware Manual ©2023 J.A. Woollam Co.
-
Page 134: Field Of View Calibration
Camera Functions Window. Select ‘Measure Camera Field of View’. Figure 8-18. Additional Camera Functions button – Measure Camera Field Of View. 3. Adjust the illumination, if applicable, so the sample surface is visible. ©2023 J.A. Woollam Co. M-2000® Hardware Manual... - Page 135 If not performed correctly, or not sure, just press Cancel and start again. 6. To test the feature, open the Translator Window by selecting Hardware>Controls>System>‘Translator.’ Figure 8-20. Click ‘Translator’ to open Translator window. M-2000® Hardware Manual ©2023 J.A. Woollam Co.
- Page 136 7. Click on the feature and the translator should move it to the Beam Position. Figure 8-21. Field of View calibration test result. ©2023 J.A. Woollam Co. M-2000® Hardware Manual...
-
Page 137: In Situ
Figure 9-1. Example hardware.cnf file. 1. Select Hardware>Controls>System>‘Activate In Situ Mode’ to start the function. A message will be displayed. Figure 9-2. Activate In Situ Mode button. M-2000® Hardware Manual ©2023 J.A. Woollam Co. - Page 138 A message will be displayed. Figure 9-4. Deactivate In Situ Mode message box. 4. The next time the software is started, it will initialize the ex situ base motors (AOI, Z-Stage, etc.) as normal. ©2023 J.A. Woollam Co. M-2000® Hardware Manual...
-
Page 139: Scheduled Maintenance
Table 10-1. Lamps and typical lifetimes. Lamp Installation/Replacement 1. Turn off the M-2000 Detector and Lamp Power Supply Module. Allow lamp(s) to cool for 2 hours. 2. Remove the (2) M3 SHC screws (2.5mm Allen wrench) and remove the cover on the light source. - Page 140 8. Place the new D2 lamp in the mount and replace and tighten the (2) M3 SHC screws back into place. Plug the D2 lamp connector back into the circuit board. ©2023 J.A. Woollam Co. M-2000® Hardware Manual...
-
Page 141: Lamp Alignment
11. Tighten the SHC screws to lock the cover closed. 12. Reset the hour meter by pressing the reset button located on the front of the M-2000 Detector and Lamp Power Supply Module. Note: When a new lamp is installed, it must be aligned so that the maximum amount of light is available for sample measurement. -
Page 142: Lamp Installation/Replacement
1500 hours Table 10-2. Arc lamp rating and typical lifetime. Lamp Installation/Replacement 1. Turn off the M-2000 Detector and Lamp Power Supply Module. Allow lamp(s) to cool for 2 hours. 2. Put on latex gloves and safety goggles. 3. Loosen the captive screws (Flat screwdriver) and remove the access panel on the light source. - Page 143 This is to ensure both that the light is not blocked by the wire and that the molded point (weakest part of the glass) is never positioned “up” as the heat can weaken the glass!! M-2000® Hardware Manual ©2023 J.A. Woollam Co.
- Page 144 9. When the lamp is in position, release the lever and the lamp will be secured. Note: Ensure the cathode is completely inserted into the cathode clamp and the anode connector is installed in the proper direction. Figure 10-7. Lamp installed. ©2023 J.A. Woollam Co. M-2000® Hardware Manual...
-
Page 145: Lamp Alignment
12. Reset the hour meter by pressing the reset button located on the front of the M-2000 Detector and Lamp Power Supply Module. Note: When a new lamp is installed, it must be aligned so that the maximum amount of light is available for sample measurement. - Page 146 7. Adjust the Source unit tilt stage slightly so the beam’s spot is centered on the receiver unit’s aperture. 8. Using the Receiver unit tilt stage, adjust so the cross hair is centered on the alignment screen. ©2023 J.A. Woollam Co. M-2000® Hardware Manual...
-
Page 147: Arc Lamp Disposal
Tighten the retainer clip screw to hold the mirror in place. Check that it is applying enough pressure to hold the mirror stable. M-2000® Hardware Manual ©2023 J.A. Woollam Co. -
Page 148: Qth Lamp (M-2000V & Vi) In Fqth-100
300 hours Table 10-4. QTH lamps and typical lifetime. Lamp Installation/Replacement 1. Turn off the M-2000 Detector and Lamp Power Supply Module. Allow lamp(s) to cool for 2 hours. 2. Put on latex gloves and safety goggles. 3. Remove (2) SHC screws (2.5mm Allen wrench) to remove the cover. - Page 149 Caution: Do not touch the quartz portion of the lamp. Fingerprints and oils can shorten the life of the lamp. If you do get a fingerprint on the lamp, clean the fingerprint off with alcohol. M-2000® Hardware Manual ©2023 J.A. Woollam Co.
-
Page 150: Lamp Alignment
8. Replace the cover and tighten the SHC screws to lock the cover closed. 9. Reset the hour meter by pressing the reset button located on the front of the M-2000 Detector and Lamp Power Supply Module. Note: When a new lamp is installed, it must be aligned so that the maximum amount of light is available for sample measurement. -
Page 151: Optical Fiber
The entire system may be cleaned using a soft cloth and mild detergent or isopropyl alcohol. However, only filtered compressed air or “canned air” should be used to remove dust from any of the optical components. M-2000® Hardware Manual ©2023 J.A. Woollam Co. - Page 152 ©2023 J.A. Woollam Co. M-2000® Hardware Manual...
-
Page 153: Performance Checks
4. Confirm that a good fit to the data is achieved. To measure straight-through (air): 1. Select “Measure in Transmission Mode” in the Acquisition Parameters Setup box. A high accuracy, 5 second measurement is recommended. M-2000® Hardware Manual ©2023 J.A. Woollam Co. - Page 154 Psi = 45° ± 0.075 for 95% of the measured wavelengths Delta = 0° ± 0.05 for 95% of the measured wavelengths Figure 11-2. Example S-T measurement (M-2000DI). ©2023 J.A. Woollam Co. M-2000® Hardware Manual...
-
Page 155: System Check
Reflected intensity is a function of angle; therefore, the intensity will change as angle changes, but the reflected beam should remain centered on Receiver Aperture for all angles. If these conditions cannot be simultaneously satisfied, the System Alignment should be verified. M-2000® Hardware Manual ©2023 J.A. Woollam Co. -
Page 156: Verify Signal/Lamp Intensity
Alignment should be verified. System Alignment is described in Chapter 4 of this manual. If the System Alignment is changed, a System Check MUST be performed when completed to calibrate the ellipsometer optics. ©2023 J.A. Woollam Co. M-2000® Hardware Manual... -
Page 157: Angle Of Incidence Offset Correction
A System Calibration is performed when the wavelengths of the instrument are known to be incorrect or the compensator or spectrometer has been changed. These situations occur if the M-2000 box or light source has been replaced. This document describes the System Calibration procedure for determining the wavelengths and compensator calibration coefficients. -
Page 158: Overview
Note: DO NOT attempt this procedure unless instructed to do so by a representative of J.A. Woollam Co. Overview Performing a System Calibration involves iterating between two steps - the System calibration and the Wavelength calibration. The first step measures the positions of the optical elements and the Retardance of the compensator at the currently accepted wavelengths. - Page 159 Yes and enter a sample thickness of 0.55mm for the calibration wafer. Figure 11-6. Choose Yes to perform a full sample alignment. Figure 11-7. Last chance to opt out of system calibration. M-2000® Hardware Manual ©2023 J.A. Woollam Co.
- Page 160 Receiver unit is closed down to avoid ‘Overload’, the DUV signal is optimized. This results in a much better calibration result at these lower wavelengths. Examples of filter wheel positions vs. Signal Intensity: ©2023 J.A. Woollam Co. M-2000® Hardware Manual...
- Page 161 Figure 11-9. Filter 6 with iris open. Figure 11-10. Filter 4 with iris closed to avoid overloading the spectrometer. M-2000® Hardware Manual ©2023 J.A. Woollam Co.
- Page 162 Figure 11-11. Overloaded spectrometer. Filter shown at the 100% light throughput position Figure 11-12. Source unit filter wheel option. Figure 11-13. MQD-Single Receiver unit iris operation. ©2023 J.A. Woollam Co. M-2000® Hardware Manual...
-
Page 163: Wavelength Calibration
Figure 11-15. Wavelength calibration model. 2. Press Perform Wavelength Calibration and follow the instructions. When the process is completed successfully, you will be asked if you want to write the wavelength correction values to the hardware.cnf file, M-2000® Hardware Manual ©2023 J.A. Woollam Co. - Page 164 ‘Yes.’ A System Calibration must be performed again after the software finishes reinitializing the system. Figure 11-16. Performing wavelength calibration. Figure 11-17. Wavelength calibration was successful. ©2023 J.A. Woollam Co. M-2000® Hardware Manual...
-
Page 165: Troubleshooting
To facilitate a quicker response, start by sending a debug file along with a detailed description of the problem and any related symptoms and error messages. Select Options>About CompleteEASE>‘Create Debug File’ to create a debug file. The file created is located in C:\CompleteEASE\CompleteEASE_Debug.zip. M-2000® Hardware Manual ©2023 J.A. Woollam Co. -
Page 166: Common Screen Error Messages
3. Electrical connections between J1 and J2 or J3 and J4 are not secured – check the cable connections and that the pins on the connectors all look normal. User key points: Is the Source side motor spinning (vibrating) to the touch? ©2023 J.A. Woollam Co. M-2000® Hardware Manual... -
Page 167: Polarizer Homing Error Message
J11 and J12 are spectrometer digital line cables with color code. Be sure to connect them correctly. User key points: Is the spectrometer power LED ON? – located on the front of the M-2000 detector box. Communication Problems If the software will not communicate with the system (EC), the following parameters need to be investigated. -
Page 168: General Problems
Re-align the sample, ensuring that the beam is sensitive to the properly aligned centered on the aperture of the receiver unit. sample tilt. Use of optional Focusing attachment reduces sensitivity to sample tilt. Table 12-1. General problems. ©2023 J.A. Woollam Co. M-2000® Hardware Manual... -
Page 169: Software Problems And Error Messages
SYMPTOM CAUSE SOLUTION Signal screen shows flat Cables not connected Make proper cable lines on all channels. properly. Electronic connections. Call J.A. scanning problems. Woollam Co. for instructions. Table 12-4. Signal screen problems. M-2000® Hardware Manual ©2023 J.A. Woollam Co. -
Page 170: Lamp And Light Problems
‘Overtemp’ indicates that the lamp power supply inside the M-2000 temp. sensor has tripped (likely cooling fan issue). The LED status is “latching” so power must be reset to change the state... -
Page 171: Usb Camera
Figure 12-7. Windows Device Manager. – power, not booted Flashing GREEN – booting Solid GREEN – connected, ready Solid ORANGE – connected, low power (likely USB 2.0) Figure 12-8. USB 3.0 Imaging Camera Status. M-2000® Hardware Manual ©2023 J.A. Woollam Co. -
Page 173: Specifications
All AC Mains components are connected with 600V rated wire and insulated terminals All PCBs and components are RoHS Compliant Electronics Control (EC) Module Input Voltage: 100/115/230/240VAC. Frequency: 50-60Hz. Current: 1A1A/.4A/.4A. Fuses: (2) T2/T2A. M-2000® Hardware Manual ©2023 J.A. Woollam Co. -
Page 174: Detector / Lamp Power Supply Modules
Detector / Lamp Power Supply Modules Input Voltage: 100/115/230/240VAC. Frequency: 50-60Hz. Current: 1.2A/1.2A/0.6A/0.6A. Fuses: (2) T2A/T2A. M-2000D(I), M-2000U(I) ©2023 J.A. Woollam Co. M-2000® Hardware Manual... - Page 175 M-2000V(I) M-2000X(I) M-2000® Hardware Manual ©2023 J.A. Woollam Co.
-
Page 176: Power Control Module
Power Control Module Input Voltage: 100-120/200-240VAC. Frequency: 50-60Hz. Current: 5A MAX. (10A for EPM-221) Circuit Breaker: UL489, 5A. (10A for EPM-221) ©2023 J.A. Woollam Co. M-2000® Hardware Manual... - Page 177 M-2000® Hardware Manual ©2023 J.A. Woollam Co.
-
Page 178: Surge Suppressor
Surge Suppressor Supplied by manufacturer. Computer Supplied by manufacturer. Monitor Supplied by manufacturer. 13.2 Environmental Operating Range Temperature: 10°C to 35°C Humidity: 20% to 80% (non-condensing) ©2023 J.A. Woollam Co. M-2000® Hardware Manual...
Need help?
Do you have a question about the M-2000 and is the answer not in the manual?
Questions and answers