
Related Manuals for BERNSTEIN DUSCH-WC T640 Pro


Summary of Contents for BERNSTEIN DUSCH-WC T640 Pro
- Page 1 BERNSTEIN DUSCH-WC T640 Pro BERNSTEIN SHOWER-WC T640 Pro GEBRAUCHSANLEITUNG - I / 2023 INSTRUCTION MANUAL - I / 2023...
- Page 2 BERNSTEIN DUSCH-WC T640 Pro HAFTUNGSBEDINGUNGEN Der Lieferant haftet nicht für Schäden aus der Nichtbeachtung der folgenden Bestimmungen: 1. Dieses Produkt ist ein elektrisches Gerät, das mit einem Erdungssystem verbunden werden muss. 2. Körperlich beeinträchtige Menschen oder Menschen ohne notwendige Kenntnisse (oder kleine Kinder) sollten dieses Gerät nicht ohne eine Aufsichtsperson verwenden.
- Page 3 DUSCH-WC T640 Pro LEISTUNGSBESCHREIBUNG Nennspannung 220-240V ~ 50-60Hz Länge des Netzkabels ca. 1500mm Temperaturbereich ca. 35ºС - 42ºС, Ausgangswasser oder die Wassertemperatur ausschalten Reinigungsvorrichtung Nomineller Wasserverbrauch 4.0L / 6.0L Temperatur der Sitzoberfläche Raumtemperatur - ca. 38ºС per Hand Sanftes Schließen der...
- Page 4 BERNSTEIN DUSCH-WC T640 Pro TECHNISCHE ZEICHNUNGEN...
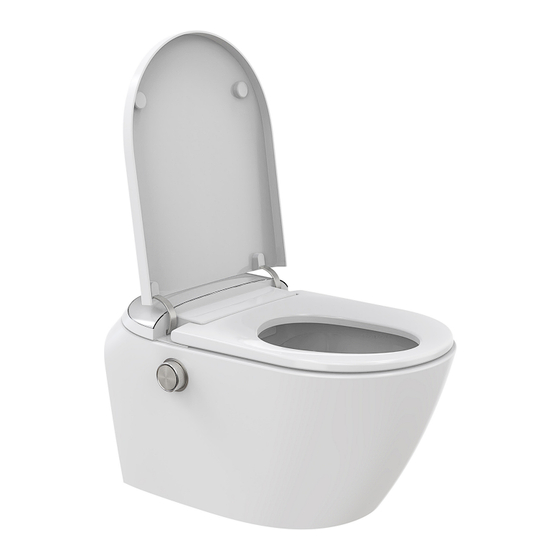
- Page 5 DUSCH-WC T640 Pro ÜBERBLICK Dämpfungsfuss Toilettenabdeckung Hintere Waschöffnung Bidet-Waschöffnungen Sitzinduktionsfenster Sitz Sprüharm Bedienelement Keramik Sensor Erfassungsbereich...
-
Page 6: Benötigtes Werkzeug
BERNSTEIN DUSCH-WC T640 Pro BENÖTIGTES WERKZEUG 10 mm 13 mm EINBAUANLEITUNG 1 1. Bevor Sie das Dusch-WC installieren, sollten Sie sicher gehen, dass das Badezimmer über einen FI-Schutzschalter abgesichert ist. Zudem ist es empfehlenswert, dass Stromanschlüsse mindestens 30 cm von der Mitte der Toilette entfernt sind. Da das Modell der Schutzart IPX4 entspricht, sollten andere Sanitärinstallationen wie Waschbecken oder Badewanne mindestens 60 cm Abstand zum Stromanschluss... - Page 7 DUSCH-WC T640 Pro TEILELISTE Fernbedienungseinheit Sechskantschlüssel Schraubenmutter Erweiterung Schraubensatz Kugelhahn Doppelseitiges Bedienungs- Schallschutz- Schrauben Abdeckungen Dichtungen Wassereinlassrohr anleitung matte EINBAUANLEITUNG 2 2. Platzieren Sie die Schallschutzmatte wie dargestellt auf Ihrer fertigen Wand auf der vorgesehenen Position. Richten Sie die Matte an der Spülöffnung, dem Abwasseranschluss und den vorbereiteten Montagegewinde- stangen des Dusch-WC aus und führen Sie zunächst die Wasserauslassleitung vor die Installation.
- Page 8 BERNSTEIN DUSCH-WC T640 Pro EINBAUANLEITUNG 3 3. Die Rückseite des Dusch-WC´s ist mit der Schallschutzmatte ausgerichtet, und die Wasserauslassleitung wird von der Rückseite in das Dusch-WC eingeführt. Die Spülöffnung und der Abwasseranschluss des Dusch-WC´s sind auf die entsprechende Position der Schallschutzmatte gerichtet. Bewegen Sie die Toilette langsam in Richtung der Wand in Richtung des Pfeils, bis sie sich in der Nähe der Wand befindet.
- Page 9 DUSCH-WC T640 Pro EINBAUANLEITUNG 4 4. Nachdem sich die Toilette in der Nähe der Wand befindet, verwenden Sie eine Wasserwaage, um das Produkt auszurichten und in einer horizontalen Position zu halten. Setzen Sie dann nacheinander einen Kunststoffstopfen und eine Edelstahldichtung auf die feste Schraube und ziehen Sie dann die Mutter fest.
- Page 10 BERNSTEIN DUSCH-WC T640 Pro EINBAUANLEITUNG 6 6. Nachdem die Leitungen angeschlossen wurden, ordnen Sie diese an und stecken Sie sie in den Drahtclip. Dann drücken und halten Sie den Drahtclip in der durch den Pfeil angegebenen Schließrichtung. Wenn Sie den Draht herausnehmen müssen, drücken Sie den Drahtclip in die durch den Pfeil angegebene Öffnungsrichtung.
- Page 11 DUSCH-WC T640 Pro BESCHREIBUNG DER BEDIENKNOPFFUNKTIONEN Rückwärts drehen Drücken Sie den Knopf Nach vorne drehen Keine Zurücksetzen erforderlich, nachdem der Knopf gedreht wurde WC besetzt: (Das Licht ist permanent hell weiß) 1. Drehen Sie den Knopf nach vorne, um die Ladydusche zu aktivieren, und drehen Sie den Knopf nach hinten, um die Gesäßdusche zu aktivieren.
- Page 12 BERNSTEIN DUSCH-WC T640 Pro FERNBEDIENUNGSFUNKTIONEN Massage-Reinigung Entkalkung Sprüharm rückwärts Oszillieren WC-Sitz umklappen Nachtlicht Benutzer 1 WC-Deckel umklappen Geruchsneutralisierung Sprüharm vorwärts Benutzer 2 Stop Gesäßdusche Ladydusche Trocknen Wassertemperatur Sterilisation Eco-Modus Selbstreinigung Sitztemperatur verringern Sitztemperatur erhöhen Codeanpassung: Halten Sie die Tasten „Ladydusche und Trocknen“. Die Lichter auf den Tasten für Gesäßdusche, Ladydusche, Trocknen und Wassertemperatur blinken.
- Page 13 DUSCH-WC T640 Pro ANLEITUNG FERNBEDIENUNG Gesäßdusche: Drücken Sie die Taste „Gesäßdusche“, der Sprüharm kommt heraus und beginnt dann mit der Gesäßdusche. Ladydusche: Drücken Sie die Taste „Ladydusche“, der Sprüharm kommt heraus und beginnt dann mit der Ladydusche. Stopp: Drücken Sie die Taste „Stop“, um die aktuelle Funktion zu stoppen.
- Page 14 BERNSTEIN DUSCH-WC T640 Pro ANLEITUNG FERNBEDIENUNG WC-Deckel umklappen: Drücken Sie die Taste „Deckel umklappen“, um das Öffnen und Schließen des Deckels zu steuern. WC-Sitz umklappen: Drücken Sie die Taste „WC-Sitz umklappen“, um das Öffnen und Schließen des Sitzes zu steuern.
- Page 15 DUSCH-WC T640 Pro TASTENKOMBINATIONEN ● Stop + WC-Deckel umklappen: Drücken Sie 5 Sekunden lang gleichzeitig, um die Funktion „Deckel automatisch schließen“ ein- bzw. auszuschalten, wenn Sie einen „BEEP“-Ton hören, bedeutet dies, dass Sie die Funktion erfolgreich ein- bzw. ausgeschaltet haben.
- Page 16 BERNSTEIN DUSCH-WC T640 Pro ERKLÄRUNG Die Bedienungsanleitung dient nur als Referenz. Diese Anleitung kann abweichende Angaben enthalten. Die beschriebenen Produkte können jederzeit aktualisiert werden. Die Zeichnungen in dieser Anleitung dienen nur zur Darstellung und haben keinen Anspruch auf Aktualität.
- Page 18 BERNSTEIN SHOWER-WC T640 Pro DISCLAIMER The supplier shall not be liable for any damage resulting from failure to comply with the following provisions: 1. This product is an electrical appliance that must be connected to an earthing system. 2. Physically impaired people or people without necessary knowledge (or small children) should not use this appliance without a supervisor.
-
Page 19: Performance Specification
SHOWER-WC T640 Pro PERFORMANCE SPECIFICATION Rated voltage 220-240V ~ 50-60Hz Power cable length About 1500mm Outlet water About 35ºС - 42ºС, temperature range turn off the water temperature Cleaning device Nominal water consumption 4.0L / 6.0L Seat surface temperature Room temperature - ca. 38ºС Gear box Smooth closing methode Remote control... -
Page 20: Technical Drawings
BERNSTEIN SHOWER-WC T640 Pro TECHNICAL DRAWINGS... - Page 21 SHOWER-WC T640 Pro PART NAME Foot pads Toilet cover Rear wash hole Bidet wash holes Seat induction window Seat Spraying arm Knob Ceramik Sensors detection range...
-
Page 22: Required Tools
BERNSTEIN SHOWER-WC T640 Pro REQUIRED TOOLS 10 mm 13 mm INSTALLATION INSTRUCTIONS 1 1. Before installing the shower toilet, you should ensure that the bathroom is protected by a residual current circuit breaker. It is also recommended that power connections are at least 30 cm from the centre of the toilet. As the model complies with protection class IPX4, other sanitary installations such as the washbasin or bathtub should be at least 60 cm away from the power connection. -
Page 23: Spare Parts List
SHOWER-WC T640 Pro SPARE PARTS LIST Remote control assembly Hexagon wrench Fixing pins Expansion screw set Ball valve Double ended Instruction Toilet mat Screw Covers Gaskets Water inlet pipe manual INSTALLATION INSTRUCTIONS 2 2. Place the Toilet mat on your finished wall in the designated position as shown. Align the mat with the flush opening, the waste water connection and the prepared mounting threaded rods of the shower toilet and first run the water outlet pipe in front of the installation. - Page 24 BERNSTEIN SHOWER-WC T640 Pro INSTALLATION INSTRUCTIONS 3 3. The rear of the shower toilet is aligned with the sound insulation mat and the water outlet pipe is inserted into the shower toilet from the rear. The flush opening and the waste water connection of the shower toilet are directed towards the corresponding position of the sound insulation mat.
- Page 25 SHOWER-WC T640 Pro INSTALLATION INSTRUCTIONS 4 4. After the toilet is near the wall, use a spirit level to set up the product and keep it in a horizontal position. Place the plastic plugs and a stainless steel seal on the fixed screw one after the other and then tighten the nut. Then connect the ball valve to the head of the outlet pipe and pass water through to remove any foreign matter.
- Page 26 BERNSTEIN SHOWER-WC T640 Pro INSTALLATION INSTRUCTIONS 6 6. After connecting the button leads, arrange them and insert them into the wire clip. Then press and hold the wire clip in the closing direction indicated by the arrow. If you need to If you need to remove the wire, press the wire clip in the opening direction indicated by the arrow.
- Page 27 SHOWER-WC T640 Pro DESCRIPTION OF THE CONTROL KNOB FUNCTIONS Rotate backward Press the knob Rotate forward No reset required after the knob has been turned In the seated state (The light is permanently bright white) 1. Turn the knob forwards to activate the lady wash function and turn the knob backwards to activate the rear wash function.
-
Page 28: Remote Control Functions
BERNSTEIN SHOWER-WC T640 Pro REMOTE CONTROL FUNCTIONS Massage cleaning Descaling Spray arm backward Oscillation WC seat flipping Night light User 1 WC cover flipping Deodorization Spray arm forward User 2 Stop Rear wash Lady wash Drying Water temperature Sterilisation Eco-Modus... -
Page 29: Remote Control Instructions
SHOWER-WC T640 Pro REMOTE CONTROL INSTRUCTIONS Rear wash: Press the „Rear wash“ button, the spray arm comes out and then starts the rear wash. Lady wash: Press the „Lady wash“ button, the spray arm comes out and then starts the lady wash. Drying: Press the „Drying“... -
Page 30: Key Combinations
BERNSTEIN SHOWER-WC T640 Pro REMOTE CONTROL INSTRUCTIONS Nozzle position adjustment: Press the „Spray arm forward“ or „Spray arm backward“ button on the remote control, the nozzle moves one step forward or backward. Cover flipping: Press the „Cover flipping“ button to control the opening and closing of the cover. - Page 31 SHOWER-WC T640 Pro KEY COMBINATIONS ● Stop + WC cover flipping: Press for 5 secs at the same time to turn on/off “ close the lid automatically” function, when you hear a “BEEP” sound, means you turn it on/off successfully. ●...
- Page 32 BERNSTEIN SHOWER-WC T640 Pro STATEMENT This instructions should only be considered as a standard manual. Modifications applied to updated version of the product might not be mentioned inside this document. In this case, please just use the manual as a reference. The...
Need help?
Do you have a question about the DUSCH-WC T640 Pro and is the answer not in the manual?
Questions and answers