
Related Manuals for Toro 86902


Summary of Contents for Toro 86902
- Page 1 Form No. 3464-309 Rev A Flex-Force Power System ™ 60V MAX Battery Chargers Model No. 86902—Serial No. 324000000 and Up Model No. 86905—Serial No. 324000000 and Up *3464-309* Original Instructions (EN)
- Page 2 Introduction These chargers and battery packs are intended to be used by homeowners and professional operators. These battery packs are designed to be charged only by Flex-Force 60V lithium-ion battery chargers. These chargers are designed to charge only Flex-Force 60V lithium-ion battery packs.
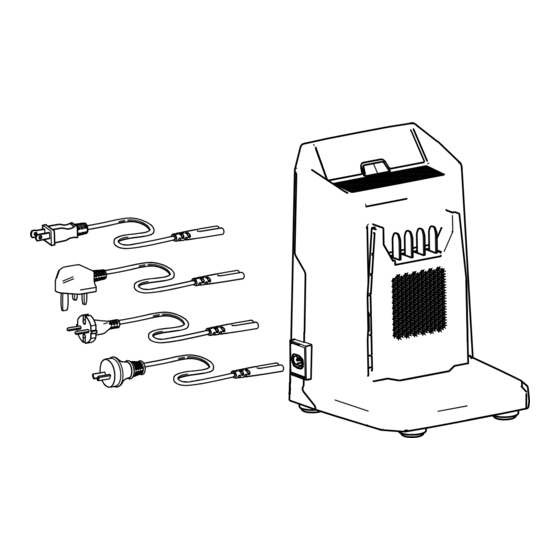
- Page 3 Whenever you need service, genuine parts, or additional information, contact an Authorized Service Dealer or distributor, or the tool manufacturer’s Customer Service, and have the model and serial numbers of your product ready. Figure 1 identifies the location of the model and serial numbers on the product.
-
Page 4: Safety Alert Symbol
Safety-Alert Symbol The safety-alert symbol (Figure 2) shown in this manual and on the machine identifies important safety messages that you must follow to prevent accidents. g000502 Figure 2 Safety-alert symbol The safety-alert symbol appears above information that alerts you to unsafe actions or situations and is followed by the word DANGER, WARNING, or CAUTION. -
Page 5: Important Safety Instructions
Safety IMPORTANT SAFETY INSTRUCTIONS SAVE THESE INSTRUCTIONS—This manual contains important safety and operating instructions for Flex-Force 60V lithium-ion battery packs and Flex-Force 60V lithium-ion battery chargers. Before using the battery charger, read all the instructions and cautionary markings on the battery charger, battery pack, and product using the battery pack. - Page 6 Charge the battery pack in a well-ventilated area only. Follow all charging instructions and do not charge the battery pack outside of the temperature range specified in the instructions. Otherwise, you may damage the battery pack and increase the risk of fire.
-
Page 7: Safety And Instructional Decals
Safety and Instructional Decals Safety decals and instructions are easily visible to the operator and are located near any area of potential danger. Replace any decal that is damaged or missing. decal161-3777 161-3777 1. Do not dispose improperly 3. For indoor use 4. - Page 8 decal161-3784 161-3784 1. The battery pack is charging. 3. The battery pack is over or under the appropriate temperature range. 2. The battery pack is fully charged. 4. Battery pack charging fault...
- Page 9 Setup Mounting the Battery Charger (Optional) If desired, mount the battery charger securely on a wall using the wall-mount key holes on the back of the charger. Mount it indoors (such as a garage or other dry place), near a power outlet, and out of the reach of children.
-
Page 10: Product Overview
Product Overview Specifications Battery Charger Model 86902 86905 Type 60V MAX Lithium-Ion 60V MAX Lithium-Ion Battery Charger Battery Rapid Charger Input 100 to 240V AC ~2.0A 100 to 240V AC ~5.0A, 50/60Hz, 50/60Hz Output 60V DC 2.0A MAX 60V DC 5.5A MAX... -
Page 11: Operation
Operation Charging the Battery Pack Important: The battery pack is not fully charged when you purchase it. Before using the tool for the first time, place the battery pack in the charger and charge it until the LED display indicates the battery pack is fully charged. - Page 12 To remove the battery pack, slide the battery backward out of the charger. Refer to the following table to interpret the LED indicator light on the battery charger. Indicator Indicates light No battery pack inserted Green Battery pack is charging blinking Green Battery pack is charged...
-
Page 13: Maintenance
Maintenance Maintenance and servicing are not required under normal conditions. When you clean the surface of the equipment, wipe it only with a dry cloth. Do not disassemble the equipment; if it is damaged, contact your Authorized Service Dealer or distributor. Storage Important: Store the tool, battery pack, and charger only in... -
Page 14: Troubleshooting
Troubleshooting Perform only the steps described in these instructions. All further inspection, maintenance, and repair work must be performed by an authorized service center or a similarly qualified specialist if you cannot solve the problem yourself. Problem Possible Cause Corrective Action The battery pack loses 1. - Page 15 Problem Possible Cause Corrective Action The LED indicator light 1. There is an error in 1. Remove the battery on the battery charger is the communication pack from the battery blinking red. between the battery charger, unplug the pack and the charger. battery charger from the outlet, and wait 10 seconds.
- Page 16 Notes:...