Table of Contents
Advertisement
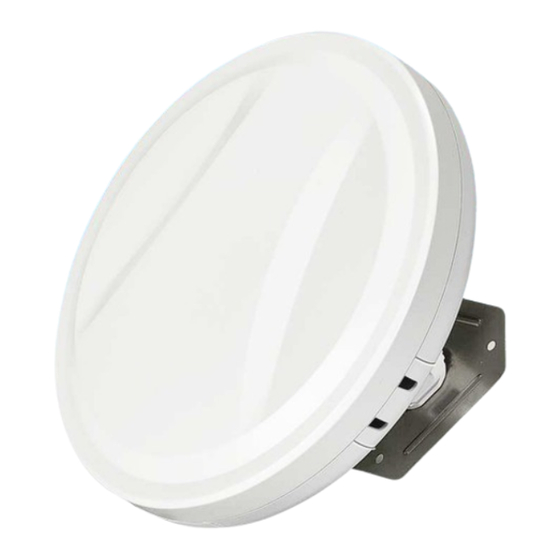
WIRELESS BRIDGE
USER MANUAL
Model: CPE880
Tips:
Thank you for ordering and using Ueevii CPE880 Wireless Bridge, please read
the manual carefully before use. If there are any problems during the use,
please contact us in time.
The installation of this device requires some network knowledge. If you can't
install it, please let us know or contact a professional.
Customer Service Email: support@ueevii.com
Advertisement
Table of Contents

Summary of Contents for UeeVii CPE880
- Page 1 USER MANUAL Model: CPE880 Tips: Thank you for ordering and using Ueevii CPE880 Wireless Bridge, please read the manual carefully before use. If there are any problems during the use, please contact us in time. The installation of this device requires some network knowledge. If you can't install it, please let us know or contact a professional.
-
Page 2: Table Of Contents
Contents 1. Overview 1.1 Introduce 1.2 Highlights 1.3 Specifications 2. Package Included 3. Interface Details 3.1. Button Operation 4. LED Indicator Details 5. Quick Start 5.1 PoE Power Supply 5.2 Point to Point Pairing Step 5.3 Point to Multipoint Pairing Step 6. -
Page 3: Overview
The working data link layer realizes the interconnection of local area networks. The transmission distance can reach up to 5km. CPE880 Video Bridge Transmission usually consists of two devices in AP and Client mode respectively. On the Client-side (Receiving side) CPE connects with IP Camera, at the AP side (Transmitting side) CPE connects with a video recorder. -
Page 4: Specifications
1.3 Specifications Brand Ueevii Model CPE-880 MT7620A+7612E Flash 8MByte DRAM DDR2 128MByte Interface 10/100/1000Mbps LAN*1 & 10/100Mbps LAN*1 11a:54M,48M,36M,24M,18M,12M,9M,6Mbps 11n:7.2M,14.4M,21.7M,28.9M,43.3M,57.8M,65M, Data rate 72.2M,14.4M,28.9M,43.3M,57.8M,86.7M,115.6M, 130M,144.4Mbps 433Mbps Transfer method Direct Sequence Spread Spectrum(DSSS) Modulation OFDM/BPSK/QPSK/CCK/DQPSK/DBPSK Protocol standard IEEE802.11ac IEEE802.11n,IEEE802.11a ,IEEE802.3u Agreement CSMA/CA,TCP/IP,IPX/SPX,NetBEUI,DHCP,NDIS3, NDIS4,NDIS5 4900~6100MHz... -
Page 5: Package Included
USER MANUAL Model: CPE880 Tips: Thank you for ordering and using Ueevii CPE880 Wireless Bridge, please read the manual carefully before use. If there are any problems during the use, please contact us in time. The installation of this device requires some network knowledge. If you can't install it, please let us know or contact a professional. -
Page 6: Button Operation
Power indicator, the LED is on after the power is connected Digital Tube Digital display LED display "H" indicates manual configuration status Digital Tube Digital display LED display "L" and flashing indicates settings status Digital Tube Digital display LED flashing indicates edit the config or connecting support@ueevii.com... -
Page 7: Quick Start
A mode. 5. Quick Start 5.1 PoE Power Supply The CPE880 wireless bridge adopts a PoE power supply, which is easy to install and manage while saving costs. 1.1. According to the requirements, prepare a long enough network cable (Recommended within 20 meters, must Cat 5e or up) to connect the wireless bridge and the PoE power supply. -
Page 8: Point To Multipoint Pairing Step
6. Wait for 2-5 minutes to complete the pairing. When the number of the digital tube is solid and the signal light on the side turns on, it means their pairing is successful; 7. Finally connect other devices(Router, PC, Switch) and install them to the target location. 6. Installation 6.1 Pole mount support@ueevii.com... -
Page 9: Wall-Mounted
6.2 Wall-mounted 6.3 Connect to the device support@ueevii.com... -
Page 10: Wifi Function
1. Choose to pole mount or wall-mounted, adjust the CPE orientation, the bracket is not included in the package. Recommended Ueevii Universal Bracket (ASIN: B09Y56M6Z9). 2. Please, prepare a long enough network cable to connect the PoE adapter and CPE, the network cable is connected to the LAN port of the CPE, and the other end is connected to the PoE port of the PoE adapter. -
Page 11: Case 2: Ptp Extended Of Surveillance Cameras Range
8.2 Case 2: Point-to-point extended of surveillance cameras range 8.3 Case 3: Point-to-multiple point extended surveillance cameras range 8.4 Case 4: Point-to-point extended surveillance cameras range support@ueevii.com... -
Page 12: Advanced Settings
Connection" to right-click to open the network properties. Refer to the picture above to open. Step 3: Find and double-click open the "Internet Protocol Version 4(TCP/IPv4)", choose the " Use the following IP address" and enter IP address, subnet mask, Default gateway, Preferred DDS server. support@ueevii.com... - Page 13 4. On the login screen, the default user name and login password of the wireless bridge is "admin", just entry password login. Note: “admin” is not the password of the WiFi SSID, it is just the password for WEB access. 5. Login successful, go to setting. support@ueevii.com...
- Page 14 6. In the wireless settings, turn off "Hide SSID", then modify the SSID name and WiFi password, and finally click "Apply" to complete the setting. Digital & IP & WiFi Correspondence Chart You can check the SSID and password through this chart. support@ueevii.com...
-
Page 15: Troubleshooting
10. Troubleshooting support@ueevii.com... - Page 16 一, support@ueevii.com...
-
Page 17: Technical Support And Service
11. Technical Support and Service A. Thank you for your order and for using Ueevii Wireless Bridge, please read the manual carefully before use. If there are any problems during the use, please contact us in time; B. The installation of this device requires some network knowledge. If you can't install it, please let us know or contact a professional.


Need help?
Do you have a question about the CPE880 and is the answer not in the manual?
Questions and answers