Advertisement
Quick Links
Advertisement

Related Manuals for EBA 551-06


Summary of Contents for EBA 551-06
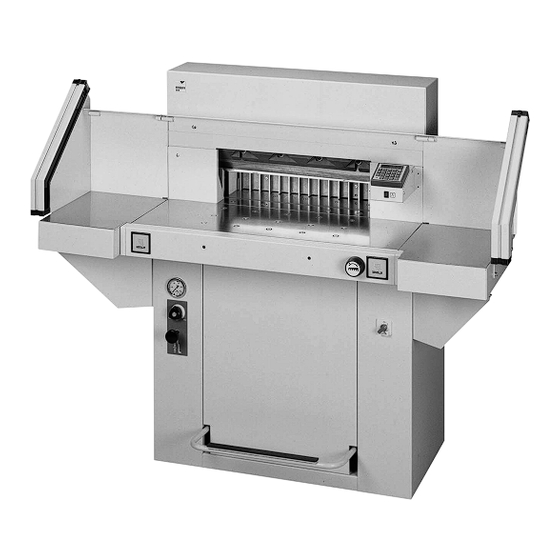
- Page 1 Guillotines GB Operating Instructions EBA 551-06 EBA 551-06 LT...
- Page 2 • Safety precautions • EBA 551-06 • EBA 551-06 LT Bitte lesen Sie vor Inbetriebnahme der Maschine unbedingt diese Betriebsanleitung und beachten Sie die Sicherheitshinweise. Die Betriebsanleitung muss jederzeit verfügbar sein. Please read these operating instructions before putting the machine into operation and observe the safety precautions.
- Page 3 • Safety precautions • Keine Bedienung durch Kinder! GB Children must not operate the machine! Pas d‘utilisation par un enfant! Geen bediening door kinderen! Non lasciare utilizzare il tagliacarte a bambini! No dejar que la utilicen los niños! Installera maskinen utom räckhåll för barn! FIN Asentakaa laite lasten ulottumattomiin ! Installer maskinen utenfor rekkevidde for barn! Dzieciom nie wolno obsługiwać...
- Page 4 • Safety precautions • EBA 551-06 • EBA 551-06 LT Messer nie lose liegen lassen! Messer nur mit Messerwechselvorrichtung oder im Messertransportkasten befördern! (siehe Seite 28 und 30). Warnung! Verletzungsgefahr! GB Never leave the blade unattended! Do not extract or transport the blade without protection! (See page 28 and 30).
- Page 5 • Safety precautions • DK Knivbladet må aldrig efterlades uden opsyn. Forsøg ikke at afmontere eller transportere knivbladet uden beskyttelse! (Se side 28 og 30) FARE! Risiko for legemlig beskadigelse. Nikdy nenechávejte nůž bez krytu. Nikdy nevyjímejte nebo neprepravujte nuz bez ochranného krytu (viz.
- Page 6 • Safety precautions • EBA 551-06 • EBA 551-06 LT Keine harten und splitternden Materialien schneiden! GB Do not cut hard materials or materials which may splinter! La coupe de matériaux trop durs ou risquant des projections est interdite !
- Page 7 Safety precautions • • The machine is designed for cutting stacks of paper to a specified size. This machine is constructed for "one-man operation" only! Warning! Clips or similar damage the cutting blade. Disconnect from the mains before starting any service work or before removing the panels! Replacement of blade and cutting stick may be performed only when the main switch is...
- Page 8 Safety precautions • • EBA 551-06 • EBA 551-06 LT All components which could endanger the operator are covered by a guard (B)! Do not operate the machine without the following safety devices: • Safety beam guard (A) • Panels, tightly screwed (B).
- Page 9 Safety precautions • • When not in use for a longer period switch off. (Main switch to "0"). Danger! Blade must always be covered by the pressing bar. Clamping Blade - 9 -...
- Page 10 Installation • • EBA 551-06 • EBA 551-06 LT The machine is mobile on castors. Align the machine as followes: • Align machine with water level and adjust accordingliy. 4 x screws size 19 (A). • Reference area machine table (B).
- Page 11 Operation • • It is forbidden to operate the machine if the operating and safety instructions have not been understood. Please check the safety devices are functioning and complete before use. • All covers have to be mounted (A). • The release for cutting is allowed only if the two-hand safety device is operated at the same time (C).
- Page 12 Operation • • EBA 551-06 • EBA 551-06 LT Position the main switch to "I" (A). Blade locking facility (B) must be pulled out. button (C). © Machine will Press automatically go to the start position. The machine is now ready for use.
- Page 13 Operation • • Optical cutting line indicator: Optical cutting red line (A), indicates the position of the cut. Blade cuts on the front edge of the light beam. Mechanical cutting line indicator: The clamp (B) can be used as cutting line indicator for cutting.
- Page 14 Operation • • EBA 551-06 • EBA 551-06 LT Clamp plate: A clamp plate (A) is fitted to the machine to prevent pressure marks on sensitive material. To dismantle: • Remove the clamp plate (A) by turning the screwdriver (found in tool box) in the space between the clamp and clamp plate.
- Page 15 Operation • • Setting clamping pressure If necessary, set clamping pressure with setting wheel (A). If a cutting process has been activated, the oil pressure can be seen on the oil pressure indicator (B). The clamp moves automatically when cutting is activated.
- Page 16 Operation • • EBA 551-06 • EBA 551-06 LT Cutting activation Do not reach into the cutting area when the blade is in motion. A cut can only be activated when the specified size is approached. The LED "S" on the display must be deleted.
- Page 17 Operation • • Operating elements - Safety light beam - Safety two-handed control system clamping and cutting - Air table On-Off - Backgauge control - Foot pedal - Main switch - Hand-wheel for backgauge setting - Blade locking - Backgauge - Side lay left and right - Clamp pressure - Clamp pressure adjustment...
- Page 18 Operation • • EBA 551-06 • EBA 551-06 LT Start machine • Main switch to position "I", Pull out blade locking key © backgauge I moves • Press button to the rear and searches for the reference position, wait until a measurement is shown in the display (57 cm or 22,44 inches).
- Page 19 Operation • • Multiple cut There are 2 multiple cuts to choose from. 1.Option: backgauge moves automatically after each cut. 2.Option: backgauge is moved by pressing button after each cut. Multiple cut function (automatic) © the LED "M" • Press and "A"...
- Page 20 Operation • • EBA 551-06 • EBA 551-06 LT Eject function If button is pressed instead of button , after inserting the measurement , the backgauge will advance forwards so that paper can be removed. Finally the backgauge moves to the last setting.
- Page 21 Operation • • Programming This control system enables you to store 99 programs with 99 programmable steps. One step represents one measurement. After entering the program numbers you are able to change between several program steps with the button on the display © the entered dimension is too low.
- Page 22 Operation • • EBA 551-06 • EBA 551-06 LT Eject function program The eject function can be added each time a measurement is entered and ejects before advancing to the next measurement. An eject at the end of a program must be programmed in the first step at the program.
- Page 23 Operation • • Programming of multiple cut dimension • Press © appears on the display. • Enter program number 01 ... Top number on display = program number. Lower number = program step. • Enter the cut size on the display •...
- Page 24 Operation • • EBA 551-06 • EBA 551-06 LT Working with programs © • Press appears on the display • Enter program number 01 ... With the button you are able to change between several program steps. With the backgauge moves to the indicated dimension.
- Page 25 Blade and cutting stick replacement • • If the cutting quality decreases: • Check the cutting depth (see page 35). • Check the cutting stick (see page 29). • Replace or grind the blade (see page 25 - 35). The blade cannot be ground if the blade height is less than 8,2 cm / 3,23 inches.
- Page 26 Blade and cutting stick replacement • • EBA 551-06 • EBA 551-06 LT • Set mains switch (A) to position "I" . • Set clamping oil pressure (B) to min. 50 bar. • Press in blade locking key (C). • Activate cutting © blade remains in lowest position.
- Page 27 Blade and cutting stick replacement • • Remove both outer screws. Mount blade changing tool (A). Tighten screws (B). - 27 -...
- Page 28 Blade and cutting stick replacement • • EBA 551-06 • EBA 551-06 LT Remove remaining two screws (A). Simultaneously slightly loosen both screws (B) and remove blade with blade changing tool. Weight of blade approx. 5 kg. Place the blade into the blade carrier and screw it into place.
- Page 29 Blade and cutting stick replacement • • • Loosen screws (A) (SW4). • Remove cutting stick (B). • If needed the cutting stick can be turned or exchanged. • Slightly tighten screws (A). The cutting stick can be used eight times. •...
- Page 30 Blade and cutting stick replacement • • EBA 551-06 • EBA 551-06 LT Take the exchange blade carefully out of the blade box and screw it to the blade changing tool (D). • Check, if when using the upper threads (B), the blade (E) is protected.
- Page 31 Blade and cutting stick replacement • • Screw in middle screws and tighten. Remove the blade changing tool. Slightly screw in outer screws. - 31 -...
- Page 32 Blade and cutting stick replacement • • EBA 551-06 • EBA 551-06 LT • Press in blade locking key. • Set main switch to position "I". • Activate cutting © blade remains in the lowest position. • Set main switch to position "0".
- Page 33 Blade and cutting stick replacement • • Loosen slightly screws (A) so that the blade slides onto the cutting stick. Push the blade and screw (B) as far as possible to the left or right and then centralize them. © The blade must rest on the cutting stick.
- Page 34 Blade and cutting stick replacement • • EBA 551-06 • EBA 551-06 LT Tighten the remaining 3 screws beginning from the left. Pull out blade locking key © blade moves to the top. Tighten the screw which is visible at the right.
- Page 35 Maintenance and cleaning • • Danger! Blade must always be covered by the pressing bar. Clamping Blade Turn main switch to position "I". Paper cutting test. If the last sheet or several sheets are not completely cut, gradually turn the knob for blade depth adjustment (A) 1/6 turn to the left until the paper is cut along the entire length.
- Page 36 Maintenance and cleaning • • EBA 551-06 • EBA 551-06 LT Maintenance work may only be performed by trained staff. Danger! Disconnect the mains before starting any service work or before removing the cover. Grease and oil the machine according to the lubrication diagram after 1000 operating hours or once a year.
- Page 37 Maintenance and cleaning • • Lubrication schedule Lubricate (1) to (8). Type of oil: SAE10 to SAE50 all types. Grease (9) to (16) (9+10) Blade guidance (11-12) Clamp guidance Type of grease: Roller bearing grease - all types. Oil hinges of the foot clamping device at the front area of the machine room.
- Page 38 Possible malfuntions • • EBA 551-06 • EBA 551-06 LT Machine does not function! Is the machine plugged in? • Main switch to position "I"? (A) • Blade locking facility (B) must be pulled out. • Push in the fuses in the back of the machine F1, F2, F3.
- Page 39 Possible malfuntions • • CUT cannot be made • Measurement has not been reached correctly. LED "S" does not turn off. © Push the button again. • Oil pressure set too low. © Increase oil pressure at rotary control (A). •...
- Page 40 Possible malfuntions • • EBA 551-06 • EBA 551-06 LT Does not cut through the last sheet. © Reset the cutting depth (A) ..or turn / replace the cutting stick (B). (See page 29 "Blade and cutting stick replacement").
- Page 41 • Display (C) is permanently on orange when the sender and/or receiver require cleaning. Clean the glass (D) from the sender and receiver. None of the above mentioned methods helped to solve the problem: Contact Service Team under • www.eba.de © "Service" service@krug-priester.com. - 41 -...
- Page 42 • Accessories • EBA 551-06 • EBA 551-06 LT Recommended accessories: Blade • Nr. 3 244 4 015 Cutting stick (6 pieces) • Nr. 4 244 1 209 Blade changing tool • Nr. 1206 016 Paper knock-up block • Nr. 9000 521 Side tables left and right •...
- Page 43 Technical data • • Technical data: Power supply: 230 V / 50 Hz / 8,5A / 1~ 120 V / 60 Hz / 12A / 1~ Leakage current: < 3,5mA Power cord gauge: min. 1,5mm (230V) Power cord gauge: AWG 12 (20A) (120V) Cutting length: 550 mm Cutting height:...
- Page 44 Technical data • • EBA 551-06 • EBA 551-06 LT - 44 -...
- Page 45 Déclaration de conformité CE - Hiermit erklären wir, daß die Bauart von - Herewith we declare that - Par la présente, nous déclarons que 551-06; 551-06 LT GS ID Nr. 11055101; UL-ID Nr. 10055101 - folgenden einschlägigen Bestimmungen entspricht - complies with the following provisons applying to it...
- Page 46 EBA 551-06 • EBA 551-06 LT Remarks: - 46 -...
- Page 47 Remarks: - 47 -...
- Page 48 EBA • Made in Germany Document Shredders Trimmers and Guillotines • • • • • 72336 Balingen Germany www.eba.de...
Need help?
Do you have a question about the 551-06 and is the answer not in the manual?
Questions and answers
The light beems in our EBA 551-06 have stopped working. They don't light up. What is wrong?
If the lights in an EBA 551-06 are not working, it could be due to an issue with the sender and receiver. During normal operation, LED (A) should illuminate orange, and LED (B) should be green. If the display (C) is permanently orange, the sender and/or receiver may need cleaning. Clean the glass (D) from the sender and receiver. If the problem persists, contact the service team.
This answer is automatically generated