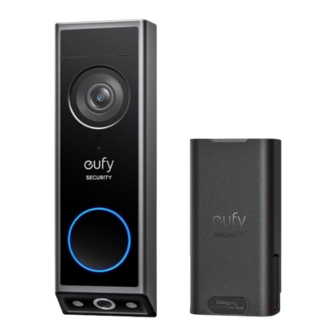
eufy Security E340 Quick Start Manual
Video doorbell
Hide thumbs
Also See for E340:
- Quick start manual (79 pages) ,
- Quick start manual (15 pages) ,
- Quick start manual (13 pages)
Table of Contents
Advertisement
Quick Links
QUICK START GUIDE
Video Doorbell E340
Anker Innovations Limited. All rights reserved. eufy Security and eufy Security
Logo are trademarks of Anker Innovations Limited, registered in the United
States and other countries. All other trademarks are the property of their
respective owners.
51005004091 V01
Advertisement
Table of Contents

Summary of Contents for eufy Security E340
- Page 1 QUICK START GUIDE Video Doorbell E340 Anker Innovations Limited. All rights reserved. eufy Security and eufy Security Logo are trademarks of Anker Innovations Limited, registered in the United States and other countries. All other trademarks are the property of their respective owners.
-
Page 2: Front View
AT A GLANCE Front View ① ② ③ ④ ⑤ ⑥ ⑧ ⑦ ⑨ ① LED Light ② Motion Sensor ③ Primary Camera Lens ④ Microphone ⑤ Ambient Light Sensor ⑥ LED Ring / Doorbell Button ⑦ LED Light ⑧ Secondary Camera Lens ⑨... -
Page 3: Rear View
The video doorbell detects motion at your porch and lets you to answer the door anytime, anywhere. You can store video clips in the built-in storage of your eufy Security HomeBase 2 or S380 HomeBase (sold separately). When someone rings the doorbell, people in the house will be ⑤... -
Page 4: Charging The Battery Pack
CHARGING THE BATTERY SETTING UP THE SYSTEM PACK 1. Download and install the eufy Security app, then sign in 1. Remove the pre-installed battery pack from the battery or create an account. compartment. 2. Fully charge the rechargeable battery pack before installation. - Page 5 DETERMING THE POWER DOORBELL MOUNTING OPTION (Battery Powered) Option 1: Battery Powered Choose a Location If you don't have existing doorbell wiring at your front door, 1. Take the video doorbell to your front door and check the use the included battery. You are free to determine the live view in the app.
-
Page 6: Mount The Bracket
Mount the Bracket Use the provided screws to secure the mounting bracket on the wall. Wooden Wall 15° Mounting Mounting Mounting Bracket Wedge Bracket Without 15º With 15° Mounting Wedge Mounting Wedge 2. Place the screw hole positioning card against the wall to mark the location. -
Page 7: Install The Doorbell
DOORBELL MOUNTING Install the Doorbell Align the doorbell with the bottom of the mounting bracket, (Wire Powered) then press the top of the doorbell into place until it clicks. Check the Doorbell Wires 1. Ring the existing doorbell to check if it is working. If it doesn't ring, your doorbell wires may be defective. - Page 8 Detach the Existing Doorbell Button Choose a Location If you already have existing doorbell wiring: 1. Take the video doorbell to your front door and check the 1. Remove the existing doorbell button with a Phillips-head live view in the app. Choose a location where you can see screwdriver (not provided).
- Page 9 Mount the Bracket Use the provided screws to secure the mounting bracket on the wall. Wooden Wall 15° Mounting Mounting Mounting Bracket Wedge Bracket Without 15º With 15° Mounting Wedge Mounting Wedge 2. Place the screw hole positioning card against the wall to mark the location.
- Page 10 Connect the Wires to the Doorbell Install the Doorbell Connect the wires to the terminals on the back of the Align the doorbell with the bottom of the mounting bracket, doorbell, then tighten the terminal screws. Wire can be then press the top of the doorbell into place until it clicks. connected to any terminal.
- Page 11 SAFETY NOTICE • The suitable temperature for devices and accessories is -20°C to 50°C (Charging FCC Statement temperature is 0°C to 40°C). This device complies with Part 15 of the FCC Rules. Operation is subject • Unless specifically indicated that it is safe to do so in the user guide or to the following two conditions: (1) this device may not cause harmful instruction manual, do not use this device in an environment that exceeds the interference, and (2) this device must accept any interference received,...
-
Page 12: Customer Service
CUSTOMER SERVICE Cet appareil numérique de la classe B est conforme à la norme NMB-003 du Canada. IC RF Statement When using the product, maintain a distance of 20cm from the body to 12-month limited warranty ensure compliance with RF exposure requirements. Lors de l'utilisation du produit, maintenez une distance de 20 cm du corps afin de vous conformer aux exigences en matière d'exposition RF.


Need help?
Do you have a question about the E340 and is the answer not in the manual?
Questions and answers