Table of Contents
Advertisement
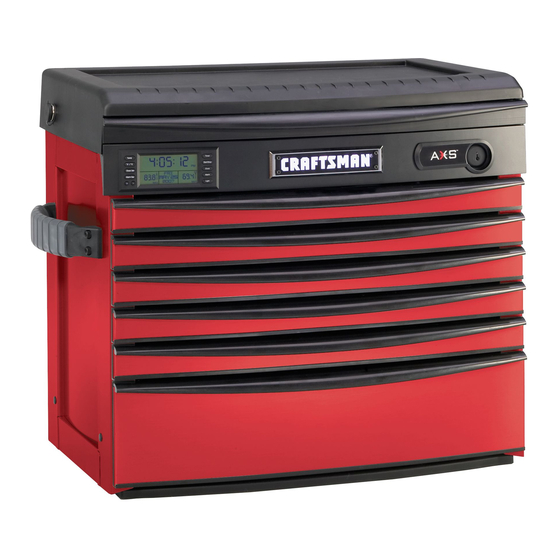
706.596680
706.596690
6-Drawer
Chest
7-Drawer
Roll-A-Way
Owners
Manual
Craftsman 7-Drawer
AXS
TM
Roll-Away
Craftsman
6-Drawer AXS
TM
Chest
Section
1612
1613
1614
1615
1616
1617
1618
1623
1624
1625
Description
Chest Top and Facia
Drawer and Work Surface
Bottom Replacement
Top, Wiring Harness, Harness Grommet
Chest Top without Task Light
Task Light Replacement
Locking
System
Lock Replacement
Striker Replacement
Drawer Front Replacement
Advertisement
Table of Contents

Related Manuals for Craftsman AXS 706.59668


Summary of Contents for Craftsman AXS 706.59668
- Page 1 6-Drawer Chest 706.596680 706.596690 7-Drawer Roll-A-Way Craftsman 7-Drawer Section 1612 1613 1614 1615 1616 1617 1618 1623 1624 1625 Manual Craftsman Roll-Away Description Chest Top and Facia Drawer and Work Surface Bottom Replacement Top, Wiring Harness, Harness Grommet Chest Top without Task Light...
- Page 2 CRAFTSMAN°i CHEST TOP AND FACIA PARTS REPLACEMENT Facia Information Sears, Roebuck and Co., Hoffman Estates, IL 60179, Tools 3/8" Wrench Chest • Disconnect • Remove top back inside Drawer • Push actuator disconnect actuator • Remove place. • Lift top off of unit enough wiring •...
- Page 3 INFORMATION CENTER AND REMOVAL Tools Required: Screwdriver, Crosstip Tape Removal Installation • Disconnect power from the unit. • Plug in information • Position • Remove enough drawers to reach the retaining screw under the information • Tighten center. (See removing and installing drawers.) •...
- Page 4 CONNECTING POWER To reinstall, push the drawer • Ensure that the unit and power cord drawer are clean and dry. • insert the round end of the power cord connector into the jack in the back of the unit. • Plug the cord into an appropriate electrical outlet.
- Page 5 I CRAFTSMAN°I DRAWER AND WORK SURFACE PARTS REPLACEMENT Work Surface Slide Sears, Roebuck and Co., Hoffman Estates, IL 60179, Tools Required: Drill 5/32" Drill bit Rivet gun Removal • Remove unit. (See drawer installation • Carefully drawer surface. • Rotate down and out.
- Page 6 DRAWER AND WORK SURFACE Tools Required: Drill 5/32" Drill bit Rivet gun Crosstip screwdriver Removal Installation • Remove drawer or work surface from • Install unit. (See Drawer and Work surface installation and removal.) • Install • Carefully drill out rivets holding slides Drawers to drawer.
- Page 7 DRAWER AND WORK SURFACE • Unplug INSTALLATION AND REMOVAL • Remove Note: For pull out work surface without • Disconnect task light, follow drawer removal instructions. DRAWER • Remove • Empty the drawer. • Fully extend the drawer. Release Lever Style - Lift or lower (depending on the slide) the release lever on both sides, (this...
- Page 8 I CRAFTSMAN°I BOTTOM REPLACEMENT Tools Required: Socket Wrench 5/16" Socket Removal Installation • Disconnect power from the unit. • Install • Remove contents from drawers. • Position • Carefully lay the chest on its back. Take care to prevent scratches •...
- Page 9 I CRAFTSMAN°I TOP, WIRING HARNESS, HARNESS Parts Replacement Roll-away Wiring harness Sears, Roebuck and Co., Hoffman Estates, IL 60179, Tools 3/8" Wrench WIRING GROMMET GROMMET • Disconnect • Remove enough inside work surface installation removal.) • Remove (See roll-away top removal and installation.)
- Page 10 TOP INSTALLATION AND REMOVAL Tools Required: Screwdriver, Crosstip Roll-away top removal Roll-away • Disconnect power from unit. • Connect • Remove pull out work surface. (See drawer and work surface installation and removal.) • Position • Remove enough drawers to reach the •...
- Page 11 I CRAFTSMAN°I CHEST TOP WITHOUT Tools Required: Screwdriver, Crosstip Chest top removal Chest • Disconnect power from unit. • Position • Remove pull out work surface. (See drawer installation and removal.) • Position • Remove enough drawers to reach the •...
- Page 12 I CRAFTSMAN°I TASK LIGHT REPLACEMENT Tools Required: Screwdriver, Crosstip Removal Installation • Disconnect power from the unit. • Plug in new light. • Fully extend task light assembly. • Position • Make note of light orientation. • Remove (6) mounting screws •...
- Page 13 I CRAFTSMAN°I LOCKING SYSTEM Parts Replacement Actuator Channel Lockbar Sears, Roebuck and Co., Hoffman Estates, IL 60179, ACTUATOR ACTUATOR CHANNEL • Disconnect • Remove only). • Remove away only.) surface • Remove top back inside drawer and removal.) • Push actuator disconnect •...
- Page 14 ACTUATOR BRACKET LOCK INSTALLATION REMOVAL REMOVAL Removal Removal • Disconnect power from unit. • Disconnect • For roll-aways, remove work surface. • For roll-aways, (See drawer and work surface installation and removal. • Remove • Remove enough drawers to reach the •...
- Page 15 CHEST TOP INSTALLATION (With task light) Tools Required: 3/8" Wrench Chest Top Removal Chest • Disconnect power from unit. • Connect • Remove enough drawers to reach the • Position top back inside of the unit. (See • Attach • Make sure the back of the actuator Drawer installation and removal.)
- Page 16 I CRAFTSMAN°I LOCK REPLACEMENT Rekeying MASTERLOCK ® ONE- Removal • Disconnect power from unit. The MASTERLOCK ® ONE_KEyTM • For roll-aways, remove work surface. (See drawer and work surface learning lock system allows the installation and removal chest and cabinet to be keyed alike.
- Page 17 I CRRFT.TMRN°J STRIKER REPLACEMENT Tools Required: Screwdriver Removal Drawer • Remove drawer from unit. • • Turn drawer upside down. • • Depress (2) detents. Push striker in to remove. Depress detents Tab Style - Depress the release tabs on both sides, (this allows the slides to ride over the Installation...
- Page 18 I CRAFTSMAN°I DRAWER FRONT REPLACEMENT Tools Required: Crosstip screwdriver Removal Installation • Position • Remove retaining screw(s). • Slide drawer front assembly indicated to unhook mounting tabs. • Insert • Pull out to remove. • Slide drawer • Install Sears, Roebuck and Co., Hoffman...