Table of Contents
Advertisement
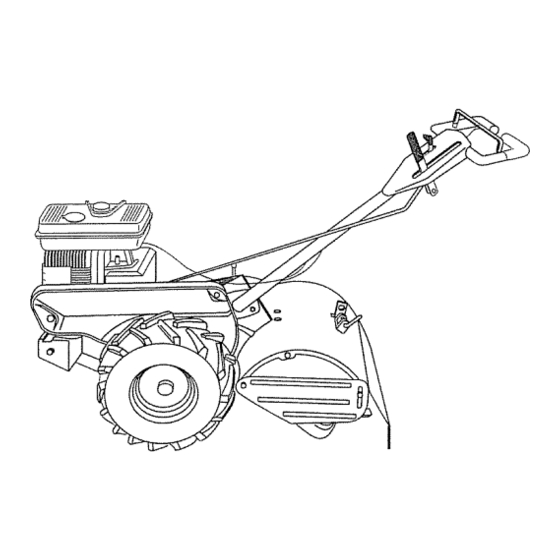
Owner's
Manual
®
5.5 HP
17 INCH TBNEWIDTH
TINE WroTH
COUNTER ROTATING
TILLE
Model No.
917.293301
TINES
o Safety
AssembRy
Operation
Maintenance
o Repair Parts
CAUTnON:
Read and follow all
Safety Rules and Instructions
before operating this equipment
For answers to your questions about
this product, Call:
Io800=659o5917
Sears Craftsman
Help Line
5 am - 5 pm, Mon- Sat
Sears, Roebuck
and Co., Hoffman
Estates, tL 60179
Advertisement
Table of Contents

Related Manuals for Craftsman 917.293301


Summary of Contents for Craftsman 917.293301
- Page 1 Owner's Manual 5.5 HP 17 INCH TBNEWIDTH TINE WroTH COUNTER ROTATING TILLE Model No. 917.293301 o Safety AssembRy Operation Maintenance o Repair Parts CAUTnON: Read and follow all Safety Rules and Instructions before operating this equipment Sears, Roebuck and Co., Hoffman ®...
- Page 2 Maintenance LIMITED TWO YEAR WARRANTY For two (2) years from date of purchase, when this Craftsman Tiller is maintained, cated, and tuned up according to the operating and maintenance owner's manual, Sears will repair free of charge any defect in material or workmanship.
- Page 3 ° Use only attachments and accessories approved by the manufacturer tiller. o Never operate the tiller without good vis- ibility or light° ° Be careful when tilling in hard ground_ The tines may catch in the ground and propel the tiller forward.
- Page 4 These accessories were available when the tiller was purchased. able at most Sears Retail outlets and Service Centers. repair parts for you when you provide the model number of your tiller: ENGINE i sPARK PLUG MUFFLER TILLER PERFORMANCE FURROW OPENER ¢...
- Page 5 Locks (1) Carriage Bolt 3/8-16 (2) Hairpin Clips Extra Shear Pins & Clips at the factory with exception of those parts left To ensure safe and proper operation of your tiller FRONT LEFT behind OPERATOR'S POSITION I=" (1) Center Locknut 3/8-16 UNC x I Gr.
- Page 6 Slide handle assembly into position. o Rotate handle assembly down, rear carriage bolt first, with head of bolt on LH. side of tiller and loosely assem- ble IocknuL Loosen Handle Lock Lever to Move o Insert pivot bolt in front part of plate and tighten.
- Page 7 Tilt tiller forward by lifting handle. Separate cardboard shield, Cables o Rotate tiller handle to the right and pull tiller out of carton. CHECK TiRE PRESSURE The tires on your unit were overinflated at the factory for shipping purposes, Correct...
- Page 8 These symbols may appear on your Tiller or in literature supplied with the product, Learn and understand their meaning. TILLING FQRWIARD KNOW YOUR TILLER READ THIS OWNER'S MANUAL AND SAFETY RULES BEFORE OPERATING TILLER. Compare the illustrations with your tiller to familiarize ous controls and adjustments.
- Page 9 The operationQfany tiller can result in foreign objects thrown which can result in severe eye damage° Always wear safety glasses or eye shields before starting your tiller and while tilling. We recommend a wide vision safety mask over the spectacles...
- Page 10 "B'L Move shield to desired position (both sides). Retighten nuts. TO TRANSPORT ,_CAUTION: Before lifting or transport- ing, allow tiller engine and muffler to cool. Disconnect spark plug wire. Drain gaso- line from fuel tank. AROUND THE YARD • Release the depth stake pin. Move the...
- Page 11 Tilling is digging into, turning over, and breaking up packed soil before planting. Loose, unpacked soil helps root growth° Best tilling depth is 4" to 6". A tiller will also clear the soil of unwanted vegeta- tion. The decomposition etable matter enriches the soil.
- Page 12 (See "FINE REPLACEMENT" Service and Adjustments section of this manual), If the tiller is unusually overloaded or jammed, the shear pins are designed to break before internal damage occurs to the transmission. = If shear pin(s) break, replace only with those shown in the Repair Parts section of this manual.
- Page 13 2 - Service more olten when operating in dirty or dusty conditions 3ENERAL RECOMMENDATIONS Fhe warranty on this tiller does not cover [ems that have been subjected to opera- or abuse or negligence. To receive full ralue from the warranty, the operator must naintain tiller as instructed in this manual.
- Page 14 Change the oil after every 50 hours of operation or at least once a year if the tiller is not used for 50 hours in one year. Check the crankcase oil level before start- ing the engine and after each five (5) hours of continuous use.
- Page 15 "HIGH" and "LOW" positions. o Retighten handle lock lever securely after adjusting_ MUFFLER Do not operate tiller without muffler, Do n( tamper with exhaust system. Damaged mufflers or spark arresters could create a fire hazard. Inspect periodically place if necessary.
- Page 16 When mounting tires, un- less beads are seated, overinflation cause an explosion. o Maintain 20 pounds of tire pressure. tire pressures are not equal, tiller will pull to one side. . Keep tires free of gasoline or oil which can damage rubber.
- Page 17 _CAUTION: Tines are sharp. Wear )loves or other protection when handling rines. _,badly worn tine causes your tiller to work larder and dig more shallow. Most impor- ant, worn tines cannot chop and shred )rganic matter as effectively nor bury it as _eeply as good tines.
- Page 18 ENGBNE Maintenance, repair, or replacement of the emission control devices and systems, which are being done at the customer's expense, may be perforrned by any non- road engine repair establishment vidual. Warranty repairs must be per- formed by an authorized engine manufac- turer's service outlet.
- Page 19 Immediately prepare your tiller for storage at the end of the season or if the unit will not be used for 30 days or more° _,CAUTION: Neverstore the tiller with gasoline in the tank insidea building where fumes may reach an open flame or spark°...
- Page 20 PROBLEM CAUSE Will not start Out of fuel. 2, Engine not "CHOKED" properly. 3. Engine flooded. 4, Dirty air cleaner° 5. Water in fue!. Clogged fuel tank, 7, Loose spark plug wire, 8, Bad spark plug or improper gap, 9, Carburetor out of adjust- ment, Hard to start 1.
- Page 21 1_ Ground too wet, Soil balls up or clumps 1_ Tine control is not engaged. Engine runs but tiller won't move 2. V-belt not correctly adjusted. 3. V-belt is off pulley(s) 1. Tilling too deep° Engine runs but labors when tilling 2.
- Page 22 110741X Handle, Shift 109313X Grommet, Rubber" 110702X Rod, Shift STD533710 *Bolt, Carriage 3/8-16 x 1 G[. 5 Lock, Handle 109229X 917.293301 PART DESCRiPTiON STD541437 *Nut, Centedock 3/8-16 19131611 Washer !3/32 x I x 11 Ga 109228X Lever; Lock, Handle 150258...
- Page 23 Guard, Pinch Point 145216 Spacer, Split 0327 x 042 x 1,688 104214X Nut, Cap 5/16-18 5018J Tire 128952 795R Tire Valve NUMBER 917.293301 < PART DESCRIPTION 126875X Rivet, Drilled STD624003 *Clip, Hairpin 131159X574 Guard, Belt 132801 Belt, V 104679X Pulley, Idler...
- Page 24 TBLLER - - MODEL NUMBER 917.293301 MAINFRAME, RIGHT SIDE DESCRIPTION PART *Nut, Keps 5/16d 8 STD541431 102332)( Bracket, Reinforcement Bolt, Hex 5/16-18 x 1-112 74760524 Counter Weight, RH. 102173X *Washer, Lock 3/8 STD551137 STD541037 *Nut, Hex 3/8-16 STD624003 *Clip, Hairpin...
- Page 25 6803J Bearing, Needle I0211tX Shaft, Reverse Idler STD551143 *Washer,Lock 7116 STD54t143 *Nut, Hex 7/16-20 143009 Baaing, Shaft, Ground Drive NUMBER 917.293301 t06390X Spacer 0765x t02134X Chain #35-50 Pitch t50737 Ground Shaft Assembly 143008 Beadng, Shaft, Ground Drive R.H. 106368X Spacer 0.70 x 1.00x 1_150...
- Page 26 TILLER - - MODEL NUMBER 917.293301 TINE SHIELD PART DESCRIPTION 98O0O129 Nut, Flange 5/16_18 161415X574 Shield, Side, Outer L.H. 8393J Pin, Stake, Depth 12000036 Ring, Klip STD533107 *Bolt, Carriage 5/16-18 x 3/4 Gr 8394J Spring 8392J Bracket, Latch 109230X Spring, Depth Stake 124289X574 Shield, "Rne...
- Page 27 132727 Assembly, Hub and Plate, LHo 73610600 Nut, Hex 3/8-24 STD551137 *Washer, Lock 3/8 74610616 Bolt, Hex 3/8-24 x 1 NUMBER 917.293301 PART DESCRIPTION 4460J "line, Outer, RH. 132728 Assembly, Hub and Plate, R H. 6555J T]ne, inner, R..H.. * STANDARD HARDWARE - - PURCHASE LOCALLY NOTE: Aft component dimensions given in US..
- Page 28 TALLER - - MODEL DECALS NUMBER 917.293301 © DESCRIPTION PART 158096 Decal, Logo 157991 Decal, Logo 157990 Decal,Logo 157984 Decal, Description Decal,Caution, DriveControl 137538 1204.31X Decal, Hand Placement 102180X Decal, Shift Indicator 147592 Decal, Operation and Lubrication 163094 Decal, Depth Stake...
- Page 29 TALLER - - MODEL NUMBER 917.293301 ENGINE, BRIGGS 8=STRATTON - - MODEL NUMBER 134402, TYPE NO. 1120-E1 '_ REQUIRES SPECIAL TOOLS TO INSTALL. SEE REPAIR INSTRUCTION MANUAL. 1036 LABEL KIT EMISSIONS I 1058 OWNER'S MANUA _ i,, ,,,,,,,,, ,H,,,H _184...
- Page 30 TBLLER =- MODEL HU_BER 917.293301 ENGINE, BRSGGS & STRATTON - - MODEL NUMBER 13z_02, TYPE NO. 1120-F.1 _[_34 219 _) REQUIRES SPECIAL TOOLS TO INSTALl. SEE REPAIR INSTRUCTION MANUAL...
- Page 31 TILLER - - MODEL NUMBER ENGINE, BRIGGS & STRATTON - - MODEL NUMBER '134402, TYPE NO. 1120-E1 @ 634 634A ® (_ 634 634A 977 CARBURETOR 9t7.293391 119 _ NlIHlllll lllll l lll .J,iii, 358 GASKET SET 634A...
- Page 32 TLLER - - MODEL NUMBER 917.293301 ENGINE, BRIGGS & STRATTON - - MODEL NUMBER 13_02, TYPE NO. 1120-E1 _ 305...
- Page 33 Rod, Connecting, +020" Undersize Crankpin Bore 225183 Dipper, Connecting Rod 94699 Screw, Connecting Rod 211119 Valve, Exhaust 261044 Valve, Intake NUMBER 917.293301 - - MODEL NUMBER 134402, TYPE NO. 1120-E1 PART NO.NO, DESCRIPTION 260552 Spring, Intake Valve 26478 Spring, Exhaust Valve 222443...
- Page 34 Spring, Torsion 271485 *Seal, Oil Fill 231818 Tube, Breather 492889 Filter,Air 231079 Bushing, Governor Crank 94907 Bolt, Governor Lever Nut, Hex 231978 917.293301 PART NO.NOo DESCRIPTION 93053 Clamp, Hose, Green 93807 Clamp, Hose, Black 692696 Starter, Rewind 93306 Pin, Cotter 495243...
- Page 36 For the repair or replacementparts you need delivered directlyto your home Call 7 am - 7 pm, 7 days a week 1-800=366=PART (1-800-368-7278) Para ordenar piezas con en_rega a domicilio - 1-800-659-7084 For in-house major brand repair service Call 24 hours a day, 7 days a week 1=800o4°REPAUFI (1-800-473-7274) Para pedir servicio de reparacibn...
Need help?
Do you have a question about the 917.293301 and is the answer not in the manual?
Questions and answers