Table of Contents
Advertisement
User Manual of Product 1:
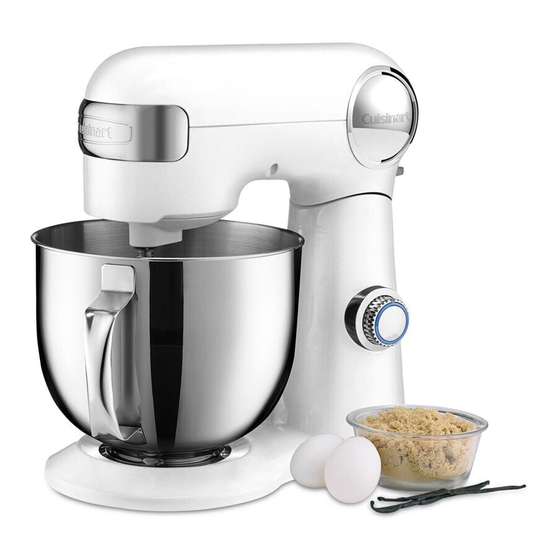
Cuisinart Stand Mixer, 12 Speed, 5.5 Quart Stainless Steel
Bowl, Chef's Whisk, Mixing Paddle, Dough Hook, Splash Guard
w/ Pour Spout, White Linen, SM-50, Manual
User Manual of Product 2:
Cuisinart Bread Maker Machine, Compact and Automatic,
Customizable Settings, Up to 2lb Loaves, CBK-110P1,
Silver,Black
Advertisement
Chapters
Table of Contents
Troubleshooting

Subscribe to Our Youtube Channel
Related Manuals for Cuisinart CBK-110P1


Summary of Contents for Cuisinart CBK-110P1
- Page 1 User Manual of Product 1: Cuisinart Stand Mixer, 12 Speed, 5.5 Quart Stainless Steel Bowl, Chef’s Whisk, Mixing Paddle, Dough Hook, Splash Guard w/ Pour Spout, White Linen, SM-50, Manual User Manual of Product 2: Cuisinart Bread Maker Machine, Compact and Automatic,...
- Page 2 INSTRUCTION AND RECIPE BOOKLET SM-50 Series Precision Master™ Stand Mixer For your safety and continued enjoyment of this product, always read the Instruction Book carefully before using.
-
Page 3: Important Safeguards
5. The use of accessories or attachments not recommended or sold by Cuisinart may cause fire, electric shock or injury. -
Page 4: Table Of Contents
GROUNDING INSTRUCTIONS For your protection, the Cuisinart Stand Mixer is equipped with a 3-conductor cord set that has a ®... -
Page 5: Features And Components
Cuisinart offers optional attachments that can be purchased separately. The selected attach- ment connects to the port on the front of the mixer, so you can make homemade pastas or grind your own meats. You can even turn your mixer into an ice cream maker! The Cuisinart ®... -
Page 6: Assembly Instructions
CLEANING AND 12. Splash Guard with Pour Spout MAINTENANCE Prevents splattering when mixing and adding ingredients. Guides ingredients Unplug your Cuisinart Stand Mixer before ® into the bowl. cleaning. Power Unit ASSEMBLY INSTRUCTIONS Wipe with a damp cloth and dry. -
Page 7: Suggested Speed Control Guide
SUGGESTED SPEED CONTROL GUIDE • “Cutting in” butter to flour (for pastry/ • Sifting dry ingredients pie dough) • Folding in ingredients, such as mix-ins • Mashing potatoes/vegetables • Whipping cream & egg whites (gradually • Whipping cream & egg whites (gradually increasing speed) increasing speed) •... -
Page 8: Maximum Capacities
an authorized service representative. the bag – while the flour is pre-sifted, it has been pressed/compacted to fit into the bag. MAXIMUM CAPACITIES Baked goods made from unstirred flour are likely to be heavy and dry because too much • Yeast doughs (most breads, pizza) – 6 cups flour is used. -
Page 9: Cookie Baking
(105°F–110°F) water and add a pinch of may not rise quite as much. sugar or flour from the recipe. If it does not • Do not use “lite” or tub margarines for bread become foamy/bubbly in 5 to 10 minutes, baking –... -
Page 10: Egg Whites
Speed 12. If egg whites are beaten tablespoons water, and a pinch of cream too rapidly in the beginning, their structure of tartar into the Cuisinart mixing bowl ® will not be as stable and strong, and they will and stir until smooth. - Page 11 Light cream may also be whipped, but will To make stabilized whipped cream, soften powdered gelatin by sprinkling it over water not last as long. Creams that are not ultra- in a measuring cup. Let stand 5 minutes to pasteurized are best for whipping. soften.
- Page 12 (A) to the store where it was purchased or (B) to another retail store that sells Cuisinart products of the same type. The retail store shall then, according to its preference, either repair the product, refer the...
- Page 13 INSTRUCCIONES Y LIBRO DE RECETAS Serie SM-50 Batidora de pie Precision Master ™ Para su seguridad y para disfrutar plenamente de este producto, siempre lea cuidadosamente las instrucciones antes de usarlo.
- Page 14 5. El uso de accesorios o aditamentos no recomendados o vendidos por Cuisinart presenta un riesgo de incendio, electrocución o heridas.
- Page 15 equilátero tiene como fin alertar al usuario de la presencia de voltajes peligrosos no aislados en el interior del aparato, los cuales pueden ser de suficiente magnitud para constituir un riesgo de incendio o electrocución. El signo de exclamación dentro de un triángulo equilátero tiene como fin alertar al usuario de la presencia de instrucciones importantes de operación y mantenimiento (servicio) en la documentación que acompaña al equipo.
- Page 16 Para hacer pan ..........................8 Para hacer pastel .........................9 Para montar claras ..........................9 Para batir crema .........................10 Garantía ............................11 Recetas .............................12 INTRODUCCIÓN ¡Cuisinart lleva el batido a un nuevo nivel! La batidora de pie Cuisinart Precision Master tiene la ® ™...
- Page 17 panel delantero. Un tornillo hace que sea ingredientes hacia el bol. fácil instalar y retirar los aditamentos. 4. Puerto de conexión para accesorios INSTRUCCIONES DE Permite conectar el batidor de alambre, el ENSAMBLAJE batidor plano, el gancho amasador y una cubierta antisalpicaduras.
- Page 18 GUÍA DE SELECCIÓN DE LA VELOCIDAD • Para tamizar ingredientes secos • Para mezclar mantequilla con harina • Para incorporar delicadamente (para preparar masa de hojaldre) ingredientes (por ej. ingredientes secos) • Para hacer puré de papas/vegetales • Para batir crema y montar claras •...
-
Page 19: Resolución De Problemas
LIMPIEZA Y MANTENIMIENTO Si esto ocurriera: • Apague y desconecte el aparato. Siempre apague y desconecte el aparato • Vacíe parcialmente el bol y permita que antes de limpiarlo. el aparato descanse por unos minutos. Unidad principal • Conecte de nuevo el cable y encienda Limpie la carcasa con un paño ligeramente el aparato. -
Page 20: Para Hacer Galletas
el resto de los ingredientes. No caliente la ½ taza (120 ml) de mezcla, son perfectas mantequilla en el microondas; esto puede para las galletas gigantes. Las cucharas de cambiar su estructura y dar una textura helado también son perfectas para llenar diferente al producto final. -
Page 21: Para Hacer Pastel
hasta que estén frescos al tacto, y luego es un buen acondicionador/potenciador desmóldelos y permita que se enfríen por de masa, especialmente para los panes integrales o los panes hechos con harina completo sobre una rejilla. común. Si una receta incluye gluten de trigo, •... -
Page 22: Para Batir Crema
butírica. Cuanta más grasa butírica, más sobre las claras; esto puede desinflarlas. estable la crema batida. La crema líquida para • Al principio, las claras se pondrán batir (“heavy cream”) tiene más grasa butírica espumosas. Después de poco tiempo, que la crema para batir (“whipping cream”), se volverán más firmes y empezarán a por lo tanto es mejor para hacer crema batida. -
Page 23: Garantía
(B) a otra La crema batida estabilizada se conservará tienda que venda productos Cuisinart® de este tipo. La tienda, a por más tiempo en el refrigerador y puede su opción, reparará el producto, referirá el consumidor a un centro de servicio independiente, cambiará... -
Page 24: Recetas
INSTRUCTION BOOKLET BOOK Compact Automatic Bread Maker atic Bread Maker CBK-110 For your safety and continued enjoyment of this product, always read the instruction book carefully before using. - Page 25 IMPORTANT SAFEGUARDS 10. Do not use attachments not recommended by the manufacturer. They may cause fire, electric shock or injury or may damage the unit and void the warranty. When using electrical appliances, especially when children are present, basic safety precautions should always be taken, 11.
- Page 26 CONTENTS 20. Do not operate your appliance in an appliance garage or under a wall cabinet. When storing in an appliance garage, always Important Safeguards ........2 unplug the unit from the electrical outlet.
-
Page 27: Parts And Features
PARTS AND FEATURES 4. Power cord (not shown) 1. Lid 5. Pan hook With viewing window Helpful tool for lifting bread 2. Control panel with LCD display pan handle See details on next page 3. Baking chamber a. Removable bread pan with handle Vertical loaf, nonstick coating b. -
Page 28: Operating Instructions
3 seconds. Delay Start Timer ® The Cuisinart Compact Automatic Bread Maker can be programmed up to 13 hours in advance. For example, you can program your bread maker at 8 p.m. to finish baking at 9 a.m. Be sure to set your timer based on when you would like your bread to be complete. - Page 29 During Bread Making 4. Removing kneading paddle: After mixing/kneading is complete, there will be an audible signal of 10 short beeps before the last Rise The Process cycle, indicating the point at which the mixing/kneading is complete Once you start a program, the unit will automatically take care of each step (the display will show “paddle”...
-
Page 30: Power Failure Backup
To remove bread from the pan: c. For best results, allow the loaf to cool on a wire rack for 20 to 30 minutes prior to slicing. a. Open the lid and use pan hook to lift the bread pan handle. Using oven mitts, remove the bread pan by turning counterclockwise. -
Page 31: Types Of Breads And Programs
TYPES OF BREADS AND PROGRAMS 8. Dough – There are two ways to prepare dough in the bread maker if you wish to bake it in a conventional oven. One way is by using our 1. White – The White program uses primarily all-purpose or bread flour. Dough program. -
Page 32: Programs And Timing
PROGRAMS AND TIMING For each program, there are two times listed under ADD-INS and under REMOVE PADDLE. The Displayed Time is what you will see in the countdown timer window. The Elapsed Time under ADD-INS and REMOVE PADDLE is the number of minutes that have passed since you pressed start. Elapsed Times are listed to let you know when you should return. - Page 33 5. SWEET Color: 9. JAM Size: Total Add-Ins Remove Paddle Total Time: Time: Displayed Time Elapsed Time Displayed Time Elapsed Time 1:20 1-lb. 3:15 2:45 30 mins 2:05 1 hr 10 mins 1½-lb. 3:20 2:50 30 mins 2:10 1 hr 10 mins 10.
-
Page 34: Measuring Ingredients
MEASURING INGREDIENTS Important Note: The MOST important rule of making bread: Yeast/Baking Powder or Baking Soda Use exact measurements. This is the key to successful bread baking. Dry Ingredients When measuring wet ingredients, use only liquid measuring cups with the Water or Liquids cups/ounces marked clearly on the side. -
Page 35: Cleaning And Care
CLEANING AND CARE TIPS AND HINTS Caution: Unplug machine before cleaning. Do not put the bread maker Important: Use top-quality ingredients to make your bread-maker breads. in water or in a dishwasher. Do not use scrubbing brushes or chemical Temperature of ingredients is important in bread-machine baking. Ideal cleansers, as these will damage the machine. -
Page 36: Bread Maker Pantry/Gluten-Free Ingredients
BREAD MAKER PANTRY Amounts/Sizes/Ingredients To be able to prepare breads quickly and easily in your Cuisinart ® For white breads and any recipe calling for a white flour, the best flour to use Compact Automatic Bread Maker, we suggest keeping some basics on hand. - Page 37 more whole-grain and gluten-free flours are best kept in the freezer (in airtight Eggs – Add taste, richness and color to breads. They act as emulsifiers bags/containers). Always mark the date on the bag/container so you can and aid in keeping breads fresh and moist. They also work as a leavener keep track.
- Page 38 to prevent from turning rancid. Bring to room temperature before using for Cornstarch – Cornstarch is a way to add structure and stability to a gluten- bread machine recipes. free bread that is otherwise provided by gluten. Be sure not to go overboard, or your finished bread will have a very starchy and unpleasant flavor.
- Page 39 smooth, sandy texture. This flour is high in protein, 7.5%, so it is a good base for gluten-free baking. White Rice Flour – Milled from polished white rice (where the bran and germ have been removed), white rice flour is considered to be very versatile in gluten-free baking because it has a rather mild, undetectable flavor.
-
Page 40: Troubleshooting
TROUBLESHOOTING Question Answer Why did my dough/bread not There are a number of factors that could result in a short rise. Be sure that the yeast is fresh and that all ingredients are room rise well? temperature (75ºF to 90°F). If the liquids are too warm or too cold, they will not activate the yeast properly. Be sure the ingredients are put into the baking pan in the correct order. -
Page 41: Warranty
Please Bread Maker will be free of defects in materials and workmanship under normal pay by check or money order made payable to Cuisinart. NOTE: For added home use for 3 years from the date of original purchase.
Need help?
Do you have a question about the CBK-110P1 and is the answer not in the manual?
Questions and answers