Table of Contents
Advertisement
Quick Links
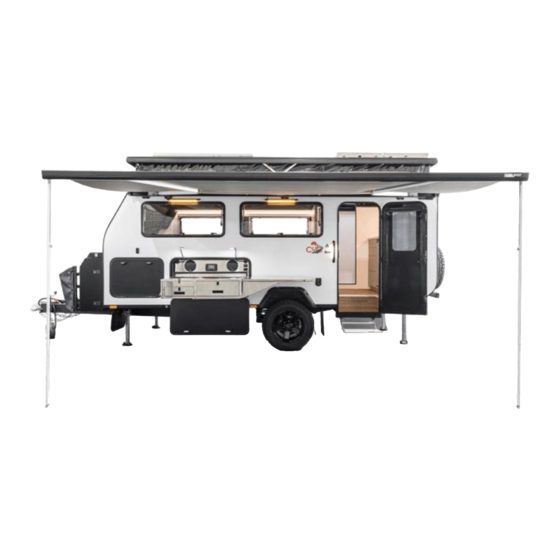
H16 OWNER'S MANUAL
Congratulations on your purchase of the Cub H16! This manual serves as a brief introduction to
help you make the most of your H16 experience. Please refer to manufacturer manuals where
possible for detailed instructions, maintenance, and safe use of appliances and fittings.
PLEASE READ AND COMPREHEND these instructions before using your H16 for the first time.
TAKE THE TIME TO GET TO KNOW YOUR H16 and become familiar with all standard fittings and
options on the caravan.
IF IN DOUBT about anything relating to your H16, please feel free to call your local CUB dealer or
our Head office for advice.
Join our Facebook Group https://www.facebook.com/groups/320243716415/
Check out handy tips on YouTube https://www.youtube.com/user/cubcampers
© CUB CAMPERS • H16 OWNER'S MANUAL • REVISION 1 – 31/10/2023
(02) 88388600
cubcampers.com.au
PAGE 1 of 53
Advertisement
Table of Contents

Related Manuals for Cub H16


Summary of Contents for Cub H16
- Page 1 TAKE THE TIME TO GET TO KNOW YOUR H16 and become familiar with all standard fittings and options on the caravan. IF IN DOUBT about anything relating to your H16, please feel free to call your local CUB dealer or our Head office for advice. Join our Facebook Group https://www.facebook.com/groups/320243716415/ Check out handy tips on YouTube https://www.youtube.com/user/cubcampers...
-
Page 2: Table Of Contents
30. JACKING THE CARAVAN ..........................47 31. FIBREGLASS CARE ............................. 47 32. WHEEL CARE ............................. 48 33. SERVICING ..............................48 34. KEYS, REMOTES & ACCESSORIES ....................... 49 © CUB CAMPERS • H16 OWNER’S MANUAL • REVISION 1 – 31/10/2023 PAGE 2 of 53... -
Page 3: Caravan Travel Check List
The electric brakes and brake lights of the caravan should activate. o Make sure RedVision system is turned off. © CUB CAMPERS • H16 OWNER’S MANUAL • REVISION 1 – 31/10/2023 PAGE 3 of 53... -
Page 4: Packing The H16
• It is illegal to ride in a caravan when it is being towed. 2. PACKING THE H16 The CUB H16 features a design style where most of the storage space is located forward of the axle. This aspect needs to be carefully considered when packing the H16 for travel to ensure that the maximum weight applied to the towbar of the tow vehicle is not exceeded. - Page 5 Ultimately, it is the responsibility of the user to ensure that the caravan is used for its intended purpose and that it is never over-loaded. © CUB CAMPERS • H16 OWNER’S MANUAL • REVISION 1 – 31/10/2023 PAGE 5 of 53...
- Page 6 It is important to note that options added to your caravan at the time of purchase or aftermarket will affect these weights – therefore this illustration is a guide only and is shown with several optional upgrades. © CUB CAMPERS • H16 OWNER’S MANUAL • REVISION 1 – 31/10/2023 PAGE 6 of 53...
-
Page 7: Safety
Fire Extinguisher Click for Fire Extinguisher User Manual The H16 is equipped with a 1kg ABE Dry Powder Fire Extinguisher FF1010 with a 1A20BE fire rating. The fire extinguisher has a discharge range of 3-4mt and is rechargeable. It has a pressure gauge to indicate internal pressure. - Page 8 • If you are fighting the fire and the fire begins to spread or burn out of control, GET OUT IMMEDIATELY! Do not fight the fire yourself. © CUB CAMPERS • H16 OWNER’S MANUAL • REVISION 1 – 31/10/2023 PAGE 8 of 53...
- Page 9 Smoke Alarm Click for QUELL Smoke Alarm User Manual The H16 is fitted with a Quell Smoke Alarm with Hush function. Refer to Smoke Alarm user manual for information about operation and maintenance. WARNING: TEST YOUR SMOKE ALARM OPERATION AFTER CARAVAN OR MOBILE HOME...
- Page 10 It is recommended that the electrical systems are periodically re-tested. (In most states of Australia, this may be carried out by a competent person in accordance with AS/NZS 3019) © CUB CAMPERS • H16 OWNER’S MANUAL • REVISION 1 – 31/10/2023 PAGE 10 of 53...
-
Page 11: Coupling
Click for Off-Road Ball Coupling Attachment Youtube Video Click for Off-Road Ball Coupling User Manual The H16 is fitted with a 50mm ALKO Off-Road Coupling. It is ADR Rated to 3500 kg. For more information and maintenance instructions, refer to the ALKO Coupling User Manual. - Page 12 Click for CRUISEMASTER Coupling User Manual Click for CRUISEMASTER D035 Coupling Hitching Youtube Video If optioned, the H16 may be fitted with a CruiseMaster DO35 Off-Road Coupling. It is ADR Rated to 3500 kg. For more information and maintenance instructions, refer to the CruiseMaster D035 Coupling User Manual.
-
Page 13: Breakaway System
6. 12-PIN TRAILER PLUG The H16 requires a 12-pin plug to connect to the tow vehicle. You will need to ensure the tow vehicle has the appropriate 12 pin socket connection as below. Power to Pin 2 is required for the reverse camera to work. -
Page 14: Rear Vision Camera (If Optioned)
Click for FURRION Rear Vision Camera User Manual If optioned the H16 will be fitted with a Furrion Vision S Rear-Vision Camera & 5" Display Kit. Power to pin 2 on the 12 pin plug is required for the camera to work. For safety information and manufacturer user instructions please refer to Rear Vision Camera User Manual. -
Page 15: Setting Up
8. SETTING UP 1. Unhitch the H16 from the tow-vehicle and use the Jockey Wheel to set the caravan parallel with the ground. NOTE: This can be simply done by marking the height of the rear of the caravan floor against your body and then leveling the front of the caravan using the jockey wheel, to the same height on your body. -
Page 16: External Kitchen
8. Your kitchen is now ready to use. When finished, make sure to turn off the gas at the bottle, and to disconnect the bayonet before sliding the kitchen back into the caravan. © CUB CAMPERS • H16 OWNER’S MANUAL • REVISION 1 – 31/10/2023 PAGE 16 of 53... -
Page 17: Awning
11. AWNING Click for FIAMMA Awning User Manual The H16 is fitted with a Fiamma F45 S Awning. For more information on the operation and maintenance of this awning please read carefully and refer to the respective Fiamma Owner’s Manuals provided. The handle and tension rafter are stored in the front lower locker area. - Page 18 Lower the leg as shown in the figure. After unrolling the awning completely, adjust the legs to the chosen height. © CUB CAMPERS • H16 OWNER’S MANUAL • REVISION 1 – 31/10/2023 PAGE 18 of 53...
- Page 19 Fiamma Tie-Down Kit strap. 7. If you want to fasten the support legs to the vehicle, put the terminals into the wall brackets. © CUB CAMPERS • H16 OWNER’S MANUAL • REVISION 1 – 31/10/2023 PAGE 19 of 53...
- Page 20 9. A. The awning is open. B. The awning is about to close. The red flag is visible. C. When the awning is completely closed, the red flag is no longer visible. The awning is now properly closed. © CUB CAMPERS • H16 OWNER’S MANUAL • REVISION 1 – 31/10/2023 PAGE 20 of 53...
-
Page 21: Redarc Redvision
There is also a RedVision App that replicates MOST of the display and switching features of the Display available in the Google Play Store or the Apple App Store. Once your H16 is all set up, go to the Red Vision control panel, and push the Power Button to power up your caravan. -
Page 22: Battery Management
Click for REDARC Battery Management System User Manual Click for REDARD BCDC Battery Charger User Manual The H16 is fitted with a REDARC BMS30 battery charger as standard. For safety information and manufacturer instructions for these Battery Chargers please refer to the respective REDARC BMS Owner’s Manuals provided. -
Page 23: Bcdc1240D (If Optioned)
This is fine and normal when adding a second charger to the BMS30, as the H16 has in its setup. This is the extra charge coming from the second charger. In the below image, “60A in” is coming in through the load, which would normally read “5A out”... -
Page 24: Connection To 240 Volt Electricity
CONNECTION TO 240 VOLT ELECTRICITY A 15A extension lead is required to connect the H16 to a 240V power supply e.g., at your home or at a caravan park. Plug the 15A lead into the 240V Power Inlet located on the outside driver’s side wall of the caravan. -
Page 25: Electrical Hatch
14. ELECTRICAL HATCH All images provided are a guide only – your individual van may have a different configuration or equipment. © CUB CAMPERS • H16 OWNER’S MANUAL • REVISION 1 – 31/10/2023 PAGE 25 of 53... -
Page 26: Inverter (If Optioned)
15. INVERTER (IF OPTIONED) Click for REDARC Inverter User Manual The H16 has an option to include a REDARC 3000W Sine Wave inverter. For information on the correct operation of this please refer to the REDARC Inverter User Manual provided. -
Page 27: 240V Outlets
16. 12V & 240V OUTLETS Throughout the H16 there are various 12V and 240V outlets. Their locations are listed below. 12V Outlets • 2 x reading lamps with USB ports at the bed head • Above the outside slide out kitchen •... -
Page 28: Water Tanks
17. WATER TANKS The H16 is fitted with a 100L water tank, and one 100L grey water tank. • All water inlets are in a steel box behind the driver side wheel, featuring domestic hose fitting inlets for each tank and a mains water inlet for connecting to town water with a hose. -
Page 29: Hot Water System
18. HOT WATER SYSTEM Click for Webasto EVO5 User Manual The H16 is fitted with a Webasto Diesel EVO5 Hydronic water and air heating system. For information on the correct operation of this product please refer to the respective Webasto Owner’s Manual provided. - Page 30 Turn the cabin heater onto high fan speed and the cabin heater will produce 60°C of hot air from the heat of the coolant. © CUB CAMPERS • H16 OWNER’S MANUAL • REVISION 1 – 31/10/2023 PAGE 30 of 53...
- Page 31 Portal. If you do not have access, email the following to: svc-WTAUtechnical@webasto.com PRODUCT NAME & SERIAL NUMBER VEHICLE MAKE, MODEL, VIN, YEAR & REGISTRATION NUMBER END USER or MANUFACTURER SUBURB/TOWN & STATE/TERRITORY © CUB CAMPERS • H16 OWNER’S MANUAL • REVISION 1 – 31/10/2023 PAGE 31 of 53...
-
Page 32: Toilet
19. TOILET Click for THETFORD Toilet User Manual The H16 ensuite includes a Thetford Cassette Toilet. Your H16 will be fitted with either a manual filled tank or a plumbed in tank. A manual filled model will have clear gauge visible on the RHS of the external compartment. - Page 33 Some H16 Caravans will be fitted with a manual fill tank (see below for instructions) If your H16 is a manual fill, it will have a clear water level gauge next to the tank. Models fitted with an auto fill tank are plumbed into the water tank.
- Page 34 2 litres, which is about 3 uses. It is advisable to empty the waste tank earlier. Do not allow the waste tank to become too full. © CUB CAMPERS • H16 OWNER’S MANUAL • REVISION 1 – 31/10/2023 PAGE 34 of 53...
- Page 35 19. If required, make the toilet ready for use once again (steps 8 and 9). Return the water filling extension to its original position on the waste tank. Slide the waste tank into the toilet and close the access door. © CUB CAMPERS • H16 OWNER’S MANUAL • REVISION 1 – 31/10/2023 PAGE 35 of 53...
- Page 36 To keep your flush water fresh and to prevent deposits from forming in your toilet bowl, add a correct dosage of Aqua Rinse in your flush-water tank, if present, in your toilet. © CUB CAMPERS • H16 OWNER’S MANUAL • REVISION 1 – 31/10/2023 PAGE 36 of 53...
- Page 37 For environmental reasons, the use of antifreeze such as that used in a car radiator is not advised. TOILET CARE PRODUCTS For more information or to purchase Thetford toilet care products for use with your Thetford cassette toilet, visit https://www.thetford.com.au/shop/ © CUB CAMPERS • H16 OWNER’S MANUAL • REVISION 1 – 31/10/2023 PAGE 37 of 53...
-
Page 38: Air Conditioning (If Optioned)
Click for WEBASTO Air Conditioner User Manual If optioned the H16 has a roof mounted Webasto Cool Top Trail 24 air conditioner, it requires 240V mains power or the optional 240V inverter to function. The power point for the air conditioner if optioned is in the wardrobe next to the fridge. - Page 39 Operation at the air distributor Filter maintenance © CUB CAMPERS • H16 OWNER’S MANUAL • REVISION 1 – 31/10/2023 PAGE 39 of 53...
-
Page 40: Windows
Note above illustration shows blind at the top however, your van will be installed with the blind drawn from the bottom up to give privacy. © CUB CAMPERS • H16 OWNER’S MANUAL • REVISION 1 – 31/10/2023 PAGE 40 of 53... -
Page 41: Ensuite Roof Vent
23. ENTRY DOOR The H16 Camec entry door with flyscreen is fitted with a lower vent for cross flow ventilation. NOTE: Do NOT obstruct the vent it is required to allow air flow in the cabin where a gas installation is fitted. -
Page 42: Fusion Stereo
Click for FUSION Stereo User Manual The H16 is equipped with a MS-RA210 Fusion Head Unit located inside the door on the side of the lounge above the switches. It comes with four speakers, two are located above the bed and two located outside above the slide out kitchen. - Page 43 Press and hold to advance to the next DAB ensemble. © CUB CAMPERS • H16 OWNER’S MANUAL • REVISION 1 – 2/11/2023 PAGE 43 of 53...
-
Page 44: Fridge
The inside kitchen includes a DOMETIC CoolMatic CRX 110 Compressor Fridge with 109L Capacity. For more detailed user and safety information please read carefully and refer to the DOMETIC Compressor Fridge User Manual provided. Control Panel © CUB CAMPERS • H16 OWNER’S MANUAL • REVISION 1 – 2/11/2023 PAGE 44 of 53... -
Page 45: Tv (If Optioned)
27. TV (IF OPTIONED) Click for ENGLAON LED TV User Manual The H16 has an option for a Englaon 27” LED TV DVD combo. Please refer to Englaon TV User Manual for correct operation and safety information. © CUB CAMPERS • H16 OWNER’S MANUAL • REVISION 1 – 2/11/2023... -
Page 46: Wi-Fi Set Up (If Optioned)
28. WI-FI SET UP (IF OPTIONED) Click for NCE Wi-Fi Modem User Manual The H16 comes with an option to include a NCE 4GX Mobile Router/Wi-Fi Modem. It features wireless internet access for multiple devices and is designed for outdoor mobile use. For more instructions, please refer to the NCE Router User Manual. -
Page 47: Jacking The Caravan
Never wax your gelcoat surface in direct sunlight. For more information, refer to the document “Owners Guide to Gelcoat Care and Maintenance” © CUB CAMPERS • H16 OWNER’S MANUAL • REVISION 1 – 2/11/2023 PAGE 47 of 53... -
Page 48: Wheel Care
4. Never use hot steam cleaning, as this can also damage the finish on your wheels. 32. SERVICING WARNING: CHECK THE TIGHTNESS OF YOUR H16’S WHEEL NUTS, tyre pressures, wheel- bearing temperatures, and brake adjustment after having travelled 100km, 1,000km and approximately every 5,000km thereafter. -
Page 49: Keys, Remotes & Accessories
(Keys are located inside kitchen drawer) External Shower Door Locker Doors Toilet Door Entry Door Front Boot Fiamma Awning – Peg Kit (located inside kitchen drawer) © CUB CAMPERS • H16 OWNER’S MANUAL • REVISION 1 – 2/11/2023 PAGE 49 of 53... - Page 50 1500kg Ultra Lo Jack & Bag (located under lounge seat base) Fiamma Awning Winder, Fiamma Tension Rafter, and AL-KO Winder Handle (Top to Bottom) (located in the front storage locker) © CUB CAMPERS • H16 OWNER’S MANUAL • REVISION 1 – 2/11/2023 PAGE 50 of 53...
- Page 51 NCE Mobile Router/Wi-Fi Modem (located inside kitchen drawer) Englaon Smart TV Remote Control (located inside kitchen drawer) Furrion Vision S Rear-Vision Camera 5” Display Kit (located inside kitchen drawer) © CUB CAMPERS • H16 OWNER’S MANUAL • REVISION 1 – 2/11/2023 PAGE 51 of 53...
- Page 52 Ensure tyre lugs are tightened to 145 Nm. If lugs become loose the tyre may detach from the van. © CUB CAMPERS • H16 OWNER’S MANUAL • REVISION 1 – 2/11/2023 PAGE 52 of 53...
- Page 53 18/11/2023. Installations and labelling requirements of earlier models will be compliant with AS/NZS3001.2 (2020) Thank you for purchasing a Cub Caravan. Please drive safely and happy travelling. © CUB CAMPERS • H16 OWNER’S MANUAL • REVISION 1 – 2/11/2023 PAGE 53 of 53...
Need help?
Do you have a question about the H16 and is the answer not in the manual?
Questions and answers
Does the Dometic Fridge, CFX3 75DZ, external dimensions, 89.2Lx 49.5Dx 47.2Hcm fit on the H16 fridge slide? What are the dimensions of the front storage bin, driver's side?