Table of Contents
Advertisement
Quick Links
Advertisement
Table of Contents

Related Manuals for PARADISE GRILLS GSL-32


Summary of Contents for PARADISE GRILLS GSL-32
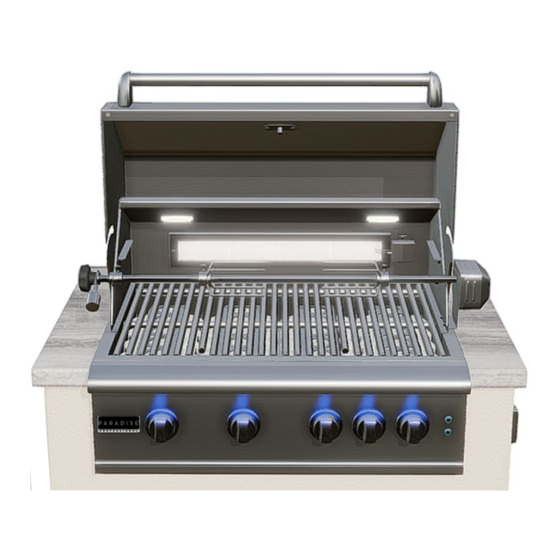
- Page 1 GSL-32 and GS-32 Operator Manual GSL-32 Grill shown...
- Page 2 GSL-32 and GS-32 Operator Manual Version 2, April 2023 The content of this manual is the property of Paradise Grills International, Inc. All rights reserved. Any reproduction, in whole or in part, is strictly prohibited without express written consent of Paradise Grills International, Inc.
-
Page 3: Table Of Contents
Outdoor Rated Electric Cord ..............11 Safety Equipment ..................11 Grill Covers ....................11 Grill Island Preparation Paradise Grills Island Ventilation ................12 Clearances ........................ 13 Custom Island Construction ................... 13 Planning Considerations ................14 Custom Built Island Ventilation ..............15 Custom Built Island Cut-outs .............. - Page 4 Rear Burner Conversion ................46 Parts Diagrams Parts List ........................47 Grill Diagram ......................48 Limited Manufacturer’s Warranty GSL-32” Professional Grill ..................49 GS-32” Premium Grill ....................49 Limited Warranty ...................... 49 Warranty Claim Submission ................... 51 ii • Contents...
-
Page 5: Safety Considerations
EXPLOSION HAZARD – Do not use the grill as storage area for flammable materials. Keep area clear and free from combustible materials, gasoline, and other flammable vapors and liquids. Failure to do so can result in death, explosion, or fire. GSL-32 and GS-32 Operator Manual Safety Considerations • 3... -
Page 6: Gas Safety
The installation must conform with local codes, or, in the absence of local codes, with one of the following, as applicable: • National Fuel Gas Code, ANSI Z223.1/NFPA 54 • Natural Gas and Propane Installation Code, CSA B149.1 Propane Storage and Handling Code, CSA B149.2 • 4 • Safety Considerations GSL-32 and GS-32 Operator Manual... -
Page 7: Tank Requirements
4. Connect the regulator valve a. Hold the regulator so it is aligned with the cylinder valve b. Thread the coupling nut onto the valve and tighten clockwise until there is resistance GSL-32 and GS-32 Operator Manual Safety Considerations • 5... -
Page 8: Leak Testing
With all burners off, open the gas source valve and spray a soap/water solution on all joints. Growing bubbles indicate leaking gas. Correct any leaks immediately. Leak Test on page for more detail. 6 • Safety Considerations GSL-32 and GS-32 Operator Manual... -
Page 9: Transporting And Storing Lp Gas Cylinder
The gas supply must be turned off at the LP Gas supply cylinder and the LP Gas supply cylinder must be disconnected from the regulator when this outdoor cooking gas appliance is not in use GSL-32 and GS-32 Operator Manual Safety Considerations • 7... -
Page 10: Specifications
(See page 49 for details) grates;1 year on all other grates; 1 year on all parts other parts Gas Type Available in LP or NG Gas Type Available in LP or NG 8 • Specifications GSL-32 and GS-32 Operator Manual... -
Page 11: Customer Required Items
You must equip your grill island with an appropriate mounting base or bracket to hold a 20 lb. LP cylinder upright, such as the examples shown in Figure 3: Figure 3 Example LP Cylinder Mounts GSL-32 and GS-32 Operator Manual Specifications • 9... -
Page 12: Gas Regulator
This does not apply to portable propane installations using a 20-pound cylinder. Delivery company employees are not licensed electricians or plumbers and shall NOT install or connect any gas regulators or supply lines, electrical connections or lines, or plumbing. 10 • Specifications GSL-32 and GS-32 Operator Manual... -
Page 13: Outdoor Rated Electric Cord
Outdoor Rated Electric Cord Your Paradise Grills Outdoor Kitchen’s base grill is pre-wired with a Ground Fault Circuit Interrupter (GFCI) electrical outlet installed. This electrical box has a hanging plug pigtail for connection to an existing GFCI electrical outlet for power supply. The customer must supply an outdoor-rated extension cord long enough to reach your chosen electrical outlet. -
Page 14: Grill Island Preparation
Grill Island Preparation Paradise Grills Island Ventilation BBQ Grill Islands and Island Bars manufactured by Paradise Grills are portable and must be adequately vented as shown in Figure 4: a. Use the provided adjustable footers to ensure the island’s entire bottom edge, on all sides, is always at least 1”... -
Page 15: Clearances
Do not install or operate the grill in or on a recreational vehicle, trailer, boat, marine craft, or other moving conveyance. Paradise Grills makes no warranties or representations as to the safe and proper design, construction, ventilation, or installation of a custom-built grill island. -
Page 16: Planning Considerations
(non-closable) ventilation. If you are in doubt, consult your local codes or a licensed contractor for guidance. Measure: Always have equipment measured by a Contractor before building. 14 • Grill Island Preparation GSL-32 and GS-32 Operator Manual... -
Page 17: Custom Built Island Ventilation
Please allow for a tolerance of +/- 1/8"; we recommend having your appliances in hand to measure before making final cutouts in your custom-built grill island Figure 7 Example Island Cut-outs for Paradise Grills Appliances GSL-32 and GS-32 Operator Manual... -
Page 18: Grill Dimensions
Grill Dimensions The GSL-32 and GS-32 grills have the same outer dimensions as shown below: Figure 8 GSL-32 and GS-32 Dimensions 16 • Grill Island Preparation GSL-32 and GS-32 Operator Manual... -
Page 19: Grill Assembly
The grill is very heavy and requires two people to lift. Unpack the Box 1. Open the box and remove the rotisserie spit rod (GSL-32 only) and the five Styrofoam spacers 2. Remove the grill from the box and place on a solid surface 3. -
Page 20: Install The Grill
Replace the burner – position the burner tube into the valve opening (Figure 11, left), then insert the mounting pin into the hole on the far side (Figure 11 right) 18 • Grill Assembly GSL-32 and GS-32 Operator Manual... - Page 21 Figure 12 Grill Rests on Island Frame 5. Carefully snip the zip ties around the electrical cable at the right rear corner of the grill (Figure 13); DO NOT CUT THE WIRE Figure 13 Electrical Cable GSL-32 and GS-32 Operator Manual Grill Assembly • 19...
- Page 22 8. Check to ensure the grill is level and properly supported around the entire outside edge of cut-out 9. If the grill is not level or is unstable, use non-combustible shims under the outside lip to level and stabilize it 20 • Grill Assembly GSL-32 and GS-32 Operator Manual...
-
Page 23: Grill Setup
4. Remove the grate sections from the plastic and set in place on the support rail with the lift hole in front and the 3 bars on the bottom Figure 17 Grill in Place GSL-32 and GS-32 Operator Manual Grill Assembly • 21... - Page 24 Insert the plug until it is fully seated (Figure 20 center) c. Slide the gnarled locking nut to the threads and hand-tighten until it stops; do not force 8. Plug in the LED light power supply and test the lights (GSL-32 only): 22 • Grill Assembly...
-
Page 25: Electrical Precautions
Do not operate any outdoor cooking gas appliance with a damaged cord, plug, or after the appliance • malfunctions or has been damaged in any manner; contact Paradise Grills to discuss service options, or call a licensed professional for inspection and repair •... -
Page 26: Connect Grill To Gas Source
20 lb., 12 1/4" diameter, 18" high cylinder with right-handed connection threads; this is the maximum size LP tank to be used. The cylinder must be marked in accordance with: 24 • Connect Grill to Gas Source GSL-32 and GS-32 Operator Manual... -
Page 27: Connection
2. Connect a suitable natural gas flex connector to the grill regulator Figure 23 Natural Gas Connection 3. Turn on the main gas supply and check all connections for leaks as described in the Leak Test procedure below GSL-32 and GS-32 Operator Manual Connect Grill to Gas Source • 25... -
Page 28: Liquid Petroleum Gas
6. Rotate the regulator coupler nut clockwise until you meet resistance, then tighten another 1/2 to 3/4 turn. Tighten by hand only – do not use any tools 26 • Connect Grill to Gas Source GSL-32 and GS-32 Operator Manual... -
Page 29: Leak Test
On LP systems, turn the cylinder valve knob counterclockwise one turn to open • 3. Spray the soapy water solution on all joints of the gas delivery system (Figure 27) GSL-32 and GS-32 Operator Manual Connect Grill to Gas Source • 27... - Page 30 9. If bubbles continue to appear after trying a few times, turn the gas source OFF and inspect the leaking gas connections to ensure they are tight and not cross-threaded 10. If no bubbles appear after a minute, wipe away the soap solution and proceed 28 • Connect Grill to Gas Source GSL-32 and GS-32 Operator Manual...
-
Page 31: Operating The Grill
Do not store any LP cylinder or tank, that is not connected for use with the grill, in the vicinity of this grill or any other appliance. Never store an LP cylinder or tank indoors, or within the reach of children. GSL-32 and GS-32 Operator Manual Operating the Grill • 29... -
Page 32: Normal Lighting
7. If the burner does not light on the second try, push in the burner knob and rotate to OFF: a. Open all access doors and drawers, and keep the grill hood open b. Wait five minutes until the gas clears before attempting to light it again 30 • Operating the Grill GSL-32 and GS-32 Operator Manual... -
Page 33: Manual Lighting
(Figure 29, right); push in the rear burner control knob, hold for 2-3 seconds, then rotate counterclockwise to HI; ensure the burner ignites and stays lit GSL-32 and GS-32 Operator Manual Operating the Grill • 31... -
Page 34: Using The Grill
Use HIGH burner setting for searing, heavy cooking, preheating, and cleanup • Use other burner settings to create temperatures to suit your personal cooking preferences • Temperatures will vary with outside temperatures and wind conditions 32 • Operating the Grill GSL-32 and GS-32 Operator Manual... -
Page 35: Rear Infrared Burner
Turn on one or two burners to control the temperature, and place the meat over the burners that are off. Indirect heat greatly reduces flare-ups. A drip pan can also be used to collect fat and juices. GSL-32 and GS-32 Operator Manual Operating the Grill • 33... -
Page 36: Rotisserie
2. Use a Phillips head screwdriver to tighten the mounting screws until they are tight (Figure 33 left) 3. Slide the Shaft Collar onto the spit rod as shown below right, with the groove to the outside; do not tighten 34 • Operating the Grill GSL-32 and GS-32 Operator Manual... -
Page 37: Operating Tips
Here are some tips for success to use with any recipe: GSL-32 and GS-32 Operator Manual Operating the Grill • 35... - Page 38 Before cooking, preheat the grill. Use a high temperature on the infrared burner for the initial sear to brown the outside of your food, then reduce heat for slow cooking as recommended in your 36 • Operating the Grill GSL-32 and GS-32 Operator Manual...
- Page 39 Place the rod in a safe place to cool – it is very hot! GSL-32 and GS-32 Operator Manual Operating the Grill • 37...
-
Page 40: Cleaning And Maintenance
Routinely wipe down the exterior and interior of the grill to remove grease and splatters. Use a good stainless steel cleaner to clean and polish the exterior surfaces. Doing so on a regular basis minimizes the 38 • Cleaning and Maintenance GSL-32 and GS-32 Operator Manual... -
Page 41: Corrosive Environmental Conditions
Routinely have a professional barbecue cleaning company detail the grill for best results and • longevity • DO NOT flood a hot cooking surface with cold water – doing so may cause the grill to warp or crack GSL-32 and GS-32 Operator Manual Cleaning and Maintenance • 39... -
Page 42: Cleaning The Drip Tray
If the grill was uncovered during rain, check the drip tray to drain any water from the tray. Preventive Maintenance Replacement parts are available from Paradise Grills International, Inc. Contact us at 800-604-2023 for assistance. At least twice a year conduct the following inspections to ensure safe grill operation:... -
Page 43: Spiders And Other Insects
Check and clean burner/venturi tubes every 6 months for insects and insect nests, and clean as needed. GSL-32 and GS-32 Operator Manual Cleaning and Maintenance • 41... -
Page 44: Troubleshooting
Adjust Air Gap If adjusting the burner orifice doesn’t result in an appropriate flame, adjusting the air flow at the air mixers should help. 1. Remove the burners per the Install the Grill procedure 42 • Troubleshooting GSL-32 and GS-32 Operator Manual... -
Page 45: Confirm Gas Type
3. Inspect the number stamped on the main orifice (circled above right); 1.1 indicates LPO gas, and 1.5 indicates natural gas GSL-32 and GS-32 Operator Manual Troubleshooting • 43... -
Page 46: Convert To Another Gas Type
6. Replace the orifice with the change-out orifice; brass fittings are fragile and very little pressure is needed for a secure connection; follow these precautions: Use a shallow socket to ensure enough threads are exposed to get it started (Figure 39 right) • 44 • Troubleshooting GSL-32 and GS-32 Operator Manual... - Page 47 Pull off the knob and adjust the setscrew shown in Figure 43 until the flame is 1/2" to 1” high c. Align the knob opening with the shaft and press the knob back into position GSL-32 and GS-32 Operator Manual Troubleshooting • 45...
-
Page 48: Rear Burner Conversion
Natural gas orifice size – 1.1 mm • LP gas orifice size – 1.0 mm 4. Complete orifice leak check after gas is supplied 5. Close the access panel; install and tighten all 4 screws 46 • Troubleshooting GSL-32 and GS-32 Operator Manual... -
Page 49: Parts Diagrams
GSL-32-025/GS-32-025 MAIN BURNER VALVE GSL-32-026/GS-32-026 GAS MANIFOLD ASM GSL-32-027/GS-32-027 NG REGULATOR ROTISSERIE COMPONENTS: GSL-32-028 MOTOR 1 (opt) GSL-32-029 MOTOR BRACKET 1 (opt) GSL-32-030 SPIT ROD 1 (opt) GSL-32-031 FORK 2 (opt) GSL-32 and GS-32 Operator Manual Parts Diagrams • 47... -
Page 50: Grill Diagram
GSL-32-032 THUMBSCREW 3 (opt) GSL-32-033 SHAFT COLLAR 1 (opt) GSL-32-034 KEY WASHER 1 (opt) GSL-32-035 BLACK PHENOLIC HANDLE 1 (opt) GSL-32-036 COUNTER BALANCE 1 (opt) Grill Diagram 48 • Parts Diagrams GSL-32 and GS-32 Operator Manual... -
Page 51: Limited Manufacturer's Warranty
“GSL Limited Warranty”) GS-32” Premium Grill PGI warrants the GSL-32” PREMIUM GRILL from the later of the date of purchase or delivery as follows: five (5) years on structural integrity of stainless steel housing to be free from original manufacturing defects;... - Page 52 File your written claim for damages immediately with the delivery company, regardless of the extent of damage. PGI and Paradise Grills Direct, Inc. (collectively, “Paradise Grills”) shall not be liable for any damage that occurs during shipment. If damages are unnoticed until the grill is unpacked, immediately notify the delivery company and file a written concealed damage claim with them.
-
Page 53: Warranty Claim Submission
No oral or written representation or commitment given by anyone, including but not limited to, an employee, representative, agent or affiliate of Paradise Grills shall in any way create a warranty (express, implied or otherwise) or in any way increase the scope of this express Limited Warranty. If there is any inconsistency between this Limited Warranty and any other agreement or statement included with or relating to the grill, the terms of this Limited Warranty shall govern and control.
Need help?
Do you have a question about the GSL-32 and is the answer not in the manual?
Questions and answers