Advertisement
Quick Links
User Manual of Product 1:
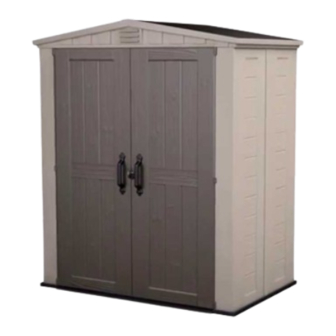
Keter Factor 6x3 Outdoor Storage Shed Kit-Perfect to Store
Patio Furniture, Garden Tools, Bike Accessories, Beach Chairs
and Push Lawn Mower, Taupe & Brown
User Manual of Product 2:
Master Lock Combination Lock, Indoor and Outdoor Padlock,
Resettable Combination Locker Lock
Advertisement

Related Manuals for Keter Factor 6x3


Summary of Contents for Keter Factor 6x3
- Page 1 User Manual of Product 1: Keter Factor 6x3 Outdoor Storage Shed Kit-Perfect to Store Patio Furniture, Garden Tools, Bike Accessories, Beach Chairs and Push Lawn Mower, Taupe & Brown User Manual of Product 2: Master Lock Combination Lock, Indoor and Outdoor Padlock,...
-
Page 2: Warranty Activation
| MONTAGE-VOORSCHRIF TEN | ISTRUZIONI D’ASSEMBL AGGIO | INSTRUÇÕES DE MONTAGEM FACTOR 6x3 SKU: 17197903 2 easy steps to use a QR-code: Thank you for your purchase of the Keter shed, 1. Download a FREE QR-Code WARRANTY In order to activate your warranty, please enter reader from your smartphone application site. - Page 4 KLANTENSERVICE | SERVIZIO CLIENTI | ASSISTÊNCIA AO CLIENTE IMPORTANT: For assistance with assembly or to request missing parts, please log onto our web site at www.www.keter.com or contact Customer Service. IMPORTANT: Pour toute assistance lors du montage ou pour obtenir des pièces manquantes, veuillez visiter notre site Internet: www.keter.com ou contacter notre Service Clientèle.
- Page 5 LEVEL THE GROUND | NIVELLEMENT DU SOL | NIVELE EL SUELO | SORGEN SIE FÜR EINE EBENE | GRUNDFLÄCHE MAAK DE GROND WATERPAS | METTERE IL TERRENO A LIVELLO | NIVELAR O SOLO Clear area of stones | Remove all plants, roots and other obstacles | Rake the ground | Make ground level using a long, flat object (e.g. wood beam) Retirez toutes les pierres | Arrachez toutes les plantes, racines et autres obstacles | Ratissez le sol | Aplanissez le sol à...
- Page 6 LEVEL THE GROUND | NIVELLEMENT DU SOL | NIVELE EL SUELO | SORGEN SIE FÜR EINE EBENE | GRUNDFLÄCHE MAAK DE GROND WATERPAS | METTERE IL TERRENO A LIVELLO | NIVELAR O SOLO In order to properly assemble some parts of the shed, it should be kept 27 inches / 70 cm from any fence or wall until fully assembled | Pour monter correctement les parties de l’abri, vous devez garder 27 pouces / 70 cm de distances d›un obstacle ou d’un mur jusqu’à...
- Page 7 CAUTION | AVERTISSEMENT | ADVERTENCIA | WICHTIG | WAARSCHUWING | ATTENZIONE | ATENÇÃO Some parts have steel edges | Please be careful when handling components | Always wear work gloves, eye protection and long sleeveswhen assembling or performing any maintenance on your shed | Do not attempt assembly on days with strong winds or low temperatures. Certaines pièces ont des bords en acier | Soyez prudent en les manipulant | Portez toujours des gants de travail, des lunettes de protection et des vêtements à...
- Page 8 ASSEMBLY REQUIRES TWO PEOPLE | LE MONTAGE DOIT ÊTRE EFFECTUÉ PAR DEUX PERSONNES | SE NECESITAN DOS PERSONAS PARA ARMARLO | ZWEI PERSONEN ZUR MONTAGE NOTWENDIG | MONTAGE VEREIST TWEE PERSONEN | MONTAGGIO RICHIEDE DUE PERSONE | A MONTAGEM EXIGE DUAS PESSOAS ASSEMBLY PARTS | PIÈCES À...
- Page 9 WALL PARTS | PIÈCES DU CONTOUR | PARTES DE LAS PAREDES | WANDELEMENTE | MUURONDERDELEN | PARTI DELLA PARETE | PAINÉIS LATERAIS FO(X4) CS3(X2) SP(X2) CS(X1) SMALL ROOF PARTS | PETITES PARTIES DU TOIT | PEQUEÑAS PARTES PARA EL TECHO | KLEINE DACHTEILE | PICCOLE PARTI DEL TETTO | KLEINE DAKONDERDELEN | PEÇAS DO TELHADO PEQUENAS CO(X24) WA(X24)
- Page 10 FLOOR ASSEMBLY | MONTAGE DU SOL | ARMADO DEL PISO | MONTAGE DER BODENPLATTE | VLOERMONTAGE | MONTAGGIO DEL PAVIMENTO | MONTAGEM DO PISO F6*3(X1) F6*3(X1) • DOOR / FRONT • PORTE / L'AVANT • TÜRE / VORDERSEITE • PUERTA / PARTE DELANTERA •...
- Page 11 CS3(X1) CO(X3) WA(X3) FO(X1)
- Page 12 SP(X1) • This side out • Côté Extérieur • Cara exterior • Diese Seite nach aussen • Deze kant buiten • Lato rivolto verso l'esterno • Este lado para fora CS(X1)
- Page 13 SP(X1) CO(X3) WA(X3) FO(X1)
- Page 14 CS3(X1) CO(X3) WA(X3) FO(X1)
- Page 15 RD3(X2) WA(X4) CO(X4)
- Page 16 DOOR ASSEMBLY | MONTAGE DE LA PORTE | ARMADO DE LA PUERTA | MONTAGE DER TÜR | DEURMONTAGE | MONTAGGIO DELLA PORTA | MONTAGEM DA PORTA DP1(X2) DP2(X2) FND(X2) HG(X4) DX463(X2) DX463 DX463...
- Page 17 FND(X2) click 90º ROOF ASSEMBLY | MONTAGE DU TOIT | ARMADO DEL TECHO | DACHMONTAGE | DAKMONTAGE | MONTAGGIO DEL TETTO | MONTAGEM DO TELHADO KETER CO(X4) WA(X4) RF3(X1)
- Page 18 CO(X4) WA(X4) RB3(X1) CLICK B3(X1) SC9(X4)
- Page 19 TL3(X2) SC9(X10)
- Page 20 SC9(X10) ASSEMBLY REQUIRES TWO PEOPLE | LE MONTAGE DOIT ÊTRE EFFECTUÉ PAR DEUX PERSONNES | SE NECESITAN DOS PERSONAS PARA ARMARLO | ZWEI PERSONEN ZUR MONTAGE NOTWENDIG | MONTAGE VEREIST TWEE PERSONEN | MONTAGGIO RICHIEDE DUE PERSONE | A MONTAGEM EXIGE DUAS PESSOAS...
- Page 21 SC9(X2) ST(X2) DS(X2)
- Page 22 IH(X2) SC1(X4)
- Page 23 DH(X1) • Left • Gauche • Izquierdo • Verließ • Links • Sinistra • Esquerdo SC5(X8) DNS(X1) • Left • Gauche • Izquierdo • Verließ • Links • Sinistra • Esquerdo...
- Page 24 DH2(X1) SC5(X2) • Right • Droit • Derecho • Richtig • Rechts • Destra • Direito DLA(X2) • Left • Gauche • Izquierdo • Verließ • Links • Sinistra • Esquerdo...
- Page 25 OPTION | OPCIÓN | OPTIE | OPZION | OPÇÃOE SH(X1) • It is recommended to purchase wooden planks to use as shelves. • Il est recommandé d’acquérir des planches de bois en guise d’étagères. • Wir empfehlen, daß Sie als Regale Holzbretter erwerben. •...
- Page 26 à partir des meilleures matières premières, elles sont exemptes de substances toxiques et entièrement recyclables. Dans le cas où vous rencontreriez un problème, veuillez le signaler à notre service clients par téléphone ou à travers notre site web : www.keter.com. La garantie limitée est valable à compter de la date d’achat et avec un document daté...
- Page 27 “limpas”: não tóxicas e completamente recicláveis. Se ocorrer algum problema, por favor, envie a sua reclamação para o serviço de atendimento ao cliente por telefone ou através do nosso web site: www.keter.com. A garantia limitada é válida a partir da data da compra e com uma prova de compra com data. O recibo deve ser apresentado mediante solicitação.
- Page 28 • Noch heiße Gegenstände wie Grillgeräte, Fackeln usw. dürfen nicht im Schuppen aufbewahrt werden. • Schwere Gegenstände dürfen nicht an die Wände angelehnt werden, da dies zu einer Verformung des Materials führen kann. • Halten Sie das Dach frei von Schnee und Laub. Große S chneemengen auf dem Dach können den Gartenschuppen beschädigen und sein Betreten zur Gefahr werden lassen.
- Page 30 Master Lock Model 175D – Combination Reset Instructions To Open the Lock the First Time: SET the combination to 0-0-0-0. DEPRESS shackle and PULL open. To Set Your Own Combination: REMEMBER: Combination can only be set when lock is open. 1.
Need help?
Do you have a question about the Factor 6x3 and is the answer not in the manual?
Questions and answers