
Related Manuals for STONEX X120GO


Summary of Contents for STONEX X120GO
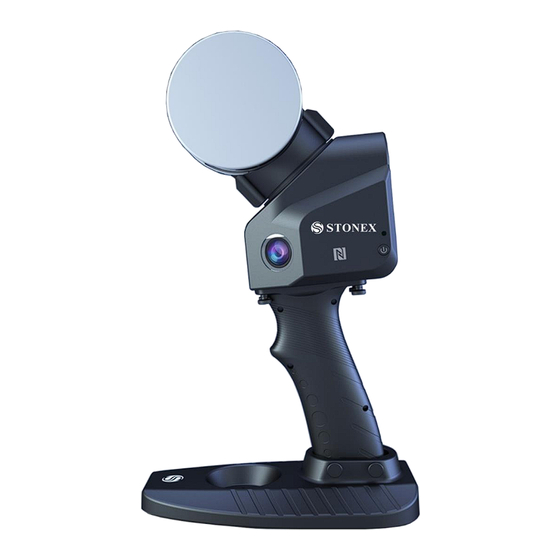
- Page 1 STONEX®X120 SLAM Laser Scanner User Guide (September 2022)-Ver.1. -Rev.1 www.stonex.it...
-
Page 2: Table Of Contents
Safety standards for lasers ................................ 9 Battery ....................................... 9 3.10 About User ....................................12 3.11 Exceptions from Responsibility ............................12 Setting up the STONEX®X120 ..............................13 Battery charging ..................................13 Led status ...................................... 14 Setting up ...................................... 14 Operating the STONEX®X120 .............................. - Page 3 Results browsing ..................................43 6.10 Trajectory ....................................44 6.11 Panorama browsing ................................44 6.12 Tool bar ..................................... 45 Technical data ......................................48 Bundle components.................................. 48 Appendix ........................................49 X120 technical features ............................... 49 Data collection guidelines ..............................50 STONEX®X120 – User Guide...
-
Page 4: Legal Notice
Customer shall pay the standard repair fees for any service (whether part replacement or repairs) and performed by STONEX® under request and explicit authorization of the customer itself. In this case the customer is charged for return shipment’s fees as well. -
Page 5: Environmental Recycling
In no event will STONEX®, its affiliates or suppliers be liable to customer or any third party for any damage in excess of the purchase price of the product. This limitation applies to damages of any kind whatsoever including (1) damage to, or loss or corruption of, customer’s records, programs, data or removable storage media, or (2) -
Page 6: Introduction
3. Introduction 3.1 General Thank you for purchasing STONEX® X120 3D Laser Scanner. This manual includes important safety directions and instructions for setting up and using the product. Please read this manual carefully before using, so that our products can serve you better. -
Page 7: Precaution For Safety
Noise from the instrument: when the instrument is working it is normal if you hear noises from instrument motors. They will not affect the instrument work. Stored data responsibility: STONEX® should not be held liable for the lost data because of wrong operation. -
Page 8: Storage
ATTENTION Do not perform disassembly or rebuilding. Fire, electric shock, or burn could result. Only STONEX® authorized distributors can disassemble or rebuilt. Do not cover the charger. Fire could result. Do not use defection power cable, socket, or plug. Fire, electronic shock could result. -
Page 9: Safety Standards For Lasers
Do not put the battery in the fire or high temperature condition. Explosion, damage could result. Do not use the battery which is not specified by STONEX®. Fire, electric shock, or burn could result. Do not use the power cable which is not specified by STONEX®. Fire could result. - Page 10 It is strictly forbidden to use batteries not officially provided by Stonex®. If you need to replace a new battery, please buy it through designated channels. Stonex® is not responsible for battery accidents and device failures caused by the use of batteries not officially provided by Stonex®.
- Page 11 ≥3000mAh Charging Limit Full Charge Voltage 4.2V If the charging current exceeds 4.2V or the Recharging Current≥1.5A charging current is lower than 1A, the charger provided by Stonex® cannot be used Maximum Discharge ≥3A Current Battery Protection Conventional Protection Battery must have its own protective plate,...
-
Page 12: About User
The user is required to be a qualified surveyor or have a good knowledge of surveying, in order to understand the user manual and safety instructions, before operating, inspecting, or adjusting. Do not operate the equipment if it shows obvious defects or damage. Please follow STONEX® service procedure to repair the equipment. -
Page 13: Setting Up The Stonex®X120 Go
• charging, and the error indicator "Err" is displayed. Please do not use equipment other than Stonex's official charger for charging; • In case of damage or deformation of the battery skin, please do not continue to use it and dispose of it •... -
Page 14: Led Status
Move the battery compartment cover lock backward to lock the battery compartment cover. STONEX®X120 – User Guide... - Page 15 Wait for the laser head to start rotating, and then the equipment starts successfully. Insert the memory card into the SD card slot with the golden finger side facing the back of the scanner. NOTE: SD card must be inserted or data will not be collected. STONEX®X120 – User Guide...
-
Page 16: Operating The Stonex®X120 Go
5. Operating the STONEX®X120 5.1 GOapp installation GOapp is mobile APP for X120 for Android (8.0 version or above), which allows to perform operations such as project management, real-time point cloud puzzle display, image preview, firmware upgrade, etc. Download on PC from here: GOapp for Android Copy the *.apk file on the Android controller using an USB connection... -
Page 17: Equipment Work
(NFC sensing area) against the NFC tag on the key side of X120 scanner to connect and bind. 5.3 Equipment work Connect the X120 scanner through mobile phone Wi-Fi, click on the online device with the green dot logo in the upper right corner of the APP page. STONEX®X120 – User Guide... - Page 18 Try to completely close the GOapp, clear the background of GOapp, re-enter GOapp and try to connect to the X120 device again. If the connection fails when you re-enter the equipment interface after the above operation, please contact your local dealer for more assistance. STONEX®X120 – User Guide...
- Page 19 Working-real-time 3D scanning display When the APP is in the standby interface, press the power key of X120 device briefly to start the operation, and the page will automatically jump to the 3D scanning display interface. STONEX®X120 – User Guide...
-
Page 20: Settings
(refer to next chapter for more details). Modify device name Click on the Device name, enter the content to be modified in the pop-up "Modify Device Name" dialog box, and click "Confirm" to modify the device name. STONEX®X120 – User Guide... - Page 21 If you want to remove the device, click on Delete dialog box, and click "Confirm" to delete the device. The Delete Device function allows you to delete devices that do not need to appear on the front page. STONEX®X120 – User Guide...
-
Page 22: Firmware
In case the latest firmware package is not downloaded on the home page. Turn on the X120 device, connect the device Wi-Fi, and click the "Home page" to enter the device details, and click the "Settings" button in the upper right corner of the page. STONEX®X120 – User Guide... -
Page 23: Data Download
The raw data includes Image data, IMU, raster data, laser data, and device calibration files. Copy and paste the folders on your device. STONEX®X120 – User Guide... -
Page 24: Gopost Software
When you click on the GOpost icon, the following page is shown. To open the software, click on its icon. If you want to change software language, click on and Settings: English, Italian and Chinese are available. Select About to check software version STONEX®X120 – User Guide... -
Page 25: New Project
Click New, set the project name and project path, click Next, select the folder path where the data file is located in the Input Path, that is, the next lower path of the SN_XXXXX, the software will automatically identify the data in the folder, click Finish to complete the project creation. STONEX®X120 – User Guide... -
Page 26: Import Gcp
Right-click the control point data function in the DataManager window, select Data, importing the organized GCP into the software. The software supports local coordinate system and the projected coordinate system. Please note this setting does not affect the final output of the point cloud coordinates. STONEX®X120 – User Guide... -
Page 27: One-Click Processing
User can process the data directly. If there are two or more projects in DataManager, the default status of the first project is active and others are inactive and in black. Please activate the project before processing it. STONEX®X120 – User Guide... - Page 28 For instance, suppose you have 5 datasets, you can queue up to solve them with Batch solve, instead of processing one by one with One-click solve. When you use Batch solve, you don't need active project before solving. STONEX®X120 – User Guide...
- Page 29 3 or 4, or even smaller. If user set the value too high and in processing the LogWindow appears “Solution failed”, we suggest resetting lower down value processing again. STONEX®X120 – User Guide...
- Page 30 With an overlapping between the starting point and the endpoint around 10 meters, the software automatically recognises the closure: no need to tick the option “Same start and end”. Real-time display: display the point cloud mapping process in display window. STONEX®X120 – User Guide...
- Page 31 When high-precision mode is selected, the optimized point cloud results are output. Panorama: A panorama image from single distortion-free images. • Point cloud coloring: Coloring based on single distortion-free images. This procedure isn't related to • Panorama function. STONEX®X120 – User Guide...
-
Page 32: Gcp Edit
Take figure below as an example, The correspondence between “GCP3” and “Matching point3” is STONEX®X120 – User Guide... - Page 33 3 to 4. CASE 2: the number of matching points is less than the imported control point, user needs to edit the control point file and delete the surplus control points. STONEX®X120 – User Guide...
-
Page 34: Add Result To View
6.5 Add result to view Select the point cloud data in DataManager, right-click, and select Add to View to add the point cloud to the display window. Other results can be viewed the same way as well. STONEX®X120 – User Guide... -
Page 35: Step-By-Step Processing
This step is to generate original point cloud with no further processing. Therefore, it may contain some noise. The processed result begins with a prefix ‘optimized’ in the file name under LIDAR Data in DataManager. Filter STONEX®X120 – User Guide... - Page 36 Cluster threshold: The percentage of points after clustering to participate in the calculation of points, • and if more than this value, it is considered non-moving object. Point clouds beginning with “filter” are the filtered result. STONEX®X120 – User Guide...
- Page 37 Dedistortion This function is designed to remove distortion from the image, and this step is necessary for subsequent point cloud coloring and panoramas. A single undistorted image is stored in a folder named “dimage”. STONEX®X120 – User Guide...
- Page 38 This function uses the undistorted image to color the point cloud. Click Texture in the data processing toolbar and select existed point cloud to perform point cloud coloring. Point cloud beginning with ‘texture’ are colored point cloud. Panorama This function processes undistorted image to generate panorama. STONEX®X120 – User Guide...
-
Page 39: Point Cloud Edit
This function is for framing the point cloud. Select the framing method (scale bar or fixed size), prefix, framing scale, frame size, expansion range and rang, etc. Then click framing to process the data in framing. STONEX®X120 – User Guide... - Page 40 Select basic point cloud and registered point cloud at the same time, then click Registration • Click pick,then select point pairs in basic point cloud and registered point cloud. The order of same • name point must be consistent. STONEX®X120 – User Guide...
- Page 41 Iterative distance: the difference between the distances calculated before and after, if it is less than this value, exit the iteration. RMS is the root mean square error related to registration. STONEX®X120 – User Guide...
- Page 42 This function can clip the point cloud according to the range. Select the data to be clipped, determine the output method, import the cropping range (vector files support shp, dxf, fmb, kml formats), and determine the expansion range. STONEX®X120 – User Guide...
-
Page 43: Description Of The Result Catalog
Select the point cloud you want to browse and right-click - Add to View. User can change display methods that contain elevation, intensity, texture and canvas. In addition, user also can change display view angle, such as front, top, etc. STONEX®X120 – User Guide... -
Page 44: Trajectory
Select Odom Data and right-click - Add to View. The points in orange are the odometer trajectory. 6.11 Panorama browsing Select the cam_pos and right-click - Add to View. The point in blue is the odometer trajectory. STONEX®X120 – User Guide... -
Page 45: Tool Bar
Select the cam_pos and right-click - Add to View. The point in blue is the odometer trajectory. Hold down the left button and move the mouse to browse the panorama. 1.Click panorama 2.Click blue point 3.Panorama is displayed 6.12 Tool bar Here are meaning of tools: STONEX®X120 – User Guide... - Page 46 Measure distance: measure 3D distance between two points • Measure XYZ: measure distance between two points in XYZ Axis. • Profile: Show point cloud details in a cross-sectional view • Plan cut: Show point cloud details by change box boundary • STONEX®X120 – User Guide...
- Page 47 Panorama: refer to previous chapter • STONEX®X120 – User Guide...
-
Page 48: Technical Data
7. Technical data 7.1 Bundle components PART NAME QUANTITY Scanner Rechargeable battery SD Memory card SD card reader post USB License key for GO Scanner base bracket for GCP Battery charging hub, Car/EU/US chargers STONEX®X120 – User Guide... -
Page 49: Appendix
Net Weight 1.6 kg (without battery) POWER Battery Life 2.5h (each set of batteries) Power consumption Capacity 3350mAh×4 Voltage 20-30V ENVIRONMENTAL CONDITIONS Working environment temperature -10°C to 45°C Working humidity <85% RH Waterproof/Dustproof IP54 In controlled environment STONEX®X120 – User Guide... -
Page 50: Data Collection Guidelines
If it's an outdoor environment, besides finding multi-path locations and planning closed routes, it is also necessary to ensure that the measured object is within the effective measurement range of the scanner (because of the different reflectivity of ground objects, the distance is also different). STONEX®X120 – User Guide... - Page 51 Matters needing attention when passing through the door When the hand-held scanner passes through the indoor door, it is recommended to pass slowly sideways to STONEX®X120 – User Guide...
- Page 52 Generally, the data obtained in areas with rich features and textures will have good calculation results. To ensure the calculation accuracy, it is necessary to manually set a feature point with a diameter of about 1 meter every 10 STONEX®X120 – User Guide...
- Page 53 STONEX®X120 – User Guide...
- Page 54 STONEX® SRL Viale dell’industria, 53 | 20037 - Paderno Dugnano (MI) | Italy Tel : + 390278619201 | Fax :+ 390278610299 STONEX®X120 – User Guide www.stonex.com | info@stonex.com...
Need help?
Do you have a question about the X120GO and is the answer not in the manual?
Questions and answers