Advertisement
Quick Links
Advertisement

Summary of Contents for Blendtec Q Series
- Page 1 ABC SMOOTHER SPACESAVER MANUAL...
- Page 3 Table Of Contents Section Page Section 1..Important Safeguards Section 2..Component Overview Section 3..Unpacking Section 4..Installation Section 5..Operating Instructions Section 6..Warranty and Service Appendix A..ABC Operation Appendix B..Product Diagrams...
- Page 5 SECTION 1 – IMPORTANT SAFEGUARDS READ ALL INSTRUCTIONS CAREFULLY BEFORE USING YOUR BLENDTEC MACHINE. 1.1 SAFETY CERTIFICATION The ABC, Smoother, and SpaceSaver blenders and accessories are certified by ETL to UL standard 763, and to CSA standard C22.2 No. 195-m1987, and to CE Standards.
- Page 6 If the blender malfunctions call Blendtec customer service (international customers contact a Blendtec qualified service agent). If it is dropped or damaged in any way, return the blender to Blendtec customer service (international customers contact a Blendtec qualified service agent) immediately for examination, repair, electrical or mechanical adjustment, or possible replacement.
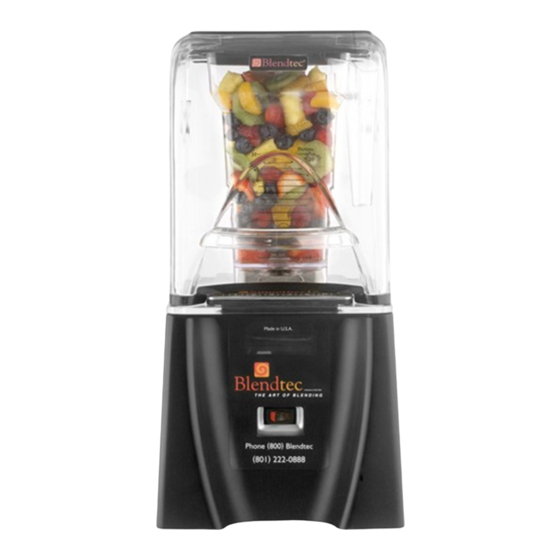
- Page 7 SECTION 2: COMPONENT OVERVIEW BLENDER MOTOR BASE The blender motor is located within the blender motor base and contains the components which run the blender including the electric motor, drive shaft, and microprocessor controlled circuit board. The blender motor base consists of the motor housing, touchpad, Liquid Crystal Display (LCD) screen, drive socket, and the power switch (See Appendix B, figures 1.1 and 1.2).
- Page 8 2.5 POWER SPECIFICATIONS Blendtec Blenders are made with power specifications listed below according to your specific model. 110/120 VOLT BLENDTEC BLENDERS ARE REQUIRED TO BE PROTECTED BY A DEDICATED 20 AMP CIRCUIT BREAKER OR FUSE. MODEL (110/120 VOLT) AMPS WATTS...
- Page 9 5. Inspect all items to ensure no damage occurred in shipment. 6. If any damage has occurred contact your Blendtec service agent immediately. 3.2 RECORDING YOUR SERIAL NUMBER AND DATE OF SHIPMENT Record your blender base serial number and date of purchase in the space below.
- Page 10 4. Slide the power cord and the motor base into the black plastic motor stand with the touchpad facing the front, fitting the motor base and clear sound enclosure bottom snugly into the motor stand. Extend the cord out the bottom of the base to its full length.
- Page 11 Multipurpose (MULTI) blender program. See the Blendtec Cycle Chart included with this manual for details regarding programming and operation of your blender. This chart can also be found online at blendtec.com. 5.3 MANUAL OPERATION Pulse Button: Blends mixture at a constant HIGH speed (70 percent power) while button is depressed.
- Page 12 Run the motor for a few seconds using the Pulse button. Switch jars back and forth to determine whether the sound changes as different jars are used. If a jar is excessively noisy, or if the blade assembly seems loose or sounds “gravelly” when turned by hand, contact Blendtec...
- Page 13 Blendtec (international customers contact a Blendtec qualified service agent) for assistance. UNSATISFACTORY BLENDED TEXTURE: If the blended texture of product is lumpy or uneven, do the following: • Make sure the mixture is not cavitating during the cycle. Cavitation is a condition in which the blender blade spins freely in an air pocket within the drink mixture because the mix is too cold or too solid.
- Page 14 5.6 LONG-TERM SANITATION OF JAR 1. Sanitize jar per local code by filling the blender jar with a sanitizer diluted to manufacture’s specifications. Bleach, properly diluted, can be used. 2. Add 1 teaspoon (5 ml) of liquid chlorine bleach. 3. Stir for 10 seconds to mix water and bleach. Let mixture stand in blender jar for 5 minutes.
- Page 15 Warranties begin from date of shipment, or on date of purchase where proof of purchase is provided. Cosmetic damage and abuse are not included within this warranty. 6.2 SERVICE PROCEDURE Should you experience any difficulty in using your Blendtec blender, please do...
- Page 16 2. If the difficulty cannot be resolved over the phone, your unit may require replacement. If you are under warranty, Blendtec will repair or replace your unit at no cost. Cosmetic damage and abuse are not included. OUT OF WARRANTY 1.
- Page 17 Problem Description: APPENDIX A: ABC BLENDER OPERATION A1: Operation The ABC models features an interlock safety switch that prevents the unit from operating unless the sound enclosure is completely shut. To operate the ABC, press the desired button. A red LED will light up above the button selected and will remain lit until another button is selected or the button is touched a second time during operation.
- Page 19 APPENDIX B - PRODUCT DIAGRAMS FIGURE 1.1 - FRONT VIEW: BLENDER MOTOR AND JAR Blade Assembly LCD Screen Power Switch FIGURE 1.2 - TOP VIEW: MOTOR Drive Socket Touchpad Motor Housing LCD Screen Power Switch...
- Page 20 FIGURE 2.1 - ABOVE COUNTERTOP: ABC, SMOOTHER (WITH Q SERIES COMPONENTS) 2.59” (65.78 mm)
- Page 21 FIGURE 2.2 - ABOVE COUNTERTOP: SPACESAVER...
- Page 22 FIGURE 3.1 - IN - COUNTER: ABC, SMOOTHER (WITH Q SERIES COMPONENTS) 3.03” (77 mm)
- Page 23 FIGURE 4 - Countertop Hole Template 5-7/8” (149.22 mm) 4-3/8” (111.125 mm)
- Page 24 1206 South 1680 West Orem, UT 84058 801-222-0888 www. blendtec.com OWN-CE-010 Manual for ABC, Smoother, and SpaceSaver v8 Aug 10...


Need help?
Do you have a question about the Q Series and is the answer not in the manual?
Questions and answers