Goal Zero YETI PRO 4000 - Portable Power Station Manual
- User manual (33 pages)
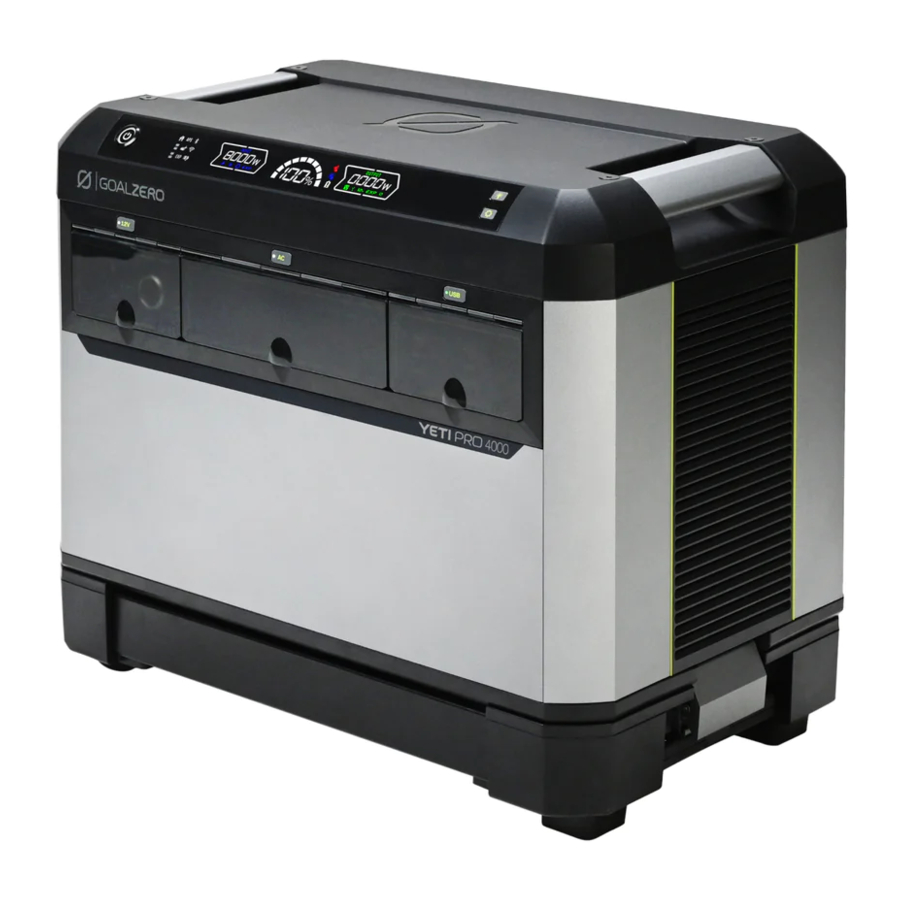
Advertisement
Getting Started
In the Box
- Yeti PRO 4000
- Yeti/Tank PRO 4000 Cart
- AC Charging Cable
- User Manual
- Quick Start Guide

How it Works

Get To Know Your Gear
FRONT INTERFACE

*DISPLAY BUTTON FUNCTIONS
Quick Press: Turn the display screen lights on or off. Long Press: Turn Blackout mode on or off. In
Blackout mode your Yeti keeps working like normal, but all status lights will turn off.
**SETTINGS BUTTON FUNCTIONS
Quick Press: Cycle through menu and info pages
Long Press: Select and enter a menu
- Quick press to go through menu items
- Long press to select menu items
Quick Double Press: Exit Menu or return to previous screen
BACK INTERFACE

SCREEN

| STATUS ICONS | |
 | [Future Functionality] |
 | APS Mode Engaged |
 | Direct Connected |
 | Yetis Chained in Parallel |
 | Tank Expansions Battery Detected |
 | Cloud Connected |
 | Yetis Chained in Series (240V) |
 | Expansion Module Detected |
 | Charge Profile Enabled |
| INPUT | |
 | AC Input Active |
 | High Voltage DC Input Active |
 | Low Voltage DC Input Active |
 | Expansion Port Input Active |
| BATTERY STATE OF CHARGE | |
 | Overheating Warning |
 | Cold Temperature Warning |
 | Battery Issue Warning |
| OUTPUT | |
 | AC Output Active |
 | USB Output Active |
 | 12V Output Active |
| | Expansion Port Output Active |
*MESSAGE CENTER
Displays time to empty and full, as well as error messages and information.
Set Up With Other Goal Zero Products
FOR HOME USE
If you plan to use the Yeti PRO 4000 with the Haven 10 Manual Transfer Switch smart energy panel, please reference the Haven 10 User Guide or visit our website at goalzero.com for additional information.
FOR VAN/RV USE
If you're installing this in a vehicle, please reference the Installation Guide for the Escape Ecosystem or visit our website at goalzero.com for additional information.
Setting Up Your Yeti PRO 4000
- PLUG YOUR YETI PRO 4000 INTO THE WALL TO BEGIN CHARGING YOUR POWER STATION.
- PRESS THE MASTER POWER BUTTON TO TURN IT ON.
 NOTE: The same button will shut down the unit. If hot, fans may continue for a few moments before it completely powers off. You can leave the power on in between uses, but we suggest powering off the unit if it will not be used for an extended period of time. We recommend making sure the battery is fully charged every 12-18 months.

NOTE: The display will hibernate after 20 minutes of inactivity (when not charging or discharging). Re-illuminate by pressing the backlight button.

-
DOWNLOAD THE GOAL ZERO APP AND UPDATE YOUR DEVICE
![]()
The Goal Zero app makes it easy to control your Yeti PRO 4000, adjust settings, and monitor your power usage. Download it from your app store, then follow the instructions in the app to pair with Wi-Fi and set up your power station.
The app will also prompt you with any new firmware updates. Please make these updates before using your device for optimal performance.


Powering Your Devices
Once the master power button is on, press the button above the output port you will be using and plug your device(s) into the desired port.

The output ports on the back of the unit are also controlled by the output port buttons on the front of the power station.
Using Your Product
Charging Your Yeti
Grid Charging
To charge your Yeti PRO 4000, insert the AC charging cable into the AC fast charge port on the back of the power station. Then plug the other end of the cable into your wall outlet.
You will see a blue plug icon illuminate on the display. Once the charge is active, you'll also see a blue blinking light near the input. These lights indicate that the unit is charging. The display will also show you your battery state of charge, input Watts and your battery time to full.
NOTE: When the master power button is off, the Yeti PRO 4000 will charge but it will not output power to other devices.
The Yeti PRO 4000 can charge from 0% to 100% in under three hours.*
*Your device will be shipped in the 'Low' Charge Speed setting to prevent circuit load issues. You can slide the Charge Speed switch on the back of your device to 'High' to charge your power station faster. The Low charge speed can be customized in the Goal Zero app.
When charging from the grid you can charge the power station at up to 1800W.
NOTE: 1800W is the maximum output of most household AC wall outlets. If you're powering other loads from this same circuit, you may trip your home breaker and thus need to reduce your charge speed. To do this, slide the Charge Speed switch to the "Low" position. This will reduce the charge rate to 400W. Reducing charge speed will also reduce fan noise. You can also customize your Low speed AC charge rates in the Goal Zero app.

Solar Charging
The Yeti PRO 4000 has two DC inputs: The 8mm Low Voltage Input and the HPP+ High Voltage Input.

The Low Voltage DC Input can input a maximum of 275W at 28V. This input is for smaller, single panel applications.
The HPP+ High Voltage Input can input a maximum of 3000 Watts up to 145V.
If you plan to use Goal Zero portable solar panels and DO NOT plan to exceed 600W of total solar input, use the 4:1 HPP Parallel Combiner Cable (SKU 98061). This will allow you to connect any four Goal Zero solar panels together for a maximum 600W of solar input.
If you want to exceed 600W of solar input, you'll need to set your panels up in series. There are two ways to do this depending on which Goal Zero solar panels you have.
If you have Goal Zero solar panels of the same wattage
You can combine up to four Goal Zero solar panels of the same wattage in a series by connecting them with one 4:1 Series combiner cable (SKU 98715). Plug the four panels into the cable, then plug the other side of the cable into your Yeti PRO 4000. This configuration allows for up to 1600W of solar input.
If you have a variety of Goal Zero solar panels that have different wattage ratings
If you have an assortment of Goal Zero solar panels of different sizes and you plan to combine for over 600W of input you will need to use up to three 4:1 Series Combiner Cables (SKU 98715) and one 3:1 HPP+ Parallel combiner (70030).
- You can connect a maximum of 12 Goal Zero solar panels this way.
- All panels connected to one Series Combiner Cable must have the same wattage. (For example, you can connect two Nomad 100 panels and two Boulder 100 panels to one Series Combiner Cable.)
- All Series Combiner Cables must have the same number of panels connected.
(For example, if you have three panels connected to one Series Combiner Cable, the other Series Combiner Cables must also have three panels connected.)
Connect your solar panels to the 4:1 Series Combiner Cables, then plug the Series Combiner Cables into the 3:1 HPP+ Parallel Combiner. Once connected, plug the 3:1 HPP+ Parallel Combiner into your Yeti PRO 4000. This configuration allows for up to 3000W of solar input.
Parallel Combining Solar Panels (600 Watt Max)
")
Series Combining Solar Panels (3000 Watt Max)
")
For more information about integrating your Yeti PRO 4000 with solar, visit our website at www.goalzero.com.

Car Charging
You can top off the Yeti while on the go using a vehicle's 12V Auxiliary Power Outlet. Use a 12V Car Charging Cable (SKU 98740) to connect your Yeti to your vehicle's 12V output.

You can also have a licensed vehicle technician connect your Yeti PRO directly to your alternator for 400W charging.
NOTE: The Yeti has built-in protection that prevents the car battery from discharging below 11.8 V so it will never over discharge your vehicle's 12V battery, even when the vehicle isn't running.
Automatic Power Switching (APS)
The product will automatically enter the Automatic Power Switching (APS) mode when you are inputting power into the AC input port and simultaneously outputting through the AC output. Power will pass directly from the grid or AC power source to the loads connected to the Yeti and bypass the inverter of the Yeti. If grid power is interrupted, power will quickly switch to Yeti power.
The Yeti PRO 4000 switches from grid to battery in under 15ms, but it does not support 0ms switching. Some sensitive loads may be interrupted during the switch over.
When using your Yeti Pro 4000 in APS mode, note that if the AC output of your Yeti exceeds your set AC fast charge input limit the input will be disabled and your Yeti PRO will run off of the internal battery until your AC output drops below your set charge input limit.
Key Accessory Integration
Expansion Batteries: A single Yeti PRO 4000 can connect up to four Tank PRO 4000 expansion batteries (sold separately). Please refer to the Tank PRO 4000 User Guide for detailed instructions on pairing and chaining the additional batteries.
Attaching and Detaching Your Cart
The cart is designed to be easily removed so you can stack your Yeti PRO 4000 on Tank PRO 4000 expansion batteries or a mounting plate, or to reduce the overall height of the product. To remove the cart, undo the latch on the side of the Yeti and lift the power station to separate it from the cart.

NOTE: Make sure the latch is secure before moving the cart. This cart is best for use on flat, level surfaces. Two-person lift is required for stairs, curbs, drops, and uneven terrain. The cart is also only designed to carry a single unit. DO NOT stack multiple units on one cart.
Storage and Maintenance
Store your power station in a climate-controlled, dry location. If you can't keep your Yeti PRO 4000 plugged into a power source during storage, keep the power button in the off state and charge the unit once every 12-18 months.
Failure to maintain your Yeti PRO 4000 by following these steps can result in battery damage which will void the product warranty.
GROUNDING INSTRUCTIONS
This product must be grounded. If it should malfunction or breakdown, grounding provides a path of least resistance for electric current to reduce the risk of electric shock. This product is equipped with a cord having an equipment grounding conductor and a grounding plug. The plug must be plugged into an outlet that is properly installed and grounded in accordance with all local codes ordinances.

Improper connection of the equipment grounding conductor is able to result in a risk of electric shock. Check with a qualified electrician if you are in doubt as to whether the product is properly grounded. DO NOT modify the plug provided with the product. If it will not fit the outlet, have a proper outlet installed by a qualified electrician.
Technical Specifications
| Charge times | |
| Maximum Solar Input | 1.7 hrs |
| Goal Zero Ranger 300 | 15.7 hrs |
| Goal Zero Boulder (3X) 200 Briefcase | 7.8 hrs |
| Goal Zero Boulder (6X) 200 Briefcase | 3.9 hrs |
| Battery: | |
| Cell Chemistry | LiFePO4 (Lithium Iron Phosphate) |
| Pack Capacity | 3993.6Wh (51.2V 78Ah) |
| Lifecycles | 4000 (0.5C discharge, climate controlled, 80% original capacity.) |
| Shelf-life | Charge every 12-18 months (in "main power off" state) |
| Wall Charge Time | 0-100% in about 3 hours at 1800W |
| Ports: | |
| Input | |
| AC Input | 1800W (120V AC, up to 15A) |
| High Voltage DC | 3000W Max (13.3-145V DC, up to 40A) |
| Low Voltage DC | 275W Max (13.3-28V DC, up to 10A) |
| Input/Output | |
| Power+ Port | Input: 120V AC, up to 15A(1800W)/ 240V AC up to13A(3000W max) Output 3600W AC (120V AC, up to 30 A) |
| Expansion Port | To be used with Goal Zero Expansion Modules such as the Tank PRO 4000 (100A, 56V DC Max) |
| Output | |
| 3x USB-A | 18W Max Individually, 54W combined |
| 3x USB-C | 2x at 30W Max, 1x at 100W Max, 160W combined |
| 1x 12V High Power Port | 405W Max (13.5V DC, up to 30A)* |
| 2x 12V 6mm port | 135W Max (13.5V DC, up to 10A)* |
| 1x 12V Car Port | 162W Max (13.5V DC, up to 12A)* |
| 4x AC 20A | 2400W (120V AC) Max per port, 3600W continuous shared**, 7200W Surge |
| 1x AC 30A | 3600W Max (120V AC), 7200W Surge |
*Max of 30 Amps shared across all 12V output ports.
**Shared across all 5 AC ports, 20A and 30A NOTE: All DC outputs are regulated.
| General: | |||
| Expandable | Yes (Up to four Tanks per Yeti Pro 4000) | ||
| Simultaneous charge and discharge | Yes | ||
| SKU | 37500 (120V) | ||
| Weight (Yeti only) | 115.74 lbs (52.5 kg) | ||
| Weight (with Cart) | 125.73 lbs (57.03 kg) | ||
| Dimensions (Yeti only) | 21.4 x 13.8 x 14.8 in (54.36 x 35.05 x 37.59 cm) | ||
| Dimensions (Yeti & Roll Cart) | 21.4 x 13.8 x 18.1 in (54.36 x 35.05 x 45.9 cm) | ||
| Operating Usage Temp. | Charge: 32° to 104°F (0° to 40°C) Discharge: -4° to 104°F (-20° to 40°C) | ||
Frequently Asked Questions
Is the Yeti PRO 4000 portable?
Yes. The power station comes with wheels and a handle to make it easier to move. Be sure to lift carefully and get assistance from a second person.
Can I use my Yeti PRO 4000 outside?
Yes. Although you should avoid getting your Yeti wet or excessively dirty, it is designed to withstand exposure to the outdoors and minor splashes.
What should I do if I notice a performance issue with my power station?
If your Yeti PRO 4000 is experiencing performance issues, power it off and then on again. We also recommend checking the app to make sure you've downloaded the latest firmware update. If you continue to experience problems, contact our customer support team at www.goalzero.com/contact or call 1-888-794-6250.
How do you dispose of the Yeti at the end of its life?
- If possible, fully discharge your battery prior to disposal. If you are unable to discharge the battery, please contact a battery recycling center directly for further instructions.
- DO NOT dispose of your Yeti PRO 4000 in your regular recycling bin. You will need to take your product to a facility that processes lithium batteries.
You can find a recycling facility near you by visiting https://www.cta.tech/Landing-Pages/Greener-Gadgets/Recycle-Locator#/
Can I remove the port covers on my Yeti PRO 4000?
The port covers on your power station protect it against the elements and prevent damage to your Yeti. If you choose to take the plastic port covers off, grip tightly and pull hard to remove them from your power station. They can be snapped back on at any time. If your port cover breaks, contact us for a replacement part.
Can I use solar panels from a different brand with the Yeti PRO 4000?
Yes, while our product is designed to be used with Goal Zero solar panels, the Yeti PRO 4000 will accommodate nearly any brand of solar panels when you use our adaptor cables, which can be found at www.goalzero.com.
IMPORTANT SAFETY INSTRUCTIONS
SAVE THESE INSTRUCTIONS
Please read all warnings, instructions and cautions carefully before use to avoid personal injury, property damage or damage to your Yeti PRO 4000, or any connected products. Goal Zero reserves the right to update this document without prior notice. Please visit www.goalzero.com to find the latest product information and the most recent version of the User Guide.
INSTRUCTIONS PERTAINING TO RISK OF FIRE, ELECTRIC SHOCK, OR INJURY TO PERSONS.
- Your Yeti PRO 4000 outputs the same potentially lethal AC power as a normal household wall outlet. Please handle and use it carefully, as you would a normal AC outlet on the wall.
- Observe and carefully follow all connector ratings. There is a risk of excessive heat, melting, fire, or electric shock from the use of accessories, charging cords, or other electrical connections if the appropriate connector ratings DO NOT match the Yeti PRO 4000 connector ratings. Consult your product manuals for information about electrical connector ratings.
- Ensure all connectors and accessories are tightly and securely plugged in. Loose connections can lead to fire and other risks.
- DO NOT allow the unit to be dropped, seriously jarred, punctured, or otherwise damaged.
- DO NOT use your Yeti PRO 4000 if it is damaged or modified. Damaged or modified batteries may exhibit unpredictable behavior resulting in fire, explosion or risk of injury.
- DO NOT allow foreign objects to enter into inputs, outputs or ventilation holes.
- DO NOT open your Yeti PRO 4000 or tamper with or attempt to replace your battery.
- DO NOT allow children to use the Yeti PRO 4000.
- To reduce the risk of damage to the electric plug and cord, pull the plug rather than the cord when disconnecting any connectors or plugs.
- Two-person lift required. Please use caution when lifting the power station to prevent injury to yourself or the unit. We recommend using the wheeled cart when the power station is on flat ground.
- Always utilize the Mounting Plate (SKU 96115) and ensure all latches are tightly secured when stacking the Yeti PRO 4000 and Yeti Tanks. Never stack more than 4 Yeti Tanks with one Yeti PRO 4000. Stacking products without the mounting bracket can constitute a tipping hazard and lead to injury. Stacking more products than recommended can lead to damage to the products and an injury hazard. Never step or climb on any Goal Zero products and never allow a child to step or climb on or around the products.
- DO NOT stack anything on top of this device while it is in storage or in use.
- DO NOT charge, turn on or otherwise use your Yeti PRO 4000 if it is submerged or exposed to a significant amount of liquid, or if any liquid enters the unit casing. If internal components get wet, your Yeti PRO 4000 must be disposed of. Failure to comply with these guidelines could cause serious damage, injury, or death. In this case, isolate it in a fire safe location before disposal. Contact your local fire department if you see any sparks or smell burning. Contact a local fire department or a local battery recycling center for instructions on battery disposal requirements in your area. More information about safely recycling batteries can be found at: https://www.epa.gov/recycle/used-household-batteries.
- DO NOT use your Yeti PRO 4000 with life-saving medical equipment. Take special care whenever using your device with medical equipment or around medical equipment and ensure that the specified requirements of the medical equipment are compatible with the device. Your Yeti PRO 4000 is not a certified Uninterruptable Power Supply and has not been tested to hospital-grade standards or any standards specifically related to medical equipment.
- DO NOT expose the Yeti PRO 4000 to extreme temperatures (greater than 140 degrees F/60 degrees C or less than -4 degrees F/-20 degrees C).
- Keep your unit in a dry, well-ventilated area when in use and DO NOT obstruct fan openings. Inadequate ventilation may cause damage to your device.
- DO NOT expose the unit to strong electrostatic or electromagnetic conditions.
- DO NOT put fingers or hands into the product.
- Use of an attachment not recommended or sold by power pack manufacturer may result in a risk of fire, electric shock, or injury to persons.
For assistance with your device in the United States, visit our contact page at www.goalzero.com/contact or call 1-888-794-6250. For assistance with your device outside of the United States, contact the local distributor. If you DO NOT have contact information for the local distributor, contact us in the United States and we will help connect you to the local representative.

Documents / Resources
References
![goalzero.com]() Portable Power Stations, Solar Generators & Home Backup | Goal Zero
Portable Power Stations, Solar Generators & Home Backup | Goal Zero![www.apple.com]() App Store - Apple
App Store - Apple![play.google.com]() Google Play
Google Play![www.goalzero.com]() Portable Power Stations, Solar Generators & Home Backup | Goal Zero
Portable Power Stations, Solar Generators & Home Backup | Goal Zero![www.goalzero.com]() Contact Us | Goal Zero
Contact Us | Goal Zero![www.cta.tech]() Home
Home![www.epa.gov]() Used Household Batteries | US EPA
Used Household Batteries | US EPA
Download manual
Here you can download full pdf version of manual, it may contain additional safety instructions, warranty information, FCC rules, etc.
Download Goal Zero YETI PRO 4000 - Portable Power Station Manual
Advertisement


Need help?
Do you have a question about the YETI PRO 4000 and is the answer not in the manual?
Questions and answers