Advertisement
Please follow these steps.
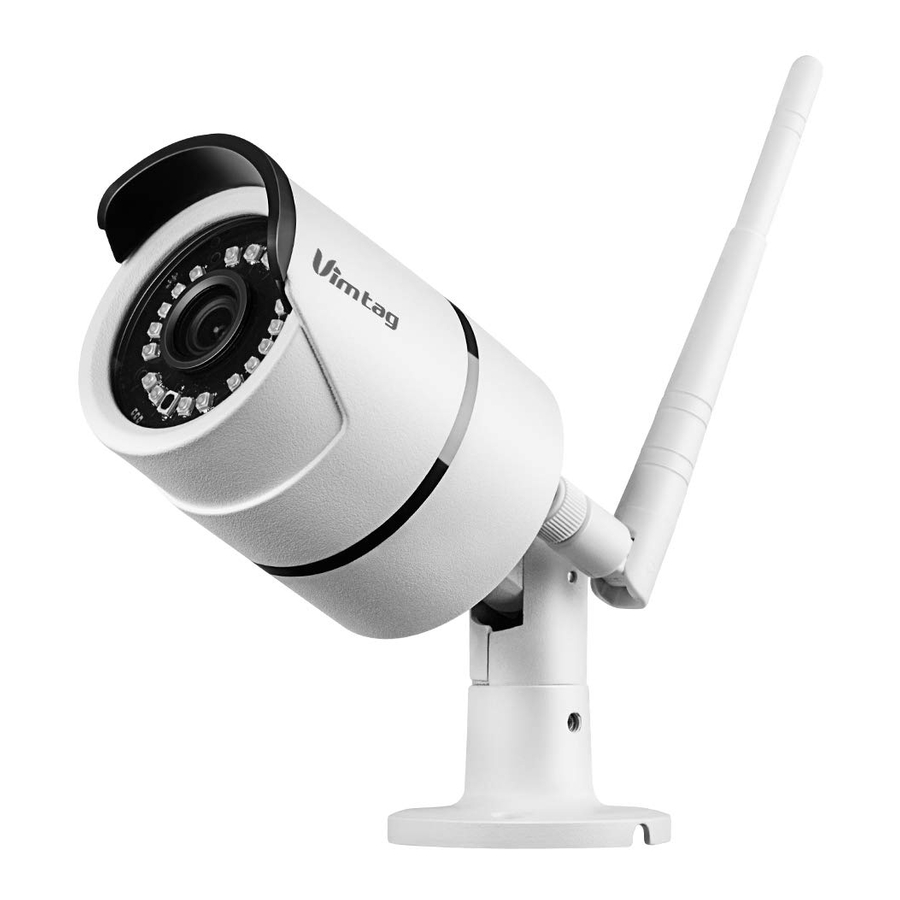
Product Diagram

| Description | Introduction |
| Lens | Capture videos. |
| Light Sensor | Infrared light adjustment. |
| IR LEDS | Additional light in low-light conditions. |
| Wi-Fi Antenna | Connect to Wi-Fi. |

| Description | Introduction |
| Wired Network Status Light | Green light flashes shows positive connectivity. |
| Wi-Fi Network Status Light | Green light flashes 3 times shows successful Wi-Fi connection. |
| Power | External power supply. |
| Ethernet | External Ethernet supply. |
| RESET | Long-press button when device is running normal. The device will restore factory settings. |
Install vimtag App
Mobile Phone App
- Scan the barcode OR download the "Vimtag" APP and install it. Register your account and finish your Wi-Fi connection according to the procedures.
![]()
- You can also download the 'Vimtag' on APP store (iOS) & Play store (Android).
![www.apple.com]()
![play.google.com]()


Connect Camera
After connecting power, downloading the 'Vimtag' APP and registering your account on your phone, please login APP and enter 'Device List' interface. Click '+' at the left top of the interface, a QR Code scanning interface will appear. Scan the QR code at the bottom of the camera or enter ID account manually and then choose WiFi or Ethernet connection.

Method 1: Ethernet connection
Click the Ethernet connection icon and connect Ethernet cable. After 50 seconds, if the wired network indicator will flash green 3 times every 3 seconds, that means connection is successful.

Method 2: Wi-Fi connection
Click the Wi-Fi icon, input Wi-Fi name and password, and then click 'Next Step'. Wait a few seconds, Wi-Fi connection will be successful.

* Smartphone must be connected to the Wi-Fi network in this situation, because camera will connect to the Wi-Fi network via smartphone.
Create Username & Sign in
New Account - Select Sign up from the Home Screen, input a username and password of your choice, confirm the password. Select Sign up.
Existing Account - Input existing Username and password. Press Sign in.

Device list
When you login to the account and access the device list, it will show multiple cameras you have added at the same time. You can also use "Add device" setting and check the "alarm message" on the interface.

View the video
Click the camera icon so that you can view the camera video, after you login to the device list, you can skip the screen to control horizontal and vertical rotation.
You can also operate the "video photo", "Two-way audio" and setting.

Check the video and alarm message
Include "device" and "local" Two ways you can view the recorded video and alarm messages at any time.
Click the "device" you can view the videos on the Micro SD card.
Click the "local" you can view the videos on your phone.

Device settings
Access the settings interface, you can set all specifications and functions of the camera. Such as: check camera details, change your password or configure the camera network. You can manage the specifications and functions based on your requirements.


Documents / Resources
References
Download manual
Here you can download full pdf version of manual, it may contain additional safety instructions, warranty information, FCC rules, etc.
Download Vimtag B1-C Series - Smart Cloud Camera Quick Installation Guide
Advertisement
Thank you! Your question has been received!
Need Assistance?
Do you have a question about the B1-C Series that isn't answered in the manual? Leave your question here.