Advertisement
Table of Contents
Contents
Sensitech TagAlert - Indicator Manual
Starting a TagAlert® Indicator
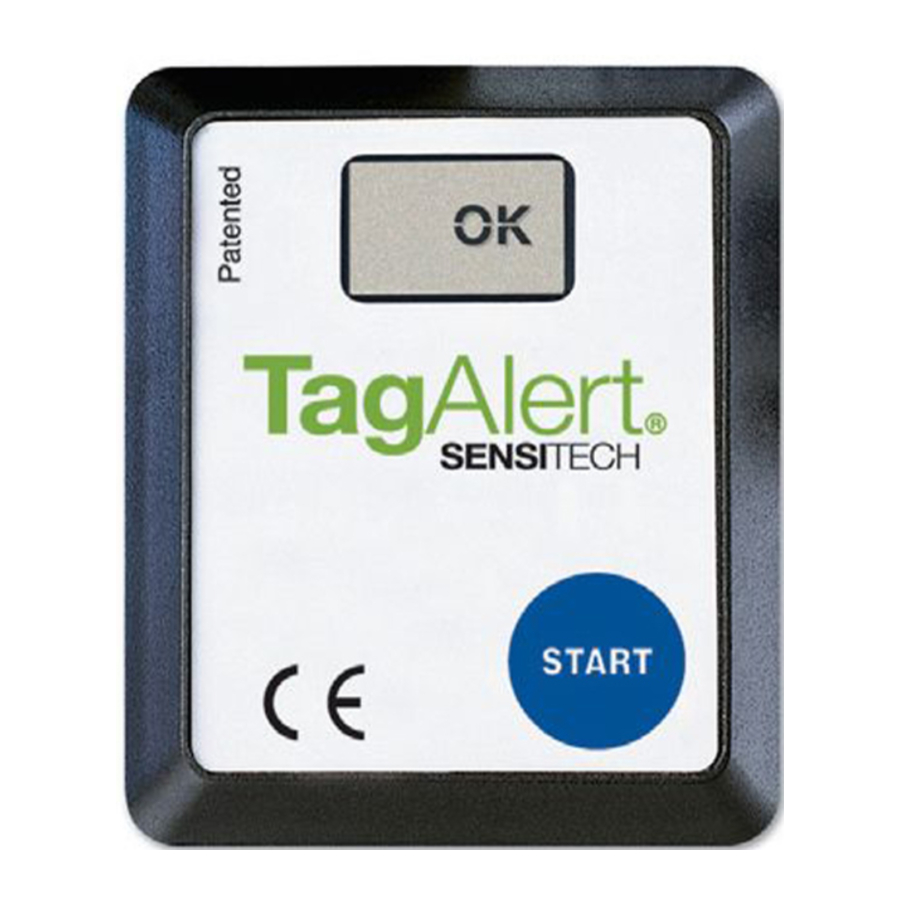
- Push the START button on the front of the device and hold for approximately 1 second.
- The LCD display will respond by displaying "OK" (Figure 1).
![]()
- Once the "OK" is displayed, theTagAlert® indicator has been activated and enters the start-up delay as programmed into the unit.
- Once activated, remove the back sticker label and affix to an instruction card or attach directly to a clean, dry surface of the product or package.

Reading a TagAlert Indicator
- Once the package has arrived at its destination, remove the TagAlert indicator from the package.
- If the LCD displays "OK", no alarms have been triggered during the trip (Figure 1).
- If the LCD displays black squares over the "OK" and the numbers 1, 2, 3 and/or 4, then an alarm has been triggered (Figure 2).
![]()
For example, if the numbers 1 and 4 are displayed, then the 1st and 4th alarm conditions were exceeded. - The receiving location should follow the appropriate protocol to determine product disposition if an alarm has triggered.

NOTE: If any numbers appear on the LCD, that alarm has triggered. The "OK" may still be visible through the black squares even if an alarm has triggered.
Fail Safe Protection
- The TagAlert indicator performs a system check during operation and incorporates a Fail-Safe protection mode to alert the user should the unit fail to function properly.
- If the TagAlert indicator detects a faulty temperature sensor or the temperature exceeds the operational limits (70ºC (158ºF) to -20ºC (-4ºF)) in transit, the unit will enter into this mode and will discontinue temperature measurement.
- The LCD will display black squares over the "OK". No numbers will be displayed on the LCD (Figure 3).
![]()

AlarmAlert™ Feature
- If alarmed, the TagAlert indicator provides a mechanism to determine at which point during the trip the first alarm was triggered. This AlarmAlert™ feature can accommodate trips up to 10 days in duration.
- Read the TagAlert and record which alarms have triggered (Figure 2).
- Follow the next three steps to determine which alarm was triggered first and the approximate time at which the alarm triggered:
- Press the Start button to determine which alarm triggered first. The number represent ing the first alarm that triggered will flash for 4 seconds. The LCD display will then clear for 2 seconds.
- The sum of the numbers that appear next will equal the day into the trip that the first alarm was triggered (Figure 4). This will be displayed for 2 seconds.
Figure 4Numbers Displayed on LCD Sum = Day of Trip 1 1st 2 2nd 3 3rd 4 4th 4 and 1 5th 4 and 2 6th 4 and 3 7th 4 and 3 and 1 8th 4 and 3 and 2 9th 4 and 3 and 2 and 1 10th - The sum of the numbers that appear next will indicate the 3-hour time interval within the day the first alarm was triggered (Figure 5).
Figure 5Numbers Displayed on LCD Sum Representing Time Interval Time Interval in 24 Hour Period 1 1st 0 - 3rd hour 2 2nd 3rd - 6th hour 3 3rd 6th - 9th hour 4 4th 9th - 12th hour 4 and 1 5th 12th - 15th hour 4 and 2 6th 15th - 18th hour 4 and 3 7th 18th - 21th hour 4 and 3 and 1 8th 21 - 24th hour 4 and 3 and 2 and 1 10th After 10th day
- Press the Start button again to repeat sequence of information.
NOTE: Days are calculated in 24 hour increments. This begins when the start button is first pressed and the "OK" is displayed on the LCD.
Sensitech Inc. • 800 Cummings Center, Suite 258X • Beverly, MA 01915
1-800-843-8367 • +1-978-927-7033 • Fax 978-921-2112 • www.sensitech.com

Documents / Resources
References
Download manual
Here you can download full pdf version of manual, it may contain additional safety instructions, warranty information, FCC rules, etc.
Advertisement


Need help?
Do you have a question about the TagAlert and is the answer not in the manual?
Questions and answers