Levoit LVAC-120 - Cordless 2-in-1 Stick Vacuum Cleaner Manual
- User manual (16 pages)
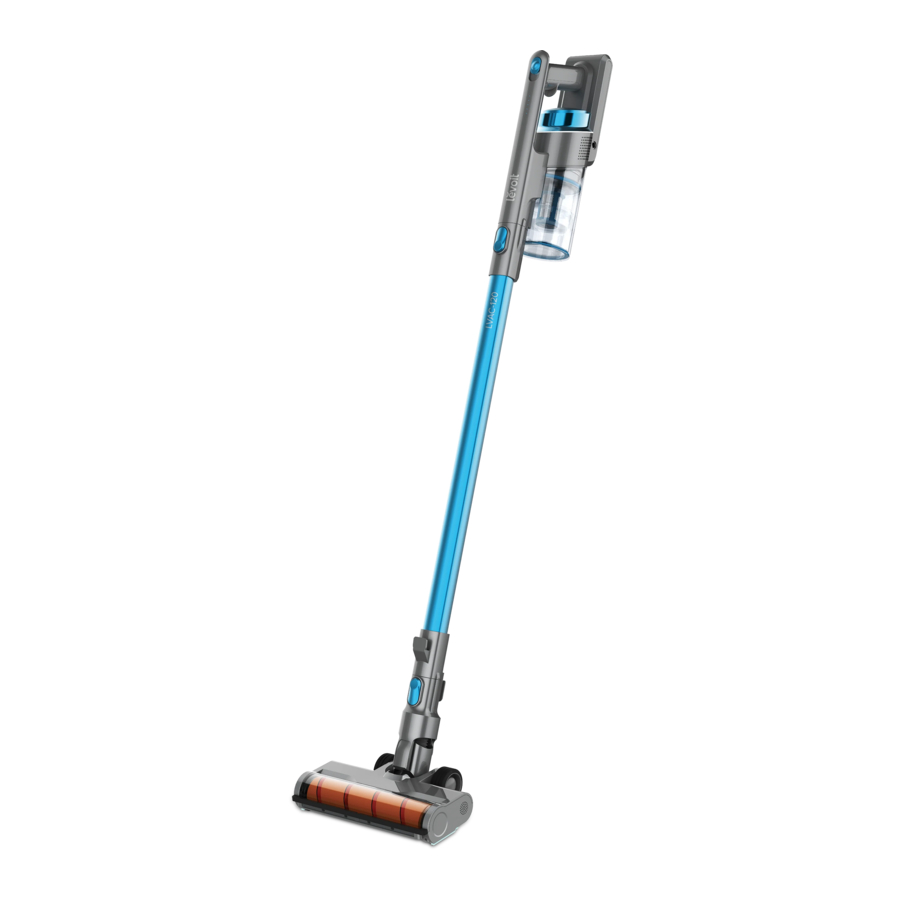
Advertisement
Package Contents
1 x Cordless Vacuum
1 x Stick
1 x Roller Brush
1 x Crevice Nozzle
1 x 2-in-1 Brush Nozzle
1 x Cleaning Brush
1 x Wall Mount
2 x Screws
1 x Charger
1 x User Manual
1 x Quick Start Guide
Specifications
| Battery Type | DC 22.2V, 2200mAh, 48.84Wh Li-ion batteries |
| Charger | Input: 100–240V, 50/60Hz 0.5A Output: DC 26V, 400mA |
| Charging Time | 5 hours |
| Dimensions | 10.4 x 5.3 x 30.3 in / 26.3 x 13.5 x 77 cm |
| Weight | 8.3 lb / 3.8 kg |
| Dust Bin Capacity | 2.1 cups / 0.5 L |
| Runtime | 20–40 minutes |
| Suction Power | 1.5 psi / 10 kPa |
IMPORTANT SAFETY INSTRUCTIONS
When using this vacuum, basic precautions should always be followed, including the following:
READ ALL INSTRUCTIONS

TO REDUCE THE RISK OF FIRE, ELECTRIC SHOCK, OR INJURY:
- Do not leave the vacuum unattended while it is on. Unplug from outlet when not charging and before servicing.
- Do not use outdoors or on wet surfaces.
- The vacuum is not a toy. Do not allow children to play with the vacuum.
- Close supervision is necessary when the vacuum is used by children, invalids, disabled persons, or those who lack experience and knowledge, unless they have been given supervision or instruction on how to use the vacuum and understand the hazards involved.
- Only use your vacuum as described in this manual.
- Do not use your vacuum if it is damaged or not working correctly, or if the charger or plug is damaged. Do not try to repair it yourself. Contact Customer Support.
- Do not handle the charger or vacuum with wet hands.
- Do not put any object into any opening. Do not use the vacuum with any opening blocked. Keep free of dust, lint, hair, or anything that may reduce air flow.
- Keep hair, loose clothing, fingers, and all body parts away from openings and moving parts.
- Use extra care when cleaning on stairs.
- The stick contains electrical wires. Do not use if damaged, cut, or punctured.
- Do not vacuum the following or use where they may be present:
- Large or sharp objects such as glass shards
- Flammable or combustible liquids such as solvents or detergents
- Inflammable or explosive substances such as gasoline or alcohol
- Risk of injury. Brush may start unexpectedly. Remove the main body before cleaning or servicing.
- Prevent unintentional starting. Ensure the switch is in the "Off" position before picking up or carrying the vacuum. Carrying the vacuum with your finger on the switch may cause accidents.
- Always turn the vacuum off before connecting or disconnecting the stick, nozzles, brushes, or vacuum head.
- Do not vacuum anything that is burning or smoking, such as cigarettes, matches, or hot ashes.
- Do not use without dust bin and filters in place.
- Do not point the vacuum at any person or animal while it is on.
- Store the vacuum on a small stand or flat surface, or hang it from the wall.
- Do not use aftermarket or third-party accessories with the vacuum. Only use the accessories provided.
BATTERY & CHARGER
Read all safety warnings and instructions. Failure to follow the warnings and instructions may result in electric shock, fire, and/or serious injury.
- Do not pull or carry the vacuum by the charging cable, use the cable as a handle, close a door on the cable, or pull the cable around sharp edges or corners. Do not run any appliance over the cable.
- Do not pull on the cable to remove it from the outlet. Only use the plug to pull it out from the outlet.
- Never place the charger or its cable near any heat source.
- Keep the charging cable out of areas where people walk often. Place the cable where it will not be tripped over.
- Do not use the charger to charge other appliances besides this vacuum.
- Only recharge the vacuum with the charger specified by the manufacturer. A charger that is suitable for one type of appliance may create a risk of fire when used with another battery pack. Charger model: charger ZD012A260040US.
- Only use the battery pack specifically designed for this vacuum. Use of any other battery packs may create a risk of injury and fire. Battery pack type: PF061JPF from Suzhou Provac Technology Co., Ltd.
- When the battery pack is not in use, keep it away from other metal objects, like paper clips, coins, keys, nails, screws, or other small metal objects that can make a connection from one terminal to another. Shorting the battery terminals together may cause burns or a fire.
- Under abusive conditions, liquid may be ejected from the battery. Avoid contact. If contact occurs, flush with water. If liquid contacts eyes, immediately flush with water and seek medical help. Liquid ejected from the battery may cause irritation or burns.
- Do not use the battery pack or vacuum if they are damaged or modified. Damaged or modified batteries may exhibit unpredictable behavior resulting in fire, explosions, or risk of injury.
- Have servicing performed only by a qualified repair person using identical replacement parts. This will ensure that the safety of the vacuum is maintained.
- Do not modify or attempt to repair the vacuum or the battery pack except as indicated in the manual.
- Do not expose the battery pack or vacuum to fire or excessive temperatures. Exposure to fire or temperatures above 265°F / 129°C may cause an explosion.
- Follow all charging instructions and do not charge the battery pack or vacuum outside of the temperature range specified in the instructions. Charging improperly or at temperatures outside of the specified range may damage the battery and increase the risk of fire.
- Environment Requirements: The vacuum or the battery pack should be stored only in a temperature range of -4°–95°F / -20°–35°C, and used and charged only in a range of 39°–104°F / 4°–40°C.
SAVE THESE INSTRUCTIONS
NOT FOR COMMERCIAL USE
HOUSEHOLD USE ONLY
GETTING TO KNOW YOUR VACUUM

- Handle
- On/Off Button
- Battery Indicator
- Vacuum Body
- Release Button
- Stick
- Vacuum Head Release Button
- Vacuum Head
- Vacuum Cushions
- Roller Brush
- Brush Lock
- Dust Bin
- Cup Filter
- Inner Dust Bin Chamber
- Charging Port
- Disc Filter
- Dust Door Release
- 2-in-1 Brush Nozzle
- Crevice Nozzle
- Wall Mount
- Cleaning Brush
- Charger
USING YOUR VACUUM
- Unpack the vacuum and make sure all parts are included.
- Attach the vacuum head to the bottom of the stick and attach the vacuum body to the top [Figure 1.1].
![]()
- Slide the On/Off button forward to turn the vacuum on. Slide the button to Stage I for hard floors, or slide to Stage II for rugs and carpets [Figure 1.2].
![]()
- Slide the On/Off button back completely to turn the vacuum off [Figure 1.2].
Note: Regularly check to make sure the vacuum cushions and the roller brush are clean to avoid scratching sensitive floors or walls.


Battery Indicator Light Chart
| Status | Description |
| 5 solid lights | Battery is fully charged |
| 3 solid lights | Battery is at 50% capacity |
| 1 solid light | Battery is at low capacity |
| 1 blinking light | Battery is almost empty |
| No light | Battery is empty |
Nozzles
Your vacuum comes with attachments to help you tackle almost any cleanup job. To use an attachment:
- Press and hold the vacuum body release button and gently pull the vacuum body from the stick [Figure 2.1].

- Slide the crevice nozzle or 2-in-1 brush nozzle onto the vacuum body [Figure 2.2].
![]()
- Optionally, leave the stick attached to the vacuum body and press the vacuum head release button to remove the vacuum head. Then, attach the nozzle or brush to the end of the stick [Figure 2.3].
![]()
Note: You can also attach the vacuum body directly to the vacuum head [Figure 2.4].
![]()


CARE & MAINTENANCE
Charging the Vacuum
Your vacuum uses a DC 22.2V, 2200mAh Li-ion battery and on a full charge, lasts 20 minutes on Stage II and 40 minutes on Stage I. Use the included charger to charge the vacuum.
Note: Make sure the vacuum is turned off before charging.
- Insert the charger into the charging port.
- Plug the charger into an outlet. The indicator lights will blink while charging.
Note:- Charging time is about 5 hours.
- The charger may be warm during charging. This is normal.
- When the vacuum has fully charged, the indicator lights will stay on for 3–5 minutes. They will then turn off to save power.
Cleaning the Dust Bin & Filters
- Turn the vacuum off.
- To empty the dust bin, remove the stick by pressing the vacuum body release button.
- Hold the dust bin over a trash can and press the dust door release button [Figure 3.1]. Use caution, as the dust door will automatically open when the release button is pushed. Empty out debris and dirt, then close the dust door.
![]()
- To wash the dust bin, remove the bin by pulling it outward [Figure 3.2].
![]()
- Remove the disk filter and pull the inner chamber out from the dust bin. Twist the tab on the bottom clockwise to remove the cup filter [Figure 3.3]. Empty out any remaining dirt.
![]()
- Rinse the dust bin, cup filter, disc filter, and inner chamber with water and dry thoroughly. Make sure the filters are completely dry before using. Reassemble and place all parts back on the vacuum body.
- Reassemble [Figure 3.4]. When reassembling, make sure the tab on the inner chamber is aligned with the slot in the dust bin [Figure 3.5]. Place all parts back on the vacuum body.
![]()
Note:- The cup filter should be cleaned every 2–3 uses.
- The disc filter should be cleaned once a month and replaced every 6–8 months.
- To maintain the performance of your vacuum, only use official Levoit filters. To buy replacement filters, visit Levoit's online store. Go to levoit.com for more information.


Cleaning the Wheel Axles
Use the cleaning brush to remove any dirt or trapped hair from the wheel axles. If necessary, carefully cut away any tangled hair with scissors or a sharp knife.
Cleaning the Roller Brush
Periodically clean the roller brush to avoid blockage or jamming.
- Turn the vacuum off. Detach the vacuum head from the stick by pressing the vacuum head release button.
- Use a coin to unlock the roller brush by turning the brush lock counterclockwise until the slot is vertical. Pull the roller brush out [Figure 4.1].

- Carefully use a pair of scissors or a sharp knife to remove any hair tangled around the roller brush.
- Replace the roller brush and use the coin to turn the brush lock clockwise until the slot is horizontal.

Storage
There are 2 ways to store your vacuum.
To use the wall mount:
- Install the wall mount by screwing it into the wall [Figure 5.1].

- Hang the vacuum on the wall mount [Figure 5.1].

To store on the ground:
- Place the roller brush on flat ground and attach the stick. Lock the stick into the standing position [Figure 5.2].

- Take the vacuum body, remove any attachments, and store the vacuum body on top of the vacuum head by hanging it on the hook near the bottom of the stick [Figure 5.2].
Note:- Always store the vacuum on flat ground. If the vacuum is stored on a slanted surface it may fall and be damaged.
- If storing for long periods of time, periodically charge the battery to preserve the life of the battery.

TROUBLESHOOTING
| Problem | Possible Solution |
| Vacuum will not turn on. | Slide On/Off button to either Stage I or Stage II (see Using Your Vacuum). |
| Recharge the vacuum (see Charging the Vacuum). | |
| Check for blockage inside the vacuum head and stick. Remove any blockage (see Care & Maintenance). Wait 10–15 minutes to allow the vacuum to cool before turning it back on. | |
| Vacuum head does not work. | Clean the roller brush (see Cleaning the Roller Brush) by removing any debris blocking the brush. |
| Roller brush drops out of the vacuum. | Check the brush lock (see Getting to Know Your Vacuum). Make sure it is in the locked position. If not, lock it by using a coin to turn the brush lock clockwise until the slot is horizontal. |
| Vacuum makes an abnormal noise. | Make sure the roller brush is placed properly and is locked in place (see Getting to Know Your Vacuum). |
| Clean the roller brush (see Cleaning the Roller Brush) by removing any debris blocking the brush. | |
| Check for blockage inside the vacuum head and stick. Remove any blockage (see Care & Maintenance). | |
| Vacuum has low suction power. | Battery may be low. Recharge the battery to full charge (see Charging the Vacuum). |
| Clean the roller brush (see Cleaning the Roller Brush) by removing any debris blocking the brush. | |
| The dust bin and filters may be full. Empty the dust bin and clean the filters (see Cleaning the Dust Bin & Filters). | |
| Make sure the cup filter is installed and is securely in place. | |
| Check for blockage inside the vacuum head and stick. Remove any blockage (see Care & Maintenance). |
If your problem is not listed, please contact Customer Support.
Questions or Concerns?
Please contact us Mon–Fri, 9:00 am–5:00 pm PST/PDT at support@levoit.com or at (888) 726-8520.
Find Us Online
Search for @LevoitLifestyle • #LevoitLove • #LevoitLifestyle on social media for tips, special deals, giveaways, inspiration, and more.

Documents / Resources
References
Download manual
Here you can download full pdf version of manual, it may contain additional safety instructions, warranty information, FCC rules, etc.
Download Levoit LVAC-120 - Cordless 2-in-1 Stick Vacuum Cleaner Manual
Advertisement


Need help?
Do you have a question about the LVAC-120 and is the answer not in the manual?
Questions and answers