Toshiba 3000 Series, 2000 Series - DKT / IPT Business Telephone Quick Reference Guide with Button Codes
- Quick reference manual (2 pages) ,
- User manual (116 pages) ,
- User manual (115 pages)
Advertisement
- 1 Introduction
- 2 What's My Line
- 3 Which Outgoing/Incoming Call Features Do I Have
- 4 Which Codes Do I Use
- 5 Making a Call
- 6 Answering a Call
- 7 Handsfree Answerback
- 8 Account Code Calls
- 9 Call Transfer
- 10 Conference Calls
- 11 Hold
- 12 Call Forward - Any Calls (Internal & External)
- 13 Call Park Orbits
- 14 Call Pickup
- 15 Echo Cancel
- 16 Paging
- 17 Redial
- 18 Speed Dial
- 19 One Touch Buttons
- 20 Voice Mail - Direct Transfer
- 21 Volume Control
- 22 LCD Features
- 23 Flexible Buttons
- 24 Flexible Button Codes
- 25 Documents / Resources
Introduction
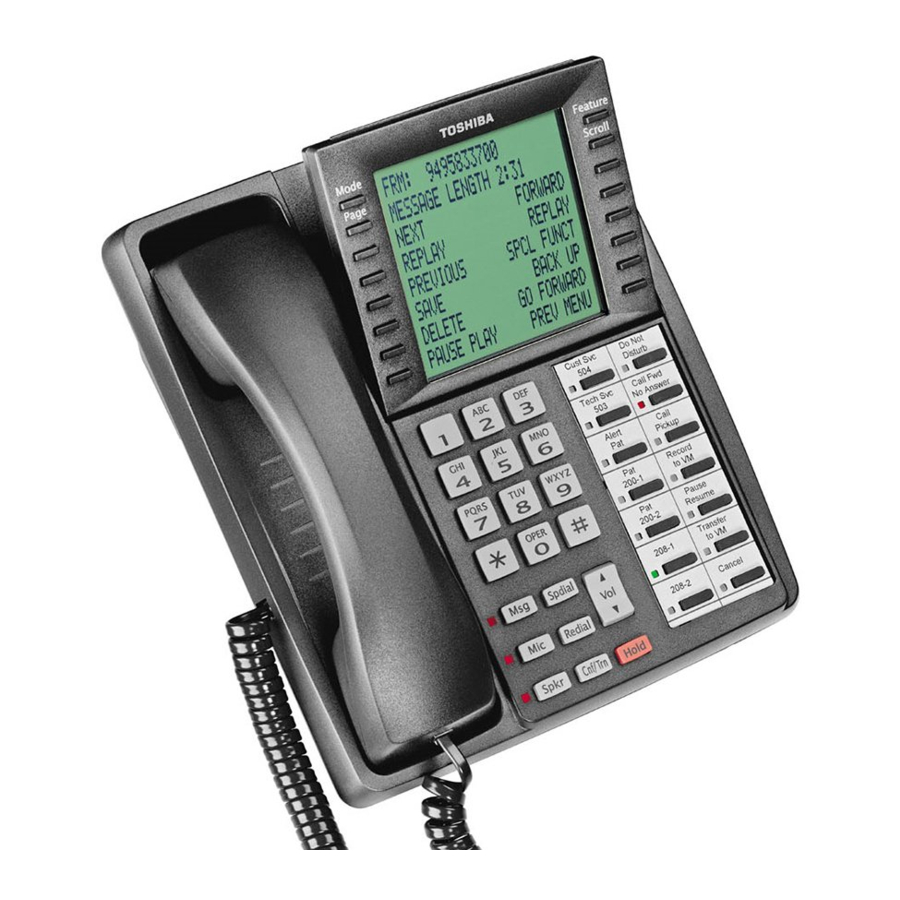
This quick reference guide applies to Toshiba 3000- and 2000- series digital telephones and Internet Protocol (IPT1020-SD) telephones connected to a Strata CTX system.
See your Telephone System Administrator to find out which features you have. Use the check boxes or blank lines to enter the variable selections for your telephone.
What's My Line
Throughout this guide, the word line is mentioned. Check mark which Line type you have. For example, you will be instructed to select a line. Line can be:
- Line button
- Pooled Line Group
- Group Line button
- Line out requiring an access code where you enter an outside line or line group access code.
Which Outgoing/Incoming Call Features Do I Have
Check mark here which outgoing/incoming feature you have on your system. Then go through the rest of this guide and check mark that feature where it s noted.
- Automatic Line Selection (ALS): For outgoing calls: You have ALS if you hear dial tone and the Line LED lights steady green when you lift the handset or press Spkr.
- Ringing Line Preference: You answer an incoming Line ringing your station by lifting the handset or pressing Spkr.
- Tone Signaling: Internal incoming call: you hear successive ring tones, then lift the handset or press Spkr.
- Voice First Signaling: Internal incoming call: your phone does not ring; instead you hear a long tone, then the caller s voice. Talk in the direction of your phone, or answer the call as you normally would by lifting the handset or pressing Spkr.
Note You can change between Tone and Voice Signaling on a call-by-call basis by pressing 1 after dialing an internal telephone number. - Hot Dialing: If your telephone is programmed for hot dialing, you do not have to press Spkr or lift the handset before dialing internal or external speakerphone calls. When you dial a number, the speakerphone automatically turns on and the Spkr and Mic LEDs light up.
Which Codes Do I Use
Default feature codes are listed in this guide. Check with your System Administrator to see if these codes have been changed. If so, write the new codes in the blank lines and cross out the default codes. For example:
Cnf/Trn + #46 or ![]() .
.
Making a Call
Hot Dialing
- To make a call using Hot Dialing, dial the number.
- When connected, you can continue speakerphone operation or lift the handset and continue the conversation.
Spkr Button
- To make a call, press Spkr.
- Dial the number.
- When connected, you can continue to use the speakerphone or lift the handset and continue the conversation.
Handset
- To make a call, lift the handset, then dial the number.
- When connected, you can continue to use the handset or switch to speakerphone by holding down Spkr and replacing the handset.
Answering a Call
- Lift the handset or press Spkr.
- If you don t have Ringing Line Preference: press the flashing line or extension button and lift the handset.
Handsfree Answerback
- To receive a handsfree internal call over the speakerphone
- You hear a single long tone, then the callers voice. Do not lift the handset; speak toward the telephone in a normal voice.
- Press Spkr or take the handset off-hook if you wish to transfer the call or place it on hold.
- To switch between Handset and Speakerphone
- Press Spkr and place the handset on-hook to switch from Handset to Speakerphone mode.
Account Code Calls
To dial with a Forced Account Code (FAC)
- Place a call in the normal method.
- After the tone burst, enter the Account Code.
If the code is invalid, you hear re-order tone and the call is rejected.
- To use an Emergency Override of an FAC
You can bypass Forced Account Code requirements with three emergency numbers, including 911. See your System Administrator for these numbers. - To dial with Voluntary Account Codes
- After accessing a CO line, press Account Code ...or Cnf/Trn + #46 ________.
You can enter it at any time during a call. - Enter the Account Code.
You should hear confirmation tone if the code is valid or two short tones if it is invalid. - Dial a telephone number if you entered the code after accessing an outside line or resume talking or hang up if you entered the code after the call.
- After accessing a CO line, press Account Code ...or Cnf/Trn + #46 ________.
Call Transfer
- While on a call, press Cnf/Trn.
- Dial the extension and announce the call or blind transfer (hang up).
During call transfer, you can reconnect to the original caller by pressing your flashing extension button. - Camp on to a busy station: If the station is busy, hang up. The called station receives a tone. Once the busy line is free, the transferred line is called back.
Conference Calls
- While on a call, press Cnf/Trn.
- Call another station or outside line.
- When the called party answers, press Cnf/Trn. If it s busy or theres no answer, press Cnf/Trn again to return to the original connection. All parties are conferenced.
- Repeat the above steps to add more lines. You can conference up to eight parties.
Note
When the person who initiates the conference (master) hangs up, control transfers to the first internal station added to the conference. If no internal stations are in the conference, the call disconnects.
To transfer conference control
- Do steps 1 and 2 above to add the line to which you wish to transfer conference control.
- Announce the call and hang up to transfer the call. This station is now the conference master with the ability to add or delete parties.
- To hold a conference call
- If you are the master conference controller, press Hold once (or twice for Executive Hold) to place the conference call on hold.
The conference continues and you can join at any time without giving up master abilities. Music-on-hold is suppressed in this mode.
- If you are the master conference controller, press Hold once (or twice for Executive Hold) to place the conference call on hold.
- To delete the last member added to a conference
- While a call is in progress, press the Cancel button.
- To conference two outside Lines
- While talking on an outside call, press Cnf/Trn.
- Access an outside line.
- After the party answers, press Cnf/Trn.
- If you receive a busy tone or if the station does not answer, press the flashing button to return to the original call.
- Press Cnf/Trn and hang-up.
Note Most phone companies provide auto disconnect, but if it is not provided, the lines must be supervised to disconnect. - To supervise a tandem call, press the extension button. If the parties have finished, hang up or if the parties are still talking, press Cnf/Trn and hang-up.
Hold
- To place a call on Hold, press the Hold button.
- To return to the held call, press the held lines button.
If you do not return to the held call, it rings back to your phone. If you are busy on another call, you hear two tone bursts. If the held party hangs up, the call is released. - If you have additional lines at your station to hold, repeat Step 1 above.
- To place a call on Exclusive Hold
- While on a call, press Hold twice. (No one can accidently pick up your call.)
- To place a call on Automatic Hold
- While on a call, press another extension button to receive/originate a new call. You can switch between calls without having to press Hold.
Make sure this feature is programmed on your system; if not, existing calls will drop.
- While on a call, press another extension button to receive/originate a new call. You can switch between calls without having to press Hold.
- To place a call on Consultation Hold
If you have multiple extensions on your phone, you can hold a different call on each extension.- Press Cnf/Trn.
Call Forward - Any Calls (Internal & External)
There are two ways to perform each Call Forward:
- Enter the button sequence below
All Calls: Press Ext. + #6011 or ________ + Destination No.
Busy: Press Ext. + #6021 or ________ + Dest. No.
No Answer: Press Ext. + #6031 or ________ + Dest. No. + Timer (seconds, 2-digits) + #
Busy No Answer: Press Ext. + #6041 or ________ + Dest.
No. + Timer (seconds, 2-digits) + #
Cancel: Press Ext. + #6051 or ________ - ...or program a flexible button to perform the sequence. See Flexible Buttons for instructions.
Call Park Orbits
- To park a call
- While on a call, press Park in Orbit ...or Cnf/Trn + #33 or ________ .
- Specify the Park Orbit using one of the following:
- Press * and the system automatically selects a General Park Orbit between 7000~7019. The chosen orbit appears on the LCD.
- Enter a valid extension.
- Press # and the system automatically selects your extension as the orbit.
- Hang up. If the parked call is not retrieved, the call rings back to your phone.
- To retrieve a parked call
- Press Park in Orbit
...or your extension button + #32 or ________ . - Enter the Orbit Number where the call is parked.
- Press Park in Orbit
Call Pickup
- Press an extension button.
- Enter a code from the following list: Group Pickup: #5#34 or ________
Directed Terminal Pickup: #5#5 or ________
Other (see System Administrator):_________ - Dial the extension that is holding the ringing or held call to be picked up.
Echo Cancel
- If you experience echo while conversing on your IP telephone, tap Vol or once to cancel the echo sound.
Paging
- To make a page announcement to a phone or external speakers
- Press extension, lift the handset, and enter:
#30 or ________ (all groups)
..or #31 or ________ + _____ the Group page access code. See Flexible Buttons for more paging codes. - Make your announcement, then hang up.
- Press extension, lift the handset, and enter:
- To make an All Call Page
- With the handset off-hook, press All Call Page ...or extension + #30. This pages all phones in the All Call Page Group, and may page external speakers (depends on programming).
- Make your announcement then hang up.
Redial
Use this button to redial the last number dialed from your phone.
- To redial the last number, press Redial or *0.
Speed Dial
- To store a Station Speed Dial Number
We suggest storing Speed Dial numbers on a One Touch button; use Speed Dial Codes to store more numbers.- Press Program or dial #9876.
- Press Spdial.
- Press 1, then enter a Speed Dial Code (00~99).
- Enter the number to be stored in the Speed Dial bin (32 digits max.).
- Press Spdial to store the entry. See DATA PROGRAMMED.
- Lift and replace the handset.
- To clear a number from a Station Speed Dial code
- Repeat the previous procedure skipping Step 4.
- To make a call using Speed Dial
- Lift the handset.
- Access a outside line (if necessary).
- Press Spdial. Then dial the Station or System Speed Dial Number.
One Touch Buttons
This feature is useful for storing frequently dialed numbers.
- To change a One Touch Button
- Press #9876 to enter User Programming Mode.
- Press the One Touch button to set.
- Enter the digits or special buttons to be stored.
- Press the One Touch button to save the entry.
If these steps do not work, you may have to create a One Touch button (see Flexible Buttons).
- To Use a One Touch Button, just press it. Voice Mail - Direct Transfer
Voice Mail - Direct Transfer
- While on a call, press Cnf/Trn.
- Press #407 ____.
- Enter the voice mailbox number (may be the same as the extension number), then press #.
- Hang up (the caller is connected to the voice mailbox) or press Cnf/Trn to return to the calling party.
Volume Control
- To adjust handset volume
- During a call, press down Vol
![]() or
or ![]() . When you hang up, volume returns to default.
. When you hang up, volume returns to default.
- During a call, press down Vol
- To adjust the speaker volume for internal/external calls and background music
- Press Spkr. Select a line and press Vol
![]() or
or ![]() .
.
- Press Spkr. Select a line and press Vol
- To adjust Ring Tone, Handsfree Answerback and Speaker Off-hook Call Announce
- With an idle phone and handset on-hook, press Vol
![]() or
or ![]() . When you hang up, volume returns to default.
. When you hang up, volume returns to default.
- With an idle phone and handset on-hook, press Vol
 or
or  . When you hang up, volume returns to default.
LCD Features
- To use Speed Dial or Directory Menus
- Press the Soft Key next to the Speed Dial (SD) or Directory (DIR) to view the first screen.

- To view the other pages, press the soft keys MORE or PREVIOUS ...or LEFT or RIGHT.
- Select someone from the list by pressing the Soft Key next to the name.
- Press the Soft Key next to the Speed Dial (SD) or Directory (DIR) to view the first screen.
- To Use Direct Station Selection
- Press the DIRECT SS Soft Key to view the first screen.

- To view other pages, press the MORE or PREVIOUS Soft Keys.
- To select someone from the list, press the Soft Key next to the name.

- Press the DIRECT SS Soft Key to view the first screen.


Flexible Buttons
There are 10, 14 or 20 Flexible Buttons on your telephone. You can program features onto Flexible Buttons for easy access.
- Press #9876 to enter User Programming Mode.
- Press Hold.
- Press the Flexible Button to set or change.
- Enter the Flexible Button Code (see following list).
- Press the same Flexible Button (flashing). DATA PROGRAMMED appears on your LCD.
Flexible Button Codes
| Account Code | 660 |
| Auto Busy Redial | 150 |
| Auto Callback | 160 |
| Call Forward - Any Calls (Internal and External) | |
| All Call | 340 |
| Busy | 350 |
| No Answer | 360 |
| Busy No Answer | 370 |
| Call Park Orbit | 170 |
| Call Pickup | |
| Incoming - Group Pickup | 430 |
| Incoming - Directed Terminal Pickup | 440 |
| Incoming - Directed Group Pickup | 450 |
| Incoming - Directed DN Pickup | 460 |
| On hold - Local Retrieve | 490 |
| On hold - Remote Retrieve | 500 |
| On hold - Outside Line Retrieve | 480 |
| On hold - Directed DN Retrieve | 510 |
| Incoming - Any External Call | 470 |
| On hold and Incoming | 520 |
| Caller ID | 590 |
| Cancel | 290 |
| Do Not Disturb | 180 |
| Door Lock Cancel | 540 |
| Direct Station Selection (DSS) Button | 610 |
| One Touch Button | 570 |
| Paging | |
| Page All Groups | 220 |
| Page Individual Groups | 230 |
| Emergency Page - Individual Group | 250 |
| Emergency Page - All Groups | 240 |
| Answer - Group Page | 590 |
| Record to VM | 630 |
| Pause/Resume | 640 |
| Release Button | 270 |
| Release/Answer | 280 |
| Speed Dial | 260 |
| User Programming Mode | 650 |
Note
Not all features have a Flexible Button Code. For additional codes, see your System Administrator.

Do not use cleansers that contain benzene, paint thinner, alcohol or other solvents on the telephone's rubber feet. The color of the rubber may transfer to the desk or mounting surface.

Documents / ResourcesDownload manual
Here you can download full pdf version of manual, it may contain additional safety instructions, warranty information, FCC rules, etc.
Advertisement
Thank you! Your question has been received!


Need Assistance?
Do you have a question about the STRATA CTX DKT3014-SDL that isn't answered in the manual? Leave your question here.