AEG IKB64301FB User Manual
Hide thumbs
Also See for IKB64301FB:
- User manual (396 pages) ,
- User manual (356 pages) ,
- User manual (20 pages)
Table of Contents
Advertisement
Quick Links
Advertisement
Table of Contents

Related Manuals for AEG IKB64301FB


Summary of Contents for AEG IKB64301FB
- Page 1 EN User Manual | Hob IKB64301FB aeg.com\register...
-
Page 2: Table Of Contents
Welcome to AEG! Thank you for choosing our appliance. Get usage advice, brochures, trouble shooter, service and repair information: www.aeg.com/support Subject to change without notice. CONTENTS 1. SAFETY INFORMATION................2 2. SAFETY INSTRUCTIONS................4 3. INSTALLATION....................6 4. PRODUCT DESCRIPTION................9 5. - Page 3 • Children should be supervised to ensure that they do not play with the appliance. • Keep all packaging away from children and dispose of it appropriately. • WARNING: The appliance and its accessible parts become hot during use. Keep children and pets away from the appliance when in use and when cooling down.
-
Page 4: Safety Instructions
• Metallic objects such as knives, forks, spoons and lids should not be placed on the hob surface since they can get hot. • Do not use the appliance before installing it in the built-in structure. • Do not use a steam cleaner to clean the appliance. •... - Page 5 – Do not store any small pieces or • If the mains socket is loose, do not sheets of paper that could be pulled in, connect the mains plug. as they can damage the cooling fans • Do not pull the mains cable to disconnect or impair the cooling system.
-
Page 6: Installation
• Switch off the appliance and let it cool WARNING! down before cleaning. • Do not use water spray and steam to Risk of fire and explosion. clean the appliance. • Fats and oil when heated can release • Clean the appliance with a moist soft flammable vapours. - Page 7 • To replace the damaged mains cable, use One-phase connection the cable type: H05V2V2-F which 1. Remove the cable end sleeve from black, withstands a temperature of 90 °C or brown and blue wires. higher. A single wire must have a minimal 2.
- Page 8 Find the video tutorial "How to install your AEG Induction Hob - Worktop installation" by typing out the full name indicated in the graphic below. www.youtube.com/electrolux www.youtube.com/aeg min. min. 500mm How to install your AEG 50mm Induction Hob - Worktop installation...
-
Page 9: Product Description
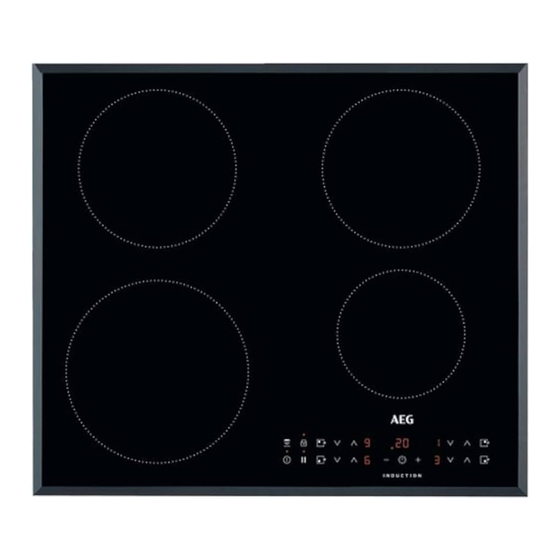
4. PRODUCT DESCRIPTION 4.1 Cooking surface layout Induction cooking zone Control panel 180 mm 180 mm 145 mm 210 mm 4.2 Control panel layout Use the sensor fields to operate the appliance. The displays, indicators and sounds tell which functions operate. Sensor Function Comment... -
Page 10: Before First Use
Sensor Function Comment field To select the cooking zone. To increase or decrease the time. To set a heat setting. PowerBoost To activate the function. 4.3 Heat setting displays Display Description The cooking zone is deactivated. The cooking zone operates. The dot means a change by half of a heating level. -
Page 11: Daily Use
• P25 — 2500 W CAUTION! • P30 — 3000 W • P35 — 3500 W Make sure that the selected power fits • P40 — 4000 W the house installation fuses. • P45 — 4500 W • P72 — 7200 W •... - Page 12 • for the neighbouring cooking zones even if First set the heat setting for the cooking zone, you are not using them, then set the function. • when hot cookware is placed on cold To set the cooking zone: touch cooking zone, repeatedly until the indicator of a cooking •...
- Page 13 6.8 Pause operate the hob. When you deactivate the hob with the function operates again. This function sets all operating cooking zones to the lowest heat setting. 6.11 OffSound Control (Deactivation When the function operates, all other symbols and activation of the sounds) on the control panels are locked.
- Page 14 continue operating with the reduced heat setting. Change the heat settings of the Automat‐ Boiling 1) Frying 2) cooking zones manually, if necessary. ic light Refer to the illustration for possible Fan speed Fan speed combinations in which power can be distributed among the cooking zones.
-
Page 15: Hints And Tips
raise the fan speed by one. When you reach Activating the light You can set the hob to activate the light an intensive level and press again you will automatically whenever you activate the hob. set fan speed to 0 which deactivates the hood To do so set the automatic mode to H1 –... - Page 16 7.3 Simplified cooking guide cooking zone with the medium heat setting uses less than a half of its power. The correlation between the heat setting of a zone and its consumption of power is not linear. When you increase the heat setting, it The data in the table is for guidance only.
-
Page 17: Care And Cleaning
Cooker hoods with the Hob²Hood function To find the full range of cooker hoods which work with this function refer to our consumer website. The AEG cooker hoods that work with this function must have the symbol 8. CARE AND CLEANING 8.2 Cleaning the hob... - Page 18 9.1 What to do if... Problem Possible cause Remedy You cannot activate or operate The hob is not connected to an elec‐ Check if the hob is correctly connected the hob. trical supply or it is connected incor‐ to the electrical supply. rectly.
-
Page 19: Technical Data
10. TECHNICAL DATA 10.1 Rating plate Model IKB64301FB PNC 949 492 705 00 Typ 61 B4A 00 AA 220 - 240 V / 400 V 2N, 50 - 60 Hz Induction 7.2 kW Made in: Romania Ser.Nr. -
Page 20: Energy Efficiency
11. ENERGY EFFICIENCY 11.1 Product Information Model identification IKB64301FB Type of hob Built-In Hob Number of cooking zones Heating technology Induction Diameter of circular cooking zones (Ø) Left front 21.0 cm Left rear 18.0 cm Right front 14.5 cm Right rear 18.0 cm... - Page 24 867379517-B-362023...
Need help?
Do you have a question about the IKB64301FB and is the answer not in the manual?
Questions and answers