Table of Contents
Advertisement
Quick Links
Advertisement
Table of Contents

Related Manuals for Phonak Audeo M-R


Summary of Contents for Phonak Audeo M-R
- Page 1 Phonak Audéo User Guide Phonak Audéo M-R/RT Phonak Audéo M-R/RT Trial...
- Page 2 2018 Phonak Audéo M50-R 2018 Phonak Audéo M50-RT 2018 Phonak Audéo M30-R 2018 Phonak Audéo M30-RT 2018 Phonak Audéo M-R Trial 2018 Phonak Audéo M-RT Trial 2018 Non wireless charging accessories Phonak Charger Case Combi 2018 Phonak Power Pack 2016...
- Page 3 Your hearing aid & charger details If no box is checked and you do not know the model of your hearing aid or charging accessories, please ask your hearing care professional. The hearing aids described in this user guide contain a built-in and non-removable rechargeable lithium-ion battery.
- Page 5 Your hearing aids and chargers have been developed by Phonak – the world leader in hearing solutions based in Zurich, Switzerland. These premium products are the result of decades of research and expertise and are designed to keep you connected to the beauty of sound! We thank you for making such a great choice and wish you many years of listening pleasure.
-
Page 6: Table Of Contents
Contents Your hearing aid and charger 1. Quick guide 2. Parts of the hearing aid & charger Using the charger 3. Preparing the charger 4. Charging the hearing aids Using the hearing aid 5. Left & right hearing aid markings 6. - Page 7 Further information 15. Operating conditions 16. Care and maintenance 17. Exchanging the earwax protection 18. Service and warranty 19. Compliance information 20. Information and description of symbols 21. Troubleshooting 22. Important safety information...
-
Page 8: Quick Guide
1. Quick guide Charging your hearing aids Before using your hearing aid for the first time, it is recommended to charge it for 3 hours. After placing your hearing aid in the charger, the indicator light will show the charging state of the battery until the hearing aid is fully charged. - Page 9 Multi-function button with indicator light The button has several functions. It functions as an on/off switch, a volume control and/or a program change depending on the hearing aid programming. This is indicated in your individual instructions. If paired with a Bluetooth® enabled phone, a short press will accept and a long press will reject an incoming call.
-
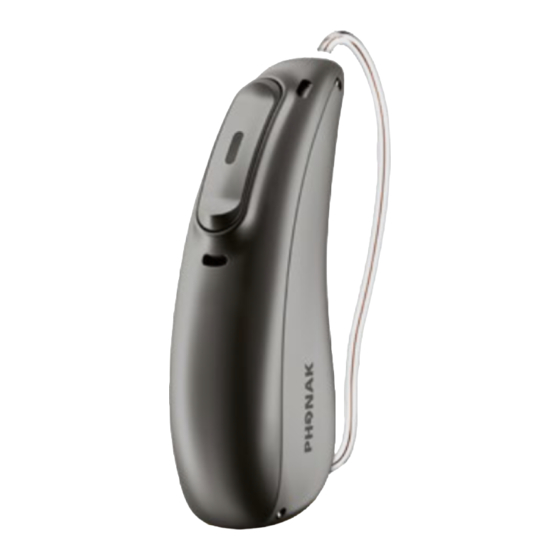
Page 10: Parts Of The Hearing Aid & Charger
2. Parts of the hearing aid & charger The following pictures show the hearing aid model and charger accessories described in this user guide. You can identify your personal models by: • checking “Your hearing aid & charger details” on page 3. - Page 11 Charger Case Combi Cleaning tool Space for drying capsule (cover closed) Space for earpieces Hearing aid charging inserts with left/right indicators Space for drying capsule (cover open) Drying capsule (optional)
- Page 12 Charger Case Combi with optional Power Pack Charger Case Combi Indicator light for power micro-USB connection to external power supply Power Pack micro-USB connection to external power supply Battery check button Indicator light for battery status and external power Power Pack lock and release...
- Page 13 Mini Charger Case Hearing aid charging inserts with left/right indicators USB-C connection to external power supply Indicator light for power External power supply USB cable (< 3 m) Power supply...
-
Page 14: Preparing The Charger
3. Preparing the charger Connecting the power supply a) Plug the larger end of the charging cable into the power supply. b) Plug the smaller end into the USB port on the charger. c) Plug the power supply into a power outlet. d) The indicator light is green when the charger is connected to the power supply. -
Page 15: Charging The Hearing Aids
4. Charging the hearing aids Low power: You will hear two beeps when the battery is low. You will have approximately 60 minutes before you have to charge the hearing aids (this can vary, depending on the hearing aid settings). The hearing aid contains a built-in and non- removable rechargeable lithium-ion battery. - Page 16 4.1 Using the Charger Case Combi or Mini Charger Case Please refer to chapter 3 for how to set up the charger. Insert the hearing aid into the charging inserts. Make sure the left and right hearing aid markings match the left (blue), right (red) indicators next to the charging inserts.
- Page 18 The indicator light will show the charging state of the battery until the hearing aid is fully charged. When fully charged the indicator light will remain on, i.e. solid green light. The charging process will automatically stop when the batteries are fully charged, so the hearing aids can be safely left in the charger.
- Page 20 Remove the hearing aids from the charging inserts by 1. pulling the hearing aids gently toward yourself and 2. lifting them out of the charger. Do not hold the tubes to remove the hearing aids from the charger as this can damage the tubes. The hearing aid switches on automatically when removed from the charger.
- Page 22 4.2 Using the optional Power Pack Note: The Power Pack is only compatible with the Charger Case Combi. Attach the Power Pack to the bottom of the Charger Case Combi and lock it. Plug in the micro-USB and connect to an external power supply.
- Page 23 micro-USB connection to external power source Indicator light battery status: 0%-29% • 30%-59% •• 60%-100% ••• Battery check push button Power Pack lock and release To check the remaining battery capacity of the Power Pack, press the battery check push button. The indicator lights will show the status.
-
Page 24: Left & Right Hearing Aid Markings
5. Left & right hearing aid markings There is a red or blue marking on the back of the hearing aid and on the speaker. This will tell you if it is a left or a right hearing aid. Blue marking for left hearing aid. -
Page 25: Putting On The Hearing Aid
6. Putting on the hearing aid Place the hearing aid behind your ear. Insert the earpiece into your ear canal. If there is an anchor attached to the earpiece, tuck it into the bowl of your ear to secure your hearing aid. -
Page 26: Removing The Hearing Aid
7. Removing the hearing aid Pull on the bend of the tube and remove the hearing aid from behind the ear. -
Page 27: Multi-Function Button
8. Multi-function button The multi-function button has several functions. It functions as an on/off switch, a volume control and/or a program change depending on the hearing aid programming. This is indicated in your individual “Hearing aid instructions”. Please ask your hearing care professional for a printout. -
Page 28: On/Off
9. On/Off Switch on hearing aid The hearing aid is configured to switch on automatically when removed from the charger. If this function is not configured, firmly press and hold the lower part of the button for 3 seconds until the indicator light blinks. -
Page 29: Connectivity Overview
10. Connectivity overview The illustration below shows the connectivity options available for your hearing aid. Cell phone TV Connector connected to TV* Roger** * The TV Connector can be connected to any audio source such as a TV, PC or hi-fi system. ** Roger wireless microphones can be connected to your hearing aids as well. -
Page 30: 1. Initial Pairing
11. Initial pairing 11.1 Initial pairing to a Bluetooth® enabled device It is only necessary to perform the pairing procedure once with each device featuring Bluetooth wireless technology. After the initial pairing, your hearing aids will connect automatically to the device. This can take up to 2 minutes. - Page 31 For more information about pairing instructions for Bluetooth wireless technology, specific to some of the most popular phone manufacturers, go to: https://marvel-support.phonak.com 11.2 Connecting to the device After your hearing aids have been paired to your device, they will automatically connect again when switched on.
-
Page 32: Phone Calls
12. Phone calls Your hearing aids connect directly with Bluetooth® enabled phones. When paired and connected to your phone, you will hear the caller’s voice directly in your hearing aids. Your hearing aids pick up your voice through its own microphones. Your voice Caller’s voice Bluetooth®... - Page 33 12.1 Making a call Enter the phone number and press the dial button. You will hear the dialing tone through your hearing aids. Your hearing aids pick up your voice through its own microphones. 12.2 Accepting a call When receiving a call, a calling notification will be heard in the hearing aids.
- Page 34 12.3 Ending a call A call can be ended by a long press on the upper or lower part of the multi-function button on the hearing aid (more than 2 seconds) or directly on your phone. long press > 2 sec...
- Page 35 12.4 Rejecting a call An incoming call can be rejected by a long press on the upper or lower part of the multi-function button on the hearing aid (more than 2 seconds) or directly on your phone. long press > 2 sec...
-
Page 36: Flight Mode
13. Flight mode Your hearing aids operate between 2.4 GHz–2.48 GHz frequency range. When flying some operators require all devices to be switched into flight mode. Entering flight mode will not disable normal hearing aid functionality, only the Bluetooth connectivity functions. 13.1 Enter flight mode To disable the wireless function and enter flight mode in each hearing aid:... - Page 37 If the hearing aid is turned off, proceed to Step 2. If the hearing aid is on, turn it off by pressing and holding the lower part of the button for 3 seconds, until the indicator light turns solid red for 2 seconds, signifying that the hearing aid is switching off.
- Page 38 13.2 Exit flight mode To enable the wireless function and exit flight mode in each hearing aid: Switch the hearing aid off and then on again - refer to chapter 9.
-
Page 39: Rebooting Your Hearing Aid
14. Rebooting your hearing aid Use this technique if your hearing aid is in an error state. This will not remove or delete any program or settings. Press the lower part of the button for at least 15 seconds. It does not matter if the hearing aid is switched on or off before you start pressing the button. -
Page 40: Operating Conditions
15. Operating conditions The product is designed such that it functions without problems or restrictions if used as intended, unless otherwise noted in these user guides. Please ensure to charge the hearing aid and Power Pack within operating temperature range: +5° to +40° Celsius (41°... -
Page 41: Care And Maintenance
16. Care and maintenance Diligent and routine care of your hearing aid and chargers contribute to outstanding performance and a long service life. To ensure a long service life, Sonova AG provides a minimum of a five year service period after phase out of the respective hearing aid. - Page 42 General information Before using hair spray or applying cosmetics, you should remove your hearing aid from your ear, because these products may damage it. Your hearing aids are resistant to water, sweat and dust under the following conditions: • After exposure to water, sweat or dust, the hearing aid is cleaned and dried.
- Page 43 Daily Hearing aid: Inspect the earpiece for earwax and moisture deposits. Clean the surfaces with a lint-free cloth or use the small brush provided in the Charger Case Combi. Never use cleaning agents such as household detergents, soap, etc. for cleaning your hearing aid. It is not recommended to rinse with water.
-
Page 44: Exchanging The Earwax Protection
17. Exchanging the earwax protection Your hearing aid is equipped with an earwax protection to protect the speaker from earwax damage. Please check the earwax protector regularly and exchange it if it looks dirty or if the hearing aid volume or sound quality is reduced. - Page 45 Gently pull off the earpiece to remove. Clean the speaker with a lint-free cloth.
- Page 46 17.2 Exchanging the earwax protection with CeruShield™ Disk Gently rotate the CeruShield Disk in the direction indicated by the arrows until a free opening appears under the bin icon. To remove a used earwax protector carefully insert the speaker into the free opening (under bin icon) until it clicks.
- Page 47 To insert a new earwax protector carefully insert the speaker into the opening where the new earwax protector is visible (opposite the bin icon) until it clicks. After the click you will see the opening below is empty and the new earwax protector sits in the speaker.
- Page 48 17.3 Attaching the earpiece to the speaker Hold the speaker in one hand and the earpiece in the other. Slide the earpiece over the speaker sound outlet. The speaker and the earpiece should fit perfectly together.
-
Page 50: Service And Warranty
18. Service and warranty Local warranty Please ask the hearing care professional where you purchased your hearing aids and chargers about the terms of the local warranty. International warranty Sonova AG offers a one year limited international warranty, valid from the date of purchase. This limited warranty covers manufacturing and material defects in the hearing aid and chargers respectively, but not accessories such as tubes, earpieces, external... - Page 51 Warranty limitation This warranty does not cover damage from improper handling or care, exposure to chemicals or undue stress. Damage caused by third parties or non-authorized service centers renders the warranty null and void. This warranty does not include any services performed by a hearing care professional in their office.
-
Page 52: Compliance Information
Medical Devices Directive 93/42/EEC as well as the Radio Equipment Directive 2014/53/EU. The full text of the EU Declaration of Conformity can be obtained from the manufacturer or the local Phonak representative whose address can be taken from the list on www.phonak.com/us/en/certificates (Phonak worldwide locations). - Page 53 The wireless models listed on page 2 are certified under: Phonak Audéo M-R & M-RT (M90/M70/M50/M30) Phonak Audéo M-R Trial & M-RT Trial FCC ID: KWC-LDR IC: 2262A-LDR Canada...
- Page 54 Notice 1: This device complies with Part 15 of the FCC Rules and with RSS-210 of Industry Canada. Operation is subject to the following two conditions: 1) this device may not cause harmful interference, and 2) this device must accept any interference received, including interference that may cause undesired operation.
- Page 55 no guarantee that interference will not occur in a particular installation. If this device does cause harmful interference to radio or television reception, which can be determined by turning the equipment off and on, the user is encouraged to try to correct the interference by one or more of the following measures: •...
- Page 56 Notice 4: Japanese Radio Law and Japanese Telecommunications Business Law Compliance This device is granted pursuant to the Japanese Radio Law and the Japanese Telecommunications Business (電波法) Law (電気通信事業法). This device should not be modi- fied (otherwise the granted designation number will be- come invalid).
- Page 57 Radio information of your wireless hearing aid Antenna type Resonant loop antenna Operation frequency 2.4 GHz – 2.48 GHz Modulation GFSK, Pi/4 DPSK, GMSK Radiated power < 2.5mW Bluetooth® Range Bluetooth 4.2 Dual-Mode Profiles supported HFP (Hands-free profile), A2DP...
- Page 58 Compliance with emission and immunity standards Emission standards EN 60601–1-2:2015 IEC 60601–1-2:2014 EN 55011:2009+A1 CISPR11:2009/AMD1:2010 CISPR22:1997 CISPR32:2012 ISO 7637-2:2011 CISPR25:2016 EN 55025:2017...
- Page 59 Immunity standards EN 60601-1-2:2015 IEC 60601-1-2:2014 EN 61000-4-2:2009 IEC 61000-4-2:2008 EN 61000-4-3:2006+A1+A2 IEC 61000-4-3:2006+A1+A2 EN 61000-4-4:2012 IEC 61000-4-4:2012 EN 61000-4-5:2014 IEC 61000-4-5:2014 EN 61000-4-6:2014 IEC 61000-4-6:2013 EN 61000-4-8:2010 IEC 61000-4-8:2009 EN 61000-4-11:2004 IEC 61000-4-11:2004 IEC 60601-1 (§ 4.10.2):2005 ISO 7637-2:2011...
-
Page 60: Information And Description Of Symbols
20. Information and description of symbols With the CE symbol, Sonova AG confirms that this product – including accessories – meets the requirements of the Medical Devices Directive 93/42/EEC as well as the Radio Equipment Directive 2014/53/EU. The numbers after the CE symbol correspond to the code of certified institutions that were consulted under the above-mentioned directives. - Page 61 This symbol indicates that it is important for the user to read and take into account the relevant information in these user guides. This symbol indicates that it is important for the user to pay attention to the relevant warning notices in these user guides. Important information for handling and product safety.
- Page 62 Japanese mark for certified radio equipment. Indicates the manufacturer’s serial number so that a specific medical device can be identified. Indicates the manufacturer’s catalogue number so that the medical device can be identified. This symbol indicates that it is important for the user to read and take into account the relevant information in this user guide.
- Page 63 Humidity during storage: 0% to 70%, if not in use. See instruction in chapter 22.2 regarding drying the hearing aid after use. Atmospheric pressure during transportation and storage: 500 hPa to 1060 hPa During transportation keep dry. The symbol with the crossed-out garbage bin is to make you aware that this hearing aid as well as chargers and Power Pack may not be thrown away as normal household waste.
- Page 64 Symbols applicable to the European power supply only Power supply with double isolation. Device designed for indoor use only. Safety isolating transformer, short circuit proof.
-
Page 66: Troubleshooting
15 seconds Indicator light on hearing Hearing aid not inserted correctly aid does not light up when into charger hearing aid placed in Charger not connected to power source charging inserts Battery fully discharged Please check https://marvel-support.phonak.com for further information. - Page 67 What to do Clean speaker opening/earpiece Press lower part of multi-function button for 3 seconds (chapter 9) Charge hearing aid (chapter 4) Insert hearing aid correctly (chapter 6) Contact your ENT/GP or hearing care professional Decrease volume if volume control available (chapter 8) Increase volume if volume control available (chapter 8) Charge hearing aid (chapter 4) Clean speaker opening/earpiece...
- Page 68 Problem Causes Indicator light on hearing Dirty charging contacts aid is solid red while Hearing aid is out of its operating hearing aid is in the temperature range charger Faulty battery Indicator light on hearing “Auto On” feature is disabled aid switches off when hearing aid is removed from charger...
- Page 69 What to do Clean the contacts of the hearing aid and the charger Warm hearing aid up. Operating temperature range is +5° to +40° Celsius (+41° to +104° Fahrenheit) Contact your hearing care professional Switch on the hearing aid (chapter 9) Reboot the hearing aid (chapter 14) Contact your hearing care professional.
-
Page 70: Important Safety Information
22. Important safety information Please read the information on the following pages before using your hearing aid and charging accessories. A hearing aid will not restore normal hearing and will not prevent or improve a hearing impairment resulting from organic conditions. Infrequent use of a hearing aid does not permit a user to attain full benefit from it. - Page 71 22.1 Hazard warnings The rechargeable hearing The intended use of aids and the Phonak Power hearing aids is to amplify Pack contain lithium-ion and transmit sound to the batteries that can be taken ears and hereby onto airplanes as carry-on compensate for impaired luggage.
- Page 72 Do not use the hearing In very rare cases, the aids and charging dome can remain in your accessories in explosive ear canal when removing areas (mines or industrial the hearing tube from the areas with danger of ear. In the unlikely case explosions, oxygen rich that the dome does get environments or areas...
- Page 73 Hearing programs in the hearing aid. If swallowed, directional microphone consult a physician or mode reduce background hospital immediately as the noises. Please be aware hearing aid or its parts can cause choking! that warning signals or noises coming from behind, e.
- Page 74 15 cm (6 inches) etc. away from the active implant. The following is only • If using a Phonak wireless applicable for persons with accessory, consult the chapter “Important safety active implantable medical devices (i.e. pacemakers, information”...
- Page 75 Use of accessories, 30 cm (12 inches) to any transducers and cables part of the hearing aids, other than those specified including cables specified or provided by the by the manufacturer. manufacturer of this Otherwise, degradation of equipment could result in the performance of this increased electromagnetic equipment could result.
- Page 76 Hearing aids should not be Avoid strong physical fitted with domes / wax impacts to the ear when protection systems when wearing a hearing aid with used by clients with customized earpiece. The perforated eardrums, stability of customized inflamed ear canals or earpieces is designed for otherwise exposed middle normal use.
- Page 77 22.2 Information on product safety These hearing aids are Never wash the water resistant and not microphone inputs. Doing waterproof. They are so could cause it to lose its designed to withstand special acoustic features. normal activities and occasional accidental Protect your hearing aid exposure to extreme and charging accessories...
- Page 78 Do not place the charging Do not drop your accessories close to an hearing aid or charging induction cooking surface. accessories! Dropping onto Conductive structures a hard surface can damage inside the charging your hearing aid or accessories could absorb charging accessories.
- Page 79 Special medical or dental Do not use your hearing examination including aid in areas where radiation described below, electronic equipment is may adversely affect the prohibited. correct functioning of your hearing aids. Remove and The hearing aids have to be keep them outside the dry before charging.
- Page 80 Both your hearing aid(s) and Power Pack contain lithium-ion batteries with a Watt hour rating <20 Wh which have been tested according to UN 38.3 of the “UN Manual of Tests and Criteria” and should be shipped in accordance with all the rules and regulations on the safe shipment of lithium-ion...
- Page 82 Notes...
- Page 84 Your hearing care professional: Manufacturer: Sonova AG Laubisrütistrasse 28 CH-8712 Stäfa Switzerland www.phonak.com...
Need help?
Do you have a question about the Audeo M-R and is the answer not in the manual?
Questions and answers