
Related Manuals for Bauknecht KWD6121


Summary of Contents for Bauknecht KWD6121
- Page 1 洗衣乾衣機 操作指南 Washer Dryer Instructions for use 洗 洗 衣乾衣機 操作指南 洗 洗 衣乾衣機 操作指南 Washer Dryer Instructions for use KWD6121...
-
Page 2: Notes On Disposal
Introduction Please read these instructions for use carefully and all other information enclosed with the washing machine. Keep all documentation in a safe place for future reference or for any future owners. This appliances is intended to be used in household and similar applications such as: - staff kitchen areas in shops, offices and other working environments;... - Page 3 o r t i t c e v i Quick start i t p i r t n s l o c e l r o t r e t , s t i h s s d i e c i Drying c i t i h s...
-
Page 4: General Delivery Notes
A) Pull out the plug B) Turn off the tap C) Bauknecht equips all its appliances with earthing. Ensure that the mains supply is earthed, and if it is not, seek assistance from a qualified person. D) Do not touch the appliance when hands or feet are wet or damp. Do not use the appliance with bare feet. -
Page 5: Quick Start
K) N.B! If the appliance is installed on a carpeted floor ensure that the ventilation holes on the base of the appliance are not obstructed. L) If the appliance is not running properly or breaks down, switch it off, turn off the tap and do not tamper with the appliance. -
Page 6: Description Of Controls
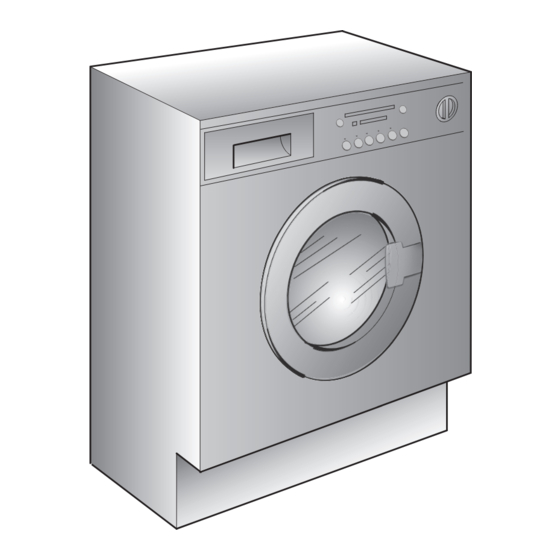
Description of controls Fig. 1 CE M G F CE M G F H I L N O P H I L N O P handle Programme selector with "OFF" position " t i r " y g i l "... -
Page 7: Door Handle
Door handle To open the door turn the handle in the manner illustrated in fig. PROGRAMME selector with "OFF" position Rotates in both directions. The machine is turned on by selecting a programme via the programme selector. This status will be indicated by the "STOP"... - Page 8 “START DELAY button” Appliance start time can be set with this button, delaying the start by 3, 6 or 9 hours. Proceed as follows to set a delayed start: Select a programme (“STOP” indicator light blinks). Press "Start delay " button (each time the button is pressed the start will be delayed by 3, 6 or 9 hours respectively and the corresponding light will blink).
- Page 9 “SPIN SELECTION button ” The spin cycle is very important to remove as much water as possible from the laundry without damaging the fabrics. You can adjust the spin speed of the machine to suit your needs. By pressing this button, it is possible to reduce the maximum speed, and if you wish, the spin cycle can be cancelled.
- Page 10 “SENSITIVE CARE”button By pressing this button you can activate a special new wash cycle in the Cotton and Mixed Fabrics programs, thanks to the new Sensor System. This option treats with care the fibres of garments and the delicate skin of those who wear them. The load is washed in a much larger quantity of water and this, together with the new combined action of the drum rotation cycles, where water is filled and emptied, will give you garments which have been cleaned and rinsed to perfection.
-
Page 11: "Anti Crease" Button
USEFUL TIPS: The 30 minute drying programme is recommended for small loads (less than 1 kg) or slightly damp loads. Your washer-dryer ends the cycle automatically when it reaches the drying level selected. For the correct operation of the appliance, it is preferable not to interrupt the drying phase unless it is really necessary. -
Page 12: Start/Pause Button
START/PAUSE button When a programme is selecting, wait for the “STOP” indicator light to flash before pressing the "Start/Pause" button. Press to start the selected cycle (according to the selected cycle one indicator lights will go on) . NOTE: When the "Start/Pause" button has been pressed, the appliance can take few seconds before it starts working. - Page 13 The manufacturer declines all responsibility in the event of any printing mistakes in this booklet. The manufacturer also reserves the right to make appropriate modifications to its products without changing the essential characteristics. 任何因為本書印刷錯誤造成的後果和責任,本產品製造商一概不負責。本產品製造商亦保 留權利在維持產品主要特徵的情況下,對產品規格進行任何製造商視之為適當的修改。...
- Page 14 TABLE OF PROGRAMMES TABLE OF PROGRAMMES TEMP. TEMP. PROGRAM FOR: PROGRAM FOR: PROGRAMME PROGRAMME EIGHT CHARGE DETERGENT CHARGE DETERGENT °C °C SELECTOR ON: SELECTOR ON: Resistant fabrics Resistant fabrics 90° 3:00 90° Whites Whites Cotton, linen Cotton, linen Whites with Cotton, mixed Cotton, mixed Whites with...
- Page 15 Please read these notes When washing heavily soiled laundry it is recommended the load is reduced to 4 kg maximum. Information for the test laboratories (Ref. EN 50229 Standards) Washing Use the programme ** Drying First drying with 4kg (the load consist: pillowcases and hand-towels) selecting the cotton drying programme ( ) cupboard dry ( Second drying with 2kg (the load consist: 2 sheets and hand towels) selecting the cotton...
-
Page 16: Programme Selector
Programme selector For the various types of fabrics and various degrees of dirt the washing machine has different programme bands according to: wash cycle, temperature and leng of cycle (see table of washing cycle programmes). COTTONS The Cotton programme is designed for maximum washing and rinsing efficiency. - Page 17 SPECIAL DELICATE FIBRES This is a new wash cycle which alternates washing and soaking and is particularly recommended for very delicate fabrics. The wash cycle and rinses are carried out with high water levels to ensure best results. WOOL PROGRAMME This special cycle enables to thoroughly wash garments without damaging them.
- Page 18 DRYING This innovative programme, allows you to wash different fabrics and colours Note: Dispensers used for concentrated powders and liquid together, such as cottons, synthetics and mixed fabrics at only 20°C and detergents must be removed from the drum before commencing the provides an excellent cleaning performance.
-
Page 19: Detergent Drawer
Detergent drawer The detergent drawer is split into 3 compartments: - the compartment labelled "I" is for prewash detergent; - the compartment labelled " " is for special additives, fabric softeners, fragrances, starch, brighteners etc; - the compartment labelled "II" is for main wash detergent. -
Page 20: Detergents, Washing Aids And Amounts To Use
Detergents, washing aids and amounts to use Choice of detergent General purpose detergents - Powder detergents, for a thorough wash, with bleaching agent, particularly suitable for use in hot wash programmes (60°C and over), for heavily soiled and stained laundry. - Liquid detergents, particularly suitable for grease stains, such as greasy skin marks, cosmetics and oil. - Page 21 Dosages Dosages Only use detergents which are suitable for use in a washing machine. Only use detergents which are suitable for use in a washing machine. You will obtain the best results from your wash with the minimum use of chemical products You will obtain the best results from your wash with the minimum use of chemical products and the best care for your laundry if you take into consideration the degree of soiling as well and the best care for your laundry if you take into consideration the degree of soiling as well...
- Page 22 Useful advice for users Tips on using your domestic appliance in the most environmentally-friendly and economical Do a full load in your washing machine To prevent any possible waste of energy, water or detergent we recommend that you put a full load in your washing machine, not exceed the recommended maximum load size.
- Page 23 Main wash Sorting the laundry - It is recommended you wash only items which are machine washable with water and detergent and not dry-clean items. - If you need to wash rugs, bedspreads or other heavy items, it is best not to spin them. - Sort the laundry according to fabric type, degree of soiling and wash temperature: Always follow the wash care advice on the garment label for the most suitable care and treatment of the laundry...
- Page 24 The correct way to wash Preparing the laundry A) Select the laundry. Loading the laundry B) Open the porthole. C) Put the laundry in the washing machine. Close the porthole again, ensuring that no items of laundry are obstructing the lock. Putting detergent in machine D) Open the drawer, choose the detergent and put in the correct amount, according to the manufacturer’s...
- Page 25 DRYING DON’T DRY GARMENTS MADE FROM FOAM RUBBER OR FLAMMABLE MATERIALS. IMPORTANT: THIS DRYER CAN ONLY BE USED FOR LAUNDRY WHICH HAS BEEN WASHED AND SPIN DRIED. WARNING: Indications given are general, therefore some practice is needed for the best drying results. We recommend setting a lower drying time than indicated, when first using, so as to establish the degree of dryness required.
- Page 26 Automatic washing/drying Warning: only a maximum 4 kg of dry laundry can be loaded otherwise the dried laundry will be not satisfactory. WASHING: Open the drawer, choose the detergent and put in the correct amount. Refer to the list of washing programmes according to fabrics to be washed (e.g. very dirty cotton) and without pressing Start button, prepare wash as described: Turning the selector knob, the required programme is activated.
-
Page 27: Drying Cycle
Drying cycle The correct way to dry: - Open door. - Fill with up to 4 kg - in case of large items (e.g. sheets) or very absorbent items (e.g. towels or jeans), it is a good idea to reduce the load. - Close door. -
Page 28: Useful Tips
Table of drying times (in minutes): PROGRAMME Min 1 Kg Max 4 Kg Min 1 Kg Max 3 Kg Extra from 30’ to 230’ from 30’ to 170’ Cupboard from 30’ to 220’ from 30’ to 150’ Iron from 30’ to 170’... -
Page 29: Cleaning And Routine Maintenance
Cleaning and routine maintenance Do not use alcohol-based scourers and / or thinners on the outside of your washing machine, just a wipe with a damp cloth will suffice. The washing machine needs very little maintenance: - Cleaning the drawer compartments. - Cleaning the filter. -
Page 30: Investigating Malfunctions
Investigating malfunctions What might be the cause of… Defects you can remedy yourself MALFUNCTION CAUSE REMEDY 1. Does not work on any Plug not in socket. Plug it in. programme Not switched on. Switch on. Power failure. Check. Fuse blown. Check. -
Page 31: Customer Service And Guarantee
Note: The use of environmentally-friendly, phosphate-free detergents can have the following effects: - waste water from rinsing may be cloudier because of the presence of zeolites held in suspension, without the rinse performance being adversely affected; - presence of white powder (zeolites) on laundry after washing, which is not absorbed by the fabric and does not alter the colour of the fabric. - Page 32 Fig. 2 Technical dat 7 kg 6 kg Max. load of dry laundry Max. load of dry laundry for drying 5 kg 4 kg Water pressure 0,05 ÷ 0,8 MPa 0,05 ÷ 0,8 MPa Measurements Width 60 cm 60 cm 54 cm Depth 54 cm...
- Page 33 SETTING UP + INSTALL L L TIO Remove the polystyrene base and place the machine near its permanent position (diagram 1). Carefully cut through the hose retaining clip at the rear of the appliance (diagram 2). Remove the 3 fixing screws marked (A) and remove the 3 spacers marked (B) (diagram 3).
-
Page 34: Water Connection
Note: we recommend you keep the screws to immobilise the machine for future transit. The Manufacturers will not be responsible for any possible damage to the machine caused by not following the rules relating to releasing the mechanism. The user is responsible for all costs of installation. Water connection The appliance must be connected to the water mains using new hose-sets. -
Page 35: Electrical Connections
Note: it is advisable to turn off the tap after each wash to isolate the washing machine from the water supply. For the washing machine to function properly the terminal end of the discharge hose (mouth) must be at a minimum of 50 cm and a maximum of 85 cm from the ground. ELECTRICAL CONNECTIONS After installation, the appliance must be positioned so that the plug is accessible. - Page 36 INSTRUCTIONS FOR INSTRUCTIONS FOR MOUNTING DOOR MOUNTING DOOR Fig.1 Fig.1 Drill holes in the door using the cardboard Drill holes in the door template as indicated in using the cardboard Fig. 1 to mount the hinge template as indicated in and closure magnet in Fig.
- Page 37 Mount the door with Montare la porta hinges by screwing with corredata di cerniere screws (L) to the front of avvitando le viti (L) sul the washing machine. frontale della lavabiancheria. NOTE: You are advised to mount the door so that it Nota: È...
- Page 38 概述 請仔細閱讀本操作指南及所有隨本洗衣機提供的資料。 請妥善保存本操作指南,以備日後供其他使用者參考。 本產品設計只適用於家居或下列之類似環境: - 一般商店、辦公室及其他工作環境的職員專用廚房; - 農莊; - 供入住酒店、汽車旅館及其他住宅式旅店之顧客使用; - 提供簡單住宿及早餐服務之旅舍。 即使在上述環境下,本產品亦只適合作家居或一般酒店房間管理的操作目的(包括由專家或有經 驗用家作商業用途),而不適合作任何其他用途。 假如本產品在不符合以上描述的條件下進行操作,產品的壽命有可能因而縮短,同時產品之 保養服務將會失效。 任何因為不符合家居操作用途(即使本產品被安置於家居環境中),導致產品本身損壞或造成 其他傷害或毀壞,本製造商將根據法律授予的一切權利,不承擔任何相關責任。 棄置本產品應注意事項 本產品所有包裝物料均使用環保及可循環再用物料所製。請以符合環保的方式棄置包裝物料。 您的產品供應商或當地相關議會組織應可為你提供有關現行 棄置方法的詳情。 透過廢物循環再造的步驟,便可從舊機中回收有價值的物料。 注意: 棄置舊機前,請先將電源插頭拔除,並剪斷電線。請將電源 插頭與舊機一併棄置。 當棄置舊洗衣機時,請將洗衣機門鎖弄壞,並確保不能上鎖,以避免小童意外被關在產品之內。...
- Page 39 目錄 頁數 概述 有關運送的一般注意事項 安全事項 快速啟動操作 控制說明 程序表 程序選擇鈕 洗衣劑格 洗衣劑、助洗劑及使用份量 有用建議 主洗 乾衣 自動洗衣 / 乾衣操作 乾衣操作 清潔及日常保養 故障診斷 技術格規 擺放及安裝 開動本產品前,請確保產品經已裝妥,並檢查清楚所有搬運安全 螺絲已按第 頁的指示拆除。...
- Page 40 有關運送的一般注意事項 當貨品運抵時,請檢查清楚以下物品經已隨產品一併附上: - 操作指南 - 保用證書 - 進水管 - 液體洗衣劑或漂白劑格 同時檢查產品於運送途中是否受損,如發現損毀,請聯絡最就近的授權技術支援服務代理。 安全事項 注意: 有關洗衣機的清潔或保養程序 1) 拔除電線插頭 2) 關上水龍頭 3) Bauknecht所有產品的電線均配有地線的插頭。請確保電源供應配備地線設計,假 如沒有,請向合資格專業人士求助。 4) 切勿以沾濕的手腳接觸本產品。赤足時切勿操作產品時。 5) 不建議使用萬能插蘇、轉換插座及/或拖板。 注意: 洗衣程序操作時,水溫可高達攝氏90度 6) 打開機門前,檢查清查洗衣桶內沒有積水。 7) 除非有負責人身安全的人士提供適當監督及指示,否則本產品的設計並非為患有身 體、知覺、心理功能障礙、或缺乏有關操作經驗及知識的人士(包括兒童)使用。請看管 兒童,切勿讓兒童玩弄洗衣機。 8) 拔除插頭時,切勿拉扯電線;應緊握電線插頭本身。 9) 切勿將本產品放置於露天環境下(包括會被雨淋、太陽直射等地方)。 10) 如搬運本產品時,切勿把持控制面板上的按鈕或洗衣齊格。在運送過程中,切勿讓機門壓向 小車,同時切勿在沒有安裝機座軟墊的情況下搬運產品。...
- Page 41 重要事項! 假如要將產品安放在地毯上,必須確保機底排氣孔不被阻塞。 遇有產品操作不正常或出現毀壞,請馬上關機、關上水龍頭,並不要操作洗衣機。請向授 權技術支援服務代理查詢有關維修安排,並要求代理使用原廠零件。假如沒有依照上述說 明操作洗衣機,將有機會危及產品的安全。 假如產品的電源線需要更換,請向授權技術支援服務代理查詢。 快速啟動操作 洗衣 用門把手 打開機門 請參閱第 頁,圖 選擇衣物並放入洗衣機 關上機門 按照本操作指南之程序指引將洗衣劑注入洗衣劑格 選擇程序 等候 停止 ( 指示燈閃爍 乾衣 假如需要在洗衣程序結束後自動開始乾衣程序,請以乾衣選擇按鈕選 取所需之程序。 亦可選擇在洗衣程序結束後,自行選擇乾衣程序並放入衣物。 按附加功能按鈕 如有需要 按「啟動 暫停」鍵 程序開始 完成洗衣後 "停止 ( )" 指示燈會亮著。 - 等候片刻待門鎖可供開啟 程序完成後約 分鐘 ,「機門上鎖」 指 指 示燈隨之熄滅。 將程序選擇鈕轉到「關機」位置以關掉洗衣機。...
- Page 42 控制說明 圖1 CE M G F CE M G F H I L N O P H I L N O P 門把手 程序選擇鈕附「關機」位置 「機門上鎖」指示燈 「預校開機時間」鍵 「操作剩餘時間」及「預校開機時間」指示燈 「脫水轉速」鍵 脫水轉速指示燈 「除污洗衣」鍵 「深層過水」鍵 「乾衣選擇」鍵 乾衣選項指示燈 「冷水洗」鍵 「防皺功能」鍵 「啟動 暫停」 鍵按鍵指示燈 洗衣劑格...
- Page 43 門把手 以指頭按壓門把手內側的推桿打開洗衣機門。 程序選擇鈕附「關機」位置 選擇鈕可左右旋動。 當轉動程序選擇鈕時,洗衣機會被 啟動,. 停止(STOP)"指示燈會閃 爍。 此指示燈會不斷閃爍直至洗衣機啟動 或程序選擇鈕轉到「關機」位置。 按「啟動/暫停」鍵啟動已選程序。 當選定程序後,程序選擇鈕將維持於已選程式的位置,直至操作結束。 請將選擇鈕轉到「關機」位置,以關掉洗衣機。 注意: 當每次洗衣機操作結束後,或當要進行下一次洗衣操作,在選擇並啟動任 何程序之前,必須先將程序選擇鈕轉回「關機」位置。 「機門上鎖」指示燈 當機門妥善關上,同時洗衣機正在操作時,「機門上鎖」指示燈將亮著。假如在機門打開的情況 下按「啟動/暫停」鍵,指示燈會瞬間閃爍,然後熄滅。 如機門沒有關妥,指示燈將不停閃爍。 本產品備有獨特的安全設計,防止機門在操作結束後可以立即打開。請待洗衣程序完成後約 2 分 鐘,同時「機門上鎖」指示燈熄滅後,方行打開機門。在程序結束後,請將程序選擇鈕轉到「關 機」位置。...
- Page 44 「預校開機時間」鍵 利用本功能鍵,閣下可預先設定洗衣程序並讓洗衣操作延遲3、6 或 9小時後才開始。 要預校開機時間程序,請按以下步驟: 設定所需程序 (“停止(STOP)”指示燈會閃爍)。 按「預校開機時間」鍵 (每按鍵一次,預校開機時間為 3、 6 或 9 小時,而其指示燈會閃爍。) 按「啟動/暫停」鍵以啟動本功能 (相關指示燈會停止閃爍並亮著)。當完成計時,預選的程序 將會自動啟動。 取消預校開機時間功能: 按「啟動/暫停」鍵直至指示燈熄滅 (“停止(STOP)”指示燈會閃爍) 。可按「啟動/暫停」鍵直 接啟動已選程序,或可將選擇鈕轉到「關機」位置取消已選程序。 警告: 在洗衣機操作過程中,假如電源突然中斷,洗衣機的一組記憶系統 會記下已選程序的設定,並在恢復電源時,接續未完成的操作。 「操作剩餘時間」 指示燈 為了讓你方便控制時間,洗衣機設有指示燈系統,讓你隨時知道餘下的操作時間。 指示燈 90: 餘下時間多於60分鐘。 指示燈 60: 餘下時間少於60分鐘。 指示燈 30: 餘下時間少於30分鐘。 指示燈15: 餘下時間少於15分鐘。 指示燈 STOP: 程序結束...
- Page 45 「脫水轉速」鍵 脫水操作的作用是盡可能將衣物中的水份弄走,同時不破壞衣物纖維。閣下可根據需要自行調 校洗衣機的脫水轉速。 閣下除可按本鍵調減最高的脫水轉速,更可取消整個脫水操作。如需重新啟用脫水操作,請按 鍵直至閣下所需要設定的轉速出現。而為保護衣物本身,系統不容許讓轉速設定超過在已選程 序下自動設定的數值。 調校脫水轉速,毋須暫停洗衣機操作。 注意: 本洗衣機設有一組獨特的電子系統,當洗衣桶內的衣物分佈不平均時, 可防止脫水操作進行。這設計可減低洗衣機操作的噪音和震動,同時有 助延長閣下洗衣機的壽命。 「脫水轉速」指示燈 每當選定一項程序之後,相關的最高脫水轉速會自動透過指示燈顯示。 可透過「脫水轉速」鍵選擇較低的脫水轉速,相關指示燈會亮著。 要啟動「附加功能」,必需先按下相關功能鍵,再按「啟動/ 暫停」鍵。 「除污洗衣」鍵 只需按下僅限在棉質程序下可供選用的「除污洗衣」鍵,本產品具備的全新感應器設計將發 揮功效。新的感應器能夠在洗衣操作過程中,同時選擇和維持於理想水平,並管理洗衣桶的機 械操作。 在全新洗衣系統下,洗衣桶於特定的時刻會以兩種不同的速度旋轉。在洗衣劑進入衣物的一 刻,洗衣桶的旋轉速度將有助洗衣劑平均分佈於衣物上;當進入洗衣及過水程序,洗衣桶的 轉速將會加快以強化清潔的效能。全賴這套全新系統,洗衣過程的效率得以提升,同時不會 增加程序操作所需時間。...
- Page 46 「深層過水」鍵 只需按下本功能鍵,全新的感應系統設計將為閣下啟動一套全新的洗衣操作程序。而本功能僅 限在棉質和混合衣物程序下可供選用。本輔助功能充份照顧衣物中的微細纖維,並呵護披上衣服 的皮膚。 當選用本功能,清洗衣物所需的耗水量將會增加,再結合洗衣桶在注水和排水時採用全新的複 合式轉速設計,確保令閣下的衣物徹底清洗和過水。為了清除殘留在衣物纖維中的洗衣劑,當 選用本功能後,過水時耗用的水量將會增加。本功能是特別為幼嫩及敏感皮膚人士而設,以免受 即使是極微量的洗衣劑殘留物刺激,引致出現各種痕癢及敏感徵狀。 我們亦建議閣下利用本功能,清洗小孩衣服及其他纖維幼細的衣物時,以及毛巾或類似衣物, 原因是上述衣物的纖維較易吸收大量洗衣劑。為確保閣下操作洗衣機時獲得最佳效果,在選擇 纖幼、羊毛及手洗衣物時,本功能將自行啟動。 「乾衣選擇」鍵 當程序選擇鈕並非處於「關機」位置,便可按本功能鍵選擇所需之乾衣程序;每按鍵一次, 一組指示燈將亮起以表示已選的乾衣效果。 如需在乾衣程序啟動前取消選項,請重複按鍵直至指示燈熄滅,或可將選擇鈕轉到「關機」 位置。 如需在乾衣程序進行期間取消操作,持續按下本鍵 2 秒,直至散熱指示燈亮起;由於洗衣桶 在操作期間溫度相當高,我們建議閣下先讓乾衣機完成整個散熱過程後,才將程序選擇鈕轉 回「關機」位置,同時取出衣物。 乾衣程式指示燈 指示燈顯示所選程序及/或乾衣時間 : 自動程序: 可從三個自動程序選擇其中一項,洗衣乾衣機會依據衣物實際多寡及乾衣類別 計算所需的乾衣時間。按啟動鍵後,相關指示燈會亮著,並顯示餘下的乾衣時間。 = 額外乾衣程序 (建議用於毛巾、浴衣及大型衣物) = 一般乾衣程序 = 熨燙乾衣程序...
- Page 47 實用提示: 30 分鐘的乾衣程序建議用於衣量較少 (少於1公斤)或濕度較低的衣物。 當乾衣達至所選擇的程度,洗衣乾衣機會自動結束程序。如非必要,切勿在乾衣程序結束前 終止洗衣乾衣機之操作。 時間程序: – 120 分鐘 – 90 分鐘 – 60 分鐘 – 30 分鐘: 雙功能指示: 當從三個自動程序選擇了其中一項時,指示燈會顯示餘下的乾衣時間。也可選擇其已設定 時間的乾衣程序。 散熱程序: 每次乾衣操作結束後,系統將進行為時10分鐘的散熱程序。 「冷水洗」鍵 當按下這個按鍵後,每個程序都會轉成冷水清洗而不會更改其他設定(如水位,時間,轉速等...) 窗簾,小地毯,人造纖細衣物,易染色衣物在此新程序下都能安全清洗。 「防皺功能」鍵 防皺功能 (不適用於棉質洗衣程序) 加上專為特定物料而設的獨特衣物防皺系統,可將 衣物摺痕減低。 混合衣物 – 在最後兩次過水程序(沒有脫水)進行時,水會逐漸冷卻,冷卻後會以柔和的模 式去脫水,以確保衣物保持在最寬鬆的狀態。 纖細衣物 – 在最後兩次過水程序(沒有脫水)完成後,洗衣機會停在最後的過水程序,選擇指示 燈會閃爍。洗衣桶內的衣物仍處於水中,從而減少摺皺,更容易熨貼。 羊毛/絲質...
- Page 48 「啟動/暫停」鍵 選擇程序時,請待 "停止(STOP)" 指示燈閃爍後,才按「啟動/ 暫停」鍵 按以開始所選程序(相關指示燈會亮著)。. 注意: 當按下「啟動/暫停」鍵,產品會在數秒後才開始操作。 在程序開始後(暫停)更改設定 於洗衣程序操作時持續按下「啟動/暫停」鍵約2秒,可暫停運作。當洗衣機進入暫 停模 式,"操作剩餘時間 "指示燈、"脫水速度"和"選項鍵"指示燈會同時閃爍。再次 按下「啟動/暫停」鍵來重新啟動程序。 假如需要在洗衣操作過程中加入或取走衣物,請等候約2分鐘待安全設計為機門解鎖。 當閣下完成所需動作後,請關上機門,按「啟動/暫停」,產品將接續未完成的操作。 取消程序 如需取消程序,請將選擇鈕轉到「關機」位置。 重新選擇其他程序。 將程序選擇重設於「關機」位置。 按鍵指示燈 指示燈在按下相關功能鍵時將會亮起。 假如個別功能選項不適用於已選程序,其按鍵指示燈將首先閃爍,隨後熄滅。...
- Page 50 程序表 注入洗衣劑及 程序適用衣物種類 溫度 程序選擇鈕標示 大概時間 建議 °C 添加劑 (時: 分) 衣量 °C 公斤 耐洗衣物 90° 3:00 90° 白色 棉質、亞麻織物 棉質、混合耐洗 白色及預洗 60° 3:20 60° 60° 3:00 60° 不易染色衣物 棉質、混合衣物 40° 3:00 40° 易染色衣物 30° 30° 1:50 纖細衣物 不易染色衣物及 混合衣物及合成纖維 60°...
- Page 51 請閱讀下列注意事項 : 如要清洗較髒污的衣物,建議將洗衣量減至最大 4 公斤。 實驗室參考資料 (參考 EN 50229 標準) 洗衣 選擇程序** 乾衣 首次乾衣操作載入4公斤衣物(衣物包括:枕袋及抹手巾), )下之一般乾衣程序 ( 並選用棉質乾衣程序( 第二次乾衣操作載入2公斤衣物(衣物包括:床單2張及抹手巾), 並選用棉質乾衣程序 ( ) 下之一般乾衣程序( 脫水轉速可因應衣物標籤上的建議而減少,或當清洗極纖細衣物時,可完全取 消脫水操作。請使用脫水轉速鍵選取有關功能。 * 可與自動乾衣操作併用的程序。 假如只有少量衣物需特別以漂白劑清除表面污漬,可以利用洗衣機的特設功能,為部份需要 特別處理的衣物進行預先清除污漬的程序。 先將漂白劑注入特設的漂白劑容器,然後將容器放入洗衣劑格內標示為 “II” 的儲存格,然後 選用特設的「過水」程序。 當操作完成後,先關掉洗衣機,再放入其餘衣物,然後選用合適的程序如常進行操作。 程序所需時間取決於洗衣量、衣物類別、水壓及溫度等。...
- Page 52 程序選擇鈕 本洗衣機因應衣物的類型和骯髒程度,已根據洗衣過程、溫度和過程操作所需時間,預設不同 類型的洗衣程序(請參閱洗衣程序表)。 棉質 棉質程序能提供最高的洗衣及過水效能。程序中包含多次脫水操作,可確保 衣物徹底過水。最後一次脫水操作轉速可達脫水轉速上限,目的是令衣物獲 得最佳的脫水效果。 棉質程序包括一次預洗步驟。這一選項是針對非常骯髒的衣物,而且可與主 洗程序獨立操作。如選用預洗功能,請將額外份量的洗衣劑注入洗衣劑格內 以 “ I ” 字標示的儲存格(請參閱本指南中題為「洗衣劑」的章節)。我們建議 預洗操作的洗衣劑用量為主洗程序所需之20%。 混合及合成纖維衣物 洗衣桶的旋轉規律和注水量經過精心計算和安排,令主洗及過水操作發揮出 最佳的洗衣效果。 溫和的脫水轉速可減少衣物起皺。 特別「過水」程序 本程序包括三次過水操作及一次中途脫水操作(操作時間可透過適當按鍵步 驟自行縮短甚至取消)。本程序適用於處理任何類型的衣物,例如用於手洗 衣物之後。 本操作程序亦可視之為漂白程序(請參閱洗衣程序表)。 特別「脫水」程序 本「脫水」程序會以最高轉速操作(亦可透過適當按鍵步驟自行調減)。 排水 本程序僅將水排出洗衣機。...
- Page 53 特別纖細衣物 此一全新洗衣操作採用洗衣、浸泡相間步驟,建議用作處理十分纖細的衣 物。洗衣及過水會配合較高注水量進行操作,以確保達至最佳的效果。 羊毛程序 這項獨特的洗衣操作,既可徹底清洗衣物,又不破壞衣物的纖維。整個操作 過程中夾雜停頓的空檔。程序採用的最高洗衣溫度為攝氏40度,過程最後包 括3次過水及一次短脫水步驟。 特別「手洗」 本洗衣機另具備柔和的手洗操作程序。本程序的操作是專為標明「只可以 手洗」的衣物而設。程序採用的洗衣溫度為攝氏30度,過程最後包括3次過 水及一次短脫水步驟。 30分鐘速洗 本30分鐘速洗程序的整個操作時間約為30分鐘,衣物載入量最多為2公斤, 洗衣溫度為攝氏30度。 請注意,如選用速洗程序,我們建議閣下採用的洗衣劑量應為洗衣劑產品 包裝上建議份量的20%。 日常衣物 此特別設計的洗衣程序能保持高質素的洗衣效果,同時大大縮短了洗衣時 間。此程序的洗衣溫度為攝氏60度,過程包括2次過水和1次高速脫水。 節能清洗 此特別程序即使你在衣物滿載時,以攝氏40度的洗衣溫度操作亦能達到 攝氏60度的洗衣效果,讓你能節省電源。 此洗衣程序的時間接近3小時。...
- Page 54 混合節能洗 這項創新的程序可讓閣下將多種不同類型和顏色的衣物,例如棉質、合成 纖維和混合衣物,以攝氏 度一同清洗,而且洗衣效果出眾。 使用本程序的耗電量,僅為一般以攝氏 度使用棉質程序所需的 。 乾衣 注意:假如使用儲放濃縮洗衣粉或洗衣液的洗衣球,在啟動烘乾程序 之前,請先將洗衣球從洗衣桶取出。 在乾衣操作過程中,洗衣桶會改變旋轉方向,目的是避免衣物纏結在一起, 從而帶來平均的乾衣效果。而在整個乾衣程序最後 分鐘,洗衣機會利用涼 風以令衣物減少起皺。 高溫乾衣 高溫乾衣程序適用於棉質及尼龍衣物,有關衣料成份請參閱衣物上之 標籤。 低溫乾衣 低溫乾衣程序適用於合成纖維及混合衣物,有關衣料成份請參閱衣物上 之標籤。。 自動半量洗衣系統 洗衣機設有自動調節水位系統。 此系統會因應衣物載入量而自動調節適量的洗衣用水量和過水用水量。 這不但能減低用電量和用水量,同時亦不會影響洗衣和過水效果。 洗衣機的用電量和用水量總會配合衣物載入量,自動地以最低的成本達至最好的清洗效 果,同時亦能節約能源,保護環境。...
- Page 55 洗衣劑格 洗衣劑格分成三個儲存格: - 以“ I ”字標示的儲存格用作存放預洗程序用洗衣劑; - 以“ ”圖形標示的儲存格用作存放專用添加劑、衣物 柔順劑、芳香劑、衣漿粉、亮白劑等; - 以“II”字標示的儲存格用作存放主洗程序用洗衣劑。 如使用洗衣液,請將隨機附上的特製容器放入洗衣劑格中 標示為“ II ” 的儲存格內。該容器可確保洗衣液在洗衣過程 中適當的時間,讓洗衣液進入洗衣桶。 該特製容器必須安裝到洗衣劑格中標示為“ II ” 的儲存格 內。假如閣下利用「過水」程序進行漂白操作,也需要用 上該特製容器。 注意: 個別洗衣劑使用較困難。如洗衣劑 生產商建議注入洗衣球使用,請遵 照有關建議。 注意: 只可將液體用品注入以“ ”圖形標示的儲存格。本洗衣機已預設 程序,不論在選用任何洗衣操作程序的情況下,均於最後一次過水 步驟時自動取用添加劑。...
- Page 56 洗衣劑、助洗劑及使用份量 洗衣劑選擇 一般用途洗衣劑 洗衣粉具備徹底清潔及漂白功效,特別適用於高溫洗衣程序(攝氏60度或以上),能有效 處理非常骯髒的衣物。 - 洗衣液適用於處理含油脂的污漬,例如皮膚油脂污漬、化妝品及油份。這類洗衣劑不適 宜用於清洗染有污漬的方物,因為洗衣液不含有漂白劑成份。 - 生物性洗衣劑,有部份無法提供真正徹底的清潔功效。 洗衣添加劑 - 軟水劑在水的硬度被界定為硬至極硬時,可發揮減少使用洗衣劑的功效。 - 預洗用品適合在主洗程序前,配合針對污漬的處理程序一起使用。 使用預洗用品令後續的洗衣程度能以低溫或配合不含漂白成份的洗衣劑進行。 - 衣物柔順劑可幫助減少合成纖維衣物中形成靜電,同時令衣物變得柔順。如閣下採用 烘焙式乾衣機,即使不使用衣物柔順劑,衣服亦同樣柔軟。 請勿將含溶劑成份物品放入洗衣機! 請將洗衣劑及其他洗衣添加劑儲放於小童不可觸及之處。 當準備注入洗衣劑前,請檢查清楚洗衣劑當中不含任何外來物。 洗衣劑用量一般顯示在洗衣劑包裝之上。使用時請參照有關指示。...
- Page 57 洗衣劑量 僅使用適合洗衣機用之洗衣劑。 儘可能減少用化學用品,以獲取最佳的洗衣效果。若按衣物骯髒程度及洗衣劑種類作考慮, 愈少使用化學用品可令衣物獲得最好的呵護。 洗衣劑量取決於: - 水的硬度:視乎水的硬度和洗衣劑的種類,某些情況下可減少洗衣劑用量。 - 骯髒程度:可按衣物的骯髒程度減少洗衣劑用量。 - 洗衣量:假如只清洗少量衣物,可減少洗衣劑用量。 洗衣粉用量 一般及低濃縮洗衣粉:如清洗一般骯髒衣物,請選擇不設預洗的程序。 將洗衣粉倒入以“II”標示的儲存格。 假如清洗非常骯髒衣物,請選擇附設預洗的程序。 將1/4的洗衣粉倒入以“I”標示的儲存格,再將餘下3/4的洗衣粉倒入以“II”標示的儲存格。 假如使用衣物柔順劑時,請先放入洗衣粉,然後再放入柔順劑至 “II” 字標的儲存格。 假如使用超濃縮洗衣粉份量不足一份,請按產品包裝指示上所示的衣服類型和份量使用。 取出洗衣粉時,為免卻量度適當份量的麻煩,可用隨產品提供的專用量杯。 洗衣液用量 洗衣液的用量可參照相關產品的包裝上指示。有關指示適用於所有不包括預洗操作的程序。 可透過使用特別設計放置於洗衣桶內的容器(須另外購買)或某些附帶同類容器的洗衣機型號, 以使用洗衣液。 不同洗衣溫度下使用洗衣劑的建議 當清洗非常骯髒的白色衣物時,我們建議使用攝氏60度或以上的棉質洗衣程序,配合能在中 溫/高溫使用並含有漂白成份的普通洗衣粉,能令洗衣效果更佳。在攝氏40度至60度的洗衣溫 度下,選擇洗衣劑時需因應該種衣物物料和衣物骯髒程度,普通洗衣粉適用於清洗較骯髒的 白色衣物和不易染色的衣物,而洗衣液或護色洗衣粉適用於清洗一般骯髒而易染色的衣物。 在攝氏40度以下的洗衣溫度下,我們建議使用專為較低洗衣溫度而設的洗衣液或洗衣劑。當 清洗羊毛或絲質物料時,需使用適合清洗該物料的洗衣劑。 洗衣劑的份量請參考洗衣劑包裝上的指示標籤。...
- Page 58 給使用者的有用建議 以下建議可助閣下在使用家庭電器時,獲得最具環保效益和經濟成效。 每次以全機衣量進行洗衣操作 為了盡可能減省耗電、耗水和洗衣劑用量,我們建議閣下洗衣時應放入全機衣量,但不要超 出建議的洗衣量上限。以全機衣量進行一次洗衣操作,比較以一半洗衣量的分兩次進行洗衣 操作,可節省高達50%耗電量。 什麼情況下才真正需要進行預洗? 僅當衣物非常骯髒時! 按一般骯髒的衣物為例,不使用預洗操作較使用此選項,可節省5至15%耗電量。 應如何選擇合適的洗衣溫度? 在進行機洗衣前先用除污劑處理衣物,可減少以攝氏60度洗衣的需要。 使用攝氏60度洗衣比較攝氏90度洗衣,可節省多達50%耗電量。 使用乾衣程序之前… 在使用乾衣操作前,利用高速脫水操作減少衣物的水份,既省電也省時間。...
- Page 59 主洗 將衣物分類 - 建議閣下只清洗可配合水和洗衣劑進行的可供機洗衣物,當中不包括只適宜乾洗的物品。 - 假如閣下需要清洗地毯、床單或其他重物,盡可能避免進行脫水操作。 - 請按照衣物的類別、骯髒程度及適用洗衣溫度分類。任何時候,應遵照衣物標籤上的建議 處理衣物,以確保衣物得到最適當的呵護及保障。 可以高溫清洗衣物 顏色、容易處理衣物 纖細及羊毛 手洗 標籤上如有以下圖案的衣物則不適宜機洗: 乾洗 假如清洗極纖細物品如窗簾、內衣、內褲等,建議使用洗衣網或洗衣袋。 - 羊毛物品必須標明為「全羊毛」,同時標明「防皺褶」或「可機洗」。 - 新買顏色物品常會出現脫色情況。 這樣會導致其他一同清洗的淺色物品被染色。 因此我們建議首次清洗顏色物品時,應與其他物品分開處理。 往後清洗時,不脫色物品如跟白色物品一同清洗,洗衣溫度不可高於攝氏40度。 注意:當進行衣物分類時 - 請確保衣物沒有藏有金屬物件(例如萬字夾、扣針、胸針、 硬幣等); - 如有枕袋,請將枕袋的鈕扣扣好;其他拉鍊、鎖扣、魚眼 鈕扣、皮帶扣及長袍衣物的索帶,亦請加以適當整理; - 移除窗簾上的掛鈎; - 請仔細閱讀衣物上的洗滌標籤; 假如為衣物分類時,發現部份衣物上有頑固污漬,請取出 衣物,並安排以特效洗衣劑或除污劑清洗。 - 我們建議閣下如清洗毛巾類型衣物時,不要放入最大衣量,因為這類衣物吸水性較強, 在洗衣過程中重量會明顯增加。...
- Page 60 正確洗衣操作 為衣物作準備 A) 將衣物分類。 將衣物放入洗衣機 B) 打開洗衣機門。 C) 將衣物放入洗衣機。 關上機門,同時檢查沒有衣物阻礙機門關妥並上鎖。 將洗衣劑注入洗衣機 D) 拉出洗衣劑格,選定洗衣劑並按產品生產商指示及本操 作指南第56頁的建議,注入適當份量。 注入其他洗衣添加劑(請參閱第56頁)。關上洗衣劑格。 選擇洗衣程序 請參閱程序表或洗衣機上的程序描述,以選擇最合適的程序。 轉動程序選擇鈕以啟動所選程序。 待“停上(STOP)” 指示燈閃爍。 按下附加功能鍵(如有需要)。 檢查水龍頭經已打開,並確保排水管安放位置妥當。 按「啟動/暫停」鍵。 當按下「啟動/暫停」鍵後,洗衣機將按所選程序完成各步驟操作。 洗衣機操作期間,程序選擇鈕將一直停留在已選程序的位置上,直至程序操作完成。 警告: 在洗衣機操作過程中,假如電源突然中斷,洗衣機的一組記憶系統會記下已選程序的設定, 並在恢復電源時,接續未完成的操作。 當程序操作完成 程序結束時,“停上(STOP)” 指示燈會亮著。 等候片刻待門鎖可供開啟(程序完成後約2分鐘)。 「機門上鎖」指示燈將會熄滅。 將程序選擇鈕轉到「關機」位置以關掉洗衣機。打開機門,取出衣物,並關上水龍頭。...
- Page 61 乾衣 請勿為塑膠製或易燃衣物進行乾衣。 重要事項: 本乾衣功能只適用於已清洗及經排走水份之衣物。 警告: 衣物標籤上指示的乾衣時間可視作一般情況下適用,為了獲取最佳的乾衣效果,我們建議在 首次使用時,可設定較標籤指示為低的乾衣時間,目的是幫助掌握所需程度的乾衣效果。我 們建議不要為易破損的衣物進行乾衣。一些長毛絨織物,由於在處理過程中容易造成氣管阻 塞,也應避避免作乾衣操作。 用作乾衣的水會經由密封的排水管道排走,因此操作時洗衣機不會出冒出蒸汽。 重要事項: 切勿在乾衣操作開始後打開機門;請等待程序中的散熱步驟結束 後,方行打開機門。 只為已經排走水份之衣物進行乾衣。 本洗衣/乾衣機具備兩種乾衣功能: 1 棉質、毛巾類衣物、亞麻織物、大麻布等…程序選擇鈕上以 作標示。 建議事項 在乾衣操作期間,洗衣桶速轉將高於正常,目的是讓衣物平均分佈,以提升乾衣功效。 2 混合衣物(合成纖維/棉質)、合成纖維衣物,程序選擇鈕上以 作標示。...
- Page 62 自動洗衣/乾衣操作 警告: 最多可放入4公斤乾衣物,否則可能影響乾衣效果。 洗衣: 拉出洗衣劑格,選定洗衣劑並注入適當份量。 根據所需清洗之衣物類型(例如非常骯髒棉質衣物),先參考洗衣程序表選擇程序,但不要按 啟動鍵,按下列步驟為洗衣作準備: 轉動程序選擇鈕至所需程序,讓洗衣機進入備用狀態。 待“停上(STOP)” 指示燈閃爍。 檢查水龍頭經已打開,並確保排水管安放位置妥當。 乾衣: 選擇所需之乾衣程度。 )、乾衣後可免於熨燙衣 物適用之一般乾 乾衣程度選擇包括適用於毛巾及浴袍之額外乾衣( ),以及乾衣後適宜熨燙的衣物適用之熨燙乾衣 ( )。 衣( 假如閣下希望為乾衣操作設定時限,請按「乾衣選擇」鍵直至所需時間之指示燈號亮起。 按「啟動/暫停」鍵。 當按下「啟動/暫停」鍵後,洗衣機將按所選程序完成各步驟操作。 洗衣機操作期間,程序選擇鈕將一直停留在已選程序的位置上,直至程序操作完成。 洗衣乾衣機將繼續完成整個乾衣程序。 ”作標示的指示燈將 乾衣操作期間,乾衣程序指示燈將保持亮著,直至進入散熱步驟,以“ 亮起。 當程序結束 程序結束時,“停上(STOP)” 指示燈會亮著。 等候片刻待門鎖可供開啟(程序完成後約2分鐘)。 「機門上鎖」指示燈將會熄滅。 將程序選擇鈕轉到「關機」位置以關掉洗衣機。打開機門,取出衣物,並關上水龍頭。...
- Page 63 乾衣操作 正確乾衣操作: - 打開洗衣機門。. - 放入最多4公斤衣物 - 如有大型物品(如床單)或吸水性較強衣物(如、牛仔布衣物),請減 - 關上機門 - 轉動程序選擇鈕至 位置。 選擇所需之乾衣程度。 )、乾衣後可免於熨燙衣物適用之一般乾 乾衣程度選擇包括適用於毛巾及浴袍之額外乾衣( 衣 ( ),以及乾衣後適宜熨燙的衣物適用之熨燙乾衣 ( )。 假如閣下希望為乾衣操作設定時限,請按「乾衣選擇」鍵直至所需時間之指示燈號亮起。 隔熱機門設計 由於乾衣操作會令機門玻璃溫度上升,因此機門玻璃之外特設保護 層,以防止雙手觸及機門玻璃釀成危險。 在一般情況下使用,毋須將保護層從機門上移除。 警告:不要隨意觸摸機門。 - 請確保進水單向閥已開啟。 - 請確保排水位置妥當。 警告: 切勿為羊毛衣服或附軟墊的物品(例如縫製被、縫製外套等)進行乾衣。 假如屬纖細衣物,請以晾乾處理,並載較少量衣物清洗,以防起皺。 按啟動/暫停鍵。 乾衣操作期間,程序選擇鈕將一直停留在 程序的位置上,直至乾衣操作完成。 ” 作標示的指示燈將亮起。 乾衣期間,乾衣程序指示燈將保持亮著,直至進入散熱步驟,以“ 當程序結束...
- Page 64 乾衣時間表(按分鐘計) 程序 棉質 混合衣物 最小衣量 最大衣量 最大衣量 最小衣量 1 公斤 3 公斤 4 公斤 1 公斤 額外乾衣 ( Extra) 由 30 分鐘 至 170 分鐘 由 30 分鐘 至 230 分鐘 一般乾衣 ( Cupboard) 由 30 分鐘 至 150 分鐘 由...
- Page 65 清潔及日常保養 切勿將含有酒精成份的沙布及/或稀釋劑用於洗衣機表面,只需以濕布加以清潔便可。洗衣 機所需的日常保養項目非常有限: - 清潔洗衣劑格 - 清潔過濾器 - 清潔機門玻璃 清潔洗衣劑格 儘管非必然,但應定時清潔用作存放漂白洗衣劑及添加劑之 儲存格。 1) 先抽出儲存格,過程中可能要稍加力度,但應避免強行抽出。 2) 打開水龍頭,徹底清潔儲存格。 3) 將儲存格妥善放回原位。 清潔過濾器 本洗衣機設有專用的過濾器,作用是阻隔一些體積較大、容易 造成排水管淤塞之沉澱物或雜物(如硬幣、衣鈕等),同時方便 取走該些沉澱物或雜物。 我們建議過濾器應最少每一個月清潔一次。 清潔步驟如下: 1) 取出過濾器之前,請先將一條吸水力強的毛巾放置於過 濾器下方,以便吸走可能積存在排水泵內的少量積水。 2) 按逆時針方向轉動過濾器直至固定於垂直位置,便可將 過濾器取出並加以清潔。 3) 完成清潔後,將過濾器放回原位,並按順時針方向轉動 直至固定,然後按相反次序完成其餘上述步驟。 清潔機門玻璃 請定時用濕布清潔機門的玻璃。假如水中的沉積物和雜質積聚於 玻璃表面,可能會導致機門漏水。 切勿利用含侵蝕性的清潔劑進行清潔,這樣會令玻璃出現損蝕。 洗衣機如需搬遷或長期閒置 假如洗衣機需要搬遷或將長期閒置於溫度較低的地方,必需先將 洗衣機所有喉管的積水完全排走。 確保切斷主電源,讓喉管垂下並置於盤內,直至所有水被排出。...
- Page 66 故障診斷 什麼原因導致… 各種可自行解決的事故 故障說明 可能原因 排解方法 沒有連接上電源 接上電源 1. 無法啟動任何程序 按下啟動/暫停鍵 沒有開啟電源 電力中斷 檢查供電來源 保險絲燒掉 檢查保險絲 洗衣機門沒有完全關上 關妥洗衣機門 2. 洗衣機沒有進水 參閱第一項故障 進行相關檢查 水龍頭被關上 打開水龍頭 程序選擇鈕未有轉到正確位置 將程序選擇鈕轉到所需及正確位置 保 進水管扭曲 持進水管暢通 3. 洗衣機沒有排水 保持排水管暢通 排水管淤塞或扭曲 清理家中排水通道 家中排水通道受阻 檢查過濾器 排水泵過濾器淤塞 更換密封圈,並妥善接駁水龍頭與喉管 4. 洗衣機附近地板有積水 水龍頭與進水管之間密封圈出現滲漏...
- Page 67 注意事項: 操作洗衣機時使用不含磷酸鹽的環保洗衣劑可能會產生下列現象: 過水操作後排走的水呈較混濁狀態,原因是水中含有懸浮的沸石,但這現象並不會 影響過水的效果。 清洗後的衣物表面會出現白色粉末(沸石),原因是沸石不會被衣物纖維吸收,但這 些粉末不會影響衣物的顏色。 最後一次過水操作中出現泡沫並不代表過水效果欠佳。 有證據顯示,洗衣劑成份中的負離子表面活性劑難以從衣物中清除的情況經常會發 生,在這種情況下,即使衣物中的負離子表面活性劑含量極少,也能造成大量泡沫。 即使重複進行過水程序,亦無法杜絕上述情況出現。 CUSTOMER SERVICE AND GUARANTEE Your new appliance is fully guaranteed by the manufacturer for 12 months against electrical/mechanical breakdown excluding: A. Any faults which occur due to bad installation or misuse of the machine. B.
- Page 68 Fig. 2 技術規格 公斤 最大衣量 最大乾衣量 公斤 水壓 0,05 ÷ 0,8 MPa 0,05 ÷ 0,8 MPa 淨機身尺寸 (不包括機門及按鈕): 厘米 闊 厘米 深 高 厘米 備注:有關電子規格的技術內容,請參閱張貼於洗衣機正面(機門位置)的技術規格表 – 如上圖 示。 本產品符合73/23/EEC及89/336/EEC指令(其後為指令2006/95/EC及2004/108/EC)及 其後繼的安全標準。...
- Page 69 擺放及安裝 取走聚苯乙烯機腳保護墊,並將洗衣機放置於接近日後長期 擺放之地方(圖1)。 小心剪掉將喉管固定於機身背部的索帶 (圖2)。 拆除3顆固定螺絲(標記A)及3個定位膠墊(標記B) (圖3)。 拆除螺絲(標記C)。 另一個定位膠墊將跌落在機身內側。將機身傾斜,便可取走 上述定位膠墊。 利用附帶於操作指南包裝內的4個螺孔保護塞,覆蓋機身背 部4個螺絲孔 (圖4)。 警告: 切勿將包裝棄置於小童可觸及的地方,以免造成危險並釀成意外。 如圖所示,將隔音墊放置於機腳下方。 Apply the insulation sheet of corrugated material to the base Type 1 Type 2 as shown. Use the 4 feet to level the machine with the floor: a) Turn the nut clockwise to release the screw adjuster on the foot.
- Page 70 注意: 我們建議閣下保留固定螺絲以便日後搬遷之用。對於任何 沒有依照本產品製造商所訂立指示安裝本產品而帶來任何 損失,產品製造商將不會負責。同時,產品用家必需負擔 所有安裝費用。 接駁水管 本產品必須使用全新的喉組接駁主要供水裝置。 老舊的喉組不應重複使用。 本洗衣機所用進水管接駁洗衣機進水部份和冷水供應裝置的接 頭,採用3/4吋直徑的氣密螺紋管規格。 本洗衣機只利用冷水供應,因此只需利用一條 喉管接駁冷水供應裝置。請勿將進水管接駁上熱 水供應裝置。冷水供應系統具備良好的能源效 益。只有用作洗衣的水需要加熱。不論需要供 水的裝置是熱水壼、熱水煲,或本洗衣機,使 用時都不會導致供水管道產生熱量流失。 最小 4 cm +2,6 mt 最大 最小 50 cm 最大 85 cm...
- Page 71 注意:建議每次完成洗衣後應關掉水龍頭,以確保洗衣 機與供水裝置徹底分隔。 而為確保洗衣機正常操作,排水管的排水末端(接水口)的離地距須介乎最小50至最大85厘米。 接駁電線 安裝完成後,必須保留足夠空間確保電源線頭伸手可及。 假如我們提供的電源插頭並不適用 請剪斷電線並將之妥善銷毀! 閣下切勿將電源插頭用在其他電器之上,假如將剪掉的插頭連接到插座,外露的電線將有機 會構成危險。更換合適插頭,請按以下步驟: 接駁 至插頭的插腳 黃、綠色線 以英文字母“E”標示, 或標以標記 或塗上綠色, 或塗上黃、綠兩色 藍色線 以英文字母“N”標示, 或塗上藍色 啡色線 以英文字母“L”標示, 或塗上紅色 警告 本產品必須接上設有地線的電源 保險絲及電源插頭 本產品只限連接到額定值為13安培的電源插座使用。 產品預設的電源插頭備有BS 1362ASTA認可的13安培保險絲,更換時必須採用相同設計。 假如遺失保險絲封蓋,請勿使用插頭直至重新裝上合適的封蓋。合適的封蓋(可向當地的零 售商選購)必須與插頭底部導入部份的顏色或標示文字相同。...
- Page 72 安裝洗衣機門板指示 按照紙板樣板在門板上鑽 孔(參考右圖),根據你的需 要將鉸鏈和磁貼安裝在門板 的右邊或左邊位置。門鉸的 位置在上方。 用 粒螺絲 將鉸鏈上緊。 用螺絲 將磁貼 上緊。 根據你的需要,將板塊 安 裝於右邊或左邊。將橡膠圈 放在板塊底部,然後用螺 絲 上緊。 卡扣式安裝帽 安放於下 方。...
- Page 73 用螺絲 將鉸鏈上緊於門板 上,然後將門板安裝在洗衣 機前方。 注意:建議將門板開口朝向 左邊,跟洗衣機機門相同 方向,以獲取更多空間。 將洗衣機推入一個大小適 合的位置。 下方可加裝壁腳板,但尺吋 需在提供的範圍之內。 尺吋單位:毫米 洗衣機的四個可調較的腳架 可將高度從 毫米 移走提 供的螺帽,並以 毫米的螺帽 取替 調整至最高 毫米, 提高腳架後並鎖緊底板的螺 帽。...
- Page 74 dsfj òfl kgòj...
- Page 75 The manufacturer declines all responsibility in the event of any printing mistakes in this booklet. The manufacturer also reserves the right to make appropriate modifications to its products without changing the essential characteristics. 任何因為本書印刷錯誤造成的後果和責任,本產品製造商一概不負責。本產品製造商亦保 留權利在維持產品主要特徵的情況下,對產品規格進行任何製造商視之為適當的修改。...
- Page 76 本產品附有的標誌,表示符合歐盟就廢電子電機產品發出的 2012/19/EU指令。本產品包含污染物質 (可能會導致對環境的負面影響)和鹼性組分(可以被重新使用)。透過以歐盟指定方法棄置本產品, 除去並處置所有的污染物,以及回收和再循環的所有材料。 在確保廢電子電機產品不會成為環境問題,必須遵循以下的基本規則: - 廢電子電機產品 不可視作一般家居廢物般棄置 ; - 廢電子電機產品 應該移交經註冊的公司或相關的回收點。在許多國家,大型廢電子電機產品可能從家 中回收。 在許多國家,當購買新電子電機產品,零售商可能會在同等類型的基礎上免費回收舊有的電子電機 產品。...
Need help?
Do you have a question about the KWD6121 and is the answer not in the manual?
Questions and answers
how to set the time