Table of Contents
Advertisement
Quick Links
USER MANUAL
Enjoy peace of mind.
Register your appliance today.
Stay updated on better living services, safety notices and
shop for accessories.
1. O pen the camera app on your smartphone and
point at the QR code to scan
Product Registration QR code is located on the
front of your appliance or inside the door rim *.
2. Tap the notification or link to open the registration form
3. Complete your details and enjoy peace of mind
*Exact location of QR code may vary depending on oven model
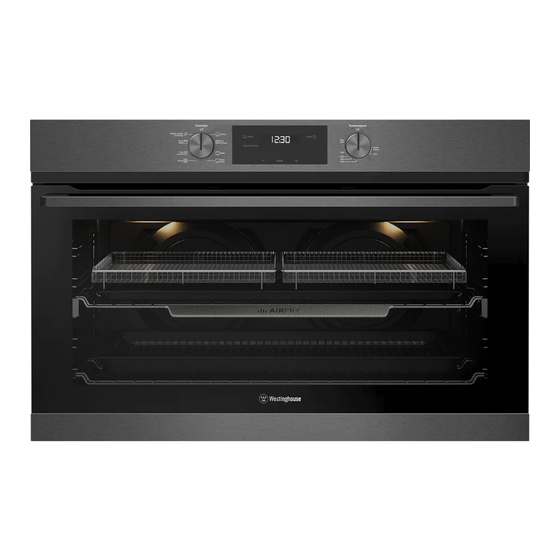
90cm COOKING
APPLIANCES
WFE9516DD
1
Advertisement
Table of Contents

Subscribe to Our Youtube Channel
Related Manuals for Westinghouse WVE9516DD


Summary of Contents for Westinghouse WVE9516DD
- Page 1 USER MANUAL Enjoy peace of mind. Register your appliance today. Stay updated on better living services, safety notices and shop for accessories. 1. O pen the camera app on your smartphone and point at the QR code to scan Product Registration QR code is located on the front of your appliance or inside the door rim *.
-
Page 2: Table Of Contents
CONGRATULATIONS CONTENTS Congratulations and thank you for choosing our product. Important safety instructions ............3 Product description ................5 We are sure you will find your new cooker a pleasure to use and a great asset to your cooking. Before you use the Installation of the appliance ............ -
Page 3: Important Safety Instructions
• In order to avoid any potential hazard, the enclosed installation instructions must be followed. damage and affect your ability to make a claim under the Westinghouse manufacturer’s warranty • Ensure that all specified vents, openings and provided with your product. Products must be airspaces are not blocked. - Page 4 IMPORTANT SAFETY INSTRUCTIONS W ARNING WARNING Oven Child safety • During use the appliance becomes hot. Care should • This appliance is not intended for use by persons be taken to avoid touching the hot surfaces inside the (including children) with reduced physical, sensory oven.
-
Page 5: Product Description
PRODUCT DESCRIPTION Freestanding cooker with flame safeguard gas cooktop and multi-function electric oven Stainless steel splashback Removable cast iron trivet Control panel Gas hob (Refer to Chapter ‘Get to know your cooktop’) Oven door Clip on kick panel (Select model only) Storage compartment (Refer to Chapter ‘Installation’) (Selected model only) -
Page 6: Installation Of The Appliance
INSTALLATION OF THE APPLIANCE Cabinet requirement if combustible surfaces are protected in accordance with AS/NZS 5601.1, or AS/NZS 5601.2. Model WFE9516DD is designed to fit into a 900mm • When setting the cooker height, ensure the top of wide gap between standard kitchen cabinets. The the cooker is at least 10mm higher than the level of appliance integrates with the kitchen cabinets by the benchtop. - Page 7 INSTALLATION OF THE APPLIANCE Freestanding installation The freestanding type installation requires four screw-in feet to be installed before it can be fitted in between cabinets, with cabinets on one side or without adjacent cabinets. There is no clearance requirement to adjacent side cabinets.
- Page 8 INSTALLATION OF THE APPLIANCE (CONTINUED) Freestanding installation (continued) Gently close the door until it comes to a stop. Then lift the door off the hinge. Installation of screw-in feet • Freestanding appliance are supplied with four screw-in feet in the internal accessory pack. The screw-in feet can be adjusted by turning the lower half clockwise or anti-clockwise.
- Page 9 Leveling oven Place a level in the oven as below making sure the level sits on the front and rear forms. Adjust the feet accordingly to level the appliance. If your kitchen has a 900mm height kitchen bench top, follow the quick measurement guide below before putting the cooker upright Installing splashback 50mm...
- Page 10 INSTALLATION OF THE APPLIANCE (CONTINUED) Freestanding installation (continued) Installation the anti-tilt brackets To ensure cooker stability, the anti-tilt brackets must be installed. There are left and right engagement slots for the anti-tilt bracket at the bottom rear of the appliance. The following steps must be followed to ensure the correct installation of anti-tilt brackets and the stability of the appliances.
- Page 11 Freestanding installation (continued) W ARNING • Appropriate fasteners must be used to suit the type of wall on which the anti-tilt brackets are installed. • Freestanding unit must be pushed up against the wall on installation. On gas units check that the gas hose, if used, has not been kinked during installation.
- Page 12 INSTALLATION OF THE APPLIANCE (CONTINUED) Freestanding installation (continued) • Connect services to the appliance prior to placing into cavity. • To locate appliance, slide into cavity ensuring the anti-tilt brackets fully engaged with the rear left and right engagement slots. •...
- Page 13 Freestanding installation (continued) Make sure both clip modules are in the same orientation after installation. Clip the kick panel onto the front feet of the appliance. Make sure the kick panel snaps onto the larger section of the front feet. INSTALLATION OF THE APPLIANCE...
- Page 14 Slot-in installation The slot-in type installation use the appliance as supplied. The appliance can be mounted on a plinth. This enables a continuous cupboard kickboard to be installed, giving a more integrated appearance. There is no clearance requirement between oven and adjacent side cabinets.
- Page 15 INSTALLATION OF THE APPLIANCE (CONTINUED) Slot-in installation (continued) • The anti-tilt brackets are to be secured to the back • Once services are connected, product can be lifted wall with appropriate fasteners. onto the plinth and pushed back carefully, ensuring the appliance engages into both brackets at the rear •...
-
Page 16: Wiring Requirements
WIRING REQUIREMENTS The cooker MUST be installed in compliance with: IMPORTANT • Wiring connections in AS/NZS 3000 Wiring Rules. Before you cook in your new oven it is important that the protective oils used in the manufacture of the • Local regulations, municipal building codes and product be removed. -
Page 17: Installing The Freestanding Cooker
INSTALLING THE FREESTANDING COOKER Model WFE9516DD Checking piping size To work out a suitable pipe size for connection use the information in this table. Gas hose restraints point to regulator GAS TYPE NATURAL UNIVERSAL Gas connection point to regulator WFE9516DD 54.2MJ/h 45.5MJ/h For information and requirements about construction... -
Page 18: Lpg Conversion Gas Cooktop Model
LPG CONVERSION GAS COOKTOP MODEL A conversion kit is included with the product for 10. Attach the LPG sticker to the cooker, near the gas Universal LPG usage. The conversion kit contains 5 or supply inlet. Cover the Natural Gas label that is 7 injectors (refer to LPG conversion table) and 1 LPG factory fitted. -
Page 19: Testing The Operation Of The Gas Cooker
TESTING THE OPERATION OF THE GAS COOKER Checking gas supply When maximum flame appearance is correct, then check the turn-down setting on each burner. If the settings 1. Check the manometer zero point is correct. appear to be incorrect, proceed as follows: 2. -
Page 20: Before Operating Your Appliance For The First Time
BEFORE OPERATING YOUR APPLIANCE FOR THE FIRST TIME Preparing your appliance for the first time • Please remove all internal boxes and bags from the oven before operation. • Please wipe out the oven interior prior to operation with warm soapy water and polish dry with a soft clean cloth. -
Page 21: Installing Your Oven Accessories
INSTALLING YOUR OVEN ACCESSORIES Slides (telescopic runners) Installing the side racks 1. Insert the rear peg into the rear access hole provided, 1. The selected models are supplied with a set of slides ensuring peg is fully inserted. and instructions on how to assemble. Ensure the rack 2. -
Page 22: Installing Burners And Trivets
INSTALLING BURNERS AND TRIVETS Installing burners Trivet installation sequence The burner crown must be fitted correctly into the Install the middle trivet first by aligning the trivet with burner cup or damage will occur during operation. the wok burner and gently placing the trivet on hob. •... -
Page 23: Getting To Know Your Cooktop
GETTING TO KNOW YOUR COOKTOP Model WFE9516DD 1. Low heat burner (5.1MJ/h) Used for simmering with small cookware items. 2. Medium heat burner (9.0MJ/h) Used for normal cooking and simmering with mid size cookware items. 3. High heat burner (12.1MJ/h) Used for fast heating with large size cookware items. -
Page 24: Using Your Oven
USING YOUR OVEN Understanding your oven functions Fan & Grill Fan Bake “Fan Grill” offers you the benefits of both “Bake” and traditional “Grill” functions. The grill element turns on and off to maintain the set temperature while the fans circulate the Heat comes from the elements surrounding the fans. - Page 25 Cooling/Venting fan Preheating your oven with “Rapid Heat” To preheat your oven select the “Rapid Heat” function. Your built-in appliance is fitted with a cooling fan. This function allows your oven to reach the preset This prevents your kitchen cabinet from overheating and temperature quicker than any other cooking function.
- Page 26 USING YOUR OVEN (CONTINUED) Setting the time of day To check or cancel settings Before the appliance can be used, the time must be set. To check settings, touch the symbol until the desired setting is displayed. The relevant After the appliance has been electrically connected, icon will flash.
- Page 27 COOKING TEST Get to know your new oven with this • The grill tray can be used in the oven as a baking dish, ‘Simple Test Cake’ except in oven shelf location 1. • Make sure dishes will fit into the oven before you Although we strive for a perfect performing oven, it’s switch it on.
-
Page 28: Cooking Guide
COOKING GUIDE Choosing the best oven settings The following table is intended as a guide and experience may show some variation in cooking times necessary to meet individual requirements. We recommend that you preheat your oven for 30 minutes. Modes without Oven Fan FOOD TEMPERATURE ˚C OVEN SHELF POSITION*... - Page 29 Air Fry Cooking (for applicable models only) The Air Fry feature works best for single shelf baking. Air Fry is suitable for French Fries, Chicken Wings, Chicken Nuggets and similar products, See settings in the table below: IMPORTANT • Air Fry is designed for single shelf cooking. •...
- Page 30 COOKING GUIDE (CONTINUED) Grilling Guide 1. Place the grill dish on the bottom rack. 2. Place meat/poultry on an oven shelf above the grill dish. WIPE OFF ANY OIL OR FAT WHICH SPATTERS WHILE W ARNING THE OVEN IS STILL WARM. Always clean the grill/oven dish after every use.
-
Page 31: Dealing With Cooking Problems
DEALING WITH COOKING PROBLEMS (see also TROUBLESHOOTING) PROBLEM CAUSES REMEDIES Uneven cooking: • Incorrect shelf position. – Select shelf that puts food in the centre of the oven. • Oven tray too large. – Experiment with other trays or dishes. •... -
Page 32: Cleaning Your Oven
CLEANING YOUR OVEN Grill W ARNING • Always keep the grill dish and grill dish insert clean, as • Always make sure that the oven is electrically isolated any fat deposits may catch fire. before cleaning. This can be done by the functional switch nearby. - Page 33 CAUTION Ensure the appliance is off and cool before cleaning. Enamel (on burner skirts and trivets) Persistent stains may require rubbing with a nylon scourer or creamed powder cleansers. Household enamel cleaners are available, follow the manufacturer’s instructions in their use. Harsh abrasive cleaners, powder cleaners, steel wool or wax polishes should not be used.
- Page 34 CLEANING YOUR OVEN ACCESSORIES Removing the trays and shelves from your Cleaning your oven door appliance The oven door has been designed to allow the two inner door glasses to be removed for cleaning without • Slide the dish and grill tray towards you until they removing the door from the product.
- Page 35 Cleaning your oven door Changing the light globes • There are 2 light globes located in the top of the oven cavity towards the front. The light globe glass is W ARNING accessible between the passes of the upper element. •...
- Page 36 STEAM ASSISTED CLEANING Steam Assisted Clean This function assists in the removal of food residue from inside the oven. This method is effective in removing light soiling only. It is not effective in removing stubborn baked-on stains. This function can only be used when the oven is cold.
-
Page 37: Troubleshooting
TROUBLESHOOTING Faults If there is a problem with the oven and/or grill, please: • Check the points listed below before calling for service. NOTE: We may charge for service even in the It may be possible to avoid a call by fixing the problem guarantee period if your problem is due to the yourself –... - Page 38 TROUBLESHOOTING (CONTINUED) NOTE: Only authorised personnel should carry out servicing. If the household fuse continues to blow, call the Customer Care Centre. In the event of a power failure the gas burners may be lit with a hand held igniter and used. Take care to avoid letting unburnt gas flow for more than 5 seconds when attempting to light the burner.
-
Page 39: Warranty
(c) ‘ASC’ means Electrolux’s authorised serviced centres; the Appliance; (d) ‘Westinghouse’ is the brand controlled by Electrolux Home Products In addition, Electrolux is not liable under this warranty if: Pty Ltd of 163 O’Riordan Street, Mascot NSW 2020, ABN 51 004... - Page 40 0800 10 66 10 email: customercare@electrolux.co.nz web: westinghouse.co.nz and WESTINGHOUSE are trademarks of Westinghouse Electric Corporation. Used under license by Electrolux Home Products Pty Ltd. All Rights Reserved. © 2023 Electrolux Home Products Pty Ltd ABN 51 004 762 341...
Need help?
Do you have a question about the WVE9516DD and is the answer not in the manual?
Questions and answers