Table of Contents
Advertisement
Quick Links
USER MANUAL
Enjoy peace of mind.
Register your appliance today.
Stay updated on better living services, safety notices and
shop for accessories.
1. Open the camera app on your smartphone and
point at the QR code to scan
Product Registration QR code is located on the
front of your appliance or inside the door rim*.
2. Tap the notification or link to open the registration form
3. Complete your details and enjoy peace of mind
*Exact location of QR code may vary depending on oven model
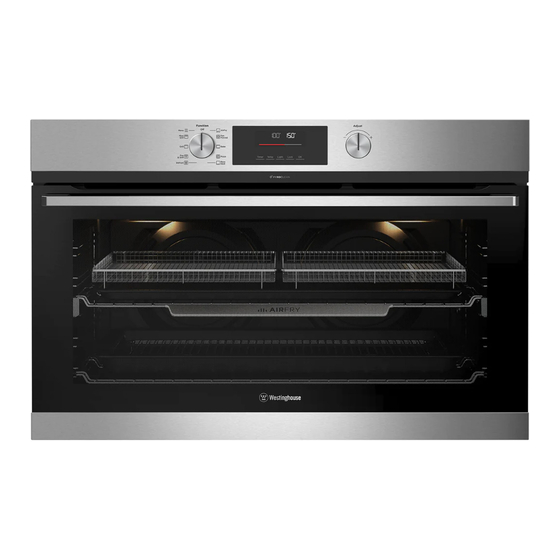
90cm ELECTRIC
BUILT-IN OVENS
WVEP9716SD
1
Advertisement
Table of Contents

Related Manuals for Westinghouse WVEP9716SD


Summary of Contents for Westinghouse WVEP9716SD
- Page 1 2. Tap the notification or link to open the registration form 3. Complete your details and enjoy peace of mind *Exact location of QR code may vary depending on oven model 90cm ELECTRIC BUILT-IN OVENS WVEP9716SD...
-
Page 2: Table Of Contents
Westinghouse manufacturer’s warranty provided with your product. Products must be used, installed and operated in accordance with this manual. -
Page 3: Important Safety Instructions
IMPORTANT SAFETY INSTRUCTIONS Please read this user manual carefully and store in a Installation, cleaning and servicing warnings handy place for later reference. Pass the user manual • An authorised person must install this appliance. on to possible new owners of the appliance. (Certificate of Compliance to be retained). - Page 4 IMPORTANT SAFETY INSTRUCTIONS (continued) W ARNING WARNING Oven Child safety • During use the appliance becomes hot. Care should • This appliance is not intended for use by persons be taken to avoid touching the hot surfaces inside (including children) with reduced physical, sensory the oven.
-
Page 5: Description Of Your Appliance
DESCRIPTION OF YOUR APPLIANCE WVEP9716SD Pyro clean knob control electric oven Control Panel DESCRIPTION OF YOUR APPLIANCE... -
Page 6: Installation Of The Appliance
INSTALLATION OF THE APPLIANCE Cabinet requirement IMPORTANT Models are designed to be built into cabinetry either To minimise the weight of the oven for easier below a benchtop or into a vertical cabinet. installation, remove the oven door and oven internal accessory pack. - Page 7 INSTALLATION (continued) Underbench installation Vertical cabinet installation Your underbench oven looks best when the control The oven can be built into a vertical cabinet in the panel is directly under the benchtop. An upper infill same manner as an underbench. The required cavity panel may be added if the cooktop placed above the dimensions are the same and the product is secured benchtop is too deep.
- Page 8 INSTALLATION (continued) Cabinet construction for built in oven For the best integration within a kitchen, install this appliance in a cupboard that gives a flush fit with the surrounding cupboard fronts. A recess of 20mm is ideal. NOTE: Your appliance must be mounted on a horizontal surface for the full width and depth of the product.
-
Page 9: Wiring Requirements
Plastic clip cooking range. Securing points Supply cord size required: WVEP9716SD - 4.0mm The Data plate gives information about rating and is located behind the bottom of the oven door. Hard wiring detail •... -
Page 10: Before Operating Your Appliance For The First Time
BEFORE OPERATING YOUR APPLIANCE FOR THE FIRST TIME Preparing your appliance for the first time • Please remove all internal boxes and bags from the oven before operation. • Please wipe out the oven interior prior to operation with warm soapy water and polish dry with a soft clean cloth. -
Page 11: Installing Your Oven Accessories
INSTALLING YOUR OVEN ACCESSORIES Slides (telescopic runners) (on selected models) provided, ensuring peg is fully inserted. Then locate the front peg into the front access The selected models are supplied with a set of slides hole and push in firmly. and instructions on how to assemble. - Page 12 INSTALLING YOUR OVEN ACCESSORIES (continued) Fitting grill dish and insert Your oven comes with a full width grill dish and a grill insert. The grill dish insert is designed with flexibility to adjust distance between the food and the grill element. Maximum grill power Grill dish insert brings the food closer to the grill element.
-
Page 13: Using Your Oven
USING YOUR OVEN COOKING FUNCTIONS Symbol Function description Fan Forced Heat comes from the element surrounding the fan. This fan circulates the hot air around the oven cavity so that you can put your food in different places in the oven and still cook them at the same time. - Page 14 USING YOUR OVEN (continued) OPERATING SEQUENCE USING THE APPLIANCE Select the oven function Control panel Turn the oven function selector clockwise to select the Control panel sensor fields desired oven function. Oven Timer NOTE: each oven function has a default temperature which can then be adjusted as outlined below.
- Page 15 USING YOUR OVEN (continued) BEFORE FIRST USE WARNING Refer to safety chapters. Initial cleaning Before the first use, clean the empty oven and set the time: The display with the maximum number of functions set. Display indicators Remove all accessories and removable shelf supports from Lock the oven.
- Page 16 DAILY USE Select Assisted Cooking. Press OK. Start cooking Set a heating function. Select the dish. Press OK. Refer to “Menu structure” chapter. Set the temperature. P1 - P41 Insert the dish into the oven. Confirm setting. How to set: Assisted Cooking Every dish in this submenu has a recommended function and temperature.
- Page 17 USING YOUR OVEN (continued) CLOCK FUNCTIONS Press OK again. Clock function Application Minute minder. When the timer ends, the signal sounds. Cooking time. When the timer ends, the signal sounds and the heating function stops. Rotate Adjust Selector until the current time is Time Delay.
- Page 18 How to set: Minute minder How to set: Cooking time Press: Timer Choose a heating function and set the temperature. Press repeatedly: Timer The display shows: Set the Minute minder The display shows: h:min STOP Press OK. Set the cooking time. Press OK.
- Page 19 How to set: Time Delay Select the heating function. START STOP Set the end time. Press repeatedly: Timer Press OK. The display shows: the time of day h:min Timer starts counting down immediately. START STOP Set the start time. How to set: Child lock Press and hold Lock to turn Child Lock ON/OFF.
- Page 20 How to change: Settings Press OK to confirm selection. Select Adjust the value and press OK. Menu structure Assisted cooking Cleaning Settings Select Settings. Press OK. Settings Time of Day Change Display Brightness Change 1 - Beep Key Tones 2 - Click 3 - Sound off Buzzer Volume 1 - 4...
- Page 21 Christmas Stollen ASSISTED COOKING SETTINGS Sponge Cake Jacket Potato Wedges Sugar Cake Hash Browns Swiss Roll Lasagne Swiss Tarte, sweet Potato Gratin Yeast Cake Pasta Bake Brownies Vegetable Gratin Cakes, small Pizza Cream Puffs Pizza frozen Eclairs Quiche Macaroons Ciabatta Muffins Rolls Pastry Strips...
-
Page 22: Easy Bake Steam
EASY BAKE STEAM Your oven has the ability to add steam while baking. Cooking with steam is a great addition to straight ‘hot air’ cooking. Steam brings out all the natural flavours and goodness in the food, cooks evenly from surface to centre and retains more nutrients and vitamins. -
Page 23: Cooking Test
COOKING TEST COOKING GUIDE Get to know your new oven with this • For best baking results preheat oven for 30 minutes. ‘Simple Test Cake’ • Select the correct shelf location for food being cooked. Although we strive for a perfect performing oven, it’s •... - Page 24 Choosing the best oven settings The following table is intended as a guide and experience may show some variation in cooking times necessary to meet individual requirements. We recommend that you preheat your oven for 30 minutes. Modes without oven fan FOOD TEMPERATURE •C OVEN SHELF POSITION*...
- Page 25 COOKING GUIDE (continued) Easy Bake Steam function WATER IN CAv ITy TEMPERATURE Ov EN Sh ELf f OOD TIME IN MINUTES WELL (ML) • POSITION* Yeast goods Bread loaves 180 - 200 2 or 3 35 - 45 Bread rolls 190 - 210 2 or 3 20 - 25...
- Page 26 Air Fry Cooking The Air Fry feature works best for single baking. Air Fry is suitable for French Fries, Chicken Wings, Chicken Nuggets and similar products. See settings in the table below: IMPORTANT • Air Fry is designed for single shelf cooking. •...
- Page 27 COOKING GUIDE (continued) Roasting Meat As a method of cooking, grilling can be used to: • Enhance the flavours of vegetables, fish, poultry Place the meat in the oven and set the temperature and meat. between 180°C and 200°C. (It is recommended to wrap your meats in an oven roasting bag or foil •...
-
Page 28: Dealing With Cooking Problems
DEALING WITH COOKING PROBLEMS (see also TROUBLESHOOTING) PROBLEM CAUSES REMEDIES Uneven cooking: • Incorrect shelf position. – Select shelf that puts food in the centre of the oven. • Trays not centralised. – Centre trays. • Air flow in oven uneven. –... -
Page 29: Cleaning Your Oven
CLEANING YOUR OVEN Oven W ARNING • Always keep your appliance clean. Ensure that fats • Always switch off power to the oven before and oils do not accumulate around elements or fans. cleaning. • Always keep the oven shelves, baking tray, grill dish •... - Page 30 CLEANING YOUR OVEN (continued) Cleaning your oven door Cleaning your oven door The oven door has been designed to allow the two inner door glasses to be removed for cleaning without WARNING removing the door from the product. • DO NOT use the oven without the inner and Removing the inner door glass for cleaning: middle door glass fitted.
-
Page 31: Cleaning Your Pyrolytic Oven
CLEANING YOUR PYROLYTIC OVEN PYROLYTIC CLEANING THE OVEN Heavy clean When the oven is very dirty it may need a longer cycle Pyrolytic cleaning of the oven cavity to clean it thoroughly. This cycle will clean the dirtiest of The oven has the Pyrolytic self-cleaning function. It ovens. -
Page 32: Troubleshooting
TROUBLESHOOTING Faults If there is a problem with the oven and/or grill, please: • Check the points listed below before calling for service. It may be possible to avoid a call by fixing the problem yourself – and so continue cooking. NOTE: We may charge for service even in the guarantee period if your problem is due to the causes listed below. - Page 33 NOTES NOTES...
- Page 34 NOTES NOTES...
-
Page 35: Warranty
(c) ‘ASC’ means Electrolux’s authorised serviced centres; the Appliance; (d) ‘Westinghouse’ is the brand controlled by Electrolux Home Products In addition, Electrolux is not liable under this warranty if: Pty Ltd of 163 O’Riordan Street, Mascot NSW 2020, ABN 51 004... - Page 36 0800 10 66 10 email: customercare@electrolux.co.nz web: westinghouse.co.nz and WESTINGHOUSE are trademarks of Westinghouse Electric Corporation. Used under license by Electrolux Home Products Pty Ltd. All Rights Reserved. © 2023 Electrolux Home Products Pty Ltd ABN 51 004 762 341...
Need help?
Do you have a question about the WVEP9716SD and is the answer not in the manual?
Questions and answers