Table of Contents
Advertisement
Available languages
Available languages
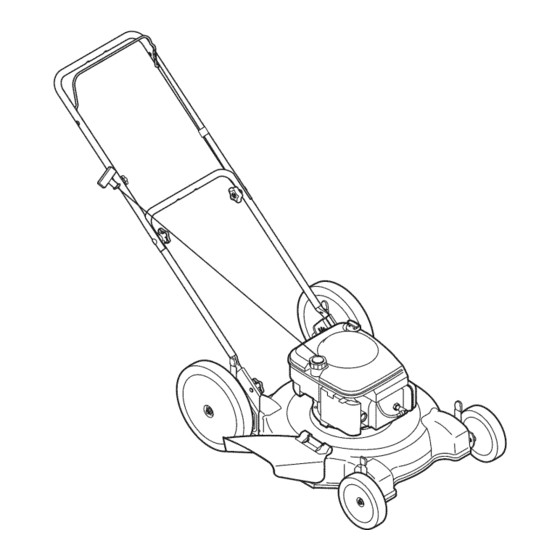
Operator's
Manual
CRRFTSMRH
22" LAWN MOWER
Model No. 247.38528
CAUTION:
Before
using
this product,
read this
manual
and follow
all
safety
rules
and operating
instructions.
o SAFETY
ASSEMBLY
OPERATION
MAINTENANCE
PARTS LIST
o ESPANOL, p. 33
Sears Brands Management
Corporation,
Hoffman Estates, IL 60179, U.S.A.
Visit our website:
www.craftsman.com
FORMNO.769-05495A
1/11/2010
Advertisement
Table of Contents

Related Manuals for Craftsman 247.38528


Summary of Contents for Craftsman 247.38528
- Page 1 Operator's Manual CRRFTSMRH 22" LAWN MOWER Model No. 247.38528 CAUTION: Before this product, read this manual and follow safety rules and operating instructions. Sears Brands Management using Corporation, Hoffman Estates, IL 60179, U.S.A. Visit our website: www.craftsman.com o SAFETY ASSEMBLY...
- Page 2 Ifthis Craftsman product fails due toadefect inmaterial orworkmanship Parts & Repair Service Center, orother Craftsman This warranty applies foronly 9 0days i fthis product isever u sed f or c ommercial Thiswarranty coversONLYdefects in material and workmanship. Sears will NOT payfor: •...
- Page 3 This symbolpointsout importantsafetyinstructionswhich,if not followed,couldendangerthepersonalsafetyand/orpropertyof yourselfand others. Readand followall instructionsin this manual beforeattemptingto operatethis machine.Failureto complywith these instructionsmay resultin personalinjury.Whenyou seethis symbol,HEEDITS WARNING! CALIFORNIA PROPOSITION EngineExhaust,someof its constituents,and certainvehicle componentscontainor emit chemicalsknownto Stateof California to cause cancerand birthdefects or other reproductive harm. Batteryposts,terminals,and relatedaccessoriescontainlead and leadcompounds,chemicalsknownto the Stateof California to cause cancerand reproductiveharm.Washhandsafter handling.
- Page 4 • The bladecontrolhandleis a safetydevice.Neverattemptto bypassits operation.Doingso makesthe safetydevice inopera- tive and may resultin personalinjurythroughcontactwith the rotatingblade.The bladecontrol handlemustoperateeasily in bothdirectionsand automaticallyreturnto the disengaged positionwhenreleased. • Neveroperatethe mowerin wet grass.Alwaysbe sureof your footing. A slip and fall cancause seriouspersonalinjury.If you feelyou are losingyourfooting,releasethe bladecontrolhandle immediately and the bladewill stop rotatingwithinthreeseconds.
- Page 5 • Extinguishall cigarettes,cigars,pipesand othersources of ignition. • Neverfuelmachineindoorsbecauseflammablevaporswill accumulatein the area. • Neverremovegas cap or add fuel whileengineis hotor running. Allowengineto coolat leasttwo minutesbeforerefueling. • Neverover-fillfuel tank.Toallowfor expansionof the fuel, do not fill abovethe bottomof the fueltank neck. • Replacegasolinecapand tighten securely. •...
- Page 6 SAFETY SYMBOLS This pagedepictsand describessafetysymbolsthat mayappear on this product. Read,understand,and followall instructionson the machine beforeattemptingto assembleand operate. READ THE OPERATOR'S MANUAL(S) Read, understand, operate DANGER -- ROTATING BLADES To reduce the risk of injury, keep hands and feet away. Do not operate unless discharge catcher is in its proper place.
- Page 7 Sight and hold this levelwith a verticaltree... or a corner of a building... 15 ° Use this page as a guide to determine slopes where you may not operate safely. Do notoperateyour lawnmoweron such slopes.Donot mowon inclineswith a slopein excessof 15degrees(a riseof approximately 2-1/2feet every 10feet). Operatewalk = behindmowersacrossthe face of slopes,neverup and downslopes.
- Page 8 This page left intentionally blank.
- Page 10 IMPORTANT: T his unit is shippedwithoutgasolineor oil in the engine. Be certain to serviceenginewithgasolineand oil as instructedin the Operationsectionbeforestartingor runningyourmachine. NOTE:Referenceto rightand left hand sideof the LawnMoweris observedfrom the operatingposition. OPENING CARTON Cut eachcornerof the cartonverticallyfromtop to bottom. Removeall looseparts. Removeloosepackingmaterial.
- Page 11 If satisfiedwith the heightof the handle,tightenthe star knobsat the endsof the lowerhandleshownin Figure3. Forconvenience of operation,youmay adjustthe handle heightas follows: NOTE:Eachend of the lowerhandlemustbe placedin the same positionon the mountingbrackets. Removethestar knobsshownin Figure3 and removethe lowerhandle. Positioneach handlebracketstud intothe top hole in the lowerhandle.
- Page 12 Attaching the Mulching Baffle Yourmowerisshippedfor sidedischargeoperation.Toconvertmower to the mulchingoperation,followthe sequenceindicatedhere: Lift up and hold the sidedischargecoverand insert t he bottomlip of the mulchingbaffle insidethe chuteopeningSee Figure6. Snapthe hooks of the mulchingbaffleoverthe hingepin of the dischargecover.The hooksmustsnap intoplaceon the hinge pin, lockingthe mulchingbafflefirmlyonto the mower.Release thedischargecover.
- Page 13 Recoil Starter Mulching Baffle ... BLADE CONTROL Theblade controlis attachedto the upper handleof the mower. Depressand squeezeit againstthe upper handleto operatethe unit. Releaseit to stop engineand blade. This bladecontrolis a safetydevice.Neverattemptto bypassits operations. CUTTING HEIGHT ADJUSTMENT One adjustmentleveris locatedon eachwheeland is used toadjust the cuttingheight.All four levershaveto be at the same positionto ensurea uniformcut.
- Page 14 Movelawnmowerat least 10feet awayfromthe fuel container/ sourceand site beforestartin{ Be sureno one otherthan theoperatoris standingnearthe lawn mowerwhilestartingengineor operatingmower.Neverrun engine indoorsor in enclosed,poorlyventilatedareas. Engineexhaust containscarbonmonoxide,an odorlessand deadlygas. Keep hands, feet, hairand looseclothingawayfrom any movingpartson engine and lawn mower. "_ Figure9 ine.
- Page 15 TO STOP ENGINE Releasebladecontrolto stop the engineand blade. Wait for the bladeto stop completelybeforeperforming any workon the moweror to removethe grass catcher. USING YOUR LAWN MOWER Be sure lawnis clearof stones,sticks,wire, or otherobjectswhich coulddamagelawnmoweror engine.Suchobjectscouldbe accidently thrownby themowerin anydirectionand cause seriouspersonalinjury to the operatorand others.
- Page 16 Before performing anytypeofmaintenance/service, disengage all controls and stoptheengine. W aituntilall moving partshavecometo a completestop.Disconnect sparkplugwireandgrounditagainst t he enginetoprevent u nintended starting. EachUse Engineoil level Looseor missinghardware Unit and engine. 1st5 hours Engineoil Annuallyor 25 hours Air cleanert Controllinkages/pivots and wheels Undersided mowerdeck Annuallyor 50 hours Engineoil...
- Page 17 Alwaysstop engine,disconnectspark plugwire, and groundagainst enginebeforeperforming any type of maintenance on yourmachine. GENERAL RECOMMENDATIONS • Alwaysobservesafetyruleswhenperformingany maintenance. • Thewarrantyon this lawnmowerdoesnot coveritemsthat have been subjectedto operatorabuseor negligence. T o receivefull valuefromwarranty,operatormustmaintainthe equipment a s instructedhere. • Changingof engine-governed speedwill voidenginewarranty. •...
- Page 18 Check Engine Checkoil levelbeforeeachoperation.Be sureoil levelis maintained. Checkthe oil with the enginestoppedand level. Removethe oil fill dipstickand wipeit clean. Insertand tightendipstick.Removeitto checkthe oil level. If the oil levelisnear or belowthe lowerlimit mark on the dipstick, removethe oil fillercap/dipstick,and fill with the recommended oil to the upperlimit mark.Do not overfill.
- Page 19 CLEANING DECK Cleanundersideof the mowerdeck once a seasonto preventbuild-up of grass clippingsor otherdebris. Followstepsbelowfor thisjob. Disconnectsparkplug wire. Runengineuntilit stopsfrom lack of fuel. Tip mowersothat it restson the housing,keepingthe mufflerside down. Referbackto Figure13.Holdmowerfirmly. Nevertip the mowermorethan 900in any directionand do not leave the mowertippedfor any lengthof time.
- Page 20 If youuse a gas additive,run the enginefor severalminutesto circulatethe additivethroughthe carburetor--afterwhichthe engineand fuel canbe storedup to 24 months. Whileengineis still warm,changethe oil. Cleanengineof surfacedebris. PREPARING THE LAWN MOWER • Cleanand lubricatemowerthoroughly as describedin the lubrica- tion instructions. • Donot usea pressurewasheror gardenhoseto cleanyour unit. •...
- Page 21 Enginefails to start Bladecontroldisengaged. Sparkplug bootdisconnected. Fueltank emptyor stale fuel. Faultyspark plug. Engineflooded. Blockedfuel line. Enginerunserratically Sparkplug bootloose. Stalefuel. Ventin gas cap plugged. Wateror dirt in fuel system. Dirtyair cleaner. Blockedfuel line. Engineoverheats Engineoil levellow. Air flow restricted. Occasionalskips(hesitates) Sparkpluggap too close. Idlespoorly Sparkplugfouled,faulty,or gap too wide.
- Page 22 Craftsman Mower B Model No. 247.38528...
- Page 23 Craftsman Mower B Model No. 247.38528 710-1205 EyeBolt 720-0279 Wing Nut 747-1161A-0637 BladeControlHandle 749-1092A-0637 UpperHandle 946-1130 ControlCable 749 -04037 LowerHandle 725-0157 CableTie 687-02048A-4044 DeckAssembly,22" 710-0654A TT Screw,3/8-16x 1.0 748-0376E BladeAdapter 942-0742A MulchingBlade,22" 736-0524B BladeBell Support 710-1044 Screw,3/8-24 x 1.5 712-04065...
- Page 24 Craftsman Engine Model No. 126TO2-O795-B1 For Craftsman Mower Model No. 247.38528 [ 48 SHORT BLOCK ] 11058OPERATOR'S MANUAL I 1329 REPLACEMENT ENGINE 1330 REPAIR MANUAL 718 @ [sos 1095 VALVE GASKET SET 358 ENGINE GASKET SET 617 0 842 0...
- Page 25 Craftsman Engine Model No. 126T02=0795=B1 For Craftsman Mower Model No. 247.38528 121 CARBURETOR OVERHAUL KIT 163 _ 276 _) 633A 36s_:_ 633A [ 633 163 _ 883 _/...
- Page 26 Craftsman Engine Model No. 126T02-0795-B1 For Craftsman Mower Model No. 247.38528 1211 1036 EMISSIONS LABEL 1210 969 I 689 0...
- Page 27 PistonAssembly(Standard) 797303 PistonAssembly(.020"Oversize) 797304 RingSet (Standard) 797305 RingSet (.020"Oversize) 691588 Lock-Piston Pin 298909 Pin-Piston For Craftsman Mower Model No. 247.38528 Rod-Connecting 691664 Screw(ConnectingRod) (Short) 695759 Screw(ConnectingRod) (Long) 262651s Valve-Exhaust 262652s Valve-Intake 691270 Spring-Valve (Intake) 691270 Spring-Valve (Exhaust) 793756 Guard-Flywheel 692194...
- Page 28 690940 Screw(DipstickTube) 790830 Thermostat 790828 Muffler 790826 Housing-Blower 691108 Screw(BlowerHousing) 790836 Shield-Cylinder 690345 Screw(CylinderShield) For Craftsman Mower Model No. 247.38528 690662 Nut (Flywheel) 802574 Armature-Magneto 691061 Screw(MagnetoArmature) 802592s Plug-Spark 692390 Wire-Stop 794307 GasketSet-Engine 691688 Screw(Carburetor) 690272 Washer(GovernorCrank) 690670 Screw(Air CleanerCover)
- Page 29 Seat-Valve (Exhaust) 262001 Bushing-Valve Guide (Exhaust) 63709 Bushing-Valve Guide (Intake) 883 • 691881 Gasket-Exhaust 795064 Cover-Blower H ousing 796136 Brake For Craftsman Mower Model No. 247.38528 Cap-FuelTank 795259 Base-AirCleanerBase 692298 Cover-Air Cleaner 690700 Screw(BlowerHousingCover) 699374 Tank-Fuel 796611 Bowl-Float 694395 Primer-Carburetor 1036 Label-Emissions (Availablefrom a Briggs&...
- Page 30 Sears, Roebuck and Co., U.S.A. (Sears), the California and the United States Environmental Emission Control System Warranty EMISSIONCONTROL WARRANTY COVERAGEISAPPLICABLE TO CERTI- FIEDENGINESPURCHASEDIN CALIFORNIAIN 1995ANDTHEREAF- TER,WHICHARE USEDINCALIFORNIA,ANDTO CERTIFIEDMODEL California and United The CaliforniaAir ResourcesBoard(CARD),U.S.EPAand Searsare pleased to explainthe EmissionControlSystemWarrantyon your modelyear2000and latersmalloff-roadengine(SORE).In California,newsmall off-roadengines mustbe designed,builtand equippedto meetthe State'sstringentanti-smog standards.Elsewherein the UnitedStates, newnon-road,spark-ignition...
- Page 31 250 hours of actual engine running time. to be emission compliant for 500 hours of actual engine running time. lawn mower is used 20 to 25 hours per year. Therefore, rating would equate to 10 to 12 years. the relative level of emissions...
- Page 32 Congratulations on makinga smartpurchase.YournewCraftsman@ productis designedand manufactured for yearsof dependableopera- tion. But likeall products,it may requirerepairfrom time to time.That's whenhavinga RepairProtectionAgreementcansave youmoneyand aggravation. Here'swhat the RepairProtectionAgreement*includes: * Expert service byour 10,000professional r epairspecialists o Unlimitedserviceand no chargefor partsand laboron all coveredrepairs o Product replacement up to $1500if yourcoveredproductcan't be fixed...
- Page 33 Almacenamiento Soluci6n de problemas ... 40-43 NOmero de servicio ... Garantia integro de Craftsman Sears, Roebuck and Co., HoffmanEstates, IL 60179 NSrnerode modelo ... N_mero de serie ... Fechade compra ... Registreel nQmero de modelo,nQmero de seriey fechade compra 0 EM-190-110 fuera de temporada ...
- Page 34 La presenciade este sirnboloindicaque setrata de instrucciones irnportantes de seguridadque se deben respetarpara evitar poneren peligrosu seguridadpersonaly/o materialy la de otras personas.Lea y sigatodas lasinstruccionesde este manualantes de poneren funcionarniento esta rn_.quina. Si no respetaestas instrucciones podria provocarlesionespersonales.Cuandoveaeste sirnbolo,i presteatenci6na la advertencia! PROPOSICION 65 DE CALIFORNIA El escapedel motorde este producto,algunosde sus cornponentes...
- Page 35 • Unacubiertade descargafaltanteo da_adapuede provocarel contactocon la cuchillao lesionesporobjetosarrojados. Muchaslesionesocurrencornoresultadode pasarla cortadora sobrelos piesduranteuna caida provocadapor derrapeso tropiezos.No se sostengade la podadorasi se est,. cayendo, sueltela rnanijainmediatarnente. Nuncatire haciausted la podadorarnientrascarnina.Si debe retrocederla podadorapara evitaruna paredu obst_.culo, mire prirneroabajoy atr_.sparaevitar tropezarsey luegosigaestos pasos: Retrocedade la podadorahastaestirar cornpletarnente sus brazos.
- Page 36 N QOS Puedenocurriraccidentestr_.gicos si el operadorno est,. atentoa la presenciade ni_os.Por Iogenerala los ni_osles atraenlas podadoras y la actividadde podarel c_sped.Noentiendenlos riesgosni los peligros.Nuncad_ por sentadoque los ni_osperrnanecer_.n en el rnisrnolugardonde losvio por Oltirna vez. • Mantengaa los ni_osfuera del Areade trabajoy bajo estricta vigilanciade un adultoresponsable adern_.s del operador.
- Page 37 • Despu_sde golpearcon algOn objetoextrafio,detengael motor, desconecteel cablede la bujfay conecteel motora rnasa. Inspeccionerninuciosarnente l a rn_.quina paradeterrninarsi est,. dafiada. Repareel dafio antesde encenderlay operarla. • Nuncatrate de ajustaruna ruedao la alturade corte rnientras el motorest,. en rnarcha. • Loscornponentes de la tolva para recorte,cubiertade descargay escudode riel,est_.nsujetosa desgastey dafios que podriadejar expuestaspartesque se rnueveno perrnitirque se arrojenobje- tos.
- Page 38 SilVIBOLOS DE SEGURIDAD Esta p&ginarepresenta y describela seguridadlos simbolosque puedenpareceren este producto.Lea,comprenda,y sigatodas instrucciones en la m_quinaantesprocurarpara reuniry operar. LEA EL MANUAL(S) Lea, comprenda, operar. PELIGRO-- GIRANDO HOJAS Para reducir el riesgo de herida, guarde manos y pies lejos. No funcione de descarga o el receptor de hierba est_n en su lugar apropiado.
- Page 39 Mirey mantenc3a estenive[ c onun_rbo[ v ertical Use esta pagina como guia para determinar en qu_ pendientes no puede operar eI tractor de manera segura. Noopere la cortadorade c_speden dichaspendientes.No corte en inclinacionesmayoresde 15grados(elevaci6naproximada de 2 1/2 piesper cada 10 pies).Opere las podadorasQUESE EMPUJAN de maneraque crucenel frentede las pendientes,nuncahaciaarribay haciaabajo.
- Page 40 IMPORTANTE: Esta unidad se envfa sin gasolina ni aceite en el motor. Antes de comenzar o correr ia ma.quinacargue el motor con gasolina y aceite como se indica en la secci6n de operaci6n de este manual. NOTA: Las referencias a los lados derecho e izquierdo de ia cortadora de cesped se hacen observando la ma.quinadesde la posici6n de operaci6n.
- Page 41 Si esta satisfecho con laaltura de lamanija, apriete lastuercas de marl posa en los extremes de la manijainferior mostradosen la Figura3. Para comodidad de laoperaci6n, puedeajustar la altura de la manija come sigue: NOTA: Cada extrerno de la manija superior debe ser colocado en la misma posicidn relativa.
- Page 42 Cone×i6n de la Tolva de Abono Su cortadora de cesped se suministra para la operacidn de descarga lateral. Para convertir el cortacesped a la operaci6n mulching, siga el orden indicado aqui: Levante y sostenga el deflector del lade de la descarga e inserte el labio inferior de la tolva de abono dentro de la apertura del canal.
- Page 43 Conecte ia tolva para recortes siguiendo las instrucciones en la secci6n de Montaje de este manual. Curnple con las norrnas de seguridad Las cortadoras de c_sped Craftsman cumplen con las normas de seguridad del Instituto Estadounidense de Normas Nacionales (ANSi). Control de cuchilla...
- Page 44 LLENADO DE GASOLINA Y ACEITE Aceite (se envia una botella junto con la unidad) Primer uso Saque la varilla del nivel de aceite (G). Con la cortadora de cesped ubicada en suelo nivelado, vierta el aceite bntamente pot dentro del tubo de Ilenadode aceite del motor (H) hasta la marca de limite alto en la varilla medidora del nivel de aceite (J).
- Page 45 PARA ENCENDER EL MOTOR Coi6quese detra.sde la podadora, apriete ia manija de control de la cuchilla y sostengala contra la manija superior. Sostenga firmemente las dos manijas juntas, tome la manija del arrancador de retroceso y tire de ia cuerda para sacarla con un movimiento r@ido y continuo.
- Page 46 Antesde realizarcuaiquiertipo de mantenimiento o servicio,desenganche todos loscontrolesy detengael motor.Esperea que sedetengancomple- tamentetodas laspiezas m6viles.Desconecteelcane de labujia y p6ngalo haciendomasacontrael motorpara evitarque se enciendaaccidentaimente. Cada uso Nivel de aceite dei motor Piezassueltasofaltantes Unidad y motor lras 5 horas Aceitedei motor Anuaimente o 25 horas Depuradordeairet Varillajes/pivotes de control y ruedas...
- Page 47 Detenga siempreel motor,desconecte el cablede la bujiay hagamasa contrael motorantesde reaiizar c uaiquiertareade mantenimiento a su mfiquina. RECONIENDACIONES GENERALES • Respete siemprelasreglasde seguridad cuandorealicetareasde mantenimiento. • La garanfiadeestacortadoranocubreelementos quehan estadosujetosal malusoo la negligencia deloperador. P ara recibirel reembolso totalde la garantia, e i operador deberfidar mantenimiento ai equipo tai y comoseindicaen estemanual.
- Page 48 Comprobar el aceite del motor Comprobar el nivel de aceite antes de cada operaci6n. Aseg_resede que el nivei de aceite se mantiene. Revise el aceite con ei motor parade y nivelado. Quite ia tapa del dep6sito de aceite/varilla medidora del nivel de aceite y limpiela.
- Page 49 LUBRICACION Control de la cuchilla Lubrique con aceite ligero los puntos de pivote del control de la cuchilla al menos una vez cada estaci6n. Este controle debe funcionar libremente en ambas direcciones. Vea la Figura 14. Ruedas Lubrique ias ruedas pot io menos una vez por temporada con aceite ligero o aceite para motor.
- Page 50 CUIDADO DE LA CUCHILLA Cuando saque la cuchilla de corte para afilarla o reemplazarla, protejase las manos usando un par de guantes para trabajo rudo o un trapo gruesc para sostener la cuchilla. Inspeccione peri6dicamente el adaptador de la cuchiiia en busca de rajaduras, especialmente cuando golpee un objeto extra_o.
- Page 51 Nunca almacene la cortadora de cesped con combustible en el tanque en un espacio cerrado o en a.reascon poca ventilaci6n, donde los gases dei combustible puedan alcanzar el fuego, chispas o una luz piloto como ia que tienen algunos homos, calentadores de agua, secadores de ropa o aigQnotto dispositivo a gas.
- Page 52 El motor no arranca Control de ia cuchilla desenganchado. Se ha desconectado el capuch6n de la bujia. El dep6sito de combustible estfi vacio o el combustible se ha echado a perder. La bujia nofuncionacorrectamente. El motorsedesbord6. Linea de combustible bloqueada. El motor funciona de El cable de la bujia estfi flojo.
- Page 53 Sears, Roebuck and Co., U.S.A. (Sears), el Consejo de Recursos Arnbientales de California (CARB) y la Agencia de Protecci6n Arnbiental de los Estados Unidos (EPA) Declaraci6n de garantia del sistema de control de emisiones LA COBERTURA DE LA GARANTJA DE CONTROLDE EMISIONESES APLIOABLE A LOS MOTORES CERTIFICADOS COMPRADOSEN CALIFOR- NIA EN 1995Y POSTERIORMENTE, QUESE UTILIZANENCALIFORNIA, Declaraci6n de garanfia sobre defectos en el control de ernisiones...
- Page 54 Busque el periodo de duraci6n Los motores cuyo cumpiimiento con los estAndares de emisi6n Tier 2 de la Comisi6n de Recursos Ambientales de California (CARB) est6 certificado deben exhibir la informaci6n relacionada con el perJodo de duraci6n de las emisiones y la clasificaci6n Roebuck and Co., de los Estados Unidos ponen esta informaci6n a disposici6n El Periodo de Duraci6n de las Emisiones describe el nQmero de horas de tiempo real de funcionamiento el motor cumple con las reglas de emisi6n, descontando...
- Page 55 Felicitaciones por haberrealizadouna adquisici6ninteligente.El productoCraftsman@ que ha adquiridoest_ dise_adoy fabricado para brindarrnuchosa_osde funcionarniento confiable.Perocorno todoslos productosa vecespuederequerirde reparaciones.Esen esernornentocuandoel disponerde un Acuerdode protecci6npara reparaciones le puedeahorrardineroy problernas. A continuaci6nsedetallanlos puntosincluidosen el Acuerdo: • Servicio experto prestadopor nuestros10,000especialistas en reparaciones profesionales •...
- Page 56 For troubleshooting, product manuals and home solutions ÷anag÷ For repair - in your home - of all major brand appliances, lawn and garden equipment, no matter who made it, no matter who sold it! For the replacement owner's manuals that you need to do-it-yourself. For Sears professional and items like garage door openers and water heaters.